
Finding a high-quality shoe rack adjustable system is key to transforming a cluttered wardrobe into a streamlined, highly functional space. To successfully integrate footwear storage with your existing closet setup—such as hangers, hanging organizers, and vacuum storage bags—you must select a unit that adapts to your physical space and your changing footwear collection. The ideal solution maximizes vertical space, accommodates varying shoe heights, and withstands the high humidity of tropical climates like that of the Philippines. By focusing on customizable dimensions, weight capacity, and robust material finishes, you can establish an organized system where your shoes remain protected and easily accessible.
Why Your Closet Needs an Adjustable Shoe Rack
Shared closets often become battlegrounds for space, where floor areas are quickly overwhelmed by a chaotic mix of shoes, storage boxes, and falling garments. Traditional fixed shelves fail to accommodate the diverse heights of modern footwear, leading to wasted vertical space above low-profile flats or forced bending of tall boots. When shoes are piled haphazardly on the floor, they block access to hanging garments and prevent you from utilizing the floor for other essential organizers, such as heavy-duty storage bags or laundry hampers.
An adjustable shoe rack solves these spatial conflicts by providing a flexible framework that conforms to your actual storage needs. Instead of forcing your footwear to fit into rigid compartments, you can modify the tier heights or expand the width of the rack to match your collection. This adaptability is particularly valuable for managing seasonal transitions, allowing you to shift configuration easily when moving from bulky rainy-season boots to low-profile sandals and slippers.
Products mentioned in this guide
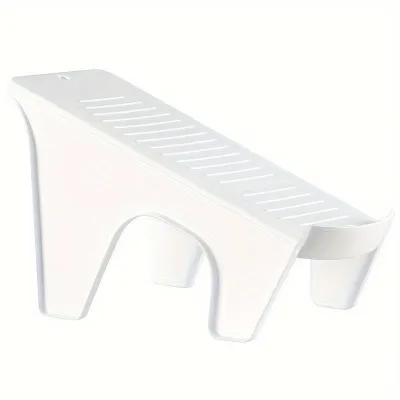
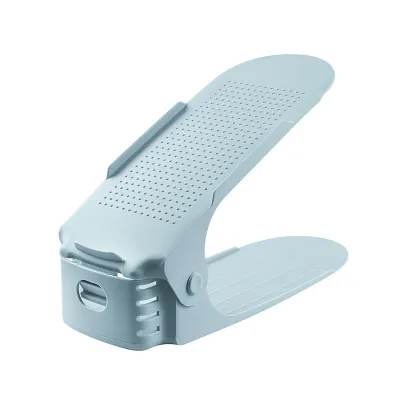
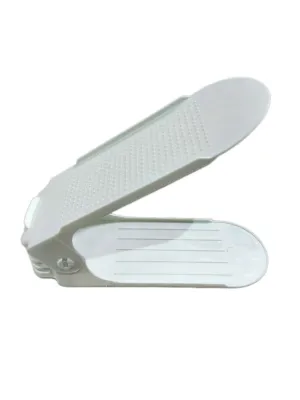
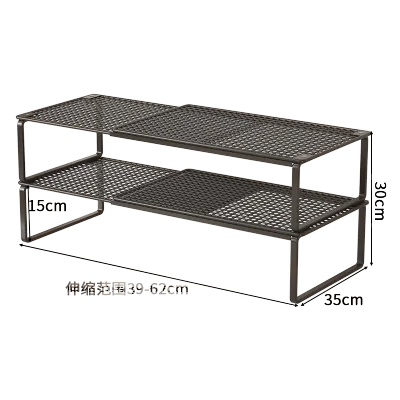
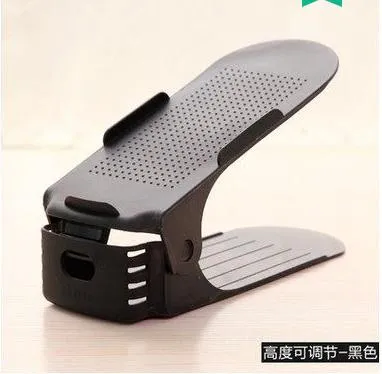
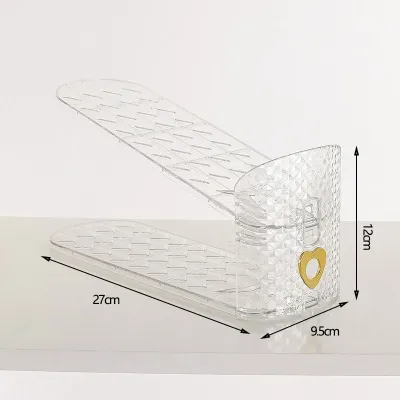
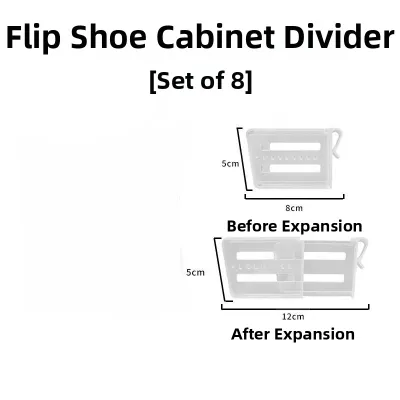
Prices are valid at publication and may change. Please refer to the product page for the latest price.
Furthermore, keeping your footwear elevated on a dedicated rack clears the closet floor, which dramatically improves air circulation. In humid environments, stagnant air at the bottom of a wardrobe can trap moisture, leading to mold growth on both shoes and wood paneling. Elevating your collection ensures that air can flow freely beneath the rack, while also keeping your daily-wear items visible and within arm’s reach without requiring you to dig through dark corners.
What to Look for When Choosing a Shoe Rack Adjustable System
Selecting the right shoe rack adjustable model requires looking beyond aesthetics to evaluate structural specifications, material durability, and physical compatibility with your wardrobe. Typically, adjustable shoe racks in the local market range from budget-friendly options under ₱500 for basic plastic modular units to over ₱3,000 for heavy-duty, rust-resistant expandable metal systems.

Dimension Adjustability Adjustable racks generally fall into two categories: width-expanding designs and tier-height adjustable models. Width-expanding racks utilize telescoping metal rods that slide outward to fill the exact horizontal span of your closet floor or alcove. These are excellent for maximizing wall-to-wall space but require secure locking mechanisms to prevent the rods from sagging when fully extended. Tier-height adjustable models feature movable shelving panels or brackets that allow you to customize the vertical distance between shelves. This is the preferred option if you need to store a mix of high heels, boots, and flat sneakers, as it prevents taller items from being crushed.
Weight Capacity and Stability Before purchasing any adjustable organizer, check the manufacturer’s specified load limits per tier and for the overall unit. Footwear can be deceptively heavy, especially when storing leather boots, thick-soled sneakers, or formal shoes. A rack that lacks structural rigidity will bow in the center over time, causing shoes to slide toward the middle or causing the entire frame to collapse. Look for units that specify a weight capacity of at least 5 to 10 kilograms per shelf, and ensure the frame features cross-bracing or reinforced joints to maintain stability when fully loaded.
Material and Finish Checks In the Philippines, the combination of high temperatures and relative humidity poses a constant threat to furniture longevity. When evaluating materials, do not assume that generic labels like “metal” or “wood” guarantee durability. Untreated wood can warp or harbor mold, while low-grade steel is highly susceptible to rust. Instead, verify that metal components feature protective surface treatments, such as powder coatings, rust-resistant chrome plating, or anodized finishes. For wooden or engineered wood components, check for water-resistant sealants or laminate finishes that can be easily wiped clean and do not absorb ambient moisture.
Footprint and Base Design The base of the shoe rack must be compatible with your closet flooring to prevent long-term damage. If you plan to slide the rack out for cleaning or reconfiguration, look for a base design with smooth, rounded feet, or high-quality protective caps made of rubber or dense felt. Avoid sharp metal edges or low-grade plastics that can scratch hardwood, tear vinyl, or crack delicate ceramic tiles. If your closet features built-in tracks for sliding doors, ensure the rack’s footprint sits completely clear of these tracks to avoid obstructing the doors.
Top Adjustable Shoe Rack Types for Closet Integration
Integrating a shoe rack into an existing closet system requires selecting a design that complements your wardrobe’s layout, whether you have a spacious walk-in closet, a compact reach-in wardrobe, or a freestanding cabinet. The right configuration depends on how much floor space you can spare and whether you need to utilize vertical walls, doors, or existing built-in shelves.
By understanding the unique mechanics of each adjustable type, you can select a system that coexists harmoniously with your clothes hangers, hanging fabric organizers, and seasonal storage bags. Below are the most effective functional configurations designed to optimize your closet’s interior footprint.
Expandable Tension and Spring-Loaded Racks
Tension-based adjustable racks are highly practical for closets with solid side walls or built-in wooden cubbies. These systems use internal spring mechanisms or threaded expansion screws to press firmly against opposing vertical surfaces, creating a stable shelf without the need for drilling or permanent screws. This makes them an excellent option for rental properties where permanent alterations are prohibited.
Before choosing a tension rack, it is critical to verify the structural strength of your closet walls. Solid wood, concrete, or reinforced brick walls can easily withstand the outward pressure exerted by these racks. However, unreinforced gypsum board, thin drywall, or flimsy wardrobe backing panels can bow or crack under the tension. Additionally, ensure the contact pads are made of non-slip rubber to prevent the rack from slipping down under the weight of your shoes.
Stackable and Modular Tier Racks
Modular tier racks offer exceptional flexibility for growing shoe collections, allowing you to stack units vertically as your storage needs expand. These systems typically consist of individual two-tier or three-tier units that lock together using heavy-duty plastic connectors, metal pins, or interlocking frame grooves. You can start with a low-profile unit on the closet floor and gradually add tiers upward, utilizing vertical space that would otherwise go wasted.
When planning a stackable setup, always verify the integrity of the interlocking mechanisms. Ensure that the connection points fit tightly without wobbling. As you stack units higher, the center of gravity shifts upward, making the system more prone to tipping. To maintain safety, avoid stacking lightweight plastic or thin wire frames more than three units high unless they are securely anchored to the closet wall.
Over-Door and Drop-Down Adjustable Racks
For reach-in closets and small wardrobes where floor space is at an absolute premium, over-door and drop-down adjustable racks offer an ingenious way to utilize dead space. These units hang securely over the top edge of your closet door using slim metal brackets, suspending a grid of adjustable shoe holders or shelves along the interior door face. This keeps your entire shoe collection off the floor, leaving ample room below for bulky items like vacuum storage bags or luggage.
When selecting an over-door rack, measure the clearance between the top of your door and the door frame to ensure the hanging brackets do not prevent the door from closing properly. Additionally, check the weight capacity of your door hinges. Standard interior doors, especially hollow-core doors, can sag or become misaligned if subjected to excessive weight. Opt for lightweight aluminum or reinforced plastic racks, and distribute the weight evenly by placing heavier shoes near the bottom and lighter footwear at the top.
Slotted Shelving Inserts for Existing Cubbies
If your closet already features built-in wooden or wire shelving, you do not need to replace the entire system to achieve better shoe organization. Slotted shelving inserts and adjustable dividers slide directly onto your existing shelves, partitioning wide open spaces into customized, individual shoe slots. Many of these inserts feature adjustable height slots, allowing you to double the storage capacity of a single shelf by stacking one shoe above another in a staggered pattern.
Before purchasing these inserts, carefully measure the exact internal height, width, and depth of your existing cubbies. Ensure the inserts are compatible with your shelf material; for instance, some wire shelf inserts require specific clip attachments to remain stable. Choosing adjustable inserts with smooth, rounded edges will prevent them from scratching the paint or wood finish of your built-in closet shelves.
How to Measure and Plan Your Closet Space
A successful closet organization project relies on precise planning and accurate measurements. Adding an adjustable shoe rack without measuring beforehand can lead to cramped quarters, blocked doors, and damaged garments. Follow these structured steps to plan your space effectively:
Measure the Physical Footprint Begin by measuring the exact floor width, depth, and vertical clearance of the zone where you plan to install the rack. Write down these dimensions and carry a tape measure if shopping in-store, or double-check the product specifications when browsing online marketplaces. Keep in mind that baseboards, door hinges, and sliding door tracks can reduce the actual usable width by several centimeters. Measure the distance between the inside faces of the baseboards rather than wall-to-wall to ensure the rack sits flat on the floor.
Calculate the Garment Hem Drop and Swing Zone One of the most common mistakes in closet planning is forgetting to account for the length of hanging clothes. If your shoe rack sits directly beneath a hanging rod, you must calculate the “hem drop” of your garments. Measure from the hanging rod down to the bottom hem of your longest items—such as long dresses, trousers, or traditional Filipino Barong Tagalogs. Add a 10-centimeter buffer zone to prevent the bottoms of these garments from resting on top of your shoes, which can transfer dirt, cause wrinkles, and restrict airflow.
Allocate Dedicated Zones for Storage Bags To keep your closet functional, separate your active daily-use items from long-term storage. Allocate the upper shelves or the deepest, least accessible corners of your closet for bulky vacuum storage bags containing off-season bedding or extra clothing. This keeps the lower, high-traffic zones clear for your adjustable shoe rack, ensuring you can access your daily footwear without having to move heavy bags out of the way.
Verify Door Clearances and Obstructions Create a quick checklist to verify how the shoe rack will interact with your closet’s moving parts:
- Swing Paths: Ensure that swinging closet doors can open fully without hitting the front of the shoe rack.
- Sliding Tracks: For sliding wardrobe doors, verify that the depth of the shoe rack does not protrude into the path of the sliding panels.
- Drawer Access: Check that the rack does not block built-in drawers from pulling out completely.
- Light Fixtures and Outlets: Ensure the height of the rack does not block access to light switches, wall outlets, or low-hanging closet lights.
Installation, Stability, and Safety Checks
Proper installation is critical to ensure your adjustable shoe rack remains safe and stable throughout its lifespan. A fully loaded shoe rack can weigh upwards of 20 to 30 kilograms, presenting a serious hazard if it tips over or collapses.
Utilize Anti-Tip Features and Wall Anchors For tall, narrow, or stacked modular racks, anchoring the unit to the wall is highly recommended. Many manufacturers include anti-tip straps or wall-mounting brackets in the packaging. If your rack is positioned against a concrete or solid wood wall, use appropriate wall plugs and screws to secure the top of the frame. If you are mounting to drywall, ensure you anchor the brackets directly into the wooden wall studs or use heavy-duty toggle bolts.
Protect Your Closet Flooring The weight of a loaded shoe rack can leave permanent indentations or scratches on your flooring. For tiled floors common in many Philippine homes, ensure the rack’s feet have soft rubber pads to prevent cracking or sliding on smooth surfaces. If your closet has hardwood or laminate flooring, apply heavy-duty felt pads to the bottom of the legs. If you choose a model with casters for easy mobility, select wheels made of soft polyurethane rather than hard plastic, as hard wheels can easily scratch polished wood finishes.
Follow Manufacturer Assembly Instructions Always assemble the shoe rack strictly according to the manufacturer’s step-by-step instructions. Do not skip any structural steps, such as installing support bars or tightening locking collars on expandable rods. Never exceed the stated weight limits per shelf, and distribute the weight of your shoes evenly, placing the heaviest pairs on the bottom shelves to keep the center of gravity low.
If the manufacturer’s assembly instructions conflict with the physical structure of your closet, or if the unit feels unstable after following the steps, do not attempt to force a fit or modify the frame yourself. Stop the installation and consult the manufacturer’s customer support or a qualified professional carpenter to find a safe solution.
Frequently Asked Questions (FAQ)
Integrating shoe storage into your wardrobe often brings up practical questions regarding floor compatibility and long-term maintenance. Below are answers to common queries to help you maintain a clean, organized, and fresh-smelling closet system.
Can I use an adjustable shoe rack on a carpeted closet floor?
Yes, you can use an adjustable shoe rack on a carpeted closet floor, but you must take extra precautions to ensure stability. Thick carpet and underlayments can compress unevenly under weight, causing the rack to wobble or tilt forward. To prevent this, place a rigid, flat board (such as a piece of sealed plywood or a sturdy plastic shelf liner) directly on top of the carpet to act as a solid foundation for the rack’s feet. Alternatively, look for shoe racks equipped with wide, leveling feet that can be adjusted individually to compensate for uneven carpet compression.
How do I prevent shoes from smelling when stored inside a closed closet?
Preventing odors in an enclosed closet requires a combination of proper hygiene and moisture control. Never place damp, sweaty, or dirty shoes directly onto your rack. Allow your shoes to air out in a well-ventilated area outside the closet for at least a few hours after wearing them. To combat the high humidity of the tropical climate, place moisture-absorbing dehumidifier tubs or activated charcoal bags on your shoe rack shelves. You can also use cedar blocks or aromatic cedar shoe trees, which naturally absorb moisture and impart a fresh scent. Always check the care labels of your shoes and the product instructions of any scent absorbers to ensure material compatibility.
Community discussion
Share your experience or ask a question. Comments are reviewed before publication.