
In a compact Filipino kitchen, maximizing every square inch of wall space is essential for maintaining an organized, functional cooking environment. When floor space is limited by appliances, trash bins, and narrow walkways, the walls offer the most valuable real estate for storage. Choosing the right hanging cabinet for the kitchen requires a careful balance between storage capacity and visual weight. If the cabinets are too deep or low, they can make a small kitchen feel dark, cramped, and prone to accidental head bumps. Finding the perfect fit involves understanding standard dimensions, adjusting them to your specific room layout, and selecting configurations that keep the workflow smooth.
Baseline Dimensions for Compact Kitchens
Before customizing your kitchen layout, it is helpful to understand the standard industry dimensions for wall-mounted cabinetry. Standard hanging cabinets typically range from 30 to 38 centimeters in depth, 76 to 100 centimeters in height, and 30 to 90 centimeters in width per individual unit. These dimensions are designed to align with standard base cabinets, which are usually 60 centimeters deep, ensuring that you have comfortable head clearance when leaning over the countertop.
When planning, also consider practical logistics such as doorway and elevator lift access to ensure the pre-assembled cabinet boxes can physically enter your home, alongside the assembly conditions required for mounting. Using these baseline measurements as a starting point allows you to make informed adjustments based on your specific physical footprint and ceiling height.
Products mentioned in this guide
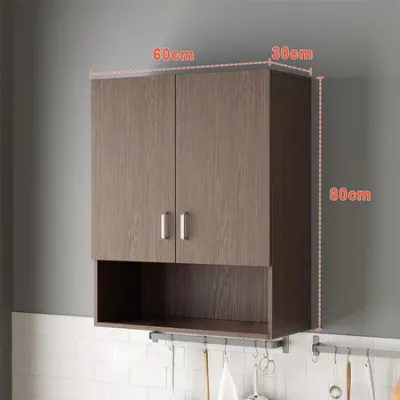
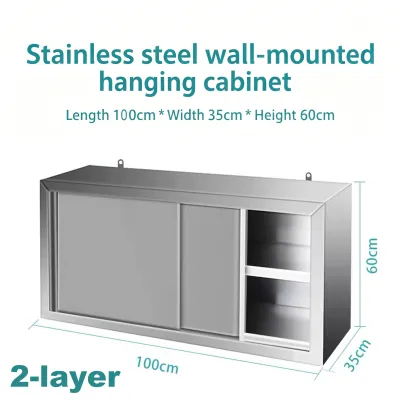
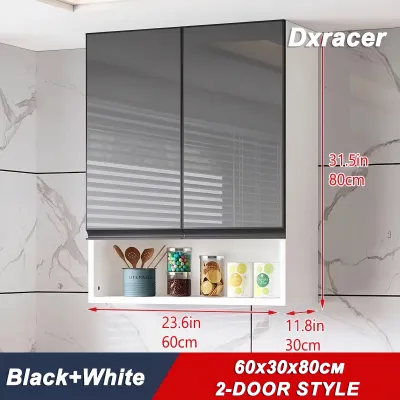
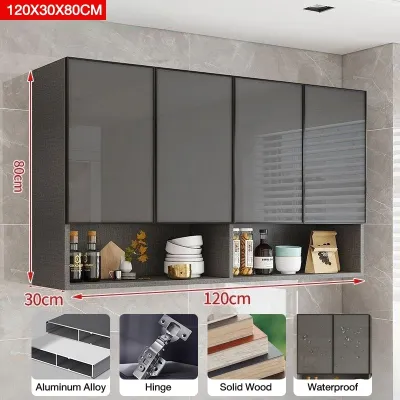
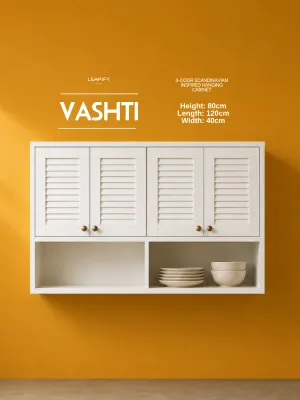
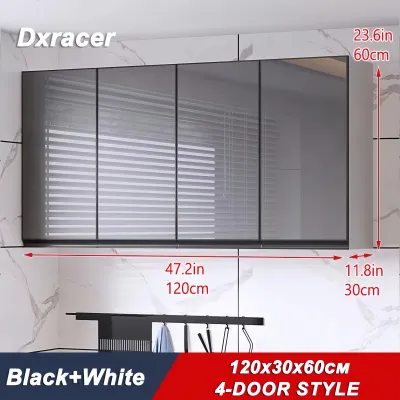
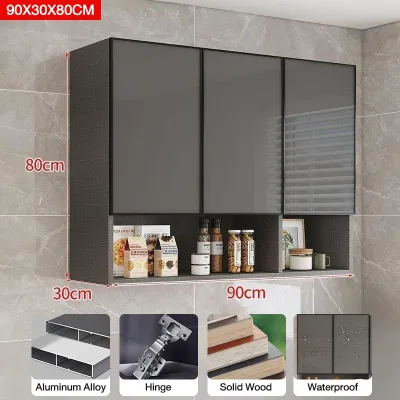
Prices are valid at publication and may change. Please refer to the product page for the latest price.
Tailoring Your Hanging Cabinet for the Kitchen: Depth, Height, and Width
Adjusting Depth for Walkway Clearance
The depth of your wall cabinets directly impacts how spacious your kitchen feels and how safely you can move around the workspace. While a standard depth of 35 centimeters easily accommodates large dinner plates and serving bowls, it can significantly restrict sightlines and physical clearance in a narrow galley or single-wall kitchen. Reducing the cabinet depth to 30 centimeters, or even 28 centimeters, can open up the room, making the countertops feel much more accessible and reducing the risk of bumping your head while prepping food.

The trade-off for a shallower cabinet is a reduction in storage volume, meaning larger platters, wide frying pans, or bulky appliances may no longer fit inside. To manage this, plan to store oversized items in your base cabinets or on specialized utility carts, reserving the shallower wall cabinets for daily glassware, spices, and standard-sized bowls.
Maximizing Vertical Height
In a small kitchen, vertical space is your most valuable asset, and extending your cabinets upward is an excellent way to gain storage without sacrificing floor space. Many standard installations leave a gap of 30 to 45 centimeters between the top of the cabinet and the ceiling, which quickly becomes a magnet for dust and grease in tropical environments. Opting for taller cabinet boxes—such as 90-centimeter or 100-centimeter units—allows you to utilize this overhead space efficiently.
This design choice draws the eye upward, making a low ceiling feel higher and creating a cleaner, more streamlined aesthetic. The topmost shelves can be reserved for infrequently used items, such as seasonal serving platters, holiday dinnerware, or backup pantry staples, keeping your lower, easily reachable shelves free for daily essentials.
Optimizing Width and Door Swing
The width of your cabinet units and the way their doors open play a critical role in the overall traffic flow of a tight kitchen. Large, wide cabinet doors (such as a single 60-centimeter door) swing far out into the room when opened, blocking narrow walkways and forcing you to step backward to access the contents. In contrast, specifying narrower double doors (such as two 30-centimeter doors for a 60-centimeter cabinet) halves the projection into the room, keeping the path clearer.
For exceptionally tight spaces, consider alternative door mechanisms such as horizontal sliding doors or upward-lifting hydraulic doors. Sliding doors completely eliminate the outward swing, while lift-up doors move vertically out of your way, allowing you to keep cabinets open during meal preparation without the risk of walking into a sharp corner.
Space-Maximizing Configurations for Limited Walls
Floor-to-Ceiling and Stacked Designs
For kitchens with limited horizontal wall space, a stacked cabinet configuration or a continuous floor-to-ceiling pantry unit offers maximum storage efficiency. Stacked designs involve mounting a row of standard-height cabinets and placing a second, shallower row of “transom” cabinets directly above them to reach the ceiling. This configuration creates a highly organized, tiered storage system where the lower tier holds daily cooking essentials and the upper tier stores long-term items.
To achieve a polished, custom look, use filler panels or crown molding to close any remaining gaps between the top cabinet and the ceiling. This prevents dust, moisture, and common tropical pests from nesting in the hard-to-reach crevices.
Corner and Awkward Space Solutions
L-shaped and U-shaped kitchens often present challenging corner walls where standard rectangular cabinets cannot be mounted without creating dead, unreachable space. A diagonal corner wall cabinet is a classic solution that bridges the two walls smoothly, offering deep, continuous storage that is ideal for large mixing bowls or dry food containers.
Alternatively, you can transition from closed cabinets on one wall to open, floating corner shelves on the other, which keeps the corner visually light and prevents the room from feeling boxed in. If you choose a blind corner cabinet configuration, ensure you install specialized internal hardware, such as pull-out kidney shelves or carousel organizers, so that items stored deep in the corner remain fully accessible.
Mixing Closed Cabinets with Open Shelving
An uninterrupted wall of heavy, solid-door cabinets can make a small kitchen feel dark and claustrophobic, especially if natural light is limited. Integrating sections of open shelving alongside closed cabinetry is an effective way to break up the visual mass and create an airy, open feel.
You can use closed cabinets to hide mismatched food packaging, plastic containers, and cluttered pantry items, while utilizing open shelves to display cohesive items like matching coffee mugs, clear spice jars, or frequently used dinnerware. This hybrid approach not only enhances the visual appeal of the kitchen but also improves efficiency, as daily essentials can be grabbed quickly without opening and closing doors.
Essential Clearances and Installation Checks
Countertop-to-Cabinet Bottom Clearance
The vertical distance between your countertop and the bottom of your hanging cabinets is critical for both ergonomics and safety. The standard industry clearance is 45 centimeters to 50 centimeters, which provides ample space to work comfortably, chop vegetables, and operate countertop appliances.
If the primary cook in your household is shorter, you can lower this clearance to 40 centimeters to make the upper shelves easier to reach, but you must first measure your countertop appliances to ensure they will still fit. Appliances like tall blenders, stand mixers, and coffee makers require sufficient vertical clearance to operate safely, so always verify their dimensions before finalizing your cabinet mounting height.
Appliance Integration and Ventilation
Mounting hanging cabinets near or above major kitchen appliances requires strict adherence to safety clearances and ventilation guidelines to prevent damage and hazards. When installing cabinets above a range hood, cooktop, or built-in microwave, always consult the appliance manufacturer’s installation manual for the exact required clearance, which typically ranges from 65 to 75 centimeters above a gas or electric stove.
In the humid tropical climate of the Philippines, proper ventilation is especially crucial; steam and heat from cooking can quickly warp wood composites, degrade finishes, and cause mold growth if cabinets are placed too close to heat sources. Before finalizing your layout, check the appliance manufacturer’s installation manual and the cabinet manufacturer’s guidelines; if instructions conflict, or if you are dealing with an unidentified appliance, consult a certified professional.
Wall Assessment and Load-Bearing Verification
Before hanging any heavy cabinetry, a thorough assessment of your kitchen wall’s structural integrity is mandatory to prevent catastrophic failures. Many residential walls in the Philippines are constructed from hollow concrete blocks (CHB) finished with plaster, while high-rise condominiums often utilize solid concrete or lightweight drywall partitions. Each wall type requires specific mounting hardware; for instance, drywall requires finding studs or using heavy-duty toggle bolts, while concrete blocks require masonry anchors or expansion bolts.
Always check the cabinet manufacturer’s instructions for load limits and mounting specifications; if the wall type is unidentified or instructions conflict, consult a structural engineer or a qualified professional before proceeding.
Common Sizing and Layout Mistakes to Avoid
One of the most common mistakes in small kitchen design is overcrowding the walls by installing deep, heavy cabinets on every available surface, which blocks natural light and makes the space feel claustrophobic. Another frequent error is failing to map out the door swing paths of your cabinets in relation to other kitchen elements; a cabinet door that collides with an open refrigerator door, a light fixture, or a range hood chimney can cause constant frustration and physical damage.
Additionally, choosing a hanging cabinet depth that is too close to the depth of the countertop below can obstruct your line of sight, making it difficult to see your prep work and creating a dark, shadowed workspace. To prevent this, always ensure your hanging cabinets are at least 20 to 25 centimeters shallower than your countertops, and plan for under-cabinet LED strip lighting to keep your work surfaces bright, safe, and visually inviting.
Frequently Asked Questions (FAQ)
Can I install hanging cabinets above a kitchen sink?
Yes, you can install hanging cabinets above a kitchen sink, but you must maintain a clearance of at least 60 to 75 centimeters above the sink rim to prevent head injuries while washing dishes. It is also essential to choose materials with excellent moisture resistance and high-quality edge banding, as the rising steam and splashes from the sink can easily damage poorly sealed cabinet bottoms over time.
What is the best material for hanging cabinets in a humid climate?
In highly humid climates like the Philippines, the best materials for hanging cabinets are marine-grade plywood, high-density fiberboard (HDF) with moisture-resistant properties, or aluminum. When purchasing, always check the manufacturer’s specifications for moisture resistance, sealants, and the quality of the edge banding, rather than relying solely on generic material names, to ensure the cabinets will not warp or swell.
How do I organize the inside of deep hanging cabinets?
To maximize the usability of deep or tall hanging cabinets, incorporate internal organization systems such as pull-down shelving baskets, tiered shelf risers, and lazy Susans. Store lightweight, infrequently used items toward the back or on the highest shelves, and keep daily essentials at the front where they can be reached easily without a step stool.
Community discussion
Share your experience or ask a question. Comments are reviewed before publication.