
Finding the best no-drill bedside tables with shelves for condo bedrooms in the Philippines requires balancing space efficiency, load capacity, and renter-friendly installation. The most reliable options fall into three main categories: freestanding slim tables (such as C-shaped or tiered units), adhesive-mounted floating shelves, and structural tension poles or headboard-clamped organizers. These non-invasive solutions provide essential bedside storage without risking your security deposit or requiring heavy-duty drilling into tough concrete walls.
In many high-rise developments across Metro Manila, Cebu, and other urban hubs, bedroom walls are constructed from solid concrete or shear walls that are incredibly difficult to drill into without a rotary hammer. Conversely, interior partition walls are often thin drywall that cannot support heavy anchors. Selecting a non-invasive bedside table with shelf storage solves this dilemma, offering a dedicated spot for your phone, glasses, and evening reads while keeping your walls pristine.
How to Choose a No-Drill Bedside Table for Small Condo Spaces
Space and Clearance Measurement
Condo bedrooms in the Philippines, particularly studio and one-bedroom units, often feature highly compact layouts where every centimeter counts. Before choosing a bedside table with shelf, measure the exact distance between the edge of your mattress and the adjacent wall or wardrobe. You must account for the swing radius of wardrobe doors, drawers, and bedroom entryways. Ensure there is at least a 50-centimeter walking path if the table sits near a high-traffic area. Checking the table’s footprint and shelf depth ensures it does not obstruct daily movement or block low-lying electrical outlets.
Products mentioned in this guide
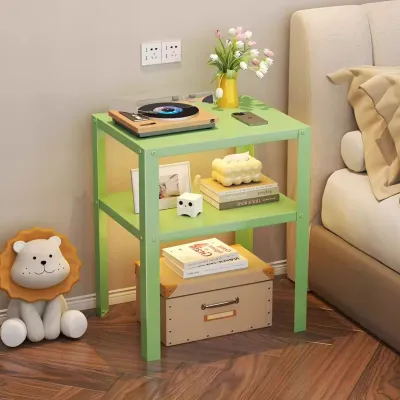
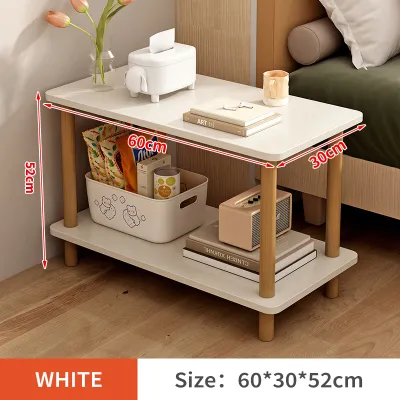

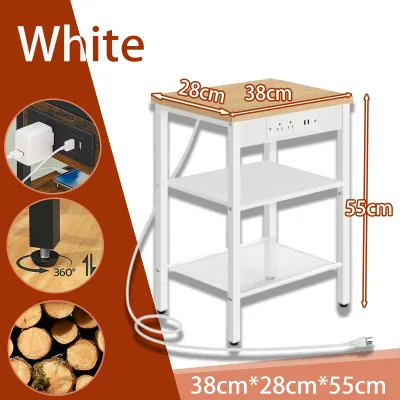
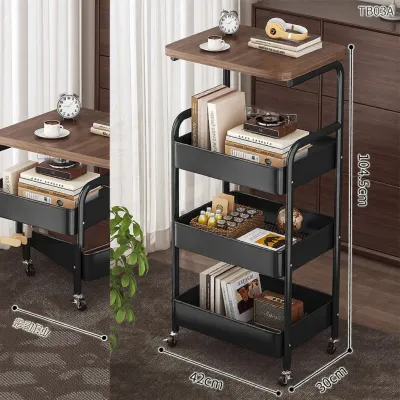
Prices are valid at publication and may change. Please refer to the product page for the latest price.
Weight Capacity vs. Wall and Surface Types
No-drill furniture relies entirely on the integrity of the surface it rests against or attaches to. If you opt for an adhesive-mounted shelf, understand that its load-bearing capacity is determined by your wall finish. Smooth, non-porous surfaces like polished tiles, glass, or high-gloss laminate panels offer the strongest bond for heavy-duty adhesive strips. Painted drywall or concrete walls with matte or textured finishes are highly porous, which significantly reduces the adhesive contact area and overall weight capacity. Always verify the manufacturer’s specified weight limits for both the shelf itself and the adhesive mechanism before placing items on it.
Climate and Environmental Factors
The tropical climate of the Philippines introduces unique challenges for household furniture and adhesives. High relative humidity, particularly during the wet monsoon season, can weaken adhesive bonds over time as moisture penetrates the interface between the tape and the wall. Furthermore, temperature fluctuations from running air conditioning units at night and turning them off during the hot daytime can cause materials to expand and contract, accelerating the degradation of double-sided tapes. When selecting a bedside table, look for moisture-resistant finishes like powder-coated steel, treated bamboo, or water-resistant laminates, and ensure any included adhesives are rated for high-humidity environments.
Renter-Friendly Considerations
For renters occupying leased condo units, avoiding property damage is paramount to securing the return of the security deposit. Standard Philippine lease agreements typically contain strict clauses prohibiting tenants from drilling holes into walls or making permanent alterations. While adhesive floating shelves seem like a convenient loophole, they carry a high risk of peeling off layers of latex paint or tearing drywall paper when removed. Freestanding slim tables and tension-based organizers are the safest renter-friendly alternatives, as they require zero wall contact and can be packed up and moved to a new unit without leaving a single trace.
Top No-Drill Bedside Table Solutions for Condo Bedrooms
Freestanding Slim and Narrow Tables
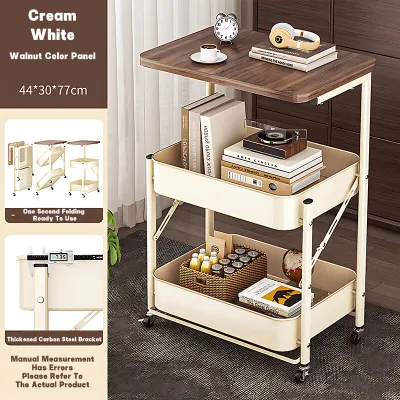
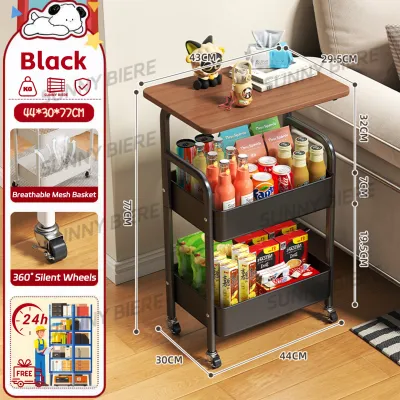
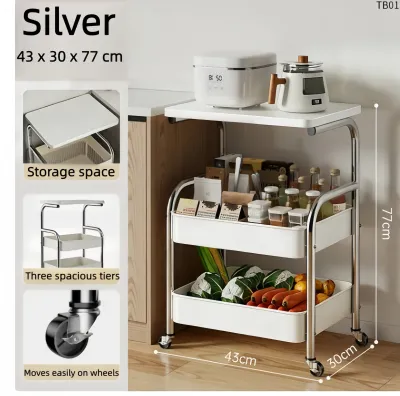
Freestanding slim tables are highly versatile options for renters and condo owners alike. They are particularly suited for those who enjoy rearranging their bedroom layout periodically or who want a completely risk-free furniture piece. These tables often feature ultra-narrow profiles, such as C-shaped tables where the base slides under the bed frame, allowing the tabletop to hover directly over the mattress. Other popular designs include multi-tiered vertical shelf units that occupy a footprint of less than 30 by 30 centimeters.

Because these tables have a small footprint and a narrow profile, their stability depends heavily on base design and weight distribution. A well-designed slim table should feature a weighted metal base or a wide, flat bottom frame that distributes weight evenly. If you choose a tiered vertical shelf, look for models with adjustable leveling feet to compensate for uneven tile or wood laminate flooring, which is common in many condo developments. Ensure that the heaviest items, such as books or organizers, are placed on the bottom shelf to lower the center of gravity and prevent the table from tipping over if accidentally bumped in the dark.
While freestanding slim tables require zero installation and carry no risk of wall damage, they do consume valuable floor space. The base of a C-table or a narrow shelf unit may block the path of robot vacuums or interfere with under-bed storage drawers. If your bed frame sits flush with the floor without any clearance underneath, you will not be able to slide a C-table base beneath it, which forces the table to sit further away from the bed and potentially block walking paths.
Adhesive Wall-Mounted Floating Shelves
When floor space is virtually non-existent, adhesive wall-mounted floating shelves provide an elegant, floor-clearing solution. These shelves are ideal for ultra-compact studio apartments where every square inch of floor must remain unobstructed. Many modern adhesive shelves are designed specifically for bedside use, featuring integrated cable slots for phone chargers, small drawers for personal items, or raised lips along the edges to prevent glasses, pens, or lip balms from sliding off.
Successful installation of an adhesive bedside table requires meticulous preparation and strict adherence to surface requirements. The target wall must be completely smooth, non-porous, clean, and dry. Before applying the adhesive, the surface should be wiped down with isopropyl alcohol to remove any dust, oils, or residue, and allowed to dry completely. Once the adhesive strips or brackets are applied to the wall, they must be left to cure—typically for 24 to 48 hours—before any weight is placed on the shelf. This curing period is crucial in the humid Philippine climate to allow the adhesive polymers to form a stable bond with the substrate.
The primary limitation of adhesive floating shelves is their restricted weight capacity and the inherent risk of adhesive failure over time. Even high-quality adhesives can degrade when exposed to humidity, dust, or constant physical vibration from nearby doors slamming. Placing heavy items like tablet computers, large stacks of books, or heavy ceramic mugs on an adhesive shelf is highly discouraged. If the adhesive fails, the shelf and its contents will fall, potentially damaging your floor, your belongings, or even injuring you while you sleep. Additionally, removing these adhesives can be difficult and may result in unsightly paint peeling that requires sanding and repainting before move-out.
Tension Pole and Headboard-Attached Organizers
For those who want the stability of a structural mount without the risks of adhesives or the floor-space consumption of traditional tables, tension poles and headboard-attached organizers are excellent alternatives. Tension pole organizers utilize a spring-loaded or screw-threaded vertical pole that wedges securely between the floor and the ceiling. These poles feature adjustable, rotating shelves that can be positioned at the exact height of your mattress. Headboard-attached organizers, on the other hand, use clamps or brackets to hook directly onto your existing bed frame or headboard, keeping your essentials within arm’s reach without touching the floor or the wall.
Before choosing a tension pole or headboard organizer, you must perform several compatibility checks. For tension poles, measure your exact floor-to-ceiling height and ensure your ceiling is a solid structure, such as concrete or reinforced drywall. Suspended acoustic ceilings or thin plasterboard ceilings without joist support can crack or sag under the pressure of a tension pole. For headboard-attached units, measure the thickness of your headboard or bed frame rail to ensure the clamps can grip it securely. These units are generally compatible with wooden or metal slatted bed frames but may not fit thick, upholstered, or padded headboards.
Although highly functional, tension poles and headboard attachments can be visually busy and may not match minimalist or high-end bedroom aesthetics. A vertical pole running from floor to ceiling can disrupt the visual flow of a small room. Furthermore, headboard-attached shelves are limited by the stability of the bed frame itself; if your bed wobbles or squeaks when you move, the attached shelf and any items on it will shake as well, which can be noisy and disruptive.
Quick Comparison of No-Drill Bedside Table Types
Comparing the primary no-drill bedside options side-by-side helps clarify which solution aligns best with your condo’s layout, wall type, and storage needs.
| Bedside Table Type | Floor Space Required | Wall Damage Risk | Weight Capacity | Installation Effort | Best Suited For |
|---|---|---|---|---|---|
| Freestanding Slim Tables | Moderate | None | High | None to Low | Flexible layouts, heavier items, and frequent room rearrangements |
| Adhesive Floating Shelves | Zero | Moderate to High | Low to Moderate | Moderate | Ultra-small spaces, light essentials, and smooth tiled/glass surfaces |
| Tension/Headboard Units | Minimal | None | Moderate | Moderate | Solid ceilings, sturdy bed frames, and multi-tier vertical storage |
Note: Always verify specific product specifications, weight limits, and installation guides provided by the manufacturer before purchasing, as actual performance can vary based on individual product designs and materials.
Installation, Maintenance, and Safety Checks
Surface Preparation for Adhesives
To maximize the lifespan and load capacity of an adhesive-mounted bedside table with shelf, proper surface preparation is non-negotiable. Clean the designated wall area thoroughly using a clean microfiber cloth dampened with isopropyl alcohol. Avoid using household glass cleaners or multi-surface sprays, as they often leave behind a thin, waxy residue that prevents the adhesive from bonding correctly. Ensure the wall is completely dry and free of any loose, flaking, or peeling paint. If your condo wall has a textured finish, do not attempt to use adhesives; instead, opt for a freestanding or tension-based alternative.
Weight Distribution and Loading
Proper weight distribution is essential for maintaining the stability of any no-drill bedside table. For freestanding units, always place heavier items—such as books, heavy water carafes, or storage boxes—on the lowest shelves. This lowers the overall center of gravity and significantly reduces the risk of accidental tip-overs. For adhesive floating shelves, place items as close to the wall as possible rather than on the outer edge of the shelf. This minimizes the leverage force exerted on the adhesive bond, reducing the likelihood of the shelf peeling away from the wall. Avoid placing fragile, expensive, or heavy electronics like laptops or tablets on adhesive shelves.
Routine Inspection
No-drill furniture requires ongoing monitoring to ensure safety and stability over time. Establish a habit of performing a quick visual and physical inspection of your bedside table once a month. For adhesive shelves, check for any visible gaps between the adhesive strip and the wall, or any slight downward tilting of the shelf. For tension poles, gently shake the pole to verify that it remains tightly wedged between the floor and ceiling, as temperature changes can cause materials to expand or contract and loosen the tension. For freestanding tables, check for any wobbling or loose screws, and tighten them as needed.
Safe Removal
When it is time to move out of your condo or rearrange your bedroom, removing adhesive shelves must be done with extreme care to avoid damaging the paint or drywall. Never pull or rip an adhesive shelf straight off the wall. Instead, use a handheld hair dryer on a medium-heat setting to gently warm the adhesive backing for a few minutes. The heat will soften the adhesive polymers, making them pliable. Once warmed, slide a piece of dental floss, fishing line, or a thin plastic putty knife behind the adhesive pad and slowly saw downward to break the bond. Clean any remaining sticky residue with an adhesive remover or a mild soap solution, always referring to the manufacturer’s specific removal instructions to prevent surface damage.
Frequently Asked Questions (FAQ)
Can I use adhesive bedside tables on textured or freshly painted walls?
No, adhesive-mounted bedside tables should not be used on textured or freshly painted walls. Textured surfaces, such as stucco, rough concrete, or patterned wallpaper, prevent the adhesive strip from making full, flat contact with the wall, which drastically reduces its holding power and leads to premature failure. Freshly painted walls require a significant amount of time to fully cure—typically at least 30 days, even if the paint feels dry to the touch. Applying adhesives to uncured paint will trap moisture and solvents, preventing a proper bond and almost guaranteeing that the paint will peel off when the shelf is removed or loaded with weight. For these wall types, freestanding slim tables or tension-pole organizers are much safer and more reliable choices.
How do I prevent a freestanding narrow bedside table from tipping over?
Preventing a narrow freestanding bedside table from tipping over requires a combination of strategic loading, placement, and physical stabilization. First, always load the bottom shelves with your heaviest items, such as books or heavy decorative objects, to keep the center of gravity as low as possible. Second, position the table snugly between the bed and the wall; tucking it into a tight corner or flush against the side of a heavy bed frame provides physical barriers that limit its ability to wobble or tilt. If the table is placed on an uneven floor, use adjustable leveling feet or adhesive felt pads under the legs to ensure it sits perfectly level. Finally, avoid placing tall, top-heavy items like high desk lamps or large water bottles on the top surface, and keep the table out of high-traffic walking paths where it might be accidentally bumped in the dark.
Community discussion
Share your experience or ask a question. Comments are reviewed before publication.