
Finding ways to maximize storage in a compact condominium in Metro Manila can feel like a constant puzzle. With studio and one-bedroom units often ranging from a tight 20 to 35 square meters, every centimeter of floor space counts. Traditional shelving requires drilling into walls, but this presents a double obstacle: most condominium association bylaws strictly prohibit structural drilling, and the solid concrete shear walls common in Philippine high-rises are incredibly difficult to pierce without heavy-duty rotary hammer drills.
No-drill narrow shelves offer an elegant, damage-free solution to reclaim underutilized vertical gaps. By utilizing adhesive backings, magnetic plates, or vertical tension mechanisms, these space-saving organizers fit neatly into tight alcoves—such as the gap beside your refrigerator, the space behind the bathroom toilet, or narrow corners in your laundry nook. Choosing the right option requires matching the shelf’s mounting mechanism to your specific wall surface, weight requirements, and the local tropical climate.
How to Choose the Right No-Drill Narrow Shelf for Tight Spaces
Maximizing a narrow gap in a high-density condo requires careful planning before making a purchase. Because you cannot use screws to secure the unit, the shelf relies entirely on friction, adhesion, or magnetic force to stay upright. Evaluating your space systematically prevents buying a shelf that either does not fit or collapses under load.
Products mentioned in this guide
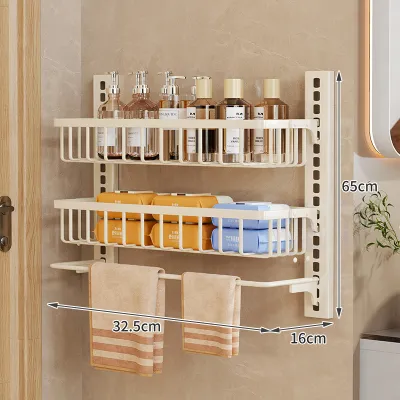
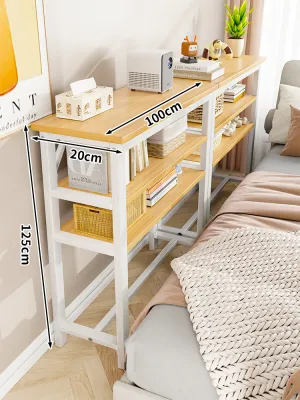
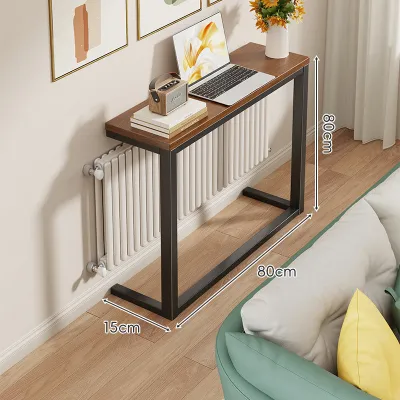
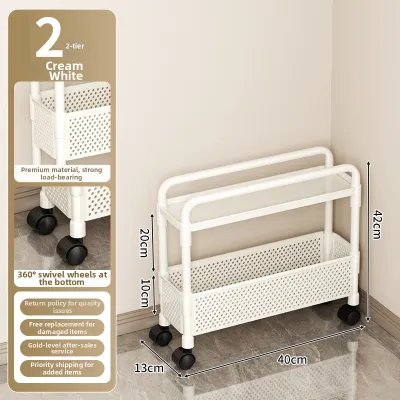
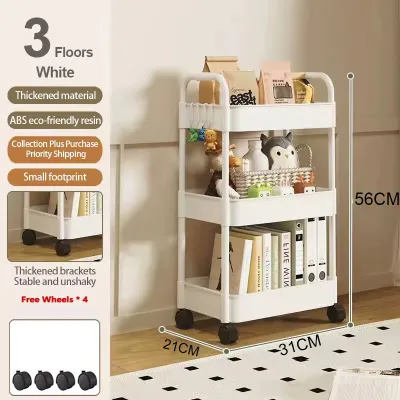
Prices are valid at publication and may change. Please refer to the product page for the latest price.
Space Measurement
When dealing with narrow gaps, precision is critical. Measure the width, depth, and height of the target area using a metal measuring tape. Do not rely on visual estimates; a gap that looks wide enough for a standard organizer might be obstructed by baseboards, electrical outlets, light switches, or water pipes. Additionally, consider operational clearances. Ensure the shelf will not block door swings, cabinet drawers, or the ventilation path of appliances like refrigerators and washing machines.
Surface Assessment
The material of your mounting surface dictates which no-drill method will succeed. Smooth, non-porous surfaces like glazed ceramic tiles, polished glass, and sealed metal are ideal for heavy-duty adhesives or suction cups. Conversely, painted concrete, textured plaster, and gypsum drywall are highly porous and prone to peeling under adhesive stress. If you plan to mount a shelf on a metal surface, you must verify that the metal is ferromagnetic, as many modern stainless-steel appliances contain high levels of nickel or chromium that prevent magnets from sticking.
Weight Requirements
Be realistic about what you intend to store on the shelf. Lightweight items like spices, cosmetic pads, and toothbrushes require minimal support, making simple adhesive spice racks or small magnetic bins ideal. Medium-to-heavy items, such as large shampoo bottles, laundry detergents, books, or small potted plants, require a structurally supportive system. For these heavier loads, a vertical tension pole shelf that transfers weight directly to the floor is a far safer choice.
Environmental Factors
The tropical climate of the Philippines introduces unique challenges for home storage. High relative humidity, particularly during the wet monsoon season from June to November, can severely compromise the longevity of standard adhesive tapes. Furthermore, bathrooms and kitchen cooking areas experience frequent temperature fluctuations and steam accumulation. These conditions accelerate the degradation of low-grade adhesives and can cause cheap iron wire shelves to rust rapidly. Always prioritize rust-resistant materials like space aluminum, stainless steel, or high-grade ABS plastic, and select moisture-resistant adhesive formulations.
Adhesive Narrow Shelves: Best for Smooth Tiles and Light Storage
Adhesive-mounted narrow shelves are incredibly popular among condo renters due to their tool-free installation and minimalist appearance. These shelves typically utilize clear, double-sided acrylic adhesive patches, heavy-duty polyurethane glue, or vacuum suction cups to bond directly to the wall surface, creating a floating storage effect.

Ideal Scenarios
Adhesive shelves perform exceptionally well in wet environments when paired with the correct surface. They are ideal for glazed ceramic bathroom tiles, glass shower enclosures, polished marble backsplashes, and smooth laminate cabinet doors. In these areas, they can easily hold daily essentials such as shampoo bottles, body washes, facial cleansers, or kitchen spice containers, keeping your countertops completely clear.
Limitations and Risks
The primary risk of adhesive shelves is surface damage upon removal. If you apply a high-strength adhesive pad to painted concrete or standard gypsum drywall, the adhesive will bond permanently to the outer paint layer. When you eventually attempt to remove the shelf, the tension will tear the paint and plaster off the wall, resulting in costly repair deductions from your security deposit. Additionally, continuous exposure to direct water or steam in poorly ventilated bathrooms can slowly seep behind the adhesive backing, causing the bond to fail over time and resulting in a sudden fall.
Buying and Usage Checklist
To ensure a secure and long-lasting installation, follow these practical steps:
- Select Traceless Adhesive Patches: Look for shelves that mount onto clear, self-adhesive plastic patches featuring built-in screw threads or hooks. This design allows you to slide the metal or plastic shelf basket off easily for cleaning without having to peel the adhesive patch off the wall.
- Verify Weight Ratings: Check the manufacturer's packaging for weight specifications. Most quality adhesive shelves are rated to hold between 2 to 5 kilograms when installed correctly.
- Prep the Surface Thoroughly: Clean the mounting surface with rubbing alcohol (isopropyl or ethyl) to remove all traces of grease, dust, and soap scum. Avoid using household glass cleaners, as they often leave a thin, slick residue that prevents proper bonding. Allow the surface to dry completely.
- Press and Cure: Apply the adhesive patch from one side to the other, pressing firmly to push out all air bubbles. To allow the chemical bond to fully cure, wait at least 24 hours before hanging the shelf basket or placing any weight on it.
Magnetic Narrow Shelves: Ideal for Fridges and Metal Surfaces
Magnetic narrow shelves offer a highly specialized, zero-effort storage solution that requires absolutely no wall contact. These organizers feature a large backplate lined with powerful magnets—often made of neodymium or flexible magnetic sheets—allowing them to cling instantly to any compatible metal surface.
Ideal Scenarios
In a compact condo kitchen, the side of the refrigerator is often a vast expanse of wasted space. A magnetic narrow shelf can turn this area into a highly functional pantry extension, holding paper towel rolls, olive oil bottles, spice jars, or oven mitts. These shelves are also excellent when attached to steel-clad entryway doors for holding keys, mail, and small umbrellas, or when mounted on the side of a metal washing machine to store laundry pods and dryer sheets.
Limitations and Risks
Magnetic shelves are strictly limited by metallurgy. They will only adhere to ferromagnetic metals like iron, steel, or cobalt. If your condo features high-end appliances made of non-magnetic stainless steel, the shelf will simply slide off. Furthermore, because these shelves rely on magnetic friction, they generally have lower weight capacities than tension or heavy-duty adhesive options. If you exceed the weight limit or place heavy items near the front edge of a deep shelf, the resulting leverage can cause the unit to slide down the appliance or detach entirely, potentially damaging your floor or items.
Buying and Usage Checklist
Before investing in a magnetic storage system, keep these tips in mind:
- Perform a Simple Magnet Test: Take a standard decorative refrigerator magnet and test the exact spot where you plan to install the shelf. If the magnet sticks firmly, the surface is compatible; if it slides or falls off, look for an alternative mounting area.
- Look for Non-Slip Rubber Backing: Choose magnetic shelves that feature a thin rubber or silicone layer over the magnetic plate. This backing serves two purposes: it prevents the hard magnet from scratching your appliance's paint or stainless-steel finish, and it significantly increases friction to prevent the shelf from sliding downward under load.
- Distribute Weight Evenly: Place heavier items, such as glass oil bottles, at the back of the shelf as close to the magnetic surface as possible. Keep lighter items toward the front to minimize outward torque.
Tension Pole Shelves: Maximizing Narrow Vertical Corners
When you need to store heavier items in a narrow space without drilling, tension pole shelves are the ultimate solution. These systems consist of a vertical metal or heavy-duty plastic pole equipped with an internal spring mechanism or a twist-to-lock threaded collar. By wedging the pole securely between your floor and ceiling, you create a rigid vertical column that can support multiple adjustable shelving trays.
Ideal Scenarios
Tension pole shelves are perfect for utilizing awkward, narrow corners that cannot accommodate standard freestanding furniture. Common locations include the dead space beside a bed, the gap between a washing machine and the wall, or the corner behind a toilet. Because the weight of the stored items is transferred vertically down to the floor rather than pulling outward on a wall, tension poles can support significantly more weight than adhesive or magnetic options, making them suitable for books, laundry detergents, folded towels, or small decorative plants.
Limitations and Risks
The stability of a tension pole relies entirely on having two solid, unyielding surfaces to press against. You must have a structurally sound, level floor (such as ceramic tile, polished concrete, or solid wood) and a solid ceiling. Do not install tension poles against suspended ceilings, acoustic ceiling tiles, or thin gypsum board drop ceilings, as the upward pressure can easily crack, bend, or puncture these delicate materials. Additionally, minor building vibrations—such as those caused by a spinning washing machine or nearby heavy traffic—can cause the tension mechanism to loosen gradually over time if not checked periodically.
Buying and Usage Checklist
To ensure your tension pole shelf remains safe and stable, use the following guidelines:
- Check for Wide Rubber End Pads: Ensure the top and bottom of the pole are fitted with wide, non-slip rubber or silicone pads. These pads protect your ceiling paint and floor tiles from scratches while providing the high-friction grip necessary to prevent the pole from slipping out of alignment.
- Measure Ceiling Height Accurately: Floor-to-ceiling heights in Philippine condos can vary widely, typically ranging from 2.4 to 3 meters. Measure your exact ceiling height and verify that the tension pole you purchase has an adjustable range that easily covers your measurement.
- Conduct Routine Maintenance: Every three to six months, give the tension pole a gentle shake. If you detect any play or wobbling, loosen the locking collar slightly, re-align the pole to a perfectly vertical position using a bubble level, and re-tighten the tension mechanism to restore maximum stability.
Comparing Adhesive, Magnetic, and Tension Narrow Shelves
Selecting the ideal narrow shelf requires balancing your condo’s physical layout, the wall materials available, and the items you need to store. The table below synthesizes the key characteristics of each shelf type to help you make an informed decision.
| Shelf Type | Best Mounting Surface | Ideal Condo Area | Relative Weight Capacity | Wall Damage Risk |
|---|---|---|---|---|
| Adhesive | Smooth glazed tiles, polished glass, sealed wood | Bathrooms, kitchen backsplashes, shower stalls | Light (typically 2 to 5 kg) | High on painted walls; very low on tile and glass |
| Magnetic | Ferromagnetic metals (iron, steel) | Sides of refrigerators, steel entry doors, washing machines | Light-to-Medium (typically 2 to 4 kg) | None (if rubber-backed to prevent scratches) |
| Tension Pole | Solid concrete ceiling and solid floor | Living room corners, laundry nooks, behind toilets | Medium-to-Heavy (typically 10 to 20 kg total) | Low (potential for minor ceiling paint indentation) |
When using this comparison, prioritize your surface material first. If you are dealing with painted concrete walls, avoid adhesives entirely and opt for a vertical tension pole. If you have a steel appliance nearby, a magnetic shelf is the most convenient option. Once you have matched the surface, ensure the relative weight capacity aligns with the items you plan to organize.
Safe Installation and Wall Protection for Condo Renters
Protecting your security deposit is a top priority when renting a condo. While no-drill shelves are designed to be damage-free, improper installation or careless removal can still leave unsightly marks or peel away wall finishes. Taking a few precautionary steps will ensure your walls remain pristine.
Pre-Installation Verification
Before unboxing your new shelf, always read the manufacturer’s instruction manual thoroughly to understand its specific weight limits and surface compatibility. If you are planning to use an adhesive shelf on a painted wall and are unsure about the quality of the paint job, perform a spot test. Apply a small, inconspicuous piece of the adhesive tape in a hidden area—such as low down behind a door or inside a utility closet—leave it for 24 hours, and then remove it to see if the paint peels or bubbles.
Damage-Free Removal Techniques for Adhesives
When it is time to move out of your condo, never attempt to pry or pull an adhesive shelf straight off a painted wall. The sudden outward force is guaranteed to tear the paint and drywall. Instead, use this safe, step-by-step removal method:
- Apply Heat: Plug in a hairdryer and direct warm air onto the adhesive backing plate for 2 to 3 minutes. The heat will soften the acrylic polymers, making the adhesive pliable and weak.
- Saw Through the Bond: Take a length of dental floss, fishing line, or thin picture-hanging wire. Holding it taut with both hands, slide it behind the top edge of the adhesive plate. Gently saw back and forth in a downward motion to cut through the softened adhesive layer.
- Clean the Residue: Once the shelf is detached, roll off any remaining adhesive residue with your thumb. If a sticky film remains, apply a small amount of rubbing alcohol or a manufacturer-approved adhesive remover to a microfiber cloth and gently wipe the surface clean.
When to Stop and Seek Help
If your condo features specialized wall finishes—such as delicate fabric wallpaper, acoustic paneling, or historical decorative plaster—do not attempt to install adhesive or tension-based shelves on them. These materials are highly sensitive to pressure and chemical bonding. In such cases, contact your landlord or building administration to ask for approved storage solutions. Similarly, if you find that your ceiling is made of thin, flexible gypsum board that bows upward when you attempt to tighten a tension pole, stop immediately to avoid causing structural damage.
Frequently Asked Questions (FAQ)
Will adhesive shelves peel off my condo's paint when removed?
Yes, standard high-strength adhesive shelves are highly likely to peel off matte, flat, or poorly primed paint when pulled directly from the wall. The bond created by heavy-duty acrylic adhesives is often stronger than the bond between the paint layer and the underlying plaster or concrete. To protect painted walls, restrict adhesive shelves strictly to non-porous surfaces like ceramic tiles, metal, or glass. If you must use them on painted surfaces, choose temporary mounting strips specifically designed for clean removal, and always use the heat-and-floss method to soften the adhesive before detaching them.
How do I clean and maintain narrow shelves in tight gaps?
Cleaning narrow shelves in restricted spaces requires specialized, slim tools. Use a long-handled microfiber duster, a flexible static duster, or wrap a damp microfiber cloth around a flat wooden ruler to slide easily into the narrow gaps between the shelf and adjacent appliances. For adhesive shelves installed in humid areas like bathrooms, perform a monthly check of the adhesive pads to ensure they have not softened or slipped. Regularly wipe down the shelf trays to prevent standing water, soap scum, and humidity from encouraging mold growth on the mounting tape.
Community discussion
Share your experience or ask a question. Comments are reviewed before publication.