
When designing a compact kitchen, choosing the right wall mounted cabinet is one of the most effective ways to maximize your available space without sacrificing storage. In typical Philippine condominiums and small houses, floor area is at an absolute premium. Every square meter occupied by a floor-standing pantry or a bulky utility cart is space taken away from essential appliances, dining furniture, or comfortable movement. Utilizing vertical dead space by installing elevated storage allows you to preserve valuable floor area for daily foot traffic and cooking tasks.
Beyond the practical physical footprint, elevated storage offers significant visual and psychological benefits. When the floor remains clear and visible, the human eye perceives the room as larger and less cluttered. In tight galley kitchens or single-wall layouts, bulky floor units can create a claustrophobic tunnel effect. Elevating your storage draws the eye upward, creating a sense of height and openness that makes even a narrow cooking zone feel more breathable.
From an ergonomic standpoint, wall-mounted storage places your most frequently used items—such as plates, coffee mugs, cooking oils, and spices—directly at eye level. This minimizes the constant need to bend down, crouch, or rummage through dark base cabinets in narrow walkways where door clearance is limited. By positioning high-use items within arm’s reach, you streamline your cooking flow and reduce physical strain during meal preparation.
Products mentioned in this guide
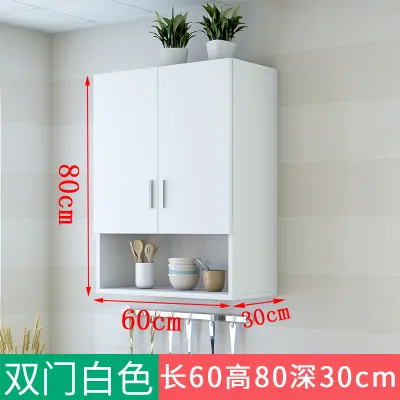
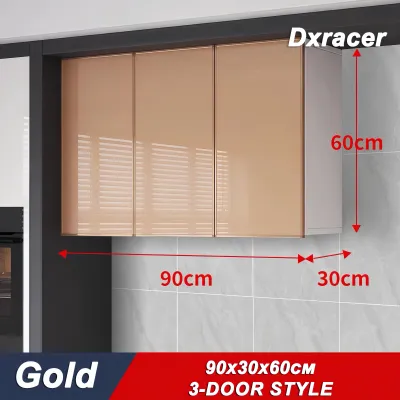
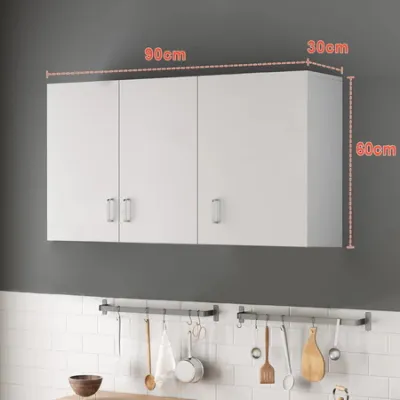
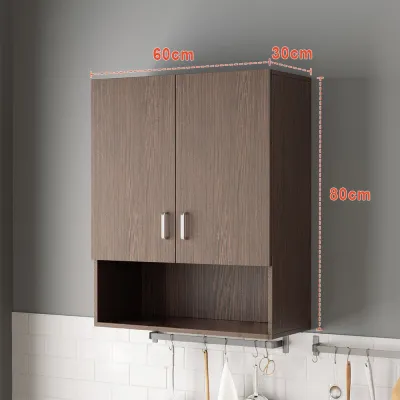

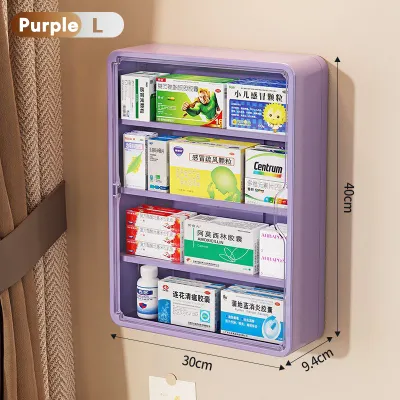
Prices are valid at publication and may change. Please refer to the product page for the latest price.
What to Look For: Sizing and Finish Criteria for Small Kitchens
Selecting the ideal wall-mounted storage for a compact kitchen requires a careful balance between maximizing storage volume and respecting the structural and physical boundaries of your space. Choosing a unit that is too large can overwhelm the room, while a unit that is too small will fail to solve your storage challenges. To make a smart investment, you must evaluate precise dimensions, clearance requirements, and material finishes that can withstand the unique environmental conditions of a busy kitchen.
Dimensions and Proportions for Tight Layouts
Standard overhead kitchen cabinets typically feature a depth of 12 inches (approximately 30 centimeters). While this depth works well in average-sized homes, it can feel imposing in narrow galley kitchens or studio units where the distance between opposing walls is minimal. For these exceptionally tight layouts, shallow-depth alternatives measuring between 8 to 10 inches (20 to 25 centimeters) offer a highly effective solution. These slimmer profiles provide ample space for standard dinner plates, glassware, and canned goods without protruding too far into your standing or walking path.
Maintaining proper headroom and clearance is another critical factor when planning your layout. As a general rule, there should be a vertical clearance of at least 18 to 24 inches (45 to 60 centimeters) between your kitchen countertop and the bottom of the upper cabinets. This gap ensures you have enough room to operate countertop appliances—such as rice cookers, blenders, and electric kettles—without steam or heat damaging the underside of the cabinet. If you are mounting a cabinet above a gas or electric range, you must strictly follow the range manufacturer’s specified clearance guidelines, which often require 30 inches (76 centimeters) or more of vertical space to prevent fire hazards.
Selecting overly bulky, deep, or excessively tall units can make a small kitchen feel dark and oppressive. If a cabinet extends too far outward, it can cast deep shadows over your prep areas, making it difficult to chop ingredients or read recipes safely. To maintain a balanced and airy feel, aim for a cohesive proportion where the depth of your overhead units does not exceed half the depth of your base countertops.
Surface Finishes and Maintenance Checks
The tropical climate of the Philippines introduces high humidity levels year-round, which can be further intensified by the heat, steam, and airborne grease generated during daily cooking. When browsing cabinet options, it is vital to check the manufacturer’s product specifications and labels to verify that the materials and finishes are rated for high-humidity environments. Unprotected materials can warp, swell, or develop mold when exposed to persistent moisture and fluctuating temperatures.
Prioritize smooth, non-porous surface finishes that are easy to wipe clean with a damp microfiber cloth and mild dish soap. Materials such as high-pressure laminates (HPL), melamine-faced moisture-resistant MDF, or powder-coated metals are excellent choices for heavy cooking zones. These surfaces resist the penetration of cooking grease, steam, and food splatters, allowing you to maintain a hygienic kitchen environment with minimal effort.
Conversely, avoid materials that require complex, specialized, or highly frequent maintenance, such as unsealed solid wood or highly textured decorative veneers that can trap grease and dust in their grooves. Before finalizing your purchase, always review the manufacturer’s care instructions to ensure the surface can handle standard household cleaning agents. If the care instructions are vague or suggest that the material is prone to water damage, it is best to look for a more resilient alternative designed specifically for kitchen use.
Choosing a Wall Mounted Cabinet: Top Designs for Compact Philippine Layouts
The most effective cabinet design for your home will depend on your specific kitchen layout, the items you need to store, and your personal maintenance habits. By understanding the distinct advantages and trade-offs of different configurations, you can choose a style that optimizes your workflow and enhances your kitchen’s overall aesthetic.

Floating Open Shelves and Plate Racks
Floating open shelves and integrated plate racks are popular choices for small kitchens because they eliminate the visual bulk of cabinet doors. By keeping the storage open, these designs allow light to pass through freely, making a compact cooking area feel significantly larger and more open. They are highly practical for storing everyday essentials—such as your daily plates, bowls, and coffee mugs—as they allow you to grab what you need quickly without opening and closing doors.
However, open storage comes with a distinct trade-off: because there are no doors to shield your items, they are fully exposed to settling dust and airborne cooking grease. This means you must commit to regular dusting and wiping down of both the shelves and the items stored on them to prevent a sticky buildup. Additionally, open shelving requires a degree of curation; displaying mismatched, cluttered items can quickly make a small kitchen look disorganized.
To balance aesthetics and practicality, use open shelves primarily for uniform, frequently washed dishware that does not sit idle long enough to collect dust. This keeps your kitchen looking neat, intentional, and visually spacious while ensuring your everyday items remain easily accessible.
Enclosed Cabinets with Adjustable Interiors
Enclosed cabinets featuring solid or semi-opaque doors are the traditional choice for a reason: they excel at hiding visual clutter and protecting your belongings. If you need to store a variety of mismatched food packages, canned goods, small appliances, or cleaning supplies, enclosed doors keep these items completely out of sight, maintaining a clean and streamlined look. They also provide a protective barrier against cooking grease, humidity, and dust, keeping your stored goods cleaner for longer.
When selecting enclosed units, look for models that feature adjustable internal shelves rather than fixed dividers. Adjustable shelving allows you to customize the interior layout to fit items of varying heights, such as tall soy sauce bottles, canisters of rice, or small kitchen appliances. This flexibility prevents wasted vertical space inside the cabinet, allowing you to maximize every cubic inch of storage.
To prevent enclosed cabinets from making your small kitchen feel dark or cramped, consider choosing light-colored finishes—such as white, cream, or light grey—or reflective surfaces like high-gloss laminates or frosted glass doors. These finishes bounce natural and artificial light around the room, helping to maintain a bright, open, and welcoming atmosphere.
Over-Sink and Corner Wall Units
Maximizing a small kitchen often requires utilizing awkward or underused zones, such as the space directly above the sink or tight corner areas. Over-sink wall cabinets with integrated dish drying racks are highly efficient double-duty solutions. They allow washed dishes to drip directly into the sink basin, eliminating the need for a bulky countertop dish rack that consumes valuable prep space. When choosing an over-sink unit, it is crucial to verify that the hardware is made of rust-resistant stainless steel and that the cabinet’s weight capacity can safely support wet, heavy ceramic dishes.
Corner wall units, such as diagonal or L-shaped cabinets, are designed to reclaim the dead space where two walls meet. In L-shaped or U-shaped kitchen layouts, standard linear cabinets can leave corner areas completely inaccessible or wasted. A dedicated corner wall cabinet provides deep, continuous storage space that is perfect for housing larger, less frequently used items like mixing bowls, baking pans, or dry food reserves.
When planning the placement of over-sink, corner, or standard wall units, always check the swing path of the cabinet doors. In a tight kitchen, a door that swings open too wide can strike a range hood, block a light fixture, hit an adjacent wall, or obstruct your movement. Opt for cabinets with compact door hinges, sliding doors, or upward-opening hydraulic doors to ensure smooth, unobstructed operation in confined spaces.
Safe Installation: Checking Wall Types and Load Limits
Installing a wall-mounted cabinet is a high-stakes task that directly impacts safety and property preservation. A fully loaded kitchen cabinet can weigh dozens of kilograms, holding fragile glassware, heavy ceramic plates, and sharp utensils. Therefore, ensuring a secure, stable installation is paramount. The first and most critical step is identifying the exact construction material of the wall where you plan to mount the cabinet.
In the Philippines, residential walls vary significantly depending on the building type. Older houses and division walls in modern homes often utilize hollow concrete blocks (CHB) finished with plaster, while high-rise condominiums frequently use lightweight drywall, fiber cement boards, or solid poured concrete. Each of these wall types requires a completely different anchoring method:
- Solid Poured Concrete: This is the strongest and most stable wall type, capable of supporting heavy loads when paired with heavy-duty metal expansion bolts or concrete masonry anchors.
- Hollow Concrete Blocks (CHB): These walls have hollow cavities inside. Standard plastic wall plugs are highly unsafe for heavy cabinets on CHB walls, as they can pull out easily. Instead, you must use specialized toggle bolts, sleeve anchors, or heavy-duty masonry fasteners designed to expand and grip the interior hollow spaces of the block.
- Drywall or Fiber Cement Board: These walls are supported by internal wooden or metal studs. Heavy cabinets should never be mounted directly onto drywall or fiber cement board alone using standard plastic anchors. They must be securely fastened directly into the structural studs behind the wall. If the studs do not align with your cabinet's mounting points, you must install a solid wood backing or support cleat to distribute the weight safely.
Before mounting, always calculate the total expected load of the cabinet, which includes the weight of the cabinet itself plus the maximum weight of the items you plan to store inside. Refer to the manufacturer’s product manual to find the specified maximum load capacity. Always use the exact size and type of heavy-duty mounting brackets, screws, and wall anchors recommended by the cabinet manufacturer.
Establish a strict safety boundary: if you are unsure of your wall’s material composition, if you do not have the proper tools (such as a stud finder, hammer drill, or spirit level), or if the manufacturer’s installation instructions conflict with your specific wall conditions, stop immediately. Do not attempt a DIY installation. Instead, consult a qualified local contractor, carpenter, or professional cabinet installer to handle the mounting safely.
Finally, never rely on adhesive strips, double-sided tape, or lightweight picture-hanging hardware to secure kitchen cabinets. While these temporary solutions may claim high weight capacities on packaging, they are not designed to withstand the constant downward pull, high humidity, and temperature fluctuations of a kitchen environment. Relying on them risks catastrophic failure, resulting in severe property damage or personal injury.
How to Measure Your Kitchen and Plan Your Purchase
A successful cabinet purchase begins with precise measurements and careful logistical planning. Before browsing online marketplaces or visiting local showrooms, grab a steel measuring tape and record the exact dimensions of your available wall space. Measure the total width, height, and depth clearances of the target wall area. Be sure to map out the exact locations of existing fixtures that cannot be moved, such as windows, electrical outlets, light switches, range hoods, and water pipes. This mapping ensures your new cabinet will not block access to power sources or interfere with ventilation systems.
When planning your purchase, you must also consider the physical path the cabinet will take from the delivery truck to your kitchen wall. This is especially critical for residents of high-rise condominiums, where large furniture pieces must fit through tight doorways, narrow corridors, and standard elevator doors. Measure the height and width of your building’s service elevator and entryways to ensure the packaged cabinet can be transported safely. Additionally, check your condominium association’s rules regarding delivery hours, moving permits, and noise restrictions for installation work to avoid unexpected fines or delays.
For sourcing your wall-mounted cabinet, you have several reliable options. Visiting local furniture showrooms in major cities allows you to physically inspect the build quality, test the door hinges, and check the material finishes in person. If you prefer a wider selection and the convenience of home delivery, reputable online home goods platforms and official brand stores offer extensive catalogs. When shopping online, always read customer reviews to verify the accuracy of the product dimensions and check the seller’s return and replacement policies in case the product arrives damaged or does not match the description.
Frequently Asked Questions (FAQ)
How high should wall-mounted kitchen cabinets be installed?
The standard industry guideline is to install the bottom of your wall-mounted cabinets 18 to 24 inches (approximately 45 to 60 centimeters) above your kitchen countertop. This clearance provides comfortable workspace for food preparation and accommodates most standard countertop appliances. However, you should adjust this height to suit your personal needs; if the primary cook in your household is shorter, lowering the cabinets slightly can improve accessibility, while taller users may prefer higher placement to prevent head obstruction.
Can I install heavy wall cabinets on a hollow block wall?
Yes, you can install heavy cabinets on a hollow concrete block (CHB) wall, but you must use specialized hardware designed for hollow structures. Standard plastic wall plugs are not strong enough and can slip out under heavy loads. Instead, use heavy-duty toggle bolts, sleeve anchors, or chemical anchors that expand securely within the block’s hollow core. For exceptionally heavy cabinets or high-load storage, it is highly recommended to hire a professional installer to assess the wall’s structural integrity and ensure the anchors are properly and safely seated.
Community discussion
Share your experience or ask a question. Comments are reviewed before publication.