
Expanding your work-from-home (WFH) setup often leads to a common bottleneck: running out of desk space. Whether you are adding a secondary monitor, setting up a dedicated tablet stand, or simply needing more room for paperwork, replacing your entire desk is not always practical or budget-friendly. This is especially true in space-constrained urban apartments in Metro Manila, where finding a larger desk that fits your room layout can be a major challenge.
A desk table extension provides an efficient, modular solution to scale up your current workspace without the expense or hassle of buying new furniture. By choosing an appropriate extension accessory, you can add valuable depth or width to your existing setup. However, selecting and installing these extensions requires a careful look at your current desk’s structural limits, material composition, and the surrounding space.
Assess Your Desk Structure and Available Space
Before purchasing any extension accessory, you must evaluate your current desk to ensure it can safely support the modification. Start by measuring the exact thickness of your desk surface using a tape measure. Most clamp-on extensions require a minimum thickness to grip securely, typically ranging from 1.5 centimeters to 5 centimeters. You must also inspect the edge profile; a perfectly flat, square edge is ideal, whereas highly beveled, rounded, or decorative chamfered edges may prevent the clamps from securing a flush, stable grip.
Products mentioned in this guide
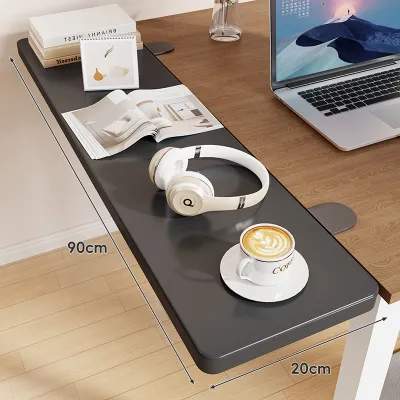
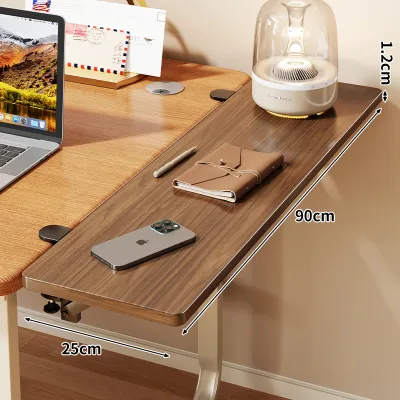
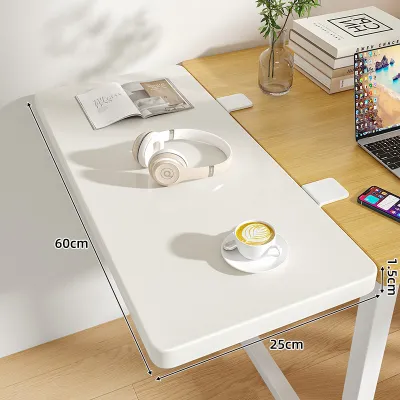
Prices are valid at publication and may change. Please refer to the product page for the latest price.
Next, identify your desk’s core material. Solid wood and thick plywood are highly resilient and can withstand substantial point pressure from clamps or screws. Conversely, engineered woods like medium-density fiberboard (MDF) and particle board require gentler handling. In the high-humidity tropical climate of the Philippines, engineered wood can absorb moisture over time, which may weaken its structural integrity and make the edges more prone to crushing or crumbling under tight clamp pressure. If your desk features a hollow honeycomb-core construction (common in budget flat-pack furniture), it lacks the internal density to support heavy clamp-on or screw-in accessories safely.
You must also measure the physical clearance around your workspace. Adding an extension will alter the desk’s footprint, so you must verify that the new dimensions do not obstruct walkways, block doors, or interfere with nearby electrical outlets. Ensure there is sufficient room for your office chair to glide back smoothly and that the extension does not force you into an awkward, non-ergonomic seating position.
Briefly define what you intend to place on the extended surface. If you only need room for a mouse, a notepad, or a lightweight keyboard, a compact clamp-on tray is sufficient. If you plan to place a secondary monitor, a heavy printer, or multiple reference books on the extension, you will need a heavy-duty solution with a higher weight capacity and a wider footprint.
Choose the Right Desk Table Extension for Your Setup
Selecting the ideal extension depends heavily on your desk’s edge design, material strength, and the layout of your room. Not all desks can accommodate the same type of accessory, and choosing the wrong style can result in structural failure or permanent damage to your furniture.

By matching your desk assessment with the specific extension types below, you can identify the safest and most functional option for your WFH workspace.
Clamp-On Desk Extensions
Clamp-on extensions are the most popular choice for users who want to expand their workspace without permanently altering their furniture. These units use adjustable C-clamps to grip the edge of your desk, extending the surface forward or to the side.
- Best Suited For: Solid wood, thick plywood, or high-density MDF desks with flat, square edges.
- Key Advantages: They create a clean, flush transition with your main desk surface, require no drilling, and can be easily removed or repositioned if your WFH layout changes.
- Physical Requirements: You must ensure there are no metal support beams, cable trays, or structural drawers directly underneath the desk edge within 10 centimeters of the border, as these obstacles will block the clamp brackets from making full contact.
Fold-Down or Drop-Leaf Extensions
Fold-down or drop-leaf extensions utilize heavy-duty hinged brackets that screw directly into the underside of your existing desk. When you need extra space, you lift the extension panel until it locks into place; when finished, you release the hinge to let the panel hang flat against the side of the desk.
- Best Suited For: Compact home offices, bedrooms, or multi-use spaces where preserving floor space when off-duty is a priority.
- Key Advantages: Highly space-efficient, offering a temporary workspace that tucks away neatly at the end of the day.
- Physical Requirements: This method requires drilling and screwing directly into your desk. It is only suitable for thick, solid wood or high-quality MDF. Avoid installing drop-leaf brackets on hollow-core or thin particle board desks, as the screws can easily strip out of the soft material under the downward leverage of the extended leaf. Always check the manufacturer's care instructions for maximum load limits and recommended screw depths to avoid puncturing the top surface.
Freestanding Side Tables
When your existing desk cannot support the physical stress of clamps or screws, a freestanding side table is the safest alternative. These are independent, narrow tables or mobile carts designed to sit immediately adjacent to your primary desk.
- Best Suited For: Glass desks, thin metal-framed desks, hollow-core budget tables, or rental properties where furniture modifications are prohibited.
- Key Advantages: Completely non-destructive, zero risk of damaging your primary desk, and they offer independent storage shelves or drawers underneath.
- Physical Requirements: You must measure and match the height of the side table perfectly to your existing desk to prevent ergonomic issues. Even a minor height discrepancy of a few millimeters can cause wrist fatigue or shoulder strain during long typing sessions. Look for height-adjustable models with locking casters or leveling feet to ensure a stable, flush alignment.
How to Install a Clamp-On Desk Table Extension Safely
To install a clamp-on desk table extension securely without damaging your furniture, follow these step-by-step instructions.
- Tools and Materials Needed:
- Measuring tape
- Screwdriver or Allen key (typically included with the extension kit)
- Protective felt pads, rubber shims, or thin silicone coasters
- A clean microfiber cloth
- Step 1: Prep the edge
Clear all items from the installation area on your desk. Use a slightly damp microfiber cloth to wipe down both the top and bottom surfaces of the desk edge to remove dust, oil, and debris. In humid environments, accumulated dust can form a slippery layer, reducing the friction grip of the clamps and causing the extension to slide. Allow the surface to dry completely before proceeding.
- Step 2: Apply protection
Many clamp-on extensions come with bare metal or hard plastic brackets. To prevent these brackets from scratching, denting, or crushing your desk, place thin protective felt pads or rubber shims between the clamp surfaces and your desk. If your kit did not include these, you can cut small pieces of non-slip rubber drawer liner or use adhesive felt furniture pads.
- Step 3: Position and align
Hold the extension board up to your desk edge and align it to your desired position. Use your measuring tape to ensure it is centered or positioned precisely where you need it. Slide the clamp brackets over the edge, making sure they are pushed all the way inward so the desk edge sits fully flush against the back of the bracket throat.
- Step 4: Tighten gradually
Begin tightening the clamp screws by hand. If your extension uses two clamps, do not tighten one side completely before starting the other. Instead, alternate between the left and right clamps, tightening them gradually in small increments. This distributes the pressure evenly across both brackets and prevents the extension board from twisting or shifting out of alignment.
- Step 5: Test stability
Once the clamps feel snug, gently press down on the outer edge of the extension with your hands. Gradually apply moderate downward pressure while checking for any signs of slipping, sagging, or bending. Inspect the underside to confirm that the clamps remain flat against the desk surface.
- Warning and Stop Conditions:
Stop tightening immediately if you hear any cracking, creaking, or splintering sounds from your desk. If you observe the desk surface bowing, or if the extension sags significantly under light hand pressure, remove the clamps immediately. These are signs that your desk material is too soft or thin to support the point pressure. In this scenario, do not attempt to use the clamp-on extension; instead, transition to a freestanding side table to prevent catastrophic damage to your equipment.
Organize Cables and Optimize Your Extended Workspace
Once your desk extension is safely installed, you must optimize the new layout to maintain a comfortable, productive, and safe WFH environment.
Managing the seam where the extension meets the main desk is critical for comfort. If you plan to move your mouse or write across this transition, the physical gap or slight seam can be highly distracting. To resolve this, lay a wide desk mat or a large mousepad over the seam. This creates a smooth, continuous surface that conceals the gap and protects the edges of both boards from wear.
Cable management is another vital step, especially when adding electronic devices to the extended area. Unsecured cables hanging off the side of your desk can easily snag on your chair, pets, or clothing, pulling your equipment down. Route all power and data cables along the back edge or underneath the seam. Use adhesive cable clips, hook-and-loop (Velcro) straps, or cable sleeves to bundle the wires and anchor them securely to the underside of the desk or the extension brackets.
When arranging your equipment, place your primary tools—such as your keyboard and primary monitor—directly in front of you on the main desk. Use the extended surface for secondary items like document trays, tablets, reference notebooks, or a secondary monitor. This keeps your immediate workspace clear of clutter and ensures your body remains aligned with your main monitor, reducing neck and back strain.
Finally, double-check your ergonomic posture. The height of your extension must align with your main desk to prevent repetitive strain injuries. If you are using the extension as a keyboard tray, ensure it sits at a height that allows your elbows to rest at a comfortable 90-degree angle, with your wrists remaining straight while typing.
Frequently Asked Questions (FAQ)
Can I install a desk table extension on a glass desk?
No, you should never install clamp-on or screw-in extensions on a glass desk. Glass is highly vulnerable to point pressure, and tightening metal clamps or brackets against a glass edge can cause the entire sheet to shatter instantly. Even if the glass is tempered, the localized stress from typing or resting your arms on the extension can lead to sudden structural failure. The only safe way to expand a glass desk is to use an independent, freestanding side table adjusted to match the exact height of your glass surface.
How much weight can a typical clamp-on desk extension hold?
The weight capacity of a clamp-on desk extension varies widely, typically ranging from 5 to 15 kilograms. This limit depends heavily on both the manufacturer’s bracket rating and the strength of your host desk’s edge. You must always consult the product manual for the specific weight limits of your extension. Additionally, avoid mounting heavy, articulated monitor arms directly onto a clamp-on extension board. The leverage and rotational force exerted by a monitor arm can easily overwhelm the extension’s clamps, ripping them off the desk or breaking the edge of your main desk.
Community discussion
Share your experience or ask a question. Comments are reviewed before publication.