
Assembling a bedside cabinet with integrated electrical components requires a careful balance of standard furniture construction and basic electrical safety. While the physical frame and storage compartments follow typical flat-pack or modular assembly logic, the built-in charging ports introduce wiring that must be routed and connected without pinching, stretching, or exposing the cables. This guide walks you through the complete process—from unboxing and structural assembly to safely integrating the power module and testing the final build—ensuring your nightstand is both structurally sound and electrically safe. Always prioritize the specific manufacturer’s instruction manual over general guidelines, especially when dealing with internal wiring and power connections.
Pre-Assembly Preparation and Electrical Safety Checks
Before opening any packaging, clear a spacious work area in your bedroom. Unbox the components carefully and lay them out on a clean, flat, and dry surface. Using the flattened cardboard packaging as a protective mat is an excellent way to shield both your floor and the cabinet’s finished panels from scratches. Take a complete inventory of all wooden panels, hardware packs, drawer tracks, and the electrical charging module against the manufacturer’s parts list. Missing a single cam lock or screw midway through the build can halt your progress, so verifying every piece beforehand saves significant time.
Inspect the electrical components thoroughly before beginning any physical assembly. Check the main power cord, USB ports, and AC outlets for any visible signs of damage, such as frayed insulation, bent plugs, or cracked plastic housings. Ensure the power cord remains completely unplugged from any wall outlet during the entire assembly process. In tropical environments where humidity levels can be high, working in a dry, well-ventilated indoor space prevents moisture from settling on raw, unsealed engineered wood edges, which can cause premature swelling or warping.
Products mentioned in this guide



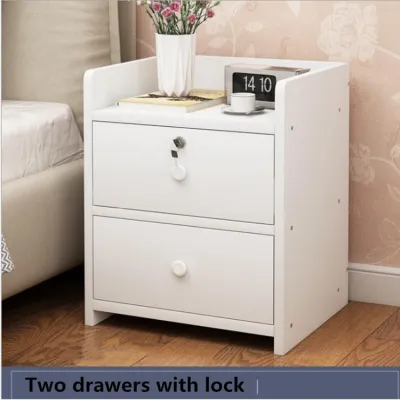
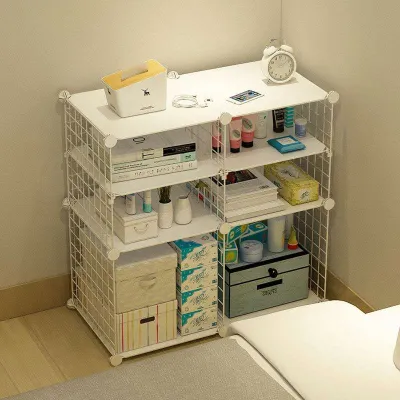
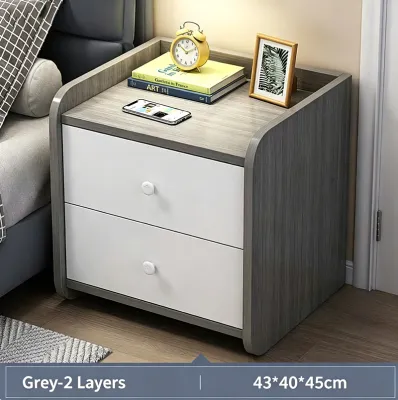

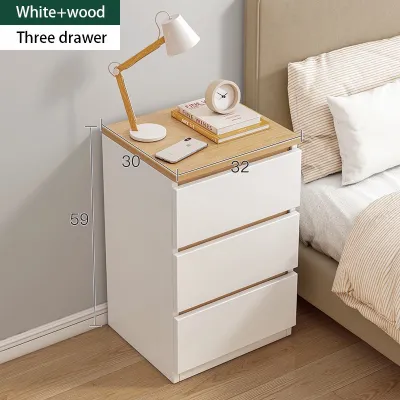
Prices are valid at publication and may change. Please refer to the product page for the latest price.
Gather all the necessary manual tools before you begin. A standard Phillips-head screwdriver, a flathead screwdriver, and a rubber mallet are typically sufficient for most flat-pack furniture. Avoid using power drills or electric screwdrivers for this project. The high torque of a power drill can easily strip the pre-drilled holes in particleboard or medium-density fiberboard (MDF), crack the laminated finish, or damage the delicate plastic housings of the integrated charging unit. Hand-tightening allows you to feel the resistance and secure each fastener safely.
Building the Cabinet Frame and Storage Compartments
Constructing a stable bedside cabinet starts with establishing a solid foundation. Begin by inserting the wooden dowels and screwing the cam pins into the designated pre-drilled holes on the bottom, side, and top panels. When joining the side panels to the base, ensure the finished edges face forward and the pre-drilled grooves for the back panel align perfectly across all pieces. Gently tap the panels together using a rubber mallet if the fit is tight, then insert the cam locks into their respective holes and turn them clockwise with a screwdriver to lock the panels securely in place.

Next, install the internal shelves, dividers, and drawer tracks before enclosing the frame. Align the drawer slides with the pre-drilled pilot holes on the interior side panels, ensuring the front of the track faces the front of the cabinet. Use a level to verify that the tracks on both sides are perfectly parallel and horizontal. If the tracks are misaligned even slightly, the drawers will stick, slide unevenly, or fail to close completely. Secure the tracks firmly with the provided flat-head screws, making sure the screw heads sit flush within the track metal to avoid obstructing the drawer rollers.
Once the internal components are set, slide the thin back panel into the grooves running along the rear edges of the side panels. Secure the back panel using the recommended nails or screws at the specified intervals. This panel is not merely cosmetic; it provides the essential lateral stability needed to prevent the cabinet from racking, swaying, or leaning over time. Skipping or rushing this step can result in a structurally weak cabinet that wobbles when you open the drawers or plug devices into the charging ports.
Throughout the structural build, avoid the temptation to over-tighten the fasteners. Tighten each cam lock and screw until you meet firm resistance, but do not force them further. Over-tightening can strip the threading on metal inserts, split the engineered wood cores, or cause the laminate surface to bulge and crack. Keeping the frame square and the joints snug without using excessive force ensures a long-lasting, stable piece of bedroom furniture.
Installing and Routing the Built-In Charging Ports
Integrating the electrical charging module requires a methodical approach to prevent wire damage. Locate the designated cutout for the power strip, which is typically positioned on the top surface, a back shelf, or within an open cubby. Carefully thread the main power cable through the pre-drilled routing holes or internal channels from the inside of the cabinet toward the back. Ensure the cable is routed away from any moving parts, such as drawer slides, hinges, or adjustable shelf pins, where it could easily become pinched, crimped, or severed during daily use.
Position the charging panel into its cutout, ensuring it sits flush against the surrounding surface. Secure the module using the provided mounting screws or snap-fit clips, depending on the manufacturer’s design. Do not force the housing into the opening; if the fit is too tight, check for wood splinters or vinyl laminate overhangs that might be obstructing the cutout. The plastic casing of the charging module must remain intact to ensure proper insulation and user safety.
If your bedside cabinet features multiple electrical components, such as a wireless charging pad and a standard USB hub, connect the internal wiring or daisy-chain the modules strictly according to the manufacturer’s wiring diagram. Ensure all quick-connect plastic terminals click together securely. Loose connections inside a wooden cabinet can lead to intermittent power delivery or localized heat buildup, which poses a serious safety hazard.
Establish clear stop conditions during this phase of the assembly. If you notice that the electrical connectors do not match, the wire insulation is cut or exposed, or the grounding pin on the main plug is bent or missing, halt the assembly immediately. Do not attempt to patch damaged wires with electrical tape or force incompatible plugs together. Contact the manufacturer to request a certified replacement module before proceeding with the build.
Final Adjustments, Cable Management, and Power Testing
With the physical structure assembled and the charging module in place, focus on organizing the external cables. Use the adhesive cable clips or hook-and-loop straps provided in the hardware kit to secure the main power cord along the back panel or down one of the rear legs. This keeps the cord tidy, prevents it from becoming a tripping hazard in a dark bedroom, and ensures it does not get caught in the bottom drawer mechanism when the drawer is pushed shut.
Insert the drawers into their tracks and test their movement. If the drawer fronts do not align evenly or if there are uneven gaps between the drawers and the cabinet frame, adjust the mounting screws on the drawer tracks slightly to realign them. For cabinets with doors, adjust the tension and alignment screws on the European-style hinges to ensure the doors hang straight and close quietly. Avoid applying household lubricants or oils to the drawer tracks unless the manufacturer specifically recommends a dry silicone spray, as wet lubricants can attract dust and lint, leading to clogged tracks.
Before plugging the bedside cabinet into the wall, perform a final stability check. Place the cabinet in its permanent location next to your bed and check if it sits level on the floor. If your bedroom floor is slightly uneven, adjust the leveling feet on the bottom of the cabinet legs until the unit is perfectly stable and does not wobble when pushed. A stable cabinet prevents items from sliding off the top surface and reduces strain on the structural joints.
Carry out a safe electrical testing protocol once the cabinet is fully stable. Plug the main power cord into a properly grounded wall outlet. Test the USB ports and AC outlets using a low-draw device, such as a mobile phone charger or a small bedside lamp. Verify that the device charges consistently and that there are no unusual humming sounds or warmth radiating from the module. Avoid plugging high-wattage appliances, such as space heaters or hair dryers, into the bedside cabinet’s outlets, as these can easily overload the integrated power strip.
Troubleshooting Common Assembly and Power Issues
If you encounter stiff drawer movement or misaligned tracks after completing the assembly, the issue is usually caused by minor alignment errors during track installation. Empty the drawers, remove them from the cabinet, and loosen the track mounting screws slightly. Realign the rails so they are perfectly parallel to the cabinet floor and to each other, then tighten the screws back down. Ensuring the cabinet frame is perfectly square by measuring the diagonal distances from corner to corner can also resolve persistent drawer alignment issues.
When the charging ports fail to power your devices, work backward through the electrical path to identify the cause. First, verify that the wall outlet itself is functioning by plugging in a known working device like a lamp. Next, unplug the cabinet and check that all internal cable connections between the charging module and the power cord are fully seated and clicked into place. Some integrated power modules feature a built-in reset button or a small circuit breaker on the side; press this button to reset the unit if an overload has occurred.
Visible gaps in the cabinet joints or uneven doors are typically caused by loose fasteners or an unlevel floor surface. Go over all the cam locks and structural screws to ensure they are fully tightened and have not backed out during assembly. If the joints are tight but the cabinet still appears skewed, check the floor level. Placing small felt pads or adjusting the screw-in leveling glides under the low corners of the cabinet legs will quickly square up the frame and align the doors.
Frequently Asked Questions (FAQ)
Can I replace the built-in charging module if it stops working?
Yes, you can replace the built-in charging module, but you must check the manufacturer’s warranty guidelines first. Always order an exact replacement part directly from the manufacturer to guarantee proper voltage, amperage, and physical dimensions. Avoid installing third-party, uncertified, or mismatched electrical modules, as they may lack internal safety fuses, fail to fit the cutout securely, or create a potential electrical hazard within the wooden cabinet.
How do I clean the charging ports without damaging them?
To clean the charging ports safely, always unplug the cabinet’s main power cord from the wall outlet first. Use dry, non-conductive tools such as a can of compressed air or a soft, dry, anti-static brush to gently remove dust, lint, and debris from the ports. Never use liquid cleaners, wet wipes, damp cloths, or metal objects like paperclips inside the ports, as moisture and metal can damage the delicate contacts and cause a short circuit once the power is reconnected.

Community discussion
Share your experience or ask a question. Comments are reviewed before publication.