
Finding the right expandable shoe rack organizer for your closet in the Philippines requires balancing space constraints, shoe collection size, and the challenges of a tropical climate. Expandable organizers are highly practical because they adjust to fit changing closet dimensions and growing shoe collections. However, selecting the right one involves looking past basic aesthetics to evaluate structural stability, material durability under high humidity, and physical space limits. By focusing on adjustable dimensions, robust materials, and smart layout integration, you can maximize your closet’s storage potential while keeping your footwear organized, accessible, and well-preserved.
To make an informed purchase on local online marketplaces or at home improvement stores, you must understand how different expansion mechanisms behave under load and how various materials hold up over time. A well-chosen rack not only declutters your floor but also promotes air circulation, which is vital for preventing mold and mildew growth on your shoes during the humid rainy season. This guide provides a comprehensive framework to help you assess your space, evaluate key product features, and select the ideal expandable shoe rack for your specific closet setup.
Assess Your Closet Space and Shoe Collection
Before browsing product listings, you must determine the exact physical constraints of your closet and the storage volume your footwear requires. Accurate measurements prevent the common mistake of buying an organizer that is either too wide to expand fully or too deep to allow your closet doors to close properly. Start by clearing out your closet floor and using a metal measuring tape to record the available width, depth, and vertical clearance. If your closet has sliding doors, measure the opening width when one door is fully open, as this determines the maximum width a rigid rack can have while still allowing you to access your shoes.
Products mentioned in this guide
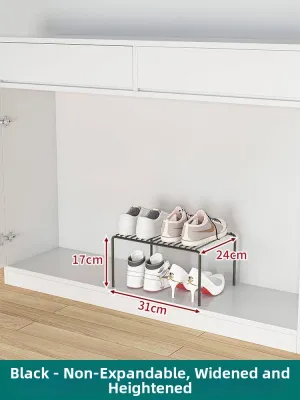
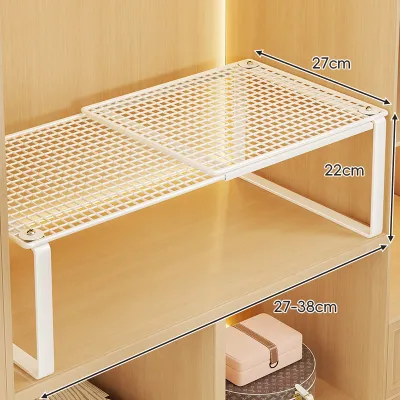
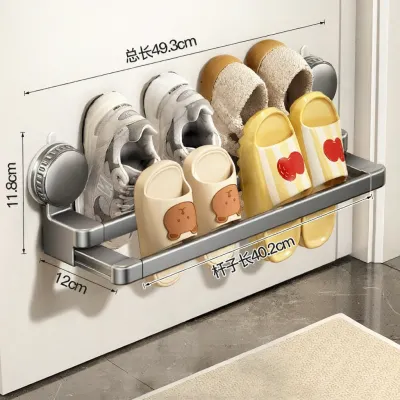
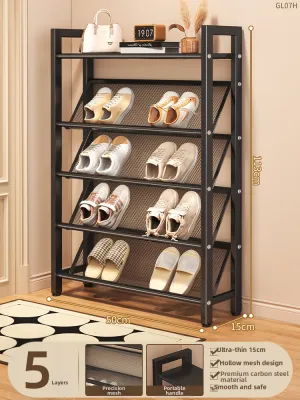
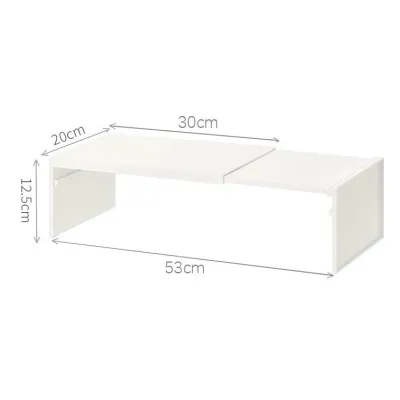
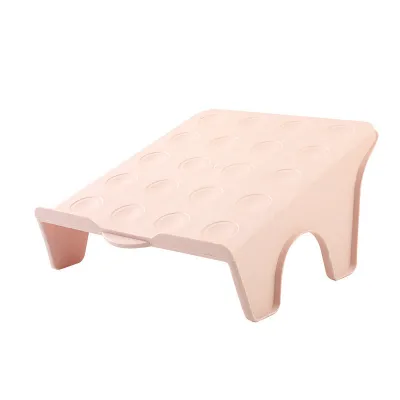
Prices are valid at publication and may change. Please refer to the product page for the latest price.
Next, categorize your shoe collection by type and height. High-heeled shoes, high-top sneakers, and boots require significantly more vertical clearance between tiers than flat sandals, slippers, or low-profile loafers. If you store a mix of these styles, you will need a rack that offers adjustable tier heights or sufficient default clearance—typically at least 15 to 20 centimeters between shelves. For exceptionally tall footwear like boots, you may need to reserve the top tier of the rack or look for a model with removable shelves.
Finally, calculate the total number of pairs you need to store to define your minimum capacity requirements. An average pair of adult shoes requires approximately 20 to 25 centimeters of horizontal shelf space. Multiply this by the number of pairs you own to estimate the total linear shelf length you need. For example, if you have 15 pairs of shoes, you will need about 300 to 375 linear centimeters of shelf space. An expandable rack that stretches from 60 to 110 centimeters across three tiers can easily accommodate this collection, but you must verify that your closet width can accommodate the fully extended rack.
Key Evaluation Criteria for Expandable Shoe Racks
When evaluating expandable shoe racks, the expansion mechanism itself is the most critical structural component to inspect. Most expandable models use telescoping metal bars, where smaller-diameter tubes slide inside slightly larger ones. While this design offers excellent width flexibility, it introduces a potential weak point at the center joint when the rack is fully extended. Under heavy loads, fully extended telescoping bars can sag or bow downward. To prevent this, look for models that feature locking collars or tightening screws at the expansion joints, which secure the tubes in place and reinforce the center span.

Material selection directly impacts both the weight capacity and the longevity of the organizer, especially in the humid Philippine climate. Untreated wood or low-grade manufactured boards can warp, swell, or harbor mold when exposed to damp shoes and high humidity. Instead, prioritize rust-resistant metals such as powder-coated steel, chrome-plated iron, or anodized aluminum. If the rack utilizes plastic connectors or frames, ensure they are made of thick, high-density polyethylene or ABS plastic, which resist cracking under stress and do not degrade quickly in warm environments.
Weight capacity is another vital specification that you must verify against manufacturer guidelines. A single pair of heavy leather shoes or thick-soled athletic sneakers can weigh over one kilogram. If you plan to store multiple pairs of heavy footwear, ensure the rack’s rated weight capacity per tier can support the load without bending. Additionally, look for adjustability features such as removable bars or shelves. Some expandable racks allow you to omit a middle bar to accommodate taller boots, or feature sloped shelves with lip barriers to keep high heels secure without taking up excess vertical space.
Building Your Shortlist by Closet Layout
Matching the design of an expandable shoe rack to your specific closet layout is essential for maximizing space efficiency. Different closet configurations demand different structural styles to avoid creating dead space or blocking access to other stored items.
Floor-Standing Expandable Racks
Floor-standing expandable racks are ideal for wide, open closet floors or walk-in closets with ample ground space. These units typically feature two to four tiers and rely on a sturdy, self-supporting frame. Because they sit directly on the floor, they offer the highest weight capacity and stability among all design types. When selecting a floor-standing model, ensure it has non-slip rubber feet to protect your closet floor and prevent the rack from sliding when you retrieve your shoes. If your closet floor is uneven, look for models with adjustable leveling feet.
Stackable and Modular Expandable Units
If your closet has limited floor width but generous vertical clearance, stackable or modular expandable units are the most efficient choice. These systems allow you to place one expandable rack on top of another, securing them with interlocking plastic or metal pins. This modular approach lets you expand your storage vertically as your shoe collection grows, without consuming additional floor space. When stacking units, always place the heaviest shoes on the bottom rack to maintain a low center of gravity and prevent the entire structure from becoming top-heavy.
Over-the-Door and Hanging Expandable Organizers
For narrow closets, reach-in wardrobes, or small bedrooms where floor space is non-existent, over-the-door or hanging expandable organizers offer an excellent alternative. Over-the-door models hang from the top of standard closet doors using flat metal hooks, utilizing otherwise wasted vertical space. Hanging organizers attach directly to the closet clothes rod using heavy-duty hook-and-loop straps or metal hooks. While highly space-efficient, these organizers generally have lower weight capacities than floor-standing models, making them best suited for lightweight footwear like sandals, flats, and slippers.
Under-Shelf and Drop-Down Expandable Inserts
Under-shelf or drop-down expandable inserts are designed to utilize the dead space directly beneath existing closet shelves or hanging clothes. These compact racks often feature tension-mount bars or slide-on brackets that attach to the underside of an existing shelf. They are perfect for storing low-profile shoes like flats or flip-flops in spaces that are otherwise too short for a standard floor rack. When choosing an under-shelf insert, measure the clearance between the bottom of your hanging clothes and the closet floor to ensure your shoes will not drag on the rack.
Pre-Purchase and Setup Checklist
Before finalizing your purchase, run through a comprehensive checklist to ensure the expandable shoe rack will fit your space and function safely. First, cross-reference the product’s fully collapsed and fully expanded dimensions with your closet measurements. Ensure that even at its maximum width, the rack leaves at least two to three centimeters of clearance on either side to allow for easy installation and removal. If the rack must be collapsed slightly to fit, verify that the overlapping bars do not create uneven gaps that could cause smaller shoes to slip through.
Second, calculate the total weight of your heaviest shoes and compare it to the manufacturer’s stated weight limits. If the product description does not specify a weight limit, look for clues in the construction, such as tube diameter and wall thickness. Thicker metal tubes (typically 12 millimeters or larger in diameter) and reinforced plastic joints generally indicate a higher load capacity. Avoid overloading the rack, as this can lead to joint failure, sagging bars, or tip-over hazards.
Finally, review the assembly requirements and prepare the necessary tools before the product arrives. Many expandable shoe racks feature tool-free assembly with snap-fit joints or thumbscrews, while others require a basic screwdriver or a rubber mallet to secure the frame. Ensure you have a clean, flat workspace to assemble the rack. Once assembled, place the rack in your closet and test its stability by gently shaking the frame. If the rack feels unstable or wobbles, adjust the leveling feet or consider anchoring it to the closet wall for added safety.
Frequently Asked Questions (FAQ)
How do I prevent an expandable shoe rack from tipping over? (FAQ)
To prevent an expandable shoe rack from tipping over, always distribute the weight of your shoes strategically by placing the heaviest pairs, such as boots and thick-soled sneakers, on the bottom tier. This lowers the overall center of gravity of the unit, making it significantly more stable. Ensure the rack is placed on a completely level surface; if your closet floor is carpeted or uneven, use leveling shims or choose a rack with adjustable screw-in feet. For tall, stacked, or narrow multi-tier racks, consult the manufacturer’s instructions regarding wall-anchoring options, and use small L-brackets or safety straps to secure the frame to the closet wall or studs.
Can I adjust the tier heights after the rack is fully assembled? (FAQ)
Whether you can adjust the tier heights after assembly depends entirely on the specific design of your shoe rack. Standard telescoping sliding racks typically have fixed-tier heights determined by the rigid side frames, meaning you cannot adjust the vertical distance between shelves without buying a different model. However, modular or clip-based metal wire racks often allow you to adjust shelf heights in small increments by repositioning the plastic support clips along the vertical support posts. Always check the manufacturer’s product specifications before purchasing if you require vertical adjustability, and remember that adjusting the height of a fully assembled rack usually requires removing all shoes first to prevent structural damage.
Community discussion
Share your experience or ask a question. Comments are reviewed before publication.