
Selecting the correct shoe brace rack size requires balancing your physical closet boundaries with your footwear collection. In tropical climates like the Philippines, where high humidity can accelerate mold growth on tightly packed shoes, choosing a rack with the correct dimensions is crucial for both organization and air circulation. By measuring your floor space, calculating your capacity needs, and verifying clearance, you can select a storage solution that keeps your shoes pristine and your closet fully functional. A well-fitted shoe brace rack preserves the structural integrity of your footwear, preventing distortion, creasing, and musty odors by ensuring every pair has a dedicated, well-ventilated space.
Measure Your Closet's Available Footprint
Before browsing online marketplaces or visiting local furniture stores, you must establish the absolute physical limits of your storage area. Use a reliable metal tape measure rather than relying on visual estimates, as even a discrepancy of a few centimeters can prevent a pre-assembled rack from fitting. Measure the width of the floor space from side to side, followed by the depth from the back wall to the front of the closet frame.
Do not assume your closet walls are perfectly square. Take measurements at three different points—near the back wall, in the middle, and close to the door opening—and use the smallest measurement as your guide. Next, measure the vertical height from the floor to the lowest obstruction, which is typically a hanging clothes rod, an existing shelf, or a low-hanging light fixture. This vertical limit determines how many tiers your new rack can safely accommodate.
Products mentioned in this guide
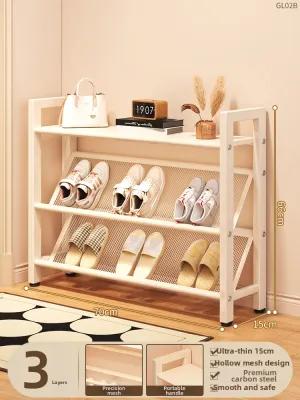
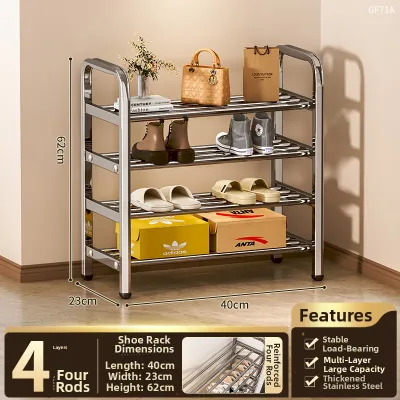
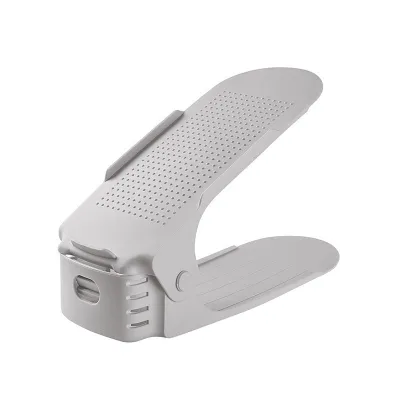

Prices are valid at publication and may change. Please refer to the product page for the latest price.
Remember to account for subtle architectural features that reduce usable space. Baseboards along the bottom of the wall can push the rack forward by several centimeters, reducing the available depth for your shoes. Additionally, note the location of light switches, electrical outlets, wall-mounted utility boxes, or floor vents. Blocking these features limits their accessibility and can restrict necessary airflow within the enclosed closet.
Finally, inspect the condition of your closet floor. If your closet is tiled or has uneven wooden floorboards, a tall, narrow shoe rack may wobble. Identifying these floor imperfections early allows you to look for shoe racks equipped with adjustable leveling feet, which can compensate for uneven surfaces and ensure the entire structure remains stable and upright.
Calculate Your Shoe Collection Capacity Needs
To choose a rack that serves you long-term, you must have an accurate count of your current footwear collection. Empty your closet completely and lay out all your shoes. Group them by style and height, as different types of footwear require vastly different amounts of vertical and horizontal space. For instance, flat sandals, slippers, and low-profile sneakers can be placed closer together, while high heels, wedge sandals, and boots require significantly more vertical clearance.

In the Philippines, daily footwear often includes lightweight slippers and casual slides alongside formal leather shoes or athletic sneakers. Slippers and flat sandals can sometimes be doubled up or nested to save space, whereas structured leather shoes require dedicated slots to prevent scuffing and deformation. If you live in an area prone to heavy rains, you must also account for wet-weather boots or synthetic clogs, which need extra space to dry properly without touching other delicate materials.
Factor in your shopping habits and seasonal rotation when calculating capacity. If you tend to acquire new shoes regularly, select a rack that offers at least twenty percent more capacity than your current inventory requires. For those who rotate their shoes seasonally, consider storing off-season footwear in breathable storage boxes on higher closet shelves, leaving the primary shoe brace rack dedicated to the pairs you wear most frequently.
Once you have your final pair count, translate this number into physical rack requirements. On average, a standard pair of adult shoes requires about twenty to twenty-five centimeters of horizontal shelf space. If you have twenty pairs of shoes and select a rack that is eighty centimeters wide, each tier will comfortably hold about three to four pairs. Consequently, you will need a rack with at least five or six tiers to accommodate your entire collection without overcrowding.
Match Rack Dimensions to Your Space and Collection
With your closet measurements and capacity needs in hand, you can begin matching these requirements to available shoe rack models. Compare the external dimensions of the rack against your measured closet footprint, ensuring you leave a buffer of at least two to three centimeters on all sides. This small gap prevents the rack from scraping against the closet walls during installation and allows for easier cleaning and dust removal.
Pay close attention to the internal shelf depth of the rack. A standard shoe rack depth ranges from thirty to thirty-five centimeters, which easily accommodates most shoe sizes. However, if you wear larger shoe sizes or own bulky athletic sneakers, a shallow rack may cause your shoes to overhang the front edge. This overhang not only looks untidy but can also prevent sliding or bifold closet doors from closing completely.
Evaluate the vertical spacing between the tiers to ensure your taller footwear fits without being crushed. If your collection consists of a diverse mix of flats, heels, and boots, a fixed-shelf rack may not be the most efficient choice. Instead, look for racks with adjustable shelves or removable fabric panels. These designs allow you to customize the height of individual tiers, ensuring you do not waste valuable vertical space above low-profile flats while still providing ample room for taller shoes.
If your storage needs are likely to change, modular, stackable, or expandable shoe racks offer excellent flexibility. Expandable racks can be adjusted horizontally to fit the exact width of your closet floor, while stackable units allow you to add vertical tiers as your collection grows. These options prevent you from having to purchase an entirely new organizer when your footwear inventory expands, making them a highly practical and cost-effective choice.
Check Clearance, Assembly, and Safety Requirements
A shoe rack must not only fit your shoes but also allow for safe and comfortable movement within your closet. Verify that the rack does not obstruct the walking path or block access to other storage areas. In walk-in closets, ensure there is at least sixty centimeters of open walkway in front of the rack so you can comfortably bend down, retrieve your shoes, and stand back up without bumping into walls or other furniture.
For closets with doors, carefully map out the door swing path. Hinged doors must be able to open fully without striking the corner of the shoe rack. If you have sliding or bi-fold doors, check that the rack sits far enough back so that the doors do not catch on the front of the rack or scrape against the toes of your shoes. If space is exceptionally tight, a slim-profile shoe cabinet with tilting drawers might be a better alternative to a traditional open rack.
Consider the assembly process before making your purchase. Many shoe racks are shipped flat-packed and must be assembled on-site. If your closet is small or narrow, you may not have enough physical space to assemble the rack directly inside the closet. Check the manufacturer’s instructions to determine if the rack can be assembled in a larger room and then carried into the closet, or if you must build it in place. Ensure your closet doorway is wide enough to accommodate the fully assembled unit if you choose the former option.
Safety and stability are paramount, especially for tall or fully loaded racks. As you stack more shoes onto a rack, the center of gravity shifts upward, making the unit prone to tipping if it is bumped. Check the manufacturer’s specified weight limits for each shelf to avoid overloading the frame. For any rack standing taller than one meter, look for models that include wall-anchoring hardware or anti-tip brackets, and secure the unit firmly to a wall stud to prevent accidental tipping.
Common Sizing Mistakes to Avoid
One of the most frequent mistakes when choosing a shoe brace rack is ignoring the depth requirements of the shoes themselves. Many buyers measure only the empty closet floor space and the rack’s frame, forgetting that shoes often overhang the front of the shelves by several centimeters. This oversight can lead to a frustrating situation where the rack fits perfectly inside the closet, but the closet doors can no longer close once the shoes are placed on the shelves.
Another common error is underestimating the vertical clearance needed for structured footwear. Shoving high-top sneakers, leather boots, or stiff high heels into tight, low-clearance shelves bends the uppers and crushes the materials. Over time, this lack of space causes permanent creasing, cracks the leather, and ruins the overall shape of your shoes. Always measure the height of your tallest shoes and ensure your chosen rack has tiers that can accommodate them comfortably.
Finally, avoid the temptation to overload a lightweight rack beyond its structural capacity. While budget-friendly plastic or thin wire racks are appealing, they can easily sag, bend, or collapse under the weight of heavy leather shoes or thick-soled boots. Overloading not only damages the rack itself but can also cause your shoes to tumble, potentially scuffing delicate materials and creating a messy, disorganized closet space.
Frequently Asked Questions (FAQ)
Can I use a shoe brace rack in a walk-in closet with sloped ceilings?
Yes, you can use a shoe brace rack under a sloped ceiling, but you must plan the layout carefully. Measure the height of the ceiling at its lowest point in the designated area to establish a strict height limit for your rack. To maximize your storage space, place shorter, modular racks or low-profile shoe benches directly under the slope, and reserve the taller, multi-tier racks for areas of the closet with full vertical clearance.
How much space should I leave between the rack and the closet door?
For hinged closet doors, ensure the rack sits completely outside the door’s full swing radius to prevent collisions. If your closet has sliding or bi-fold doors, leave at least five to ten centimeters of clearance between the front edge of the rack (including any potential shoe overhang) and the door track. This buffer ensures the doors glide smoothly without catching on your shoes or scraping the rack’s frame.
Community discussion
Share your experience or ask a question. Comments are reviewed before publication.