
Finding the right shoe racks organizers for your closet setup is a balancing act between your available physical space and the specific demands of your footwear collection. The ideal storage system does not just keep your closet tidy; it preserves the shape and material of your shoes while ensuring they remain easily accessible. To make an informed decision, you must evaluate your closet’s layout, measure your space accurately, and understand how different organizer styles interact with your daily routine and local environmental conditions.
Assess Your Closet Dimensions and Footwear Profile
Before purchasing any shoe racks organizers, you must conduct a thorough assessment of your closet’s physical dimensions and your personal footwear profile. Start by clearing out your closet floor and shelves so you can measure the raw space. Use a reliable metal tape measure to record the width, depth, and height of the available areas. Pay close attention to door swing paths; if you have hinged doors that swing inward or sliding doors that overlap, you must ensure that any floor-standing or door-mounted organizer will not obstruct the doors from opening and closing fully. Measure the clearance between the bottom of your hanging clothes and the closet floor to determine the maximum height a floor rack can occupy without crushing your garments.
When measuring shelf depth, ensure you account for the longest pair of shoes in your collection. Standard shelves are often 30 to 35 centimeters deep, which easily accommodates most shoes. However, larger athletic sneakers or high heels may require deeper shelving or need to be placed at an angle. If your shelves are too shallow, your shoes will overhang, preventing closet doors from closing or creating a cluttered appearance. Measuring these details beforehand prevents the frustration of purchasing an organizer that does not fit your specific footwear.
Products mentioned in this guide
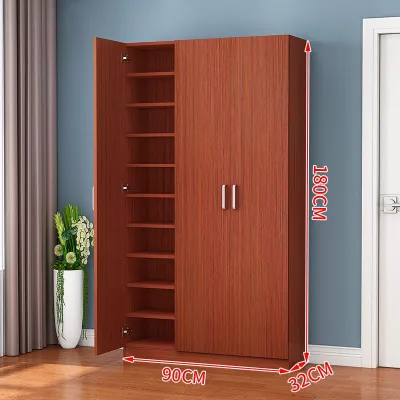
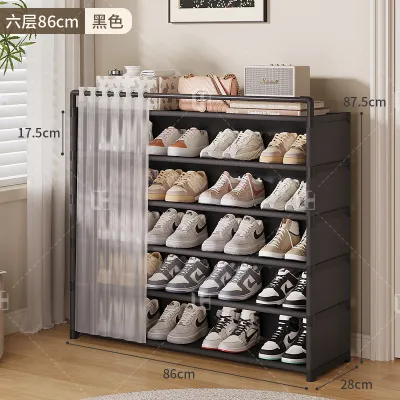
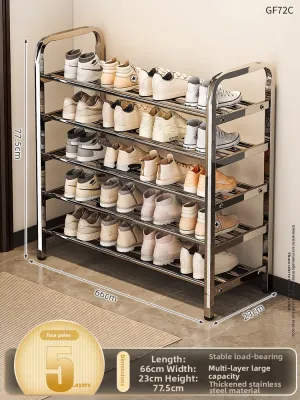
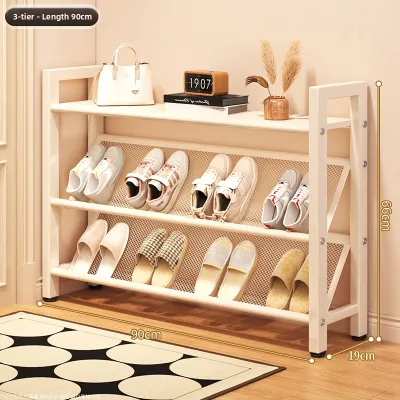
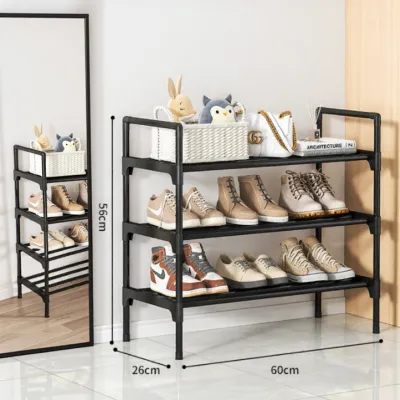
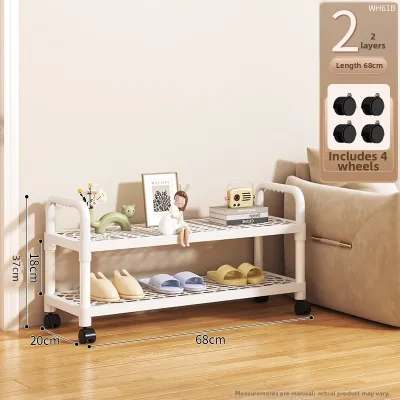
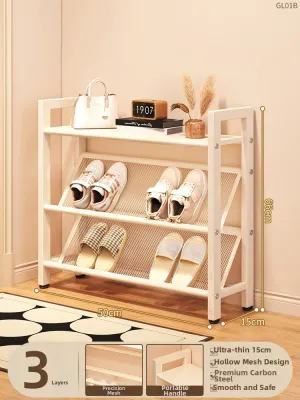
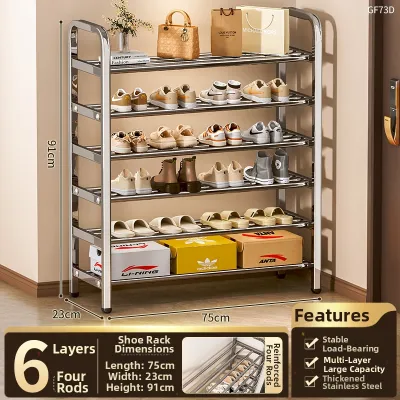
Prices are valid at publication and may change. Please refer to the product page for the latest price.
Next, catalog your footwear collection. Group your shoes by type, height, and weight. For instance, tall boots, high-heeled shoes, heavy work boots, and flat sandals all have vastly different vertical clearance and weight support requirements. Count how many pairs you own in each category to establish your baseline storage capacity. A collection dominated by lightweight flats and sandals requires a completely different storage strategy than one consisting of heavy leather boots or bulky athletic sneakers.
Finally, identify the underutilized “dead zones” within your closet. These are areas that are often overlooked but can host specialized organizers. Look at the back of your closet doors, the narrow vertical gaps between built-in shelves, or the high shelves that are difficult to reach daily. High shelves are excellent for seasonal or rarely worn shoes stored in protective boxes, while the back of a door is prime real estate for quick-access, lightweight footwear.
Stackable Racks: Maximizing Floor Space and Adjustability
Stackable shoe racks organizers are among the most versatile options for open closet floors and walk-in closets with generous floor footprints. These freestanding units allow you to utilize vertical space on the closet floor that would otherwise go to waste. They are particularly well-suited for wide closets with standard depth clearances, where you can place multiple units side-by-side or stack them to reach just below your hanging clothes.

When selecting stackable units, it is critical to verify the manufacturer’s specified weight capacity and stability limits. Stacking multiple lightweight plastic or thin metal frames too high can create a top-heavy structure prone to wobbling or collapsing under the weight of heavy shoes. Always check the locking mechanisms or connector pins provided by the manufacturer to ensure the tiers secure tightly to one another. If you plan to stack units more than three tiers high, look for models that include wall-anchoring hardware or have a wide, weighted base to lower the center of gravity.
During the assembly process, pay close attention to the joints and connection points. If the rack uses plastic connectors to join metal tubes, ensure each tube is fully seated into the connector to prevent uneven weight distribution. For wooden racks, check that the dowels or screws are tightened securely without stripping the wood. Periodically inspect these joints over time, especially if you frequently add or remove heavy shoes, as daily vibrations can gradually loosen the hardware and compromise the rack’s overall stability.
The primary trade-off with stackable floor racks is the consumption of floor space versus vertical efficiency. While they keep your shoes visible and highly accessible, they do occupy valuable floor real estate that might otherwise be used for luggage, laundry hampers, or low-hanging garments. Additionally, in tropical climates where floor-level humidity can be high, ensure that the rack material is moisture-resistant. Check the finish of metal racks for rust-resistant coatings, and inspect wooden or engineered wood racks for sealed joints and protective laminates that prevent moisture absorption and warping.
Hanging and Over-Door Solutions: Utilizing Vertical and Dead Space
If your closet floor is already fully occupied or you are working with a very narrow, shallow wardrobe, hanging and over-door organizers offer an excellent way to reclaim dead space. Hanging organizers typically attach directly to your existing closet rod using heavy-duty hook-and-loop straps or metal hooks, creating a vertical column of fabric cubbies. Over-door solutions utilize metal brackets that hang over the top edge of standard doors, suspending a grid of pockets or wire racks along the door’s interior surface.
These solutions are highly practical for lightweight footwear such as flat sandals, canvas slip-ons, flip-flops, and lightweight running shoes. They keep these everyday items at eye level and off the floor, making them easy to grab on your way out. However, before installing an over-door organizer, you must verify your door’s clearance. Check the gap between the top of the door and the frame; if the gap is too tight, the metal hooks may scrape the frame or prevent the door from latching. Additionally, ensure the door hinges are sturdy enough to support the added weight of the organizer loaded with shoes.
Additionally, consider the material of your closet door. Hollow-core doors, which are common in many modern homes, have limited structural strength in their center panels. Mounting a heavy over-door rack on a hollow-core door can cause the door to warp or the mounting brackets to pull loose over time. Solid wood doors are much more resilient and can handle heavier loads. To protect the finish of your door, apply small felt pads or foam tape to the back of the organizer’s frame where it contacts the door surface, preventing scratches and dampening the noise of shoes shifting when the door is opened.
The main limitation of hanging and over-door systems is their structural capacity. Heavy leather boots, thick-soled sneakers, and high heels can easily stretch fabric pockets, cause the shelves of hanging organizers to sag, or place excessive stress on your closet’s hanging rod. A standard closet rod has a finite weight rating; overloading it with a heavy hanging shoe organizer can cause the rod to bow or pull away from its wall mounts. For safety, reserve these vertical fabric and wire organizers strictly for your lightest footwear.
Pull-Out Drawers: Protecting Shoes in Deep or Built-In Closets
For deep closets, walk-in wardrobes, or custom built-in closet systems, pull-out drawers and sliding trays represent a premium, highly organized storage solution. Deep closets often suffer from “lost shoe syndrome,” where pairs pushed to the back are forgotten and left to gather dust. Pull-out drawers solve this accessibility issue by bringing the entire contents of the shelf forward into plain view with a simple pull.
Integrating pull-out drawers requires careful planning and precise measurements. You must verify that your closet has sufficient internal depth clearance to accommodate the drawer runners and that the drawer can extend fully without hitting open closet doors or adjacent furniture. The installation of sliding tracks requires secure mounting to the closet’s side panels or existing shelves. It is essential to check that the tracks are perfectly level and aligned; even a slight misalignment can cause the drawers to stick, slide open on their own, or wear out the ball bearings prematurely.
Ventilation is another critical factor when using enclosed pull-out drawers, particularly in warm, humid environments. Storing shoes that are damp from sweat or rain in a completely sealed drawer can trap moisture, leading to unpleasant odors and mold growth. Look for drawer designs that incorporate slatted bottoms, mesh panels, or ventilation holes to promote continuous airflow. It is also a good practice to let your shoes air out in a well-ventilated space for a few hours after wearing them before placing them back into an enclosed drawer system.
One of the greatest advantages of enclosed pull-out drawers is the protection they offer. In tropical environments, dust, ambient moisture, and direct sunlight can degrade shoe materials over time, causing leather to crack, glue to fail, and colors to fade. Enclosing your shoes in drawers or individual clear pull-out boxes shields them from these elements. When planning this setup, consult the manufacturer’s specifications for the load limits of the sliding mechanisms. Heavy-duty drawer runners are necessary if you plan to store multiple pairs of heavy boots or structured leather shoes on a single sliding tray.
Matching Organizer Styles to Your Specific Shoe Types
To build a truly functional closet storage system, you must match the specific physical characteristics of your footwear to the appropriate organizer style. Different shoe designs require different levels of support and clearance to maintain their structural integrity over time.
Tall boots and high heels are particularly demanding. Tall boots will crease, crack, and lose their shape if they are bent or folded to fit into standard-sized cubbies. They require dedicated tall slots, adjustable shelves where you can increase the vertical clearance, or specialized boot stands that hold them upright. High heels, especially stilettos, need stable, flat surfaces or specialized angled wire racks that catch the heel securely. Avoid storing delicate heels on loose fabric hanging shelves where they can tip over and scratch adjacent shoes.
Everyday sneakers, running shoes, and flats are much more resilient and fit well into standard stackable tiers, shallow drawers, or hanging pockets. Because these shoes are worn frequently, prioritize placing them in highly accessible zones, such as the middle shelves of a stackable rack or the lower pockets of an over-door organizer.
Delicate, seasonal, or premium footwear—such as suede dress shoes, formal leather heels, or collectible sneakers—demands maximum protection. These pairs should be stored in enclosed drawers, individual clear plastic shoe boxes with ventilation holes, or on shelves equipped with dust-proof covers. In humid climates, consider placing silica gel packs inside these enclosed storage units to absorb excess moisture and prevent mold growth, and ensure the storage area is kept out of direct sunlight to prevent UV damage.
Installation, Stability, and Safety Checks
Before you fully load your new shoe racks organizers with your footwear collection, you must perform essential installation, stability, and safety checks. A fully loaded shoe rack can become surprisingly heavy, creating potential hazards if not properly secured.
For tall, freestanding stackable racks, always assess the risk of tipping. If a rack is taller than waist height or is placed in a high-traffic area, it should be anchored to the wall. Check the manufacturer’s instructions for anti-tip hardware requirements. When anchoring to a wall, identify your wall type—such as concrete, brick, or drywall—and use the appropriate wall anchors and screws. Ensure the rack is perfectly level; use a bubble level during installation and adjust the leveling feet if the floor is slightly uneven.
For hanging solutions, verify that your closet rod is securely anchored to the wall studs or closet panels. Inspect the rod brackets for any signs of wear, loose screws, or bowing before hanging a loaded organizer. Distribute the weight evenly across the organizer, placing heavier shoes in the bottom compartments to keep the center of gravity low and prevent the unit from swaying excessively when you open the closet.
If your chosen setup involves modifying built-in closet tracks, drilling into load-bearing walls, or altering structural closet components, stop and consult a qualified professional. Improper drilling can damage hidden electrical wiring or plumbing pipes, and poorly installed heavy-duty drawer tracks can ruin expensive custom cabinetry. Taking the time to verify these structural elements ensures your shoe storage system remains safe, stable, and functional for years to come.
Frequently Asked Questions (FAQ)
Can I use stackable shoe racks on carpeted closet floors?
Yes, you can use stackable shoe racks on carpeted closet floors, but you must take extra precautions to ensure stability. Thick carpet and padding can compress unevenly under the weight of a loaded rack, causing it to tilt, sink, or wobble. To prevent this, assess the pile height of your carpet. For medium to high-pile carpets, place a rigid base board—such as a pre-cut piece of plywood or a sturdy plastic shelf liner—directly on the carpet beneath the rack’s feet to distribute the weight evenly. Alternatively, choose stackable racks equipped with wide, flat feet or adjustable leveling glides that can be tuned to compensate for any sinking or unevenness in the carpet padding.
How do I prevent hanging shoe organizers from slipping off the closet rod?
To prevent hanging shoe organizers from sliding laterally or slipping off the closet rod, you must ensure a secure fit between the organizer’s attachment mechanism and the rod itself. Start by measuring your closet rod’s diameter and comparing it to the width of the organizer’s hanging straps or hooks. If the hooks are too wide, the organizer will slide around every time you retrieve a shoe. You can secure the organizer in place by wrapping non-slip silicone tape or rubber grips around the closet rod where the hooks rest. Alternatively, look for organizers that feature heavy-duty velcro straps that wrap tightly around the rod, or replace standard open hooks with locking carabiners or zip-ties to ensure the organizer remains permanently anchored and cannot be accidentally knocked loose.
Community discussion
Share your experience or ask a question. Comments are reviewed before publication.