
Finding the right shoe track organizer size requires balancing your closet’s physical dimensions with the specific storage needs of your shoe collection. In the Philippines, where high tropical humidity can quickly lead to mold and mildew on leather and canvas, choosing the correct size is not just about maximizing space—it is also about ensuring adequate air circulation. To determine the ideal setup, you must measure your available closet footprint, calculate the physical width and height requirements of your footwear, and account for crucial installation and door clearances.
Measure Your Closet Space for Shoe Tracks
To find the perfect fit, you must start with precise physical measurements of your closet. Grab a reliable steel measuring tape rather than a flexible fabric one, as steel tapes remain rigid over long distances and provide more accurate readings. You will need to measure the width, depth, and height of the specific zone where you plan to install the organizer. Always take these measurements at three different points: the top, the middle, and the bottom of the space. Walls in residential homes, particularly concrete hollow block walls common in local construction, are rarely perfectly plumb, and a variance of even a single centimeter can prevent a pre-fabricated track system from fitting.
When measuring the width, pay close attention to physical obstructions that might limit your usable space. Hinged doors require a certain amount of clearance to swing open, and their hinges can protrude into the closet opening. If your closet has sliding doors, remember that they always block a portion of the interior space. You must measure the net opening width—the actual clear space available when the door is fully slid to one side—rather than the total wall-to-wall width. Otherwise, you may install a track system only to find that the sliding door prevents you from accessing the outer edges of the organizer or keeps the door from closing completely.
Products mentioned in this guide
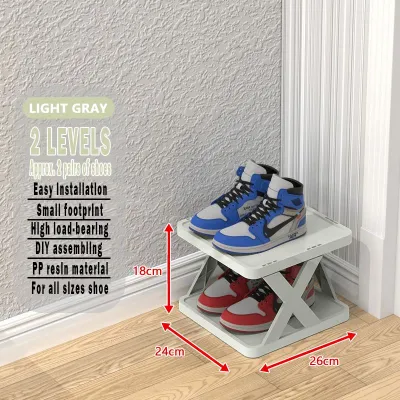
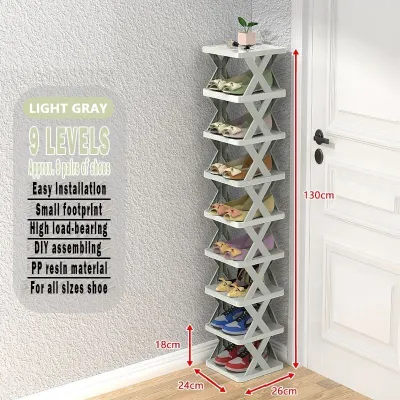
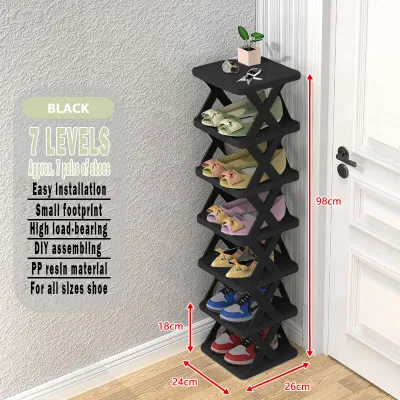
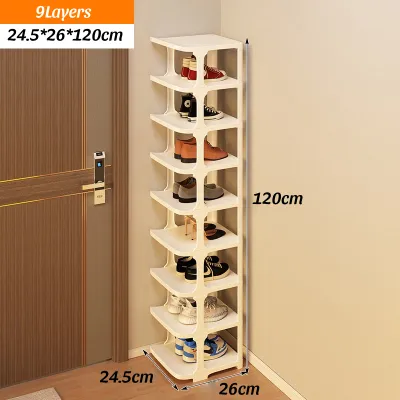
![[CLOSET MALL]10 Layers Shoe Rack Organizer Storage Rack For Dormitory Stackable Shoes Storage Space Saving](https://img.lazcdn.com/g/p/4e133488a148c8100c7627e75dfde375.jpg_400x400q80.jpg_.webp)
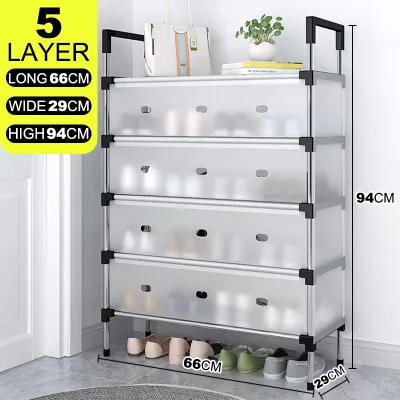
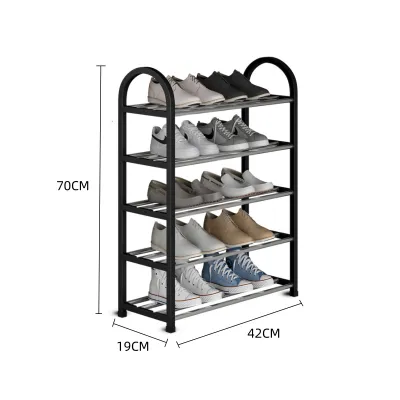
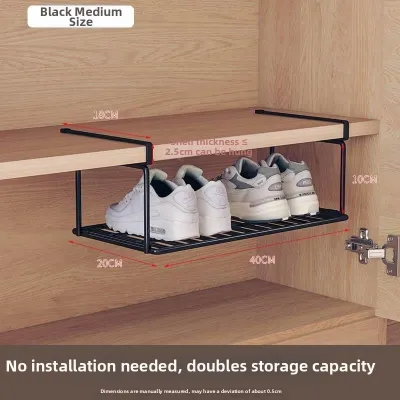
Prices are valid at publication and may change. Please refer to the product page for the latest price.
Depth is another critical dimension that is frequently miscalculated. Measure from the back wall to the inside face of the closed closet door. If you have hanging clothes in the closet, note how far they project from the hanging rod. Standard hangers and adult clothing typically protrude 50 to 55 centimeters from the back wall. If your shoe track organizer is going directly beneath hanging clothes, you must ensure the track depth and the shoes themselves do not interfere with the drape of your garments. Additionally, check for baseboards, decorative trim, or light fixtures that might reduce the available depth at the bottom or top of the closet.
Finally, if you are planning a wall-mounted track system, you must assess the structural integrity of your closet walls. In the Philippines, interior closet walls are often made of either concrete masonry units finished with plaster or lightweight gypsum board over metal studs. For concrete walls, you will need to verify if you have the appropriate masonry drill bits and wall plugs (often referred to as tox plugs) to secure the tracks. For drywall or plywood partitions, use a stud finder to locate the vertical framing members. Mounting a heavy shoe track system directly into drywall without securing it to studs or using specialized heavy-duty anchors will inevitably lead to wall damage and system failure.
Calculate Capacity Based on Your Shoe Collection
Once you know the physical limits of your closet, you must evaluate your shoe collection to determine the capacity your organizer needs to support. Different types of footwear require vastly different amounts of physical space, meaning you cannot rely on a generic “holds 20 pairs” estimate from a manufacturer without analyzing what those pairs actually consist of.

To calculate your width requirements, group your shoes by style and measure the physical footprint of a representative pair of each type. Standard athletic sneakers and running shoes typically require 20 to 25 centimeters of horizontal width per pair. Casual sandals, slippers, or local tsinelas are much slimmer, often needing only 15 to 18 centimeters. Conversely, wide-soled boots, safety shoes, or chunky platform sneakers can easily demand 28 centimeters or more per pair. If you have a collection dominated by wider footwear, your total horizontal track requirement will be significantly higher than someone storing delicate flats or narrow heels.
Vertical clearance is equally important for maintaining the shape of your shoes and preventing damage. Flat shoes, sandals, and low-profile loafers can comfortably sit in spaces with a vertical clearance of 10 to 12 centimeters. Standard sneakers and low heels generally require 15 to 18 centimeters. High heels, ankle boots, and mid-cut sneakers need 20 to 25 centimeters of vertical space, while tall riding boots or work boots may require 35 to 45 centimeters. If your organizer has fixed shelves, you will either waste valuable vertical space above your flat shoes or crush the uppers of your taller boots.
To find your total required track length, multiply the average width of your shoe pairs by the number of pairs you own, and then add a 10% buffer for future purchases. For example, if you own 25 pairs of shoes with an average width of 22 centimeters, you will need approximately 550 centimeters of total linear shelf space. If your measured closet width allows for a 90-centimeter-wide organizer, you can divide your total required length by the closet width to find the minimum number of tiers needed (550 divided by 90 equals approximately 6.1). In this scenario, a 6-tier or 7-tier track system would be necessary to house your entire collection.
Organizing your collection by usage frequency will help you decide on the configuration of these tiers. Place your daily-use footwear, such as work shoes or school shoes, on the middle tiers at waist height for quick, ergonomic access. Slippers and indoor tsinelas can reside on the very bottom tier, while seasonal footwear, formal dress shoes, or heavy rain boots can be placed on the highest shelves. If you have a highly diverse collection of heights, look for adjustable track systems that allow you to customize the spacing of individual tiers rather than relying on a rigid, uniform layout.
Select the Right Track Dimensions and Configuration
With your measurements and capacity calculations in hand, you can now select the specific dimensions and physical configuration of your shoe track organizer. Most modular track systems are designed around standard width increments, typically ranging from 60 to 90 centimeters. If your closet is wider than these standard sizes, you can combine multiple modular sections side-by-side to create a seamless, custom-fitted storage wall.
When selecting the depth of your organizer, ensure it matches the length of your largest shoes. For most adult shoes up to a US size 10, a track depth of 30 to 33 centimeters is sufficient. However, if you or family members wear larger sizes, you will need a depth of 35 to 40 centimeters to prevent the toes or heels of the shoes from protruding past the front edge of the shelves. If your closet depth is exceptionally shallow—such as in narrow hallway closets—you should consider slanted shoe tracks. Slanting the shelves downward at a 15- to 30-degree angle reduces the required physical depth of the organizer, though it does increase the vertical clearance required between the tiers.
The choice between fixed-height and adjustable track systems is particularly important in tropical environments. Adjustable track systems utilize vertical metal standards with closely spaced slots, allowing you to reposition bracket-supported shelves at any height. This flexibility is highly beneficial because it allows you to adapt your storage as your footwear collection changes—such as adding more vertical space for high-cut rain boots during the wet monsoon season, and tightening the spacing for light sandals during the dry summer months. Fixed-height systems, while often more budget-friendly, offer no such adaptability and can result in inefficient space utilization.
You must also choose the structural configuration that best fits your closet’s construction:
- Floor-Standing Tracks: These units rest directly on the closet floor and are highly stable. They are ideal if you rent your home and want to avoid drilling extensive holes into the walls. However, they occupy valuable floor space and can make cleaning or sweeping beneath the organizer difficult.
- Wall-Mounted Tracks: These systems hang from a top horizontal track secured to the wall, with vertical standards hanging down. They keep the floor completely clear, making it easy to clean and sweep away dust or outdoor debris. They are incredibly strong when mounted correctly into concrete or wall studs, but they require precise drilling and installation.
- Shelf-Mounted Tracks: These are smaller track inserts designed to sit on top of existing wooden or laminate closet shelves. They are excellent for dividing large, open cabinet spaces into smaller, organized compartments, but their capacity is strictly limited by the weight-bearing threshold of the underlying shelf.
Always check the manufacturer’s product specifications for the maximum load limit per tier and for the entire system. A typical residential shoe track shelf is rated to hold between 10 and 15 kilograms. While lightweight running shoes and sandals will rarely approach this limit, a collection of heavy leather boots, safety shoes, or thick-soled wedges can quickly add up. Overloading a track system can cause metal brackets to bend, wooden shelves to bow, or wall anchors to pull loose from the plaster.
Plan Installation Clearances and Door Swing
Selecting the correct size of your shoe track organizer is only half the battle; you must also ensure there is adequate physical clearance for the system to operate smoothly within your daily routine. If you choose a pull-out or sliding track system, you must calculate the extension clearance. A drawer-style shoe track typically requires a front clearance equal to the depth of the shelf itself—usually between 30 and 40 centimeters—plus an additional 45 to 50 centimeters of space for you to stand comfortably in front of the fully extended drawer. If your closet is located in a tight walk-in area or a narrow bedroom corridor, a pull-out system may block traffic or prove highly awkward to use.
For closets with traditional hinged doors, you must verify that the door can open fully past a 90-degree angle. If the door cannot swing completely out of the way, the edge of the door or its handles will obstruct the path of sliding shelves or pull-out tracks. This can lead to unsightly scratches on your closet doors and can damage the outer edges of your shoe organizer. If your door swing is restricted by nearby bedroom furniture or walls, a static, open-shelf track configuration is a much safer and more reliable choice than a sliding system.
If you are planning to stack multiple track organizers vertically to maximize high ceilings, prioritize structural stability. When stacking floor-standing units, always use the manufacturer-provided stacking clips or brackets, and secure the top unit to the wall using anti-tip hardware. If you are mounting tracks to an existing shelf, verify that the shelf’s support brackets are anchored securely. Stacking heavy items high up shifts the center of gravity upward, increasing the risk of a structural collapse if the system is bumped or overloaded.
The angle of your shoe tracks also dictates your clearance requirements. Flat shelves are highly space-efficient vertically, but they require you to look directly down to see the shoes at the back. Slanted shelves provide excellent visibility and make it easier to grab your shoes, but because the heel is elevated, they require significantly more vertical distance between the shelves. If you choose slanted tracks, you must allow for an extra 5 to 8 centimeters of vertical clearance per tier compared to flat shelves, which will reduce the total number of tiers you can fit within a fixed height.
Avoid Common Shoe Track Sizing Mistakes
When planning closet storage, small oversights can lead to major installation headaches or unusable space. One of the most common mistakes is failing to measure the narrowest point of the closet. Many homeowners measure the wall-to-wall distance at the back of the closet, forgetting that the door frame, decorative molding, or sliding door tracks narrow the actual entry point. If your organizer is wider than the door opening, you will not be able to carry it into the closet, let alone install it, even if there is plenty of room once inside.
Another frequent error is assuming that all your shoes will fit into a single, uniform tier height. While a uniform layout looks neat in product photos, it is highly impractical for a real-world shoe collection. Placing low-profile flats on a shelf with 25 centimeters of clearance wastes nearly half of the vertical space, while trying to force mid-cut sneakers or heels into a 12-centimeter space will permanently crease and damage the shoe materials. Always plan for a mix of shelf heights or opt for an adjustable system that can adapt to your specific collection.
Do not forget to account for the physical footprint of the installation hardware itself. The nominal width of a shoe shelf or track is often just the width of the usable storage surface. The actual space required for installation must include the thickness of the side brackets, the vertical standards, wall mount tracks, and any decorative end caps. This hardware can easily add 2 to 4 centimeters to the overall width of the system. If your closet space is exactly 90 centimeters wide and you purchase a 90-centimeter track system, the added width of the hardware may make it impossible to install without modifying your closet walls.
In the humid, tropical climate of the Philippines, proper ventilation is a critical factor that is often overlooked during the sizing process. Packing your shoes tightly together to maximize capacity traps stagnant, humid air around the footwear. This creates an ideal breeding ground for mold, mildew, and unpleasant odors, which can rapidly ruin expensive leather shoes and canvas sneakers. When calculating your organizer size, always factor in a 2-to-3-centimeter gap between each pair of shoes to allow for healthy air circulation. Choosing wire mesh or slatted wood tracks rather than solid solid-surface shelves will also significantly improve airflow and help keep your footwear dry and fresh.
Frequently Asked Questions (FAQ)
Can I install a shoe track organizer on a slanted closet floor?
Yes, you can install a shoe track organizer on a slightly slanted floor, but you must take precautions to ensure stability. For floor-standing units, use adjustable leveling feet or wooden shims to compensate for the slope, checking your progress with a spirit level. If the floor slope is severe or if the floor is highly uneven, a floor-standing unit may wobble or tip over. In these cases, it is highly recommended to bypass the floor entirely and opt for a wall-mounted or shelf-mounted track system that anchors securely to plumb walls or level shelving.
How much weight can a typical shelf-mounted shoe track hold?
The weight capacity of a shelf-mounted shoe track depends heavily on the manufacturer’s specifications and the material of the underlying shelf. Generally, a standard residential shoe track tier can support between 10 and 15 kilograms of evenly distributed weight. However, you must also ensure that the closet shelf supporting the track is strong enough to handle this load. To prevent bowing or collapse, distribute heavier footwear like work boots or thick leather heels across the lowest tiers, and consider reinforcing the main shelf supports with heavy-duty steel brackets if you plan to store a large volume of heavy shoes.
Do I need to leave space between the shoe track and the closet wall?
Yes, leaving a small gap of approximately 1 to 2 centimeters between the shoe track organizer and the closet walls is highly recommended. This clearance accommodates slight wall bowing, protruding baseboards, or uneven plaster finishes. Furthermore, if you are installing sliding or pull-out tracks, this side clearance is essential to prevent the moving parts of the organizer or the edges of your shoes from scraping against the wall during operation, which can scuff your walls and damage your footwear.
Community discussion
Share your experience or ask a question. Comments are reviewed before publication.