
Finding the right shoe cabinet is not just about choosing an attractive piece of furniture; it is about balancing your home’s physical footprint with the size and shape of your footwear collection. In the Philippines, where residential spaces range from compact high-rise condominiums in metropolitan areas to spacious suburban houses, selecting the perfect storage solution requires careful planning. The ideal Shoerock shoe cabinet model for your home depends directly on this balance between available floor space and total shoe volume.
To make the right choice, you must weigh different configurations against your daily habits and spatial constraints. Slim and tall configurations work best for narrow entryways and tight corridors because they maximize vertical wall space without obstructing foot traffic. Wide and low models are ideal for spacious hallways, offering a generous top surface for daily essentials while keeping your footwear organized at waist level. Bench-style cabinets provide a dual-purpose seating area that simplifies putting on shoes, though they typically accommodate a smaller, more curated collection. Before making any purchase, verifying exact physical dimensions and door clearances is the mandatory first step to ensure a seamless fit.
Assess Your Space and Shoe Collection First
Before browsing specific cabinet designs, you must establish your spatial and capacity boundaries. Accurate measurements prevent common installation headaches, such as doors that cannot open fully or cabinets that block natural walking paths. Start by measuring the precise width, depth, and height of the designated wall area using a metal measuring tape.
Products mentioned in this guide
![leo&bea 4 Layer / 6 Layer Shoe Rack Stackable Shoes Organizer Storage Stand [Stainless Steel]](https://img.lazcdn.com/g/p/ba71430d7fce5648c9e7be42db4c7a81.jpg_400x400q80.jpg_.webp)
Prices are valid at publication and may change. Please refer to the product page for the latest price.
Do not overlook the depth of your baseboards. Many standard shoe cabinets are designed to sit flush against the wall for maximum stability; if your baseboards are exceptionally thick, the cabinet will be pushed forward, creating a gap at the top. Measure the height and thickness of your baseboards to determine if you need a cabinet with a built-in baseboard cutout, or if you must factor this gap into your overall depth calculations. Additionally, map out the door swing clearance. Measure the arc of nearby room doors, entry doors, and the cabinet doors themselves to ensure they can open simultaneously without colliding.
Traffic flow is another critical spatial consideration. In a busy household, entryways are high-traffic zones where family members bypass one another daily. As a general rule, maintain a clear walkway width of at least 90 centimeters in front of the cabinet. If your hallway is narrower than this, a standard swing-door cabinet may cause constant obstruction when open, making a slim, tipping-bucket style cabinet a much more practical choice.
Once you have mapped the physical space, turn your attention to your footwear collection. Count your existing shoes and categorize them by physical height and bulk. Standard flats, sandals, and slippers (tsinelas) require very little vertical clearance, allowing you to stack them closely on tight shelves. Conversely, bulky sneakers, high-cut basketball shoes, heels, and boots require significantly more vertical space and depth. If your collection consists primarily of high-top athletic shoes or high heels, standard flat shelves may restrict your capacity, pointing you instead toward models with adjustable or removable internal shelves.
Always factor future growth into your capacity estimates. A household shoe collection is rarely static; new purchases, seasonal footwear, and guest shoes quickly add up. To avoid outgrowing your cabinet within a few months, choose a model that offers at least 15% to 20% more storage capacity than your current inventory requires.
Finally, plan the logistics of getting the furniture into your home. Measure the widths of your front door, interior doorways, stairwells, and elevator cabins. This is especially crucial for pre-assembled or heavy semi-assembled units. If you live in a high-rise condominium, verify the maximum dimensions allowed in the service elevator with your building administration to avoid delivery day surprises.
Compare Cabinet Designs by Footprint and Capacity
To find the right balance between spatial efficiency and storage capacity, you must compare the primary structural designs of shoe cabinets. Each configuration serves a specific spatial layout and offers distinct functional trade-offs. The physical shape of the cabinet dictates not only how many pairs of shoes it can hold, but also how naturally it integrates into your daily routine.

| Cabinet Configuration | Typical Depth Range | Average Capacity | Best Suited For | Primary Safety Requirement |
|---|---|---|---|---|
| Slim and Tall | 15 cm – 25 cm | 15 – 30 pairs | Narrow corridors, tight entryways, studio condos | Mandatory anti-tip wall anchoring |
| Wide and Low | 30 cm – 40 cm | 20 – 40 pairs | Broad hallways, open-plan living rooms | Flat, level flooring to prevent door misalignment |
| Bench / Multi-Function | 30 cm – 35 cm | 6 – 12 pairs | Active entryways, mudrooms, small collections | Verifying seat weight capacity limits |
Slim and Tall Cabinets for Narrow Entryways
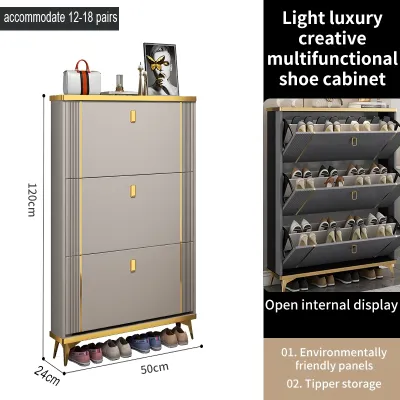
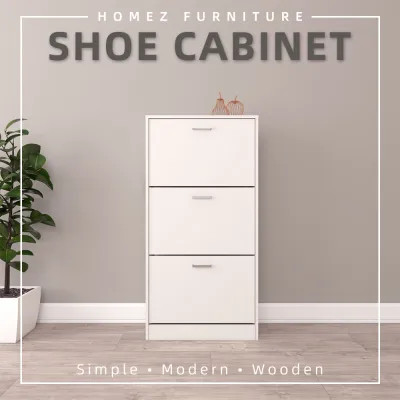
Slim and tall shoe cabinets are engineered specifically to exploit vertical wall space while keeping floor intrusion to an absolute minimum. These models often utilize innovative tipping-bucket drawers rather than traditional flat shelves. In this design, shoes are stored vertically or at an angle inside drop-down compartments, allowing the cabinet’s overall depth to shrink to as little as 15 to 24 centimeters.
This ultra-slim profile keeps narrow corridors and small condo foyers entirely clear, preventing the cluttered look that standard furniture can create in tight spaces. However, this vertical efficiency comes with specific physical limitations. Because the compartments are narrow, they may not accommodate exceptionally long shoes or high-cut boots without bending the footwear. You must check the maximum shoe size supported by the tipping mechanism before purchasing.
Safety is the most critical consideration for tall, slim furniture. Because these cabinets have a shallow depth and a high center of gravity, they are naturally prone to tipping forward when multiple drawers are opened at once. To prevent serious accidents, especially in homes with active children or pets, tall models strictly require secure anchoring to the wall studs using the manufacturer-provided anti-tip hardware.
Wide and Low Cabinets for Spacious Hallways
Wide and low cabinets utilize a more traditional horizontal layout, featuring standard swing doors and flat, horizontal shelves. These models typically have a depth of 30 to 40 centimeters, allowing shoes to sit flat on the shelves. This depth makes them highly versatile, easily accommodating bulky athletic shoes, high heels, and mens’ formal shoes without any risk of bending or crushing the material.
One of the main advantages of a low-profile cabinet is the accessibility of its contents. All your shoes are visible at a glance, and you do not have to reach high or operate complex tilting mechanisms to grab a pair. Furthermore, the flat top surface of a low cabinet serves as a highly functional entryway console. You can use this surface to place key bowls, decorative trays, mail organizers, or sanitizing alcohol sprays, creating an organized transition zone at your front door.
On the other hand, horizontal cabinets require a substantial amount of continuous wall space. If placed in a narrow hallway, the 30-to-40-centimeter depth, combined with the space needed to swing the doors open, can easily block the walkway. Carefully measure your hallway’s width to ensure that opening the cabinet doors does not completely bottle-neck traffic flow.
Bench and Multi-Function Cabinets for Entryways
Bench-style shoe cabinets combine storage with a practical seating surface, creating a dedicated space to sit comfortably while putting on or taking off your footwear. These multi-functional designs are highly popular in active households where family members frequently transition between indoor and outdoor activities. Many models also integrate secondary features, such as a small coat rack, upper shelves, or side compartments for umbrellas.
While highly convenient, bench cabinets prioritize utility over raw storage capacity. Because a significant portion of the unit’s height is dedicated to the seating surface, the internal storage space is limited, typically holding only 6 to 12 pairs of shoes. This makes them ideal for storing your most frequently used daily footwear, while seasonal or formal shoes are kept in a larger wardrobe elsewhere.
When choosing a bench model, structural stability and weight capacity are paramount. You must verify the manufacturer’s stated maximum weight limit for the seating surface to ensure it can safely support adults. Look for models constructed with reinforced joints, sturdy legs, and high-quality fastening hardware to ensure the bench remains stable and wobble-free over years of daily use.
Key Features to Verify for Humid Environments
In the tropical climate of the Philippines, high relative humidity and sudden monsoon downpours present unique challenges for wooden furniture. Excess moisture can quickly lead to mold growth, musty odors, and structural damage such as wood swelling or peeling veneers. To ensure your shoe cabinet lasts, you must look for specific material and design features engineered to handle humid conditions.
First, check the product specifications and labels for moisture-resistant finishes. Standard untreated particle board or low-grade MDF (medium-density fiberboard) can absorb airborne moisture rapidly, causing the panels to warp and the edges to split. Look for cabinets constructed with high-quality engineered wood that features a water-resistant melamine laminate or a protective polyurethane coating. Pay close attention to the edge-banding; tightly sealed edges prevent humidity from penetrating the core material.
Airflow is your primary defense against mold and unpleasant odors inside a shoe cabinet. When damp shoes are stored in a completely sealed, unventilated compartment, they create a breeding ground for bacteria and mildew. To prevent this, look for cabinets that incorporate active or passive ventilation features:
- Louvered Doors: Doors with angled slats allow continuous air circulation while keeping your footwear hidden from view.
- Ventilation Cutouts: Openings or metal mesh grilles on the back panel facilitate steady airflow through the cabinet.
- Open-Slat Shelving: Shelves made of spaced slats rather than solid boards allow air to circulate freely around the entire shoe.
Additionally, consider how the cabinet interacts with your floors. During the rainy season, wet umbrellas and damp shoes can leave puddles in your entryway. A cabinet that sits directly on the floor can absorb standing water from its base. To protect the furniture, select a model with elevated legs or adjustable plastic glides. Elevating the base of the cabinet by even a few centimeters protects the wood from damp floors and makes it much easier to sweep and mop underneath.
Decision Framework: Which Configuration Fits Your Home?
To finalize your choice, apply a conditional decision framework that matches your specific living situation, spatial limitations, and household needs. By evaluating these conditions systematically, you can narrow down the options to the single most practical model.
Choose a slim and tall configuration if:
- Your entryway or hallway is exceptionally narrow (less than 100 centimeters wide).
- You live in a compact studio or one-bedroom condominium where floor space is at a premium.
- You have a medium-to-large shoe collection (15 to 30 pairs) consisting mostly of standard-profile footwear like flats, sneakers, and sandals.
- You are permitted to drill into your walls to install secure anti-tip safety anchors.
Choose a wide and low configuration if:
- You have a broad, unobstructed wall in your entryway, living room, or hallway.
- Your collection includes bulky, high-profile footwear, such as heavy boots, high heels, or basketball shoes that require flat storage.
- You want a dual-purpose piece of furniture that can also serve as a console table for keys, decor, and daily essentials.
- You prefer easy, direct access to your shoes without operating drop-down tilting mechanisms.
Choose a bench or multi-function configuration if:
- You have an active household where family members prefer to sit down while putting on or removing shoes.
- Your primary goal is to organize a small, curated collection of daily-use footwear (under 12 pairs) right at the entrance.
- Your entryway has enough floor depth to accommodate a wider seating footprint.
- You want to consolidate multiple entryway functions—such as seating, shoe storage, and umbrella placement—into a single piece of furniture.
Verify first if you are a renter or have uneven floors:
- If you rent your home and your lease strictly prohibits drilling into concrete or drywall, avoid ultra-slim, tall cabinets that rely entirely on wall anchoring for safety. Instead, opt for a low, wide cabinet or a sturdy bench model with a low center of gravity that stands safely on its own.
- If your home has uneven tile or concrete flooring, look specifically for cabinet models equipped with adjustable leveling feet. These feet allow you to compensate for floor imperfections, ensuring the cabinet remains perfectly stable and preventing door hinges from warping or binding over time.
Installation, Stability, and Safety Checks
Once you have selected and purchased your shoe cabinet, proper assembly and installation are crucial to ensure its long-term durability and the safety of your household. Always begin by reading the manufacturer’s assembly instructions thoroughly. Lay out all the panels, screws, dowels, and brackets before starting, and verify that you have all the necessary tools on hand.
For tall or top-heavy models, securing the unit to the wall is a non-negotiable safety step. Standard drywall, plaster, and concrete walls require different types of mounting hardware. If you are mounting the cabinet to a concrete or hollow-block wall—common in many Philippine homes—use a masonry drill bit and high-quality wall plugs (tox plugs) to ensure a firm grip. If mounting to a drywall partition, locate the wooden or metal studs using a stud finder, and screw the anti-tip brackets directly into the studs rather than the hollow drywall alone.
Before finalizing the placement, check the levelness of your floor. Place a bubble level on top of the cabinet; if the bubble is off-center, the cabinet will lean, putting uneven stress on the joints and causing the doors or drawers to misalign. Use the cabinet’s built-in adjustable feet to level the unit. If your model does not have adjustable feet, you can insert plastic shims or heavy-duty felt pads under the low corners until the unit is perfectly level.
Finally, perform a functional check of all moving parts. Open and close every door and drawer to ensure they glide smoothly without catching or rubbing against adjacent panels. If the doors are uneven, adjust the cabinet’s hinge screws—most modern hinges feature adjustment screws that allow you to shift the doors slightly up, down, left, or right. Regularly check the tightness of all structural screws and wall brackets every six months, as daily use and changes in humidity can cause hardware to loosen over time.
Community discussion
Share your experience or ask a question. Comments are reviewed before publication.