
Finding the perfect stainless wall mounted cabinet for your kitchen requires balancing available wall space, daily cooking workflows, and structural safety. Unlike traditional wooden cabinetry, stainless steel offers exceptional resistance to moisture and pests—making it highly popular in humid tropical climates like the Philippines—but its substantial weight requires precise planning. To choose the right size, you must measure your physical wall boundaries, verify your wall’s structural load capacity, and select a cabinet depth that keeps your countertops fully functional.
Quick Answer: Determining the Right Cabinet Size
The ideal size for a stainless wall mounted cabinet depends on your available wall width, vertical clearance, and the structural load capacity of your kitchen wall. Standard wall cabinets typically feature depths ranging from 12 to 15 inches (30 to 38 cm) to prevent head bumps while working at the counter, with heights commonly spanning 12 to 36 inches depending on your ceiling height. Because stainless steel is significantly heavier than wood or MDF, you must match the cabinet’s weight and intended storage load to your wall type, such as solid concrete or concrete hollow blocks. Before making any purchase, always verify the manufacturer’s exact exterior dimensions and mounting requirements to ensure a secure, flush fit.
Step-by-Step Guide to Measuring Your Kitchen Wall
Before browsing online marketplaces or visiting local showrooms, you need a detailed map of your kitchen’s physical boundaries. Accurate measurements prevent costly installation errors and ensure your new storage unit integrates seamlessly with your existing layout.
Products mentioned in this guide
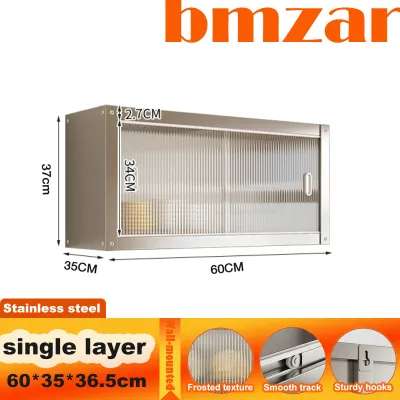
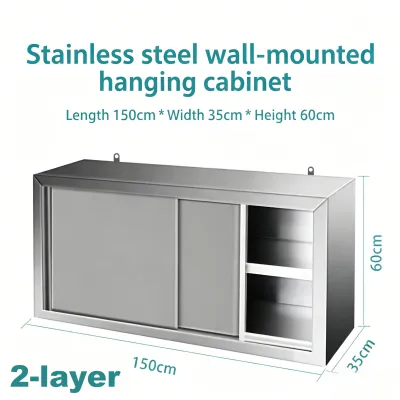
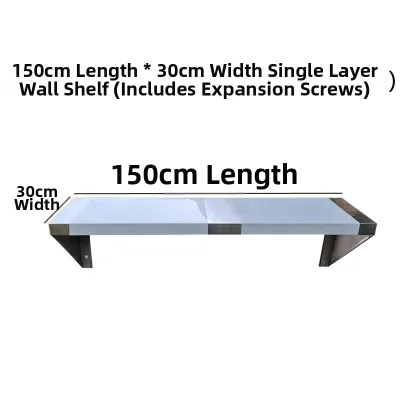
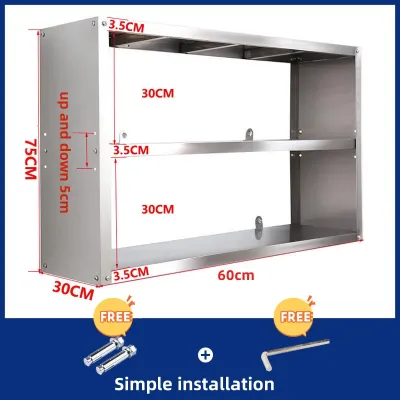
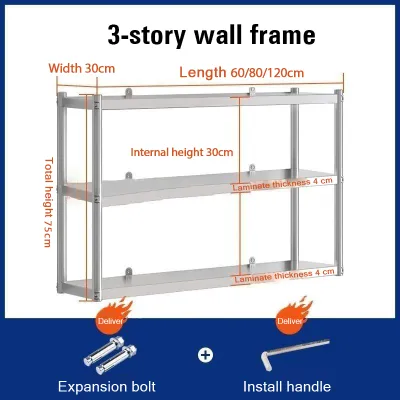
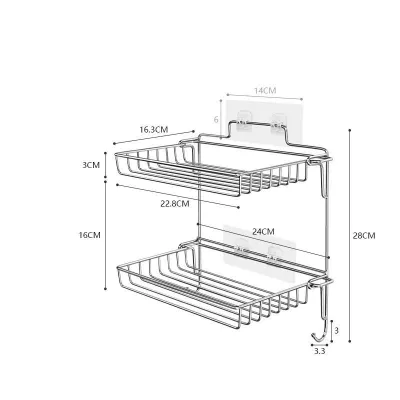
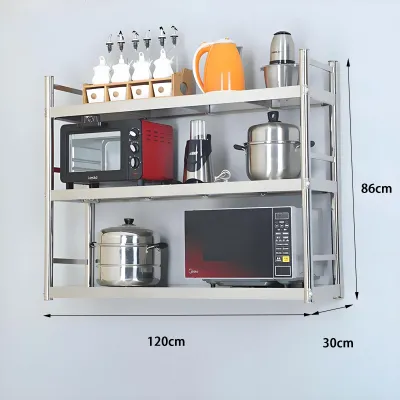
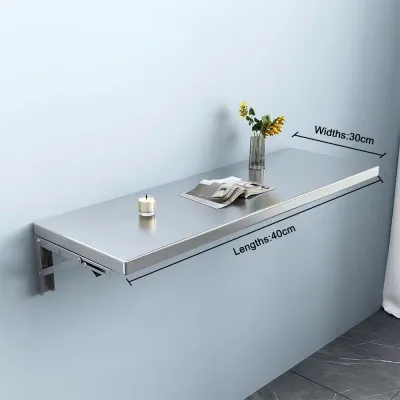
Prices are valid at publication and may change. Please refer to the product page for the latest price.

Mapping Width and Height Boundaries
Begin by measuring the total continuous horizontal wall space where you plan to mount the cabinet. Use a metal measuring tape and record the width at three different heights—near the ceiling, at the midpoint, and just above the backsplash—as walls are rarely perfectly plumb. From this total width, deduct the dimensions of any permanent fixtures, including windows, range hoods, refrigerators, and tall pantry towers. Leave at least a 2-inch (5 cm) buffer zone on either side of these fixtures to allow for natural clearance and easy cleaning.
For vertical measurements, calculate the distance from the top of your countertop to the ceiling. Subtract the standard operational clearance of 18 inches (45 cm) above the countertop, which is the minimum space required to comfortably use small appliances. You must also account for any architectural features that restrict vertical space, such as crown molding, ceiling bulkheads, concrete structural beams, or low-hanging pendant lights. If your kitchen has a high ceiling, you can opt for taller 30-inch or 36-inch cabinets, whereas low-ceiling condo units may require compact 12-inch or 15-inch models to maintain a balanced look.
Checking Depth Limits and Obstructions
Determining the maximum safe depth of your wall cabinet is essential to preserve your kitchen’s ergonomics. Measure the depth of your lower base cabinets or countertops; your wall-mounted cabinet should be at least 12 inches shallower than the base below it. This offset ensures you can lean over the counter to prep food without hitting your forehead on the stainless steel frame. For most residential kitchens, a cabinet depth of 12 to 15 inches strikes the perfect balance between storage capacity and user comfort.
Next, inspect the installation zone for hidden and surface-level obstructions. Use a stud finder or map out the locations of electrical outlets, light switches, plumbing lines, and ventilation ducts. Your cabinet’s back panel must not cover active switches or outlets unless you plan to have a professional modify the cabinet chassis. Additionally, check the thickness of your wall tiles or backsplash; if the tile ends halfway up the wall, the cabinet may sit at a slight angle unless you install a spacer or shim to level the mounting bracket.
Typical Dimensions and Storage Configurations
Stainless steel wall cabinets are highly modular, allowing you to combine different sizes to fit your specific wall run. Standard widths generally start at 12 inches and increase in 3-inch increments up to 36 inches or more. For wide kitchen walls, installing two or three medium-sized modular units side-by-side is often easier and structurally safer than mounting a single, massive cabinet.
The choice between single-door and double-door configurations depends on your horizontal wall space and storage needs. Single-door units (typically 12 to 18 inches wide) are ideal for narrow gaps or compact kitchens, while double-door units (24 to 36 inches wide) provide wide, unobstructed access to larger cookware. If you plan to store heavy stacks of ceramic plates, large serving platters, or heavy-duty kitchen tools, wider double-door cabinets offer excellent storage volume, though they require more front clearance to open.
When evaluating these configurations, never rely solely on nominal size labels. Always consult the manufacturer’s official specification sheet to verify the exact exterior dimensions, including the thickness of the metal frame. Keep in mind that external door handles, hinges, and magnetic latches can add up to an inch of depth, which can interfere with adjacent cabinet doors or walls if not accounted for during planning.
Weight, Wall Support, and Installation Clearances
Mounting a stainless wall mounted cabinet is fundamentally different from hanging a lightweight wooden shelf. Stainless steel is incredibly dense, and once you fill it with plates, bowls, and pantry staples, the downward force on your wall increases exponentially.
Evaluating Wall Load Capacity
Before purchasing any stainless steel cabinet, you must determine the composition of your kitchen wall. In the Philippines, residential interior walls are commonly constructed from solid concrete or concrete hollow blocks (CHB) finished with plaster, though modern high-rise condominiums frequently use drywall over metal studs. Solid concrete and CHB walls offer exceptional load-bearing capacity, but they require heavy-duty masonry anchors, expansion bolts, or sleeve anchors to secure the cabinet’s mounting rail.
If you are mounting onto drywall, you must never rely on standard plastic drywall plugs or toggle bolts to hold a heavy stainless cabinet. The mounting brackets must be screwed directly into the wooden or metal structural studs behind the drywall. If the studs do not align with the cabinet’s mounting points, you will need to install a solid wood backing support behind the drywall first. If you discover any wall damage, cracks, or dampness from tropical humidity, or if you are unsure of your wall’s structural integrity, stop immediately and consult a licensed contractor or structural engineer before proceeding.
Planning for Door Swing and Workflow Space
A perfectly sized cabinet can still feel frustrating if its doors block your kitchen’s natural workflow. Visualize the door swing radius in three dimensions before drilling holes into your wall. Ensure that when the cabinet doors are fully open, they do not collide with ceiling fans, pendant lights, open refrigerator doors, or nearby pantry cabinets.
You must also consider the physical space needed for the cook. There should be ample room to stand directly in front of the countertop, open the cabinet doors completely, and retrieve items without having to step backward into a major walkway. In narrow galley kitchens or tight condominium layouts, sliding-door stainless cabinets are an excellent alternative to traditional swing-door models, as they eliminate door-swing hazards entirely.
Common Sizing and Placement Mistakes to Avoid
Avoiding these frequent space-planning errors will save you from the hassle of returning heavy items or dealing with unsafe, awkward installations.
- Ignoring the Hardware Bump-Out: Many homeowners measure only the cabinet box, forgetting that hinges, handles, and door bumpers protrude past the frame. This oversight can prevent doors from opening fully if the cabinet is mounted flush against a side wall.
- Mounting Too Low: Placing the cabinet lower than 18 inches above the countertop restricts your workspace. It prevents you from using taller countertop appliances like high-dome rice cookers, air fryers, or blenders, and increases the risk of bumping your head while prepping food.
- Using Weak Wall Anchors: Relying on lightweight plastic anchors on drywall or hollow blocks is a recipe for structural failure. Always use high-grade expansion bolts or sleeve anchors rated specifically for the total weight of the cabinet plus its maximum storage capacity.
- Neglecting Narrow Passageways: In compact kitchens, wide swinging doors can block the entire corridor, preventing other family members from moving through the space while you cook.
- Disregarding Heat Sources: Installing a storage cabinet too close to a cooktop can expose the stainless steel and its contents to excessive heat, steam, and grease buildup. Always check the appliance manufacturer's instructions for recommended clearances.
Frequently Asked Questions (FAQ)
Can I install a stainless wall cabinet directly above a gas stove?
While stainless steel is highly heat-resistant and non-combustible, mounting a storage cabinet directly over an active gas stove is not recommended. The intense heat, rising steam, and airborne grease can cause the cabinet’s exterior to become dangerously hot, potentially damaging the items stored inside or degrading any internal rubber seals and shelf liners. Instead, you should install a dedicated range hood with proper external ventilation in this high-heat zone. Always consult your stove manufacturer’s manual and local building safety codes to determine the exact vertical clearance required above your cooking surface.
What is the standard clearance between the countertop and the wall cabinet?
The standard vertical clearance between a kitchen countertop and the bottom of a wall cabinet is 18 inches (45 cm). This height provides comfortable access to the countertop while keeping the cabinet shelves within arm’s reach for an average-sized adult. However, you should adjust this height based on your household’s primary cook and the specific appliances you use daily. For example, if you frequently use tall blenders, stand mixers, or multi-tier rice cookers, raising the clearance to 20 or 22 inches (50 to 56 cm) can prevent steam damage and offer better maneuverability. Before drilling, use painter’s tape to mark the cabinet’s outline on the wall to physically test the clearance.
Community discussion
Share your experience or ask a question. Comments are reviewed before publication.