
Working from home in the Philippines often means making the most of limited residential space. Whether you are operating from a cozy condominium unit in Metro Manila or a shared study room, a cramped workstation can quickly hinder your productivity. If your current desk feels cluttered with a laptop, secondary monitor, and documents, you do not necessarily need to invest in a brand-new, larger piece of furniture. Instead, using a table desk extension is a practical, cost-effective way to physically expand your existing surface area. By selecting the right add-on accessories, you can optimize your workstation to match your daily workflow while preserving your room’s floor layout.
Assess Your Desk's Compatibility and Space Needs
Before purchasing any extension accessory, you must thoroughly evaluate your current desk’s physical structure and identify your specific workspace bottlenecks. Start by measuring the depth, width, and height of your tabletop. Take note of what is causing the clutter: do you need more room for your keyboard and mouse, a dedicated spot for writing, or a higher platform for your monitor? Pinpointing the exact type of space you lack prevents you from buying accessories that do not solve your primary functional issues.
Next, examine the edge profile and thickness of your tabletop. Most clamp-on accessories require a flat, straight edge with a thickness of at least 15 to 50 millimeters to secure properly. If your desk has a highly beveled, chamfered, or rounded edge, standard C-clamps may slip or fail to grip securely. Additionally, look underneath the desk to check for any structural metal frames, support beams, or drawers that run close to the edge, as these obstructions can block a clamp from reaching far enough under the table to lock in place.
Products mentioned in this guide
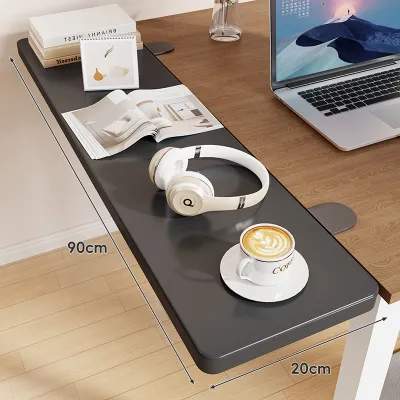
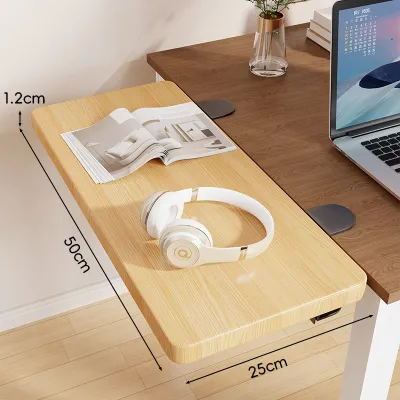
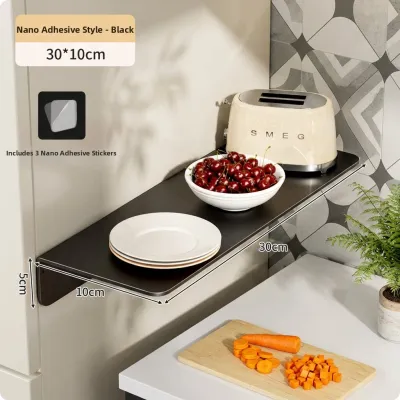
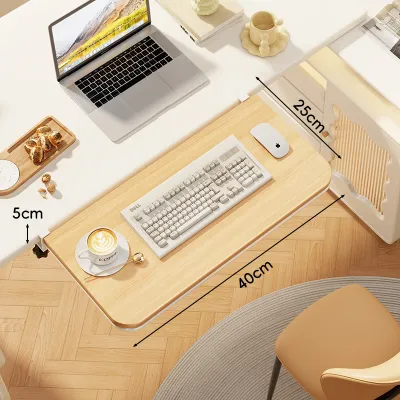
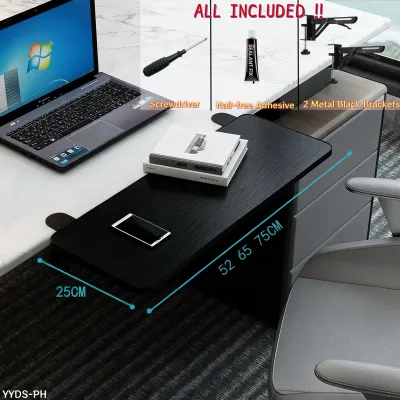
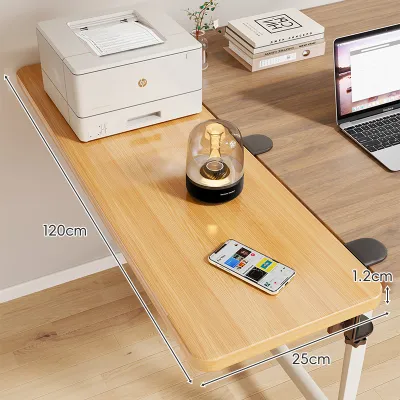
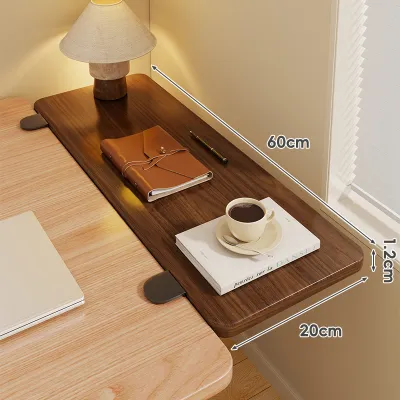
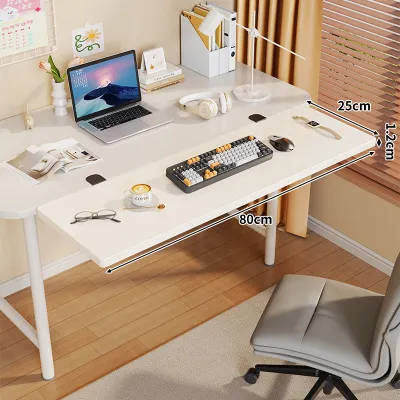
Prices are valid at publication and may change. Please refer to the product page for the latest price.
The material composition of your desk is equally critical. Solid wood tables, such as those made from local mahogany or acacia, are highly durable and can withstand concentrated clamp pressure. However, many modern budget desks are constructed from particleboard, medium-density fiberboard (MDF), or hollow-core materials with a honeycomb paper interior. Clamping heavy extensions onto hollow-core or low-density particleboard can crush the material, leading to structural failure. Always check your desk manufacturer’s documentation to verify its overall weight capacity and material limits before adding external loads.
Choose the Right Desk Extension Method for Your Setup
Expanding your workspace does not require permanent modifications or drilling into your furniture. Depending on your spatial constraints and the type of tasks you perform, you can choose from several non-destructive extension methods.

Clip-On Desk Extensions for Extra Surface Area
Clip-on or bolt-on side panels are designed to attach directly to the edge of your table, effectively lengthening or widening the main surface. These extensions typically feature a flat platform supported by heavy-duty metal brackets that clamp onto the side of your desk. They are ideal for creating a small writing area, holding a mouse pad, or placing lightweight desk organizers.
If you have a standard rectangular desk, you can use these side panels to create a pseudo-L-shaped setup or a return. This configuration allows you to pivot slightly to handle paperwork without moving your keyboard or monitor. Keep in mind that these extensions are built for light to moderate use; they generally have lower weight capacities than the main desk and require a robust, straight edge for stable mounting.
Freestanding Risers to Utilize Vertical Space
When floor and edge space are limited, utilizing vertical space is an excellent alternative. Freestanding monitor risers and desk converters sit directly on top of your existing tabletop without requiring clamps or screws. By elevating your monitor or laptop, these risers create a multi-tiered system that frees up the valuable surface area directly underneath the screen.
The space beneath a riser is perfect for tucking away notebooks, external hard drives, or your keyboard when it is not in use. This method is particularly beneficial in humid tropical environments, as elevating your electronics promotes better airflow around your devices and keeps them off warm wooden surfaces. When choosing a riser, ensure its footprint fits comfortably within your desk’s depth and that the elevated height aligns ergonomically with your eye level.
Clamp-On Trays and Arms to Reclaim Desktop Space
Another highly effective way to extend your desk is to relocate items that normally sit on the main surface. Clamp-on keyboard trays slide out from underneath the desk, moving your input devices completely off the main tabletop. This simple adjustment can reclaim up to 30 percent of your usable desk surface, leaving you with ample room for documents, tablets, or design tools.
Similarly, installing a clamp-on monitor arm eliminates the bulky plastic stands that come with modern screens. By suspending your monitor in the air, you open up the central real estate of your desk. However, monitor arms exert significant leverage and torque on the table’s edge. You must verify that your desk material is strong enough to handle this concentrated force and that the clamp has adequate clearance from any back walls or cable management trays.
How to Safely Install a Clamp-On Desk Extension
Proper installation is key to ensuring your new extension remains stable and does not damage your existing furniture. Follow these steps to set up your clamp-on accessory securely:
- Preparation: Clear your entire desk surface of fragile electronics and valuable items before starting. Gather any necessary tools, which typically include an Allen key or an adjustable wrench provided by the manufacturer.
- Positioning: Place soft rubber, silicone, or felt pads between the metal clamp plates and your desk surfaces (both top and bottom). These pads act as a protective barrier to prevent scratches, improve grip, and distribute the clamping pressure more evenly across the wood or laminate.
- Securing the Clamp: Align the extension platform so it sits perfectly flush and level with your tabletop. Tighten the clamp screws gradually, alternating between the left and right clamps if your accessory uses a dual-clamp system. Avoid overtightening, as excessive force can strip the threads or warp the desk material.
- Stability Testing: Before placing any expensive electronics or heavy office supplies on the extension, perform a manual stability check. Apply gradual downward pressure with your hands to the outer edge of the extension. Watch closely for any signs of slipping, wobbling, or bending at the clamp connection.
- Warning: If you notice the desk edge beginning to deform, crack, or make hollow crushing sounds during installation, stop immediately. Loosen the clamps and remove the accessory. In such cases, your desk material is likely too fragile or hollow, and you should opt for a freestanding riser instead.
Maintain Stability and Protect Your Original Desk
Once your table desk extension is installed, regular maintenance is necessary to keep your workstation safe and functional over the long term. Daily typing, moving your mouse, and adjusting monitor arms create micro-vibrations that can gradually loosen clamp screws. Set a reminder to check the tightness of all brackets and clamps every few weeks, gently tightening them if they have worked loose.
Weight distribution plays a critical role in preventing structural failure or tipping. Always place your heaviest equipment—such as your main computer tower, uninterruptible power supply (UPS), or heavy textbooks—on the center of the original desk surface. Use the extended sections strictly for lighter items like keyboards, mice, notepad folios, or lightweight secondary screens.
In the Philippines, high relative humidity can trap moisture between the protective rubber clamp pads and your desk’s finish. Over time, this trapped moisture can cause wooden veneers to bubble, discolor, or develop mold. To prevent this, periodically loosen the clamps during your deep-cleaning routine, wipe both surfaces dry with a microfiber cloth, and allow them to air out before reassembling.
Finally, develop mindful habits while working. Avoid leaning your body weight heavily on the extended edges or using them to push yourself up from your chair. This concentrated downward force can exceed the hardware’s rated capacity and lead to sudden structural failure or cause your entire desk to tip forward.
Frequently Asked Questions (FAQ)
Can I install a desk extension on a glass table?
Standard clamp-on desk extensions should not be installed on tempered glass tables. The concentrated, localized pressure from metal C-clamps poses a high risk of shattering glass surfaces, even if you use protective rubber padding. If you have a glass desk, it is highly recommended to avoid clamp-on accessories entirely. Instead, use freestanding risers, under-desk drawer units, or adjacent mobile filing cabinets that sit flush with your tabletop height to safely expand your workspace.
How much weight can a typical clamp-on desk extension hold?
The weight capacity of a clamp-on desk extension varies widely depending on the manufacturer’s specifications and the structural integrity of your host desk. Most standard clamp-on side panels and keyboard trays are designed to support between 5 to 15 kilograms. Always consult the product manual for the exact weight limit of your specific accessory. Keep in mind that a weak or thin desk edge will significantly reduce this capacity, so it is best to stay well below the maximum rated limit to ensure long-term stability.
Community discussion
Share your experience or ask a question. Comments are reviewed before publication.