
Installing a bypass sliding door system is an excellent way to save space in tight areas, such as closets, pantries, or hallways, where a traditional swinging door would block foot traffic. Unlike pocket doors that require opening up the wall cavity, a bypass system allows two or more door panels to slide parallel to each other within a single opening, overlapping smoothly to grant access to different sides of the space. Achieving a flawless, quiet glide requires precise measurements, secure anchoring, and careful alignment of the track and rollers. By following a systematic installation process, you can mount your bypass doors securely, ensuring they remain stable, balanced, and perfectly aligned for years to come.
Whether you are updating an existing closet or installing a new partition, the success of this project depends on attaching the heavy track to solid structural framing rather than relying on drywall alone. This guide walks you through the entire process, from preparing the opening and mounting the hardware to hanging the panels and fine-tuning the rollers for a smooth glide.
Tools and Materials You Will Need
Before beginning the installation, gather all the necessary tools and hardware to ensure a seamless workflow. Having the correct equipment on hand prevents interruptions and helps you maintain accuracy during critical steps like leveling and drilling.
Products mentioned in this guide
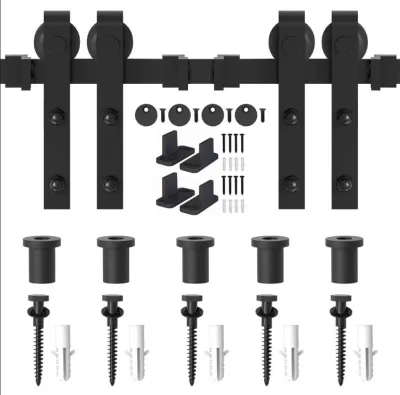
1,741 Lazada user ratings
I ordered A 200cm double, but inclusions were incomplete. Floor door guide only 1pc. Upper guide only 2 pcs. Should be 4 pcs each. Pls check…Read full reviewShow less
I ordered A 200cm double, but inclusions were incomplete. Floor door guide only 1pc. Upper guide only 2 pcs. Should be 4 pcs each. Pls check the required inclusion items and send missing items. OR I will return the parcel. Lazada pls advise if I should return the parcel.
Easy installation process, Beautiful black powder-coated surface, Smooth and quiet sliding operation, High-quality carbon steel material, St…Read full reviewShow less
Easy installation process, Beautiful black powder-coated surface, Smooth and quiet sliding operation, High-quality carbon steel material, Sturdy and durable sliding door hardware, Long-lasting and resistant to corrosion,
High-quality carbon steel material, Perfect for kitchen and living room doors, Can support heavy doors up to 100kg, Adds a rustic touch to a…Read full reviewShow less
High-quality carbon steel material, Perfect for kitchen and living room doors, Can support heavy doors up to 100kg, Adds a rustic touch to any room, Easy installation process,
Ease of Installation:10/10 very easy to install Durability:10/10 very durable Security:10/10 it holds the door firmly
fast delivery. mukhang matibay nmn dpa na install kung ok at kung kumpleto mga piyesta.. maganda cya
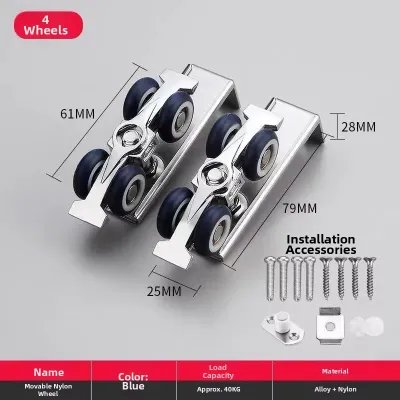
Prices are valid at publication and may change. Please refer to the product page for the latest price.
For the primary hand and power tools, you will need a reliable power drill with wood and masonry drill bits, a high-quality bubble level, a tape measure, a pencil, and a stud finder. A stud finder is essential for locating the solid wood framing behind drywall to support the weight of the sliding panels. If you are mounting the system onto concrete or masonry walls, which are common in residential construction in the Philippines, you will also need a hammer drill and appropriate masonry wall anchors.
Your hardware checklist depends on the specific bypass sliding door kit you purchase. A standard kit typically includes the top track, roller brackets, floor guides, stop brackets, and mounting screws. Lay out all these components and verify them against the manufacturer’s parts list before you begin. It is also wise to inspect the door panels themselves for any warping or damage, ensuring they are ready for hardware attachment.
Measuring and Preparing the Door Opening
A successful sliding door installation relies entirely on a square, level, and structurally sound opening. Any deviation from plumb or level in the door frame will cause the sliding panels to drift on their own, bind against each other, or leave uneven gaps along the sides.

Begin by checking the header—the horizontal beam at the top of the opening—with your bubble level. If the header is sloped, the track will also slope, causing the doors to slide open or closed automatically. Next, check the vertical side jambs with a level or plumb bob to ensure they are perfectly vertical. If you find significant deviations, you may need to shim the track or adjust the side trim to create a visually square frame before mounting the hardware.
Next, verify the load-bearing capacity of the wall above the opening. Bypass sliding doors can be heavy, especially if you choose solid wood or thick composite panels. The entire weight of these doors hangs from the top track, meaning the header must be strong enough to support the load without sagging. Locate the wood studs or header beam behind the plasterboard using your stud finder. If you are working with concrete or solid masonry walls, ensure you have heavy-duty expansion anchors designed to hold the weight of the track and doors securely.
Finally, confirm all clearances for the track, panels, and floor guides based on the manufacturer’s specified dimensions. Measure the height of the opening in three places—the left, center, and right—and use the smallest measurement to determine your door height. You must leave enough clearance at the bottom for the floor guides and any flooring materials, while ensuring the top of the door has sufficient space to clear the track hardware.
Mounting the Top Track and Brackets
Mounting the top track is the most critical structural step of the installation. The track must be perfectly level and anchored into solid material to prevent the doors from sagging or sliding unevenly.
Start by marking the exact height for the track installation on the wall or header. Refer to your manufacturer’s instructions for the precise distance from the floor, taking into account the height of the door panels, the clearance for the floor guide, and the dimensions of the roller hardware. Use your level to draw a straight, horizontal reference line across the entire width of the opening. Double-check this line to ensure it is absolutely level before proceeding to drill.
Once your reference line is marked, align the track or its mounting brackets with the line and mark the locations for the pilot holes. If you are mounting directly into wood framing, drill pilot holes using a drill bit slightly smaller than the mounting screws to prevent the wood from splitting. If you are mounting to concrete or masonry, use a hammer drill and a masonry bit to drill holes for your heavy-duty wall anchors, then tap the anchors flush with the surface. Never attempt to mount the track using drywall anchors alone, as they cannot support the dynamic weight of moving doors.
Secure the track brackets or the track itself to the wall or header using the provided heavy-duty screws. Tighten the fasteners securely, but avoid over-tightening to prevent warping the metal track. Once the track is mounted, place your level inside or along the bottom of the track to verify that it remains perfectly level. If there are any slight dips or slopes, loosen the screws slightly and insert thin shims behind the track to correct the alignment before tightening the fasteners completely.
Hanging the Door Panels on Rollers
With the track securely in place, you can prepare the door panels and lift them into position. This step requires careful handling to avoid scratching the doors or damaging the roller mechanisms.
Begin by pre-drilling and mounting the roller brackets to the top edge of each door panel. Most bypass kits require two roller assemblies per door, positioned a specific distance from the outer edges. Measure and mark these positions carefully, ensuring the brackets are aligned straight and square with the top edge of the door. Drill pilot holes to prevent the wood or composite material from splitting, then secure the roller brackets firmly with the provided screws.
Before hanging the doors, install the floor guides at the bottom of the opening. Floor guides are essential because they keep the bottom of the panels aligned, preventing them from swinging outward or rubbing against each other. Depending on your kit, the floor guide may be a single center-mounted guide or individual guides for each door. Position the guide so that the doors remain parallel to the wall and to each other throughout their full range of motion. Secure the floor guide to the floor using appropriate screws for wood or masonry anchors for concrete floors.
To hang the doors, lift the back panel first and carefully guide its rollers onto the rear track. It is often helpful to have a second person assist with lifting and aligning the panel to prevent strain or accidental drops. Once the back panel is securely on the track, test its movement to ensure it slides freely. Next, lift the front panel and place its rollers onto the forward track. Ensure both panels are seated correctly in their respective tracks and that they clear each other without rubbing when they bypass.
Adjusting Alignment and Testing the System
Once both door panels are hanging on the track, you must fine-tune the alignment to ensure smooth operation, even gaps, and proper privacy overlap.
Most modern bypass door rollers feature adjustment screws or dials that allow you to raise or lower each side of the door panel slightly. Locate these adjustment points on the roller brackets. If you notice that a door panel is hanging crookedly or that there is an uneven gap between the door edge and the side jamb, turn the adjustment screw to raise or lower that side of the door. Adjust both panels until they are perfectly plumb and the vertical gaps along the side jambs are uniform from top to bottom.
Next, check the overlap between the bypass panels when they are closed. The doors should overlap sufficiently in the center to prevent any sightlines into the closet or room, maintaining privacy. Ensure that the floor guides are properly engaged with the bottom of the doors throughout their entire travel distance. If the doors swing outward at any point, adjust the position of the floor guides to keep them securely on track.
Finally, test the doors multiple times by sliding them back and forth along the entire length of the track. Listen for any scraping or squeaking noises, which could indicate that the rollers are misaligned or that the panels are rubbing against each other or the wall. The doors should glide quietly and smoothly, stopping securely at the edges without drifting back toward the center. If you detect any resistance, recheck the level of the track and make incremental adjustments to the roller heights until the movement is effortless.
Common Installation Mistakes to Avoid
Avoiding common installation errors will save you time and prevent premature wear on your bypass sliding door system. Paying close attention to structural support and alignment during the initial setup ensures a long-lasting installation.
One of the most frequent mistakes is failing to anchor the top track into solid framing or masonry. Relying on drywall or plasterboard alone to support the weight of the doors will inevitably lead to sagging, which causes the doors to bind, scrape the floor, or even fall off the track entirely. Always take the time to locate studs or use heavy-duty masonry anchors when installing the system.
Another common error is ignoring or improperly installing the floor guide. Some installers skip this step to avoid drilling into their flooring, but without a guide, the bottom of the doors will swing freely. This swinging can cause the doors to derail, damage the surrounding walls, or scratch the faces of the panels as they rub against each other. Always install the floor guide and ensure it is properly aligned with the track above.
Lastly, never force misaligned panels to slide if you encounter resistance. Forcing the doors will damage the rollers, warp the track, or scratch the door finish. If the doors do not glide smoothly, stop and recheck the track level, verify that the roller brackets are mounted straight, and use the adjustment screws to correct any alignment issues. Taking a few minutes to diagnose and fix the root cause of the resistance will ensure your bypass sliding door system operates flawlessly for years to come.

Community discussion
Share your experience or ask a question. Comments are reviewed before publication.