
To install a canopy bracket on a concrete wall securely, you must use a hammer drill equipped with a masonry bit to drill precise holes, insert heavy-duty expansion anchors (such as sleeve or wedge anchors), and bolt the bracket flush against the surface. Because outdoor canopies are subjected to dynamic wind loads and gravity, standard plastic plugs are insufficient; instead, structural metal anchors are required to ensure the installation remains stable and safe over time. Following a systematic approach—from scanning the wall for hidden utilities to executing clean drilling and proper torque application—guarantees a professional-grade mount that protects your property and anyone walking underneath.
Tools and Materials Needed for Concrete Installation
Gathering the correct heavy-duty tools and safety gear before starting is essential. Working with concrete requires specialized equipment that can handle the density of the material without damaging the wall or the tools. Using standard household drills or incorrect fasteners can lead to loose brackets, cracked concrete, or tool failure.
A hammer drill is the primary tool required for this project. Unlike a standard rotary drill, a hammer drill combines rotation with a rapid hammering action that pulverizes the concrete, allowing the bit to penetrate the hard surface efficiently. Pair this tool with high-quality masonry drill bits. The diameter of the masonry bit must match the exact specifications provided by your anchor manufacturer, as even a millimeter of deviation can compromise the anchor’s holding capacity.
Products mentioned in this guide
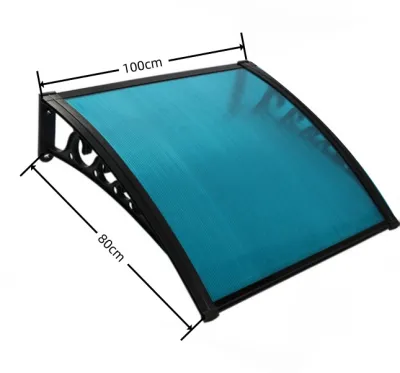
107 Lazada user ratings
tiiiihn buu.hhuibb hhgfi hioob jooonh hgdfuk jjiib hjjjb hhjok jiii ggggi uiii uuiib hjjjb hjjib jjjkk jjkobhjjj.jjjjj hjjii hhjooob hjiob
My item was delivered maybe 2 weeks ago, at ngyon lng namin nabuksan pero kulang ng isang arm dapat at 3 can you send me one of it.
Very useful. Also very beautiful. But the screws provided are large, but they are large, strong and durable.
one of the bracket is missing can you send the mussing bracket it supposed to be 3 pcs.
Durable polycarbonate, UV protection, easy to install
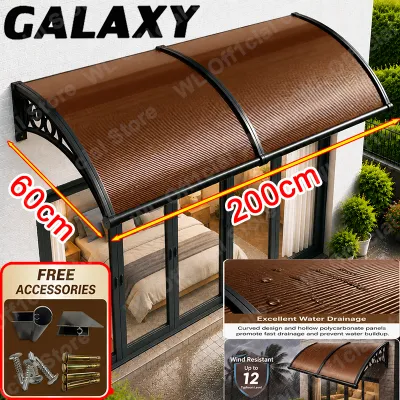
98 Lazada user ratings
My order was excellent but the delivery was disgusting. The rider of J&t first attempt stated was a faikure due to the client ask for a re s…Read full reviewShow less
My order was excellent but the delivery was disgusting. The rider of J&t first attempt stated was a faikure due to the client ask for a re schedule whereiin I didnlt ask for one, He posted a proof of delivery, a convo with someone which is not me. He didn’t send a message . I was at home the whole day waiting for my delivery. The rider is Jayson Panimdim, don’t put the blame to me if you can’t deliver
🛠️Durability:good 👜Portability:good 🛠Ease of Setup:good panagalawa ko order,,ok pa din Naman maliban dun sa kulang na Isang set Ng expansion …Read full reviewShow less
🛠️Durability:good 👜Portability:good 🛠Ease of Setup:good panagalawa ko order,,ok pa din Naman maliban dun sa kulang na Isang set Ng expansion bolt,,nalaglag siguro sa delivery at Yung delivery di din Naman maingat,nayupi Yung pinaka bubong pero di Naman sira at pwede pa makabit..dagdagan na lang siguro Ang support sa packaging,dahil malambot lang Ang pinaka bubong.
🛠️Durability:good 👜Portability:good 🛠Ease of Setup:good mabilis delivery at maayos Naman at walang damage,kumpleto at walang kulang,mura at p…Read full reviewShow less
🛠️Durability:good 👜Portability:good 🛠Ease of Setup:good mabilis delivery at maayos Naman at walang damage,kumpleto at walang kulang,mura at parang mamahalin Naman ,,matibay at elegante tignan.
Ok po magandacat walang damagecty seller,lazada at courier.
All goods ang order ko ty seller sa uulitin
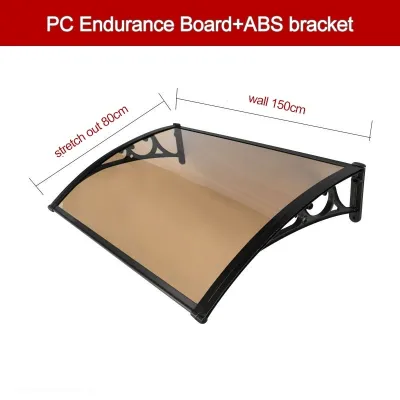
48 Lazada user ratings
softer type of fiberglass,good for the door
good quality thank you seller ⭐⭐⭐⭐⭐
🛠️Durability: good goods
sakto ok n ok
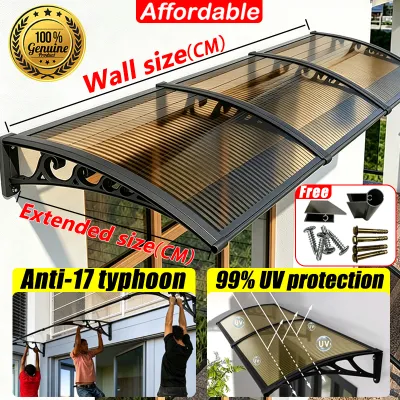
3 Lazada user ratings
this is crap.
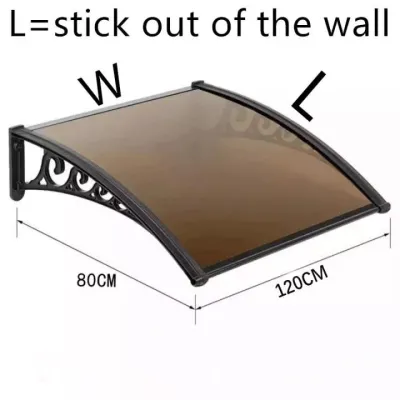
363 Lazada user ratings
Easy to install and foldable for convenience., The frame adds stability and support., Provides excellent sun protection., Waterproof and per…Read full reviewShow less
Easy to install and foldable for convenience., The frame adds stability and support., Provides excellent sun protection., Waterproof and perfect for rainy days.,
Provides excellent sun protection., Anti-UV material ensures long-lasting use., Easy to install and foldable for convenience., Perfect for s…Read full reviewShow less
Provides excellent sun protection., Anti-UV material ensures long-lasting use., Easy to install and foldable for convenience., Perfect for shading your balcony.,
Plastic material I hope it will last longer.Provides excellent sun protection., Perfect for shading your balcony.,
awesome, I like it very very much, hope it will last for 20 years thanks
Item as described
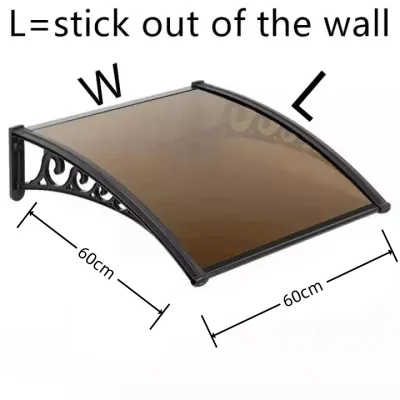
914 Lazada user ratings
High-quality materials used, Versatile and adjustable size options, Weather-resistant and long-lasting, Perfect for parties and gatherings,
I am very happy with the product and the quick delivery, the price is good and I think it is durable. Thank you seller
I received the item securely packed and was delivered fast. Good quality and will definitely purchase again
This canopy is very good.The endurance board is also very thick.Highly recommended purchase
The canopy is of good quality, and the shipping package is strong and effective.It's nice.
1,002 Lazada user ratings
The item arrived earlier than expected, Though the courier mis hadled and caused deformation of the metal edge elements... The seller is ver…Read full reviewShow less
The item arrived earlier than expected, Though the courier mis hadled and caused deformation of the metal edge elements... The seller is very professional and understand the case, uppon knowing through chat, sent me the replacement parts free of charge and very fast in 1 day.. Thank you seller. I recommend for those looking for this product to buy in this seller... The item is so durable and easy to install... Seller's after sale support is very good. The item fit perfectly and beautifully to my garden wash area..
Ideal for DIY awning installation. Perfect for door and window protection from rain and sun. Sturdy and durable design, quality materials us…Read full reviewShow less
Ideal for DIY awning installation. Perfect for door and window protection from rain and sun. Sturdy and durable design, quality materials used. I have received the items in good condition. The parcel arrived ahead of schedule and was securely packed. A very nice product, exactly what I needed! COMPLETE I am extremely satisfied and will definitely order again from your Good Shop... Thank you so much , looking forward to my next purchase.
Ideal for DIY installing of awning for the door and windows in the house. Materials are sturdy and well made, value for the money. I have re…Read full reviewShow less
Ideal for DIY installing of awning for the door and windows in the house. Materials are sturdy and well made, value for the money. I have received the items in good condition. The parcel arrived ahead of schedule and was securely packed. A very nice product, exactly what I needed! COMPLETE I am extremely satisfied and will definitely order again from your Good Shop... Thank you so much , looking forward to my next purchase.
The package was already open and item is not fully secured. Polycarbonate sheet and frame is in good condition but the expansion bolt is sub…Read full reviewShow less
The package was already open and item is not fully secured. Polycarbonate sheet and frame is in good condition but the expansion bolt is substandard need to replace and buy another anchoring materials
Item delivered efficiently by Ninja courier and arrived well packaged . All components complete . Have not assembled as yet but will post ad…Read full reviewShow less
Item delivered efficiently by Ninja courier and arrived well packaged . All components complete . Have not assembled as yet but will post additional reviews once assembled and installed .
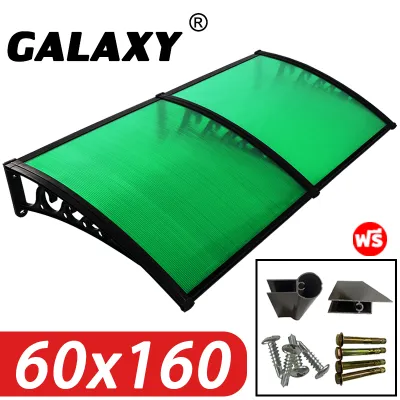
711 Lazada user ratings
Ang produkto ay sumusunod sa order, mabilis ang paghahatid, maganda ang packaging, walang pinsala, walang problema sa kalidad, madaling i-in…Read full reviewShow less
Ang produkto ay sumusunod sa order, mabilis ang paghahatid, maganda ang packaging, walang pinsala, walang problema sa kalidad, madaling i-install
Height adjustable to get a perfect shade, very good for blocking sun and rain, beautiful and elegant design.
thank you very much, seller your promise to deliver the missing items is complete...thank you very much
Good light transmittance, Provides excellent sun shade,
Prices are valid at publication and may change. Please refer to the product page for the latest price.
Choosing the right concrete anchors is critical for outdoor, load-bearing applications like canopies. Heavy-duty metal anchors, such as sleeve anchors or wedge anchors, are highly recommended because they expand inside the concrete to create a friction lock. For older or hollow concrete blocks, a two-part chemical anchor system or epoxy injection may be necessary to distribute the load safely. Always verify the load ratings on the anchor packaging to ensure they can support the weight of your specific canopy model.
Accurate layout and safety checks require a few standard hand tools. You will need a reliable measuring tape, a long spirit level to keep the bracket perfectly aligned, and a pencil or permanent marker to mark the drill points. A multi-scanner or stud detector capable of locating metal and live electrical wires behind concrete is also vital to prevent drilling into structural rebar, water pipes, or electrical conduits.
Safety must be a priority throughout the drilling and mounting process. Concrete drilling generates fine, hazardous silica dust that can irritate your lungs, making a high-quality dust mask or respirator indispensable. Additionally, wear impact-resistant safety goggles to protect your eyes from flying concrete chips, and heavy-duty work gloves to maintain a firm grip on the drill and protect your hands from sharp metal edges.
Preparing the Wall and Marking the Bracket Position
Before lifting any tools, you must thoroughly inspect the concrete wall where you plan to mount the canopy. Look closely for signs of structural compromise, such as deep cracks, spalling, crumbling edges, or active water damage. Mounting a heavy, wind-catching canopy on compromised concrete can cause the wall surface to break away under tension, leading to a catastrophic failure of the installation. If you detect significant damage, select an alternative location or repair the wall before proceeding.

Once you confirm the wall is structurally sound, determine the ideal mounting height for your canopy. Consider the finished dimensions of the canopy, the clearance required for doors or windows to open fully, and the typical height of people walking underneath. Keep in mind that outdoor canopies must be high enough to clear head traffic but low enough to provide effective shade and rain protection.
Hold the canopy bracket against the wall at the desired height and use a spirit level to ensure it is perfectly plumb and level. While holding the bracket steady, use your marker to trace the exact center of each mounting hole onto the concrete surface. Do not rely on visual estimation, as even a slight tilt will be magnified once the full canopy frame is attached, causing uneven stress on the anchors and frame.
Before drilling, use a high-quality wall scanner over the marked points to check for hidden hazards. Concrete walls, especially in modern residential structures, often contain embedded steel reinforcement bars (rebar), electrical conduits, or plumbing lines. If your scanner indicates metal or live wires directly behind a marked point, shift the entire bracket layout slightly to avoid these obstructions, ensuring you maintain a safe distance from any utility lines.
Drilling into the Concrete Wall
With your safety gear securely on, prepare your hammer drill for operation. Ensure the drill is set to its hammer or percussion mode, which is typically represented by a small hammer icon on the tool’s collar. Insert the correct size masonry drill bit into the chuck and tighten it securely. Double-check that the bit diameter matches the anchor manufacturer’s instructions exactly; a hole that is too wide will prevent the anchor from expanding securely, while a hole that is too narrow will make it impossible to insert the anchor.
Controlling the depth of the hole is just as important as its diameter. Most heavy-duty anchors require a hole that is slightly deeper than the length of the anchor itself to accommodate any dust that settles at the bottom. To measure this accurately, refer to the anchor packaging for the recommended depth. You can set the depth stop rod on your hammer drill to this measurement, or wrap a piece of bright masking tape around the drill bit at the correct depth mark to serve as a clear visual guide while drilling.
Position the tip of the masonry bit directly on your marked point, keeping the drill perfectly perpendicular to the wall surface. Hold the drill firmly with both hands to prevent it from walking or slipping when you start. Pull the trigger to start drilling at a moderate speed, applying steady, forward pressure. Do not force the drill or lean your entire body weight into it; let the hammer action of the tool do the work. Forcing the drill can overheat the bit, dulling the cutting edges and potentially cracking the surrounding concrete.
Periodically pull the drill bit slightly out of the hole while it is running to help clear out the accumulated concrete dust. If you encounter sudden, high resistance, you may have hit a piece of hard aggregate or structural rebar. If this happens, stop drilling immediately to inspect the hole; forcing the drill through steel rebar with a standard masonry bit will destroy the bit and could damage the wall.
Once you reach the desired depth, stop drilling and pull the bit straight out. The newly drilled hole will be filled with fine concrete dust, which must be completely removed. Residual dust acts as a lubricant, preventing the expansion anchor from gripping the concrete walls effectively and reducing its holding power by up to fifty percent. Use a manual hand blower, a can of compressed air, or a wet-dry vacuum with a narrow crevice tool to thoroughly clean the dust from the very back of the hole.
Inserting Anchors and Securing the Canopy Bracket
Now that the holes are clean and free of debris, you can prepare to insert the concrete anchors. If you are using sleeve anchors, ensure the nut and washer are threaded onto the top of the bolt, with the nut flush with the top of the threads to protect them from damage. Push the anchor assembly into the drilled hole. If you encounter resistance, use a hammer to tap the top of the anchor gently until the washer sits flush against the concrete surface. Avoid hitting the anchor too hard, as this can bend the threads or prematurely expand the sleeve.
With the anchors in place, carefully lift the canopy bracket and align its mounting holes with the protruding anchor bolts. Slide the bracket over the bolts until the back of the bracket rests completely flat against the concrete wall. There should be no gaps, unevenness, or debris trapped between the bracket and the wall surface. If the wall is slightly uneven, you may need to use metal shims behind the bracket to ensure it remains perfectly vertical without bending when tightened.
Place the washers and nuts onto the exposed threads of the anchors. Hand-tighten all the nuts first to ensure the bracket is held in place and remains level. Once all nuts are hand-tight, use a wrench or a socket set to tighten them further. If your bracket has multiple mounting points, tighten the nuts gradually in a star or diagonal pattern rather than tightening one fully at a time. This distributes the clamping pressure evenly across the bracket and prevents it from shifting or warping.
As you tighten the nuts, the anchor’s internal expansion mechanism will engage, pulling the cone up into the sleeve or wedge and forcing it outward against the concrete walls. Pay close attention to the resistance you feel while turning the wrench. Stop tightening as soon as the bracket is firmly secured against the wall and you feel solid resistance. Over-tightening can strip the threads of the bolt, deform the bracket, or crack the surrounding concrete, which would completely ruin the structural integrity of the mount.
Testing the Installation and Safety Checks
After securing the bracket, perform a thorough visual inspection of the installation site. Check the bracket with your spirit level once more to confirm it remained perfectly aligned during the tightening process. Inspect the concrete immediately surrounding each anchor for any hairline cracks, chipping, or signs of stress. If you notice significant cracking or if the concrete has begun to spall around the anchor, the mount is compromised and must not be used to support the canopy.
Next, conduct a manual load test to verify the stability of the bracket. Apply moderate, steady downward and outward pressure on the bracket using your hands. The bracket should feel completely rigid, with absolutely no movement, wobbling, or shifting. If you detect even a fraction of a millimeter of play, the anchors are not fully engaged or the hole was drilled too large. Do not proceed with mounting the canopy fabric or frame if the bracket fails this manual test.
Because outdoor canopies are constantly exposed to wind, rain, and temperature fluctuations, they require regular maintenance checks. Schedule a periodic inspection at least twice a year, and always perform a check after severe weather events like typhoons or heavy storms. During these checks, inspect the metal parts for signs of rust or corrosion, ensure the concrete remains solid, and use a wrench to verify that the nuts have not vibrated loose over time.
It is crucial to recognize when a project exceeds your DIY capabilities. Define clear stop conditions before you begin or during the installation process. If the concrete crumbles extensively while drilling, if the bracket continues to shift during testing, or if you are installing an exceptionally large or heavy commercial-grade canopy, halt the process immediately. In these situations, consult a licensed structural engineer or a professional contractor to assess the wall and complete the installation safely.
Frequently Asked Questions (FAQ)
Can I use standard plastic wall plugs for a canopy bracket on concrete?
No, standard plastic wall plugs should never be used to mount an outdoor canopy bracket on concrete. Plastic plugs are designed for light, static indoor loads, such as picture frames, small shelves, or light fixtures. Outdoor canopies are subjected to significant dynamic forces, including strong wind uplift, heavy rain accumulation, and gravity. These forces can easily pull plastic plugs straight out of the wall, leading to a sudden and dangerous collapse. For structural outdoor installations, you must use heavy-duty metal expansion anchors, such as sleeve or wedge anchors, or certified chemical anchoring systems designed to withstand high shear and tension loads.
What should I do if the concrete crumbles while drilling?
If the concrete begins to crumble or blow out while you are drilling, stop the drill immediately to prevent further damage. Crumbling usually indicates that the concrete is old, low-quality, or hollow, or that you have drilled too close to an edge or an existing crack. Inspect the hole to see if it has become oversized or irregular. To fix this, you can use a high-strength, two-part epoxy resin or a chemical anchoring system. Inject the epoxy into the cleaned hole, insert the anchor, and allow it to cure fully according to the manufacturer’s instructions before applying any load. If the damage is extensive, patch the crumbled area with concrete repair mortar, let it cure completely, and relocate your bracket to a solid, undamaged section of the wall.
Do I need a permit to install an outdoor canopy in the Philippines?
In the Philippines, permit requirements for installing an outdoor canopy depend on your specific location, the size of the canopy, and where it is being mounted. If your canopy extends over a public sidewalk, street, or common area, or if you live in a subdivision governed by a Homeowners Association (HOA), you will likely need formal clearance. Before starting your installation, check with your local Barangay Hall or HOA office to review their specific guidelines regarding property line setbacks, structural additions, and aesthetic rules. For larger, permanent structural canopies that attach to the main building facade, you may also need to consult your local government unit’s (LGU) building official to determine if a minor building permit is required under the National Building Code of the Philippines.
Community discussion
Share your experience or ask a question. Comments are reviewed before publication.