
Living in a modern condominium in Metro Manila or other urban hubs in the Philippines often means working with compact spaces. Utilizing vertical space with a floating cabinet wall mounted design is one of the most effective ways to keep toiletries organized and countertops clear. However, many condo tenants and homeowners face a major hurdle: strict building regulations or lease agreements that prohibit drilling into bathroom walls. Drilling through ceramic or porcelain tiles is not only noisy and disruptive, but it also risks cracking expensive finishes and puncturing the delicate waterproofing membrane hidden behind the wall, leading to costly water damage.
Fortunately, you can securely mount a floating bathroom cabinet without drilling a single hole. By understanding the science of modern high-performance adhesives, evaluating your wall surfaces, and executing a precise installation process, you can achieve a stable, long-lasting hold. This guide provides a comprehensive, step-by-step roadmap to drill-free mounting, tailored specifically for the humid conditions of tropical bathrooms.
Assessing Wall Surfaces and Weight Limits for Drill-Free Mounting
Before purchasing any adhesive, you must critically evaluate the structural integrity of your bathroom wall. Drill-free mounting relies entirely on surface-to-surface adhesion, meaning the bond is only as strong as the outermost layer of your wall. If that outer layer is weak, flaky, or poorly adhered to the underlying structure, your cabinet will eventually fall.
Products mentioned in this guide
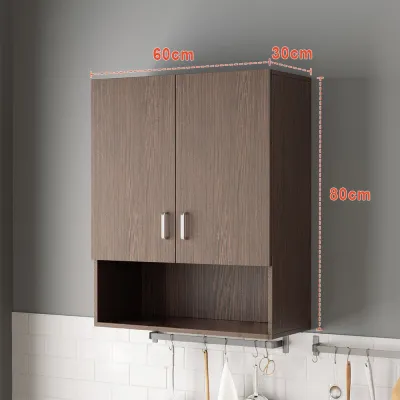
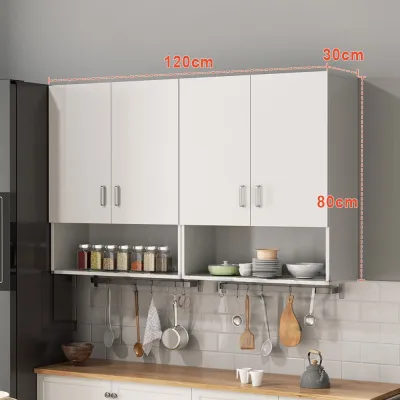
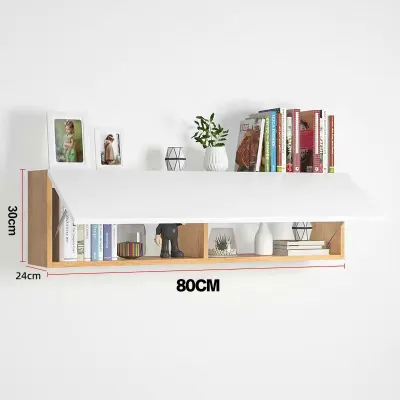
Prices are valid at publication and may change. Please refer to the product page for the latest price.
Wall Surface Evaluation
The ideal surfaces for drill-free adhesives are smooth, non-porous, and structurally sound materials. Glazed ceramic tiles, porcelain tiles, polished glass, and flat metal panels are excellent candidates. These materials do not absorb the adhesive, allowing it to form a continuous, high-strength chemical bond across the entire contact area. Before proceeding, inspect your tiles for hairline cracks, loose grout, or hollow sounds when tapped, as these indicate underlying structural weaknesses that cannot support a heavy load.
Conversely, you must never attempt to mount a floating cabinet using adhesives on painted drywall, plaster, wallpaper, textured natural stone, or crumbling grout. Painted surfaces are highly deceptive; while the adhesive might bond perfectly to the paint, the weight of the cabinet will simply pull the paint layer away from the underlying drywall. Textured stone and uneven tiles prevent full surface contact, which dramatically reduces the adhesive’s effective bonding area and leads to premature failure.
Weight and Dimension Checks
A floating cabinet wall mounted installation is subject to constant gravitational pull and leverage. To ensure safety, you must calculate both the dead load (the weight of the empty cabinet itself) and the live load (the weight of all items you plan to store inside). Always measure the finished dimensions of your cabinet and ensure it fits comfortably within your available wall space without blocking doorways, shower enclosures, or light fixtures.
Most compact, drill-free floating cabinets designed for bathrooms are constructed from lightweight materials like engineered wood, PVC, or aluminum, typically weighing between 2 to 5 kilograms empty. When you fill the cabinet with heavy glass jars, large bottles of shampoo, contact lens solutions, and electrical grooming tools, the total weight can easily double. Always verify that this combined weight falls well within the maximum load capacity specified by both the cabinet manufacturer and the adhesive manufacturer, maintaining a safety margin of at least 100 percent.
Condo and Rental Considerations
In the Philippines, condominium corporations often impose strict penalties for unauthorized alterations and structural damage. While drill-free methods spare you from drilling holes, you must still exercise caution during installation and removal. Some high-strength construction adhesives form an incredibly permanent bond that can chip tile glazes or tear away grout during eventual removal. If you are renting, choosing a highly reversible adhesive system—such as heavy-duty, moisture-resistant acrylic mounting tape designed for clean removal—is crucial to safeguarding your security deposit.
Essential Tools and Adhesives for Humid Bathroom Environments
The tropical climate of the Philippines introduces high relative humidity and significant temperature fluctuations, especially in enclosed condo bathrooms without external windows. Standard adhesives will quickly degrade under these conditions, leading to bond failure. Gathering the correct specialized materials is essential for a secure, long-lasting installation.

Adhesive Selection
To combat constant moisture and condensation, you must select an adhesive specifically formulated for wet environments. Look for heavy-duty, waterproof construction adhesives, such as polyurethane-based formulas or silane-modified polymers (SMP). These adhesives cure via reaction with atmospheric moisture, making them incredibly resilient in humid bathrooms. Alternatively, for lighter cabinets, you can use high-strength, water-resistant acrylic mounting tapes. Avoid standard double-sided foam tapes, generic craft glues, or hot melt adhesives, as they soften when exposed to warm shower steam.
Surface Preparation Supplies
Proper surface preparation is the single most important factor in adhesive performance. Gather the following supplies before you begin:
- Isopropyl Alcohol: Use 70% or 90% rubbing alcohol to strip away oils and soap scum. Avoid using household glass cleaners, as they often leave behind a thin silicone or chemical residue that prevents proper bonding.
- Microfiber Cloths: Ensure they are clean and lint-free to avoid leaving fibers on the bonding surfaces.
- Plastic Scraper: Useful for gently scraping away old silicone, soap residue, or paint flecks from the tiles without scratching the glaze.
Alignment and Temporary Fixing Tools
Because heavy-duty adhesives do not cure instantly, you will need tools to align the cabinet and keep it perfectly still during the initial drying phase:
- Spirit Level: Essential to ensure your cabinet is perfectly horizontal and stable.
- Measuring Tape and Pencil: For precise layout planning.
- Painter's Tape (Masking Tape): Used to mark boundaries on tiles and to temporarily support the cabinet.
- Temporary Support Brackets or Suction Cups: High-load suction cups or a temporary wooden T-brace can support the cabinet's weight from underneath while the glue cures.
Step-by-Step Installation Guide for a Secure, Level Mount
Achieving a professional-grade, secure installation requires patience and meticulous attention to detail. Follow these steps carefully to mount your floating cabinet wall mounted unit.
Step 1: Surface Preparation
Begin by thoroughly cleaning the tile wall where the cabinet will hang. Wash the area with a grease-cutting dish soap and warm water to remove surface grime and body oils. Rinse the tiles with clean water and dry them completely with a clean towel.
Next, pour isopropyl alcohol onto a microfiber cloth and vigorously scrub the tiles. Repeat this process on the back panel of the cabinet where the adhesive will be applied. Allow the alcohol to evaporate fully; the surfaces must be bone-dry, cool to the touch, and completely free of dust, grease, and soap residue before proceeding.
Step 2: Measuring and Marking
Hold the empty cabinet against the wall at your desired height. Place a spirit level on top of the cabinet to ensure it is perfectly level.
While holding it steady, use a pencil to lightly mark the top and side edges on the tiles. Alternatively, apply strips of painter’s tape along the outer borders of the cabinet’s planned position. This creates a highly visible alignment guide and protects the surrounding tiles from accidental adhesive squeeze-out.
Step 3: Applying the Adhesive
Refer to your adhesive manufacturer’s instructions for specific application patterns. As a general rule, apply the adhesive to the back of the cabinet in thick, vertical beads spaced roughly 5 to 10 centimeters apart.
Do not apply the adhesive in horizontal lines or closed circles. Horizontal beads can trap moisture and condensation behind the cabinet, creating a breeding ground for mold and weakening the bond over time. Vertical beads allow air to circulate and moisture to drain downward. Keep the adhesive beads at least 3 centimeters away from the outer edges of the cabinet backplate to prevent messy squeeze-out when pressed against the wall.
Step 4: Positioning and Temporary Securing
Carefully align the cabinet with your pencil marks or painter’s tape guides. Press the cabinet firmly against the tile wall, applying even, heavy pressure across the entire back panel for at least 60 seconds. This action spreads the adhesive beads flat, maximizing the contact surface area.
Since construction adhesives require time to cure, you must support the cabinet’s weight immediately. Secure the cabinet by stretching multiple strips of heavy-duty painter’s tape from the sides and top of the cabinet to the surrounding tiles. For heavier cabinets, position a temporary wooden support brace or a stack of sturdy boxes underneath the cabinet to bear its weight during the curing process.
Step 5: Cleanup
Inspect the edges of the cabinet for any adhesive that may have squeezed out. If you spot any wet adhesive, wipe it away immediately using a damp cloth or a plastic scraper. If using a polyurethane adhesive, you may need a cloth dampened with mineral spirits or the manufacturer’s recommended solvent to clean the residue before it begins to cure and harden. Remove the border painter’s tape while the adhesive is still wet to ensure clean, sharp lines.
Curing Times, Safe Loading, and Damage-Free Removal
Once the cabinet is mounted, the physical installation is complete, but the chemical bonding process has just begun. Rushing this phase is the most common cause of drill-free mounting failures.
Curing Patience
It is vital to understand that “initial grab” or “tackiness” is not the same as structural strength. Most heavy-duty adhesives require a full cure time of 24 to 72 hours, depending on the ambient temperature and humidity levels.
In the tropical climate of the Philippines, high humidity can actually accelerate the cure of moisture-curing polyurethane adhesives, but it can slow down water-based formulas. Always err on the side of caution: keep the temporary support braces and painter’s tape in place, and leave the cabinet completely empty for at least 72 hours. Do not use the shower during the first 24 hours to prevent steam from interfering with the curing adhesive.
Safe Loading Practices
When you finally begin using your floating cabinet wall mounted storage, load it strategically to minimize physical stress on the adhesive bond.
Distribute the weight of your items carefully. Place heavier items, such as large shampoo bottles, mouthwash, or glass jars, on the bottom shelf and as close to the back wall as possible. This positioning keeps the center of gravity close to the wall, minimizing the rotational leverage (torque) pulling outward on the top of the cabinet. Reserve the front edges and upper shelves for lightweight items like cotton swabs, toothbrushes, and paper products.
Damage-Free Removal Strategy
If you eventually need to move out of your condo or redesign your bathroom, you can safely remove the cabinet without shattering your tiles.
Start by completely unloading the cabinet. Use a household hair dryer or a heat gun on a low-medium setting to apply steady heat to the back panel of the cabinet. This heat will soften the adhesive, making it pliable.
Once the adhesive is warm, take a long piece of high-tensile fishing line or dental floss. Slide the line behind the top edge of the cabinet and, using a sawing motion, pull it downward between the cabinet backplate and the tiles to slice through the softened adhesive. Have a helper support the cabinet so it does not fall as the bond is severed.
To clean up the remaining adhesive residue on the tiles, apply a commercial adhesive remover or acetone. Always test the solvent on an inconspicuous area of grout first to ensure it does not cause discoloration. Scrape away the softened residue with a plastic scraper, then wipe the tiles clean with isopropyl alcohol to restore their original, glossy finish.
Frequently Asked Questions (FAQ)
Can I install a floating cabinet on painted drywall without drilling?
No, you should not install a floating cabinet on painted drywall using drill-free adhesives. The adhesive bond of heavy-duty construction glue is significantly stronger than the bond between paint and drywall paper. If you attempt this, the weight of the cabinet will simply tear the paint or paper facing away from the gypsum core, causing the cabinet to fall and leaving severe wall damage. For painted drywall, you must secure the cabinet by drilling into the wall studs or using heavy-duty toggle bolts designed for hollow walls.
How do I know if the adhesive has failed or is slipping?
Adhesive failure rarely happens instantaneously; there are usually clear warning signs. Inspect your cabinet regularly for any visible gaps forming between the cabinet backplate and the tile wall. Other warning signs include a noticeable forward tilt, cracking or popping sounds when you open the cabinet doors, or visible stretching and peeling of any visible adhesive borders. If you observe any of these warning signs, immediately unload all items from the cabinet, support it from underneath, and prepare to remove and reinstall it using fresh adhesive.
Community discussion
Share your experience or ask a question. Comments are reviewed before publication.