
Installing a wall-mounted bag rack is a highly effective way to organize your space, keep your bags off the floor, and display your collection cleanly. To ensure the rack remains securely attached to the wall without causing structural damage, you must identify your wall type, select the correct anchors, and follow a systematic installation process. Whether you are setting up a heavy-duty storage system or a decorative bag stand rack, taking the time to prepare your tools and measure your space properly is the key to a stable, long-lasting setup.
By following professional installation practices, you protect both your home’s walls and your valuable bags from accidental falls. This guide provides a comprehensive, step-by-step walkthrough tailored to standard residential construction materials, ensuring your mounting project is successful, secure, and level.
Assessing Your Wall Type and Choosing the Location for a Bag Stand Rack
Before drilling any holes, you must identify the material of the wall where you plan to mount your bag stand rack. In the Philippines, residential walls are typically constructed from solid concrete, concrete hollow blocks (CHB), or drywall (gypsum board). Each of these materials behaves differently under tension and shear stress, meaning they require specific anchoring systems to hold weight safely.
Products mentioned in this guide
![[On Hand] Shira Bag Rack Stand White/Brown/Wood Bamboo Coat Rack Stand With 8 Hooks Coat Rack Bag Organizer](https://img.lazcdn.com/g/p/88a8b959bd6e4ef3f842b3cce3fb027d.jpg_400x400q80.jpg_.webp)
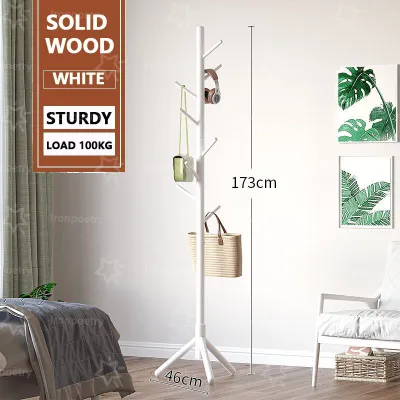
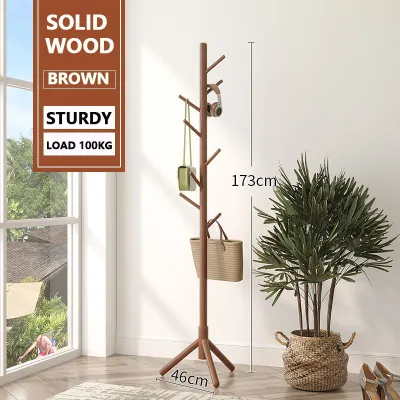
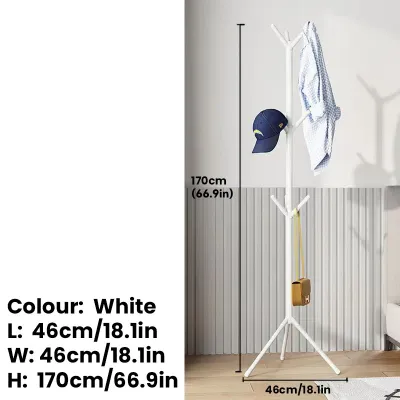
Prices are valid at publication and may change. Please refer to the product page for the latest price.
Solid concrete walls are common in modern condominiums and structural load-bearing walls. They offer the highest load capacity but require a hammer drill and heavy-duty expansion bolts or concrete screws to penetrate. Concrete hollow blocks, which make up the majority of residential exterior and partition walls in local homes, have hollow cores that require sleeve anchors or toggle bolts to grip the block’s inner web securely.
Drywall or gypsum board partitions are lightweight and easy to work with but have very limited load-bearing capacity on their own. If you are mounting a rack on drywall, you must use specialized toggle bolts or self-drilling nylon plasterboard anchors. However, these anchors are only suitable for light decorative items and empty bags.
For safety, heavy-load racks must never be installed directly onto drywall without locating and anchoring directly into the underlying wooden or metal studs. Studs provide the necessary structural framework to support the downward pulling force of multiple heavy bags. You can locate these studs using an electronic stud finder or by gently tapping the wall to listen for a solid, non-hollow sound.
Selecting the right location also requires careful spatial planning. Measure the drop length of your longest shoulder bags, tote bags, and backpacks to ensure they will hang freely without dragging on the floor or hitting baseboards. Additionally, verify that the installed rack and hanging bags will not block door swings, obstruct light switches, or restrict movement in narrow hallways and walkways.
Essential Tools and Materials for a Secure Installation
Having the correct tools on hand before you begin prevents mistakes and keeps the installation moving smoothly. Using makeshift tools can damage your wall, strip your screws, or result in an uneven and unstable rack.

Gather the following essential tools before starting your project:
- Power drill: A variable-speed drill is necessary, preferably with a hammer function if you are drilling into concrete or masonry.
- Appropriate drill bits: Use carbide-tipped masonry bits for concrete and hollow blocks, or standard high-speed steel (HSS) bits for wood studs and drywall.
- Phillips screwdriver: A manual screwdriver allows for precise torque control during the final tightening phase.
- Measuring tape and pencil: Essential for layout accuracy and marking drill points.
- Spirit level: A bubble or digital level ensures your rack sits perfectly horizontal.
Your hardware checklist must include the wall-mounted bag rack itself, any included mounting brackets, and high-quality screws. Do not automatically use the generic plastic plugs packaged with the rack if they do not match your specific wall type; instead, purchase dedicated masonry anchors or toggle bolts separately if needed.
Safety must always be your top priority during home improvement projects. Always wear safety glasses to protect your eyes from flying plaster or concrete chips, and wear a dust mask to avoid inhaling fine masonry dust while drilling into concrete walls.
Step-by-Step Guide to Mounting Your Bag Rack
Once you have verified your wall type and gathered your tools, you can proceed with the physical installation. Take your time during each step to ensure accuracy and structural stability.
Step 1: Measure and Mark
Determine the ideal height for your rack, keeping in mind the clearance needed for your longest bags. Hold the bag rack or its independent mounting bracket against the wall at this height. Place your spirit level on top of the rack and adjust the angle until the bubble sits perfectly centered between the two indicator lines. While holding the rack steady, use a sharp pencil to mark the exact center of each mounting hole onto the wall surface.
Step 2: Drill the Pilot Holes
Select a drill bit that matches the specified outer diameter of your wall anchors. If you are drilling into a concrete wall, set your drill to hammer mode and hold it perfectly perpendicular to the wall. To avoid drilling too deep, wrap a small piece of masking tape around the drill bit at a distance equal to the length of your anchor. Drill steadily into your pencil marks until you reach the tape line, then pull the bit straight out while it is still spinning to clear out loose dust.
Step 3: Insert the Wall Anchors
Clear any remaining dust or debris from inside the pilot holes using a hand pump, vacuum, or dry cloth. Insert your wall anchors into the holes. Gently tap them with a rubber mallet or the flat handle of a screwdriver until they sit completely flush with the wall surface. If an anchor bends or resists insertion, do not force it; remove it, clear the hole of any obstructions, and ensure the hole is drilled to the correct depth and diameter.
Step 4: Align and Attach the Rack
Align the mounting holes of your bag rack with the installed wall anchors. Insert the mounting screws through the rack’s brackets and thread them into the anchors by hand to prevent cross-threading. Use your manual Phillips screwdriver to drive the screws in, turning them clockwise. If you are using a power drill to drive the screws, set the clutch to a low setting to avoid stripping the anchor threads.
Step 5: Final Tightening and Level Check
Before tightening the screws completely, place your spirit level on the rack one final time to confirm it is still perfectly straight. Once verified, tighten all the screws securely until the rack sits flush and tight against the wall surface. Avoid over-tightening, as excessive force can strip plastic anchors inside the wall, crack wooden mounting plates, or warp metal brackets, which severely reduces their load-bearing capacity.
Testing the Installation and Verifying Weight Limits
Never load your bags onto a newly installed rack without first verifying its stability and strength. A thorough physical check prevents unexpected structural failures that could damage your walls or ruin your bags.
Begin with a visual and physical inspection of the completed installation. Check the entire perimeter of the mounting plate to ensure there are no visible gaps between the rack and the wall surface. Grasp the rack firmly near the mounting points and apply gentle downward and outward pressure; there should be absolutely no wobbling, shifting, or flexing of the hardware.
Perform a gradual weight test to safely evaluate the load capacity. Start by hanging a single empty bag or a lightweight accessory on one of the hooks. Gradually add more items over the course of an hour, slowly increasing the total load to simulate real-world use while observing how the wall and anchors react to the weight.
Always check and adhere to the manufacturer’s specified maximum weight limit found on the product label or instruction manual. Never guess the weight capacity based solely on the rack’s size or physical appearance, as internal weld quality and anchor ratings dictate the true limit. Remember to factor in the weight of the bags’ contents, such as laptops, books, and water bottles, when calculating the total load.
Establish clear stop conditions during your testing phase. If you notice the wall cracking, the rack pulling away from the plaster, or the mounting screws loosening, remove all weight immediately. Do not use the rack; instead, uninstall it and consult a professional builder to reassess your wall strength or anchor selection.
Long-Term Maintenance and Safety Checks in Humid Climates
In tropical environments like the Philippines, high humidity, temperature fluctuations, and coastal salt air can gradually affect the structural integrity of your walls and mounting hardware. Regular maintenance is necessary to keep your installation safe over time.
Perform periodic safety checks every three to six months. Daily use, the physical impact of hanging and removing bags, and subtle structural settling can cause mounting screws to back out slightly over time. Use a manual screwdriver to check each screw and gently tighten any that have vibrated loose.
Address local humidity concerns by inspecting all metal components, brackets, and screws for early signs of rust or corrosion. If you spot surface rust, wipe the hardware down with a dry microfiber cloth and ensure the room remains well-ventilated to prevent moisture buildup. Keeping a small dehumidifier or moisture-absorbing sachet nearby can protect both your metal hardware and your leather bags from mold and mildew.
Practice proper load management to prevent uneven stress on your wall anchors. Avoid consistently hanging all your heaviest bags on one side of the rack, as this uneven distribution can cause the anchors on that side to loosen prematurely. Distribute the weight evenly across the entire length of the fixture to ensure long-term stability and balance.
Frequently Asked Questions (FAQ)
Can I install a bag stand rack on a tiled wall?
Yes, but installing a bag stand rack on a tiled wall requires specialized tools to prevent the tiles from cracking. You must use a carbide-tipped glass or tile drill bit to slowly penetrate the hard, glazed surface of the tile without using the hammer function on your drill. Once you have successfully drilled completely through the tile layer, switch to a standard masonry drill bit and engage the hammer setting to drill into the concrete or block wall behind the tile before inserting your anchors.
What should I do if the drill hole becomes too large for the anchor?
If a drill hole becomes too large, do not attempt to force an undersized anchor or use makeshift fillers like wooden toothpicks, as these materials cannot reliably support heavy loads. Instead, purchase a larger anchor and screw combination that fits the new hole diameter snugly. Alternatively, you can fill the oversized hole completely with a high-strength epoxy or heavy-duty wall filler, allow it to cure fully according to the manufacturer’s instructions, and then drill a new pilot hole of the correct size.
Community discussion
Share your experience or ask a question. Comments are reviewed before publication.