
Mounting a wall-mounted bag rack organizer is an excellent way to declutter entryways, bedrooms, and closets, keeping your daily essentials organized and off the floor. Achieving a secure, sag-free installation depends heavily on matching your mounting hardware to the specific wall material of your home. In the Philippines, residential walls vary widely, ranging from solid poured concrete and concrete hollow blocks to lightweight drywall partitions and tiled surfaces. High relative humidity throughout the year can also impact the integrity of certain wall materials and adhesives, making mechanical fasteners the most reliable choice for supporting heavy bags. By understanding the characteristics of your wall and using the correct drilling techniques, you can ensure your organizer remains stable even when loaded with heavy backpacks, purses, and laptop bags.
Pre-Installation Checks and Tool Preparation
Before making any holes in your wall, take the time to verify the physical specifications of your bag rack organizer. Check the manufacturer’s documentation for the finished dimensions, overall weight, and recommended load capacity. Measure your intended wall space carefully to ensure there is sufficient clearance for the rack itself, as well as the bags that will hang from it. Consider the swing of nearby doors, the height of adjacent furniture, and the daily traffic flow through the room to prevent the rack from becoming an obstruction.
Identifying the exact composition of your wall is the next critical step. Tap the wall gently; a dull, solid thud usually indicates concrete or brick, while a hollow sound suggests drywall or plasterboard over wood or metal studs. Use a reliable multi-scanner or stud finder to scan the area for hidden hazards, such as electrical wiring or water pipes, which are often routed through interior walls. This is especially important in modern condominiums and renovated homes where utility lines may run close to the surface.
Products mentioned in this guide
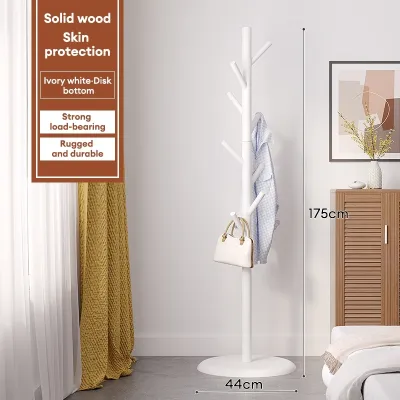
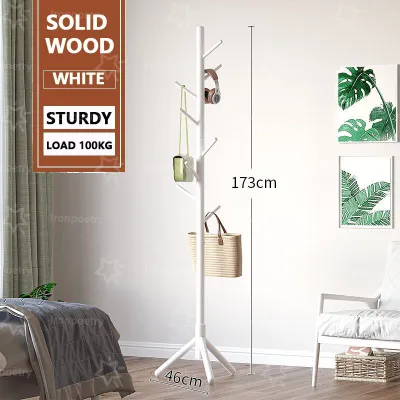
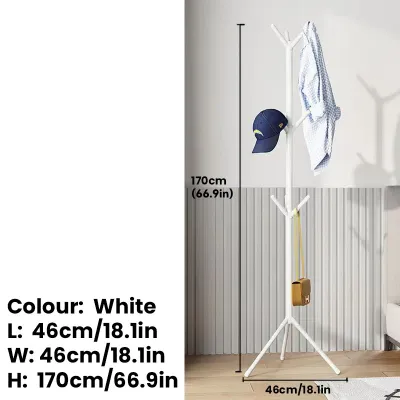
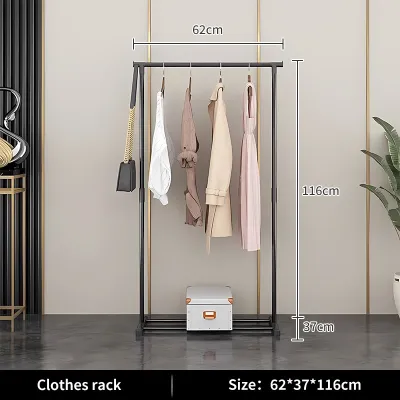
Prices are valid at publication and may change. Please refer to the product page for the latest price.
Gather all the necessary tools and materials before starting the installation process. You will need a power drill—preferably a hammer drill for concrete walls—along with drill bits matched to your wall type, such as masonry bits, wood bits, or specialized tile bits. A bubble level is essential to ensure the rack sits perfectly straight, while a measuring tape, pencil, and safety glasses will keep your work precise and safe. Most importantly, acquire high-quality wall anchors that match both your wall type and the estimated total weight of the rack and your bags.
Always establish a clear stop condition before you begin drilling. If you encounter unexpected resistance that feels like metal, if the drill bit suddenly sinks into a void with no resistance, or if you notice signs of moisture or crumbling plaster, stop immediately. These are indicators of potential structural issues, hidden utility lines, or incompatible wall materials that require the expertise of a professional carpenter or contractor to resolve safely.
Step-by-Step Installation Guide by Wall Type
Skipping wall-specific hardware or relying on generic plastic plugs included in the product packaging is the primary cause of wall organizer failures. Different wall substrates require distinct anchoring mechanisms to distribute weight effectively and prevent the fasteners from pulling out under load. The following step-by-step guides detail the precise methods for securing your bag rack organizer to solid masonry, hollow drywall, and tiled surfaces.

Installing on Concrete or Brick Walls
Solid concrete and concrete hollow blocks are the most common wall materials found in Philippine homes. To mount your bag rack organizer on these sturdy surfaces, begin by positioning the organizer against the wall at your desired height. Place a bubble level on top of the rack to ensure it is perfectly horizontal, then use a pencil to mark the exact center of each mounting hole onto the concrete surface. Double-check your marks against the rack’s mounting brackets before proceeding to drill.
Equip your hammer drill with a masonry drill bit that matches the exact diameter of your concrete wall anchors. Set the drill to its hammer function, which combines rotation with a rapid pulsing action to chip away the tough concrete. Hold the drill completely perpendicular to the wall to prevent the hole from becoming enlarged or angled. Drill to a depth slightly deeper than the length of the anchor, using a piece of masking tape wrapped around the drill bit as a visual depth guide.
Once the holes are drilled, it is crucial to clean out the concrete dust from inside the cavities. Use a hand pump, a vacuum cleaner, or a straw to blow out the loose debris, ensuring you wear safety glasses to protect your eyes. Insert plastic expansion plugs or metal sleeve anchors into the clean holes, tapping them gently with a hammer until they sit completely flush with the concrete surface. If the anchor does not go in smoothly, verify that the hole is deep enough rather than forcing it.
Align the mounting brackets of the bag rack organizer with the installed anchors. Insert the mounting screws through the brackets and thread them into the anchors by hand to prevent cross-threading. Use a screwdriver or a drill on a low-torque setting to tighten the screws gradually. Stop tightening as soon as the screw head is flush against the bracket and the rack feels completely secure; over-tightening can strip the plastic anchor or crack the mounting bracket.
Installing on Drywall or Hollow Walls
Drywall and gypsum board partitions are popular in modern apartments and office spaces due to their clean finish and ease of installation. However, because drywall is relatively soft and brittle, it cannot support heavy loads on its own. Start by using a stud finder to locate the wooden or metal studs behind the drywall panel. Securing your bag rack organizer directly into these structural studs provides the highest level of stability and load-bearing capacity.
If the studs do not align with your desired mounting location, you must use heavy-duty hollow-wall anchors instead of standard screws. Toggle bolts, snap toggles, or self-drilling drywall anchors are excellent choices because they expand or clamp against the back of the drywall sheet, distributing the weight over a larger surface area. Avoid using simple plastic expansion plugs, as they are designed for solid walls and will easily pull out of drywall under the downward pull of heavy bags.
Drill pilot holes through the drywall at your marked locations using a standard wood or metal drill bit sized according to the anchor manufacturer’s instructions. Insert the hollow-wall anchors carefully through the pilot holes, taking care not to tear or damage the paper face of the drywall. If you are using toggle bolts, feed the bolt through the organizer’s mounting bracket first, thread the spring-loaded toggle wings onto the bolt, compress the wings, and push them through the hole until you hear them snap open behind the wall.
Pull back slightly on the organizer to keep tension on the toggle wings while you tighten the bolt with a screwdriver. This prevents the wing from spinning behind the wall. Tighten the fasteners slowly and evenly across all mounting points. If you notice the drywall paper beginning to compress, puckering, or crumbling around the anchor, stop tightening immediately to avoid damaging the wall structure.
Installing on Tiled Walls
Mounting a bag rack organizer on a tiled wall, such as in a bathroom, kitchen, or tiled entryway, requires extra care to prevent cracking or chipping the delicate tile surface. Begin by marking your drilling points on the tile with a pencil. Apply a piece of masking tape or painter’s tape over the marks in an “X” shape; this simple step provides traction, preventing the drill bit from slipping and scratching the surrounding tile glaze when you start drilling.
Use a specialized carbide-tipped tile and glass drill bit, or a diamond-grit hole saw for harder porcelain tiles. Set your power drill to its standard rotary mode—never use the hammer function on tiles, as the rapid impact will instantly crack the ceramic. Place the tip of the bit on your mark, hold the drill steady and perpendicular to the wall, and begin drilling at a low speed with light, consistent pressure. You can drip a small amount of water onto the drilling site to keep the bit cool and prolong its lifespan.
Once the drill bit has successfully penetrated the tile layer and reached the underlying concrete or drywall backing, switch to a standard masonry or wood bit that matches the backing material. Continue drilling to the required depth, keeping the drill perfectly straight to avoid putting lateral pressure on the edges of the tile hole. Remove the masking tape and clean away any tile dust from the hole.
Insert the appropriate wall anchors through the tile and push them deep into the backing material so they expand behind or within the solid wall, not inside the tile itself. In humid tropical environments, apply a small bead of silicone sealant around the mounting bracket edges and inside the screw holes before securing the rack. This prevents moisture from seeping behind the tiles, which can weaken the adhesive bond over time and lead to mold growth. Tighten the screws carefully until the rack is snug against the tile.
Load Testing and Post-Installation Maintenance
Once your bag rack organizer is securely mounted, it is essential to verify its stability before loading it with your valuable belongings. Perform a gradual load test by placing a single lightweight item, such as an empty canvas tote, on one of the hooks. Slowly add heavier items, such as purses, jackets, or backpacks, one by one, up to the weight you plan to hang daily. Watch the mounting points closely during this process, listening for any creaking sounds and checking for visible shifting or wall separation.
After the initial load test, inspect the fasteners to ensure they remain tight and that the organizer is still perfectly level. If you notice any play, wobble, or gaps between the wall and the mounting brackets, remove the weight immediately and check if the anchors have seated properly or if the screws require further tightening. It is always better to address minor installation adjustments early rather than risking a complete mounting failure later.
In tropical climates where high humidity and temperature fluctuations are common, wall materials and metal hardware can degrade over time. Establish a routine to visually inspect the mounting points of your bag rack organizer every few months. Look for signs of rust on the screws, loosening of the anchors, or hairline cracks in the surrounding plaster, drywall, or grout. If you notice any degradation, tighten the hardware or replace worn fasteners to maintain structural integrity.
Always adhere to a strict safety limit: never exceed the lowest weight rating among the organizer itself, the fasteners used, and the wall substrate. For instance, if your heavy-duty anchors are rated to hold 15 kilograms but the organizer’s frame is only rated for 8 kilograms, your maximum safe load is 8 kilograms. Distribute the weight of your bags evenly across the hooks or shelves rather than concentrating all the heavy items on a single side, which can create uneven leverage and strain the wall anchors.
Frequently Asked Questions (FAQ)
Can I install a bag rack organizer without drilling?
Yes, drill-free alternatives such as heavy-duty adhesive hooks, mounting strips, or tension-based organizers can work, but they come with significant limitations. Adhesives require a completely smooth, clean, non-porous surface like sealed wood, glass, metal, or smooth ceramic tile to establish a strong bond. They are not suitable for textured walls, painted drywall, or bare concrete, as the adhesive can easily peel away the paint layer or fail to grip the uneven surface. Additionally, adhesive options have much lower weight capacities and can weaken over time in hot, humid climates, making them unsuitable for heavy leather bags, laptop backpacks, or frequently accessed items.
How do I repair the wall if I need to remove the rack later?
Repairing the wall after removing a bag rack organizer is a straightforward process that helps restore your wall’s original appearance. Start by backing out the mounting screws and carefully removing the organizer. For plastic wall anchors, use needle-nose pliers to gently pull them straight out of the wall, or use a utility knife to carefully slice off the exposed plastic collar so the remaining body sits slightly recessed. Fill the holes with a high-quality spackling compound for drywall, or a cement-based patching filler for concrete walls, pressing the material firmly into the cavity with a putty knife. Once the filler is completely dry, sand the area smooth with fine-grit sandpaper, apply a coat of primer, and paint over the patch to match the surrounding wall color and sheen.
Community discussion
Share your experience or ask a question. Comments are reviewed before publication.