
A wall-mounted bag stand is an exceptionally practical addition to any home, offering a dedicated space to organize handbags, backpacks, and satchels while keeping them off the floor and away from dust. Mounting these fixtures securely prevents damage to both your walls and your valuable bags. In the Philippines, residential construction varies widely, featuring interior walls made of solid concrete, concrete hollow blocks (CHB), drywall partitions, or wooden paneling.
To ensure your bag stand remains firmly attached under the daily weight of straps, buckles, and bag contents, you must tailor your installation method to the specific wall material in your space. This comprehensive guide details how to assess your wall type, select the appropriate tools, execute step-by-step mounting procedures for concrete, drywall, and wood, and maintain your setup over time.
Prepare Your Space and Gather the Right Tools
Before making any permanent modifications to your wall, you must evaluate the structural surface and gather the appropriate equipment. Taking the time to prepare ensures a smooth installation process and prevents costly mistakes or structural damage.
Products mentioned in this guide
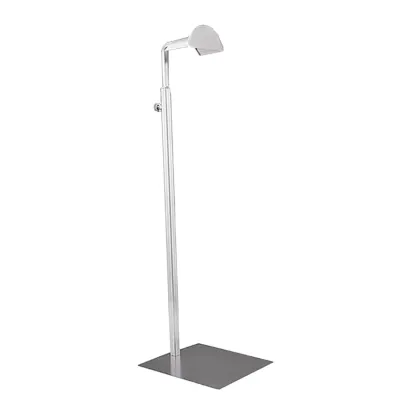
![[In Stock]Stainless Steel Bag Stand Display Silver Adjustable Bag Display Stand Holder](https://img.lazcdn.com/g/p/a3435e98eef5bda18cb25b8c680c8bb1.jpg_400x400q80.jpg_.webp)
Prices are valid at publication and may change. Please refer to the product page for the latest price.
Assess the Wall Type
To determine the correct mounting approach, identify the wall material by tapping on the surface and observing its texture. A solid, heavy thud indicates a poured concrete wall or a plaster-covered concrete hollow block (CHB) wall, which are highly common in Philippine homes. A hollow, echoing sound suggests drywall (gypsum board) mounted over metal or wooden studs, often used in newer condominium partitions or renovated rooms. Wooden walls or plywood panels produce a distinct, warm resonance and are typically found in older homes or custom built-in cabinetry areas.
Check Manufacturer Specifications
Review the manufacturer’s manual or packaging for your bag stand to verify its maximum weight capacity, recommended screw sizes, and specific anchor requirements. Different bag stands are designed to support different loads; a stand meant for light canvas totes will require different support than one holding heavy leather briefcases or school backpacks filled with books. Always prioritize the manufacturer’s instructions. If the provided hardware does not match your wall type, prepare to purchase appropriate third-party fasteners.
Tool Checklist
Having the correct tools on hand makes the installation efficient and safe. Gather the following items before you begin:
- Power drill (with a hammer-drill function for concrete walls)
- Drill bits: Carbide-tipped masonry bits for concrete; wood or brad-point bits for wooden walls; standard twist bits for drywall
- Spirit level to ensure the bag stand is perfectly horizontal
- Tape measure and pencil for precise layout markings
- Safety goggles and a dust mask to protect your eyes and lungs from concrete or drywall dust
- Stud finder if you are installing on a drywall partition
Safety Boundary
Before drilling into any wall, you must verify that the area is free of hidden hazards. Avoid drilling directly above or below light switches, power outlets, or water fixtures, as electrical conduits and plumbing pipes run vertically and horizontally behind these points. If you suspect hidden utilities, cannot determine the wall’s structural integrity, or find that the plaster is crumbling, stop immediately and consult a qualified professional handyman or contractor.
Step-by-Step Installation Guide for Different Walls
Different wall materials possess distinct structural properties and load-bearing capacities. Using the wrong mounting technique can cause the fasteners to pull out, resulting in a fallen bag stand and damaged walls. Follow these tailored procedures to achieve a secure hold on your specific wall type.

Concrete and Solid Masonry Walls
Solid concrete and plaster-finished hollow block walls offer excellent load-bearing capacity when paired with expansion anchors. This installation requires a hammer drill to penetrate the dense material.
- Marking and Drilling: Hold the bag stand or its mounting bracket against the concrete wall at your desired height. Place your spirit level on top of the bracket to ensure it is level, then mark the screw holes clearly with a pencil. Fit your power drill with a carbide-tipped masonry drill bit that matches the outer diameter of your plastic or metal expansion anchors. Set the drill to the hammer function, hold it strictly perpendicular to the wall, and drill to a depth slightly deeper than the length of the anchor. Pull the drill bit back and forth a few times to clear out concrete dust, or use a straw or vacuum to clean the hole completely.
- Inserting Anchors: Push the expansion anchors into the drilled holes. They should fit tightly; if they slide in too easily, the hole may be too large, and you will need to use a slightly larger anchor. Gently tap the anchors with a hammer until they are completely flush with the plaster surface.
- Securing the Mount: Align the mounting bracket of your bag stand over the inserted anchors. Insert the screws through the bracket holes and drive them into the anchors using a manual screwdriver or a power drill on a low-torque setting. Tighten the screws until the bracket is firmly pressed against the wall. Do not over-tighten, as excessive force can strip the plastic threads of the anchor or crack the surrounding plaster.
Drywall and Hollow Block Walls
Drywall partitions and the hollow cavities inside concrete blocks do not have solid backing to grip standard screws. You must use specialized anchors that expand behind the wall surface to distribute weight safely.
- Locating Studs (If Applicable): When mounting on drywall, always try to anchor the bag stand directly into the wooden or metal studs behind the gypsum board. Use a stud finder to locate the edges of the stud, mark the center point, and plan your mounting holes there. Securing the stand to studs provides the highest possible stability.
- Using Hollow-Wall Anchors: If studs are unavailable at your preferred location, or if you are mounting on a hollow section of a concrete block wall, you must use hollow-wall anchors, such as toggle bolts or spring toggles. These fasteners feature wings that fold flat to pass through a drilled hole and then spring open inside the wall cavity, clamping the fixture securely against the drywall or block face.
- Drilling and Securing: Drill a hole through the drywall or hollow block face using the specific drill bit size recommended on the toggle bolt packaging. Thread the toggle wings onto the screw, insert the screw through the bag stand bracket, fold the wings down, and push the assembly through the drilled hole. Once you hear or feel the wings spring open inside the wall, pull back slightly on the bracket to create tension on the wings, then tighten the screw with a screwdriver. Ensure you do not over-tighten, which can crush the gypsum core of the drywall or fracture the thin shell of a hollow block.
Wood Studs and Wooden Panels
Mounting directly into solid wood studs or thick wooden panels is highly secure and does not require plastic wall anchors, as wood fibers naturally grip screw threads tightly.
- Finding the Center: If you are mounting onto drywall with wood studs, use a stud finder to locate the exact center of the stud to prevent the screw from grazing the edge and splitting the wood. If you are mounting onto a solid wood wall or thick plywood paneling, verify that the wood is thick enough (ideally at least 15mm) to support the weight of the bag stand and its intended load.
- Pre-Drilling Pilot Holes: To prevent the wood from splitting as the screw enters, you must pre-drill pilot holes. Select a wood drill bit with a diameter slightly smaller than the inner shank of your wood screws (excluding the outer threads). Drill straight into the marked points on the wood to the depth of the screw length.
- Direct Screwing: Align the bag stand bracket over your pre-drilled pilot holes. Drive high-quality wood screws directly through the bracket and into the wood using a screwdriver or drill. Tighten until the screw head is flush with the bracket and the stand is held firmly against the wooden surface.
Verify Stability and Test the Load Safely
Once the installation is complete, you must verify that the bag stand is safe to use before placing your valuable bags on it. A systematic testing process helps identify any structural weaknesses before they cause a failure.
First, perform a thorough visual and physical inspection. Step back and check if the stand is level. Inspect the mounting plate to ensure there are no gaps between the metal or wood bracket and the wall surface. Run your fingers over the screw heads to confirm they are flush and not protruding or sitting at an angle.
Next, conduct a gradual stress test. Place your hands on the bag stand and apply gentle, downward manual pressure. Slowly increase the force, simulating the weight of a light bag. While applying pressure, watch the mounting points closely. There should be no shifting, flexing, or creaking sounds. If the stand feels solid, proceed to hang a lightweight bag, then gradually replace it with heavier items over a few hours to monitor how the wall responds.
Always respect the manufacturer’s load limits. If your bag stand is rated for a maximum of 12 kilograms, do not exceed this weight. If the stand features multiple hooks or a shelf, distribute your bags evenly across the entire fixture rather than hanging all heavy items on a single hook, which concentrates torque on a single fastener.
Pay close attention to stop conditions during testing. If you notice the bracket pulling away from the wall, see hairline cracks appearing in the plaster or wall paint, hear hollow cracking noises, or observe the screws beginning to turn or loosen, stop immediately. Remove all weight from the stand, carefully uninstall the hardware, and inspect the wall holes. You may need to use larger anchors, relocate the stand to a stronger section of the wall, or consult a professional builder to reinforce the mounting area.
Maintain the Mount and Fix Loose Hardware
Over time, daily use and environmental changes can affect the stability of your wall-mounted bag stand. Implementing a simple maintenance routine ensures the installation remains secure for years.
Periodic Checks
Establish a habit of inspecting your bag stand every three to six months. Gently wiggle the frame to check for any play or looseness. In tropical climates like the Philippines, high relative humidity and seasonal temperature shifts can cause wooden studs, plywood panels, and plaster to expand and contract slightly, which can gradually loosen screws. If you detect any movement, use a manual screwdriver to gently tighten the screws back to a secure fit.
Troubleshooting Loose Anchors
If a screw spins freely or an anchor becomes loose within the wall, the mounting hole has stripped. To resolve this, uninstall the bag stand. If the wall material is still structurally sound, you can replace the loose plug with a larger, heavy-duty anchor that fits the enlarged hole tightly. Alternatively, you can fill the damaged hole with a high-strength wall repair compound or epoxy, allow it to cure completely according to the product’s instructions, and then re-drill a new pilot hole. If the surrounding wall is severely degraded, the safest option is to patch the area and relocate the bag stand to a fresh, undamaged section of the wall.
Rust and Corrosion Prevention
High humidity levels in tropical environments can accelerate the rusting of metal hardware, brackets, and screws, especially if your bag stand is located near entryways, windows, or bathrooms where moisture levels fluctuate. Regularly wipe down the metal components of your bag stand with a clean, dry microfiber cloth to remove dust and condensation. If you notice early signs of rust, gently clean the affected hardware with a mild rust remover, wipe it dry, and consider applying a thin coat of clear protective lacquer or anti-corrosion spray, ensuring the treatment is compatible with the product’s finish.
Frequently Asked Questions (FAQ)
Can I install a bag stand on a tiled wall?
Yes, but drilling through ceramic or porcelain tiles requires specialized tools and extreme care to avoid cracking the glaze. Apply a piece of masking tape over your marked spot to prevent the drill bit from slipping or wandering. Use a specialized carbide-tipped glass or tile drill bit at a slow speed, applying light, steady pressure without using the drill’s hammer function. Once the bit has fully penetrated the tile and reached the concrete or drywall behind it, you can switch to a standard masonry bit and engage the hammer function to complete the hole. Insert the wall anchor deep enough so that it expands in the substrate behind the tile, not within the tile itself.
What if my bag stand did not include wall anchors?
If your bag stand did not come with wall anchors, or if the included anchors are not suitable for your wall type, you can easily purchase third-party fasteners at a local hardware store for a few pesos. Take one of the mounting screws with you to match its diameter and length to the correct anchor size. Ensure the anchors you select are rated to support both the weight of the bag stand and the maximum load capacity of the bags you plan to hang. For concrete walls, standard plastic wall plugs are sufficient, while drywall partitions require toggle bolts or self-drilling hollow-wall anchors to ensure a safe and reliable hold.
Community discussion
Share your experience or ask a question. Comments are reviewed before publication.