
Mounting a display rack on your wall is an excellent way to organize your space, showcase your favorite items, and keep your floors clear. However, a successful installation depends entirely on matching your mounting technique to the specific type of wall in your home. Whether you are working with solid concrete, concrete hollow blocks, drywall, or wood paneling, using the wrong tools or anchors can lead to damaged walls and broken belongings. Understanding how to identify your wall material and select the correct hardware ensures your display rack remains secure and level for years to come.
Identify Your Wall Type and Gather the Right Tools
Before drilling any holes, you must determine exactly what material lies behind your paint or wallpaper. In many homes, especially in the Philippines, walls are made of solid concrete or concrete hollow blocks (CHB). Interior partition walls might consist of drywall (gypsum board) or wood paneling.
To identify your wall type, start with a simple tap test. Knocking on drywall or thin wood paneling produces a hollow, resonant sound, whereas knocking on concrete or CHB feels solid and sounds dull. If you are still unsure, drill a tiny pilot hole in an inconspicuous spot, such as behind a baseboard. White dust indicates drywall, while grey dust indicates masonry.
Products mentioned in this guide
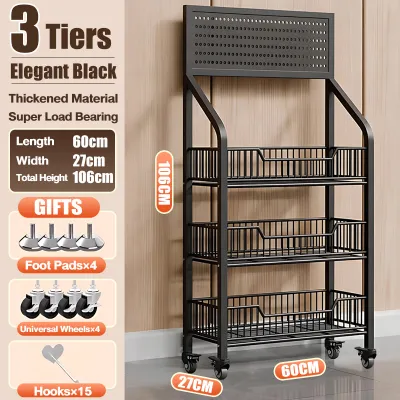
81 Lazada user ratings
Product received. Reasonable price, cheaper than other stores. Neat packaging. The delivery man will notify you of the arrival time.
The goods have been received. Shipping was very fast, product quality is good, price is reasonable, and shipping service is good.
Good quality product, reasonable price, simple assembly, not complicated, right size, good shop, fast shipping.
The quality is good, but I received a item with the rust already....
Fast shipping service, Multi-functional design. Thank you seller
283 Lazada user ratings
🙂Sturdy after assembled! 🙂 Nice quality materials 🙂Very satisfied with the quality, price and the delivery. Even it was very heavy the packa…Read full reviewShow less
🙂Sturdy after assembled! 🙂 Nice quality materials 🙂Very satisfied with the quality, price and the delivery. Even it was very heavy the package was handled well! Perfect for organizing groceries!, High weight capacity for heavy items!, Sleek and modern design!, Adjustable height for customized storage!,
maganda ang design. medyo malapad lang ang na order ko Durability:manipis lang ang shelf material pero steel sya. so better pa rin kesa sa i…Read full reviewShow less
maganda ang design. medyo malapad lang ang na order ko Durability:manipis lang ang shelf material pero steel sya. so better pa rin kesa sa iba na cardboard thin na plywood Storage Capacity:huge. i ordered the biggest size avaikable :-)
Itong isang order ko okay naman complete accessories at sturdy👍👍👍..tamang tama sa tools sa shop ng husband ko..sana yung isang order ko na rac…Read full reviewShow less
Itong isang order ko okay naman complete accessories at sturdy👍👍👍..tamang tama sa tools sa shop ng husband ko..sana yung isang order ko na rack na check muna ni seller bago na-send..di kp tuloy magamit😥😥😥
It's a great great deal👍 Definitely will buy again. Super duper like it😊 Seller is accommodating & answers queries. The product is highly re…Read full reviewShow less
It's a great great deal👍 Definitely will buy again. Super duper like it😊 Seller is accommodating & answers queries. The product is highly recommendable👍👍👍
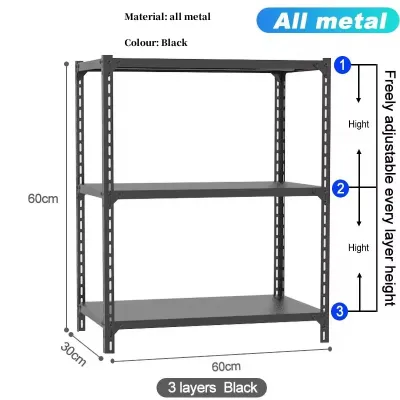
30 Lazada user ratings
Perfect for garage,Modern industrial style,
good product but not the one I expected.
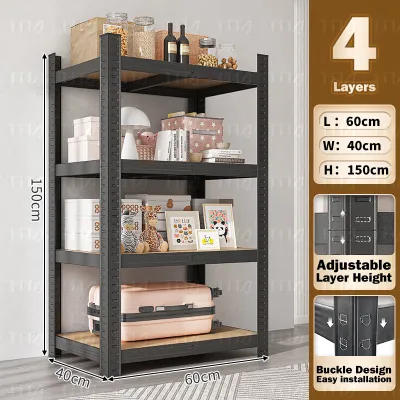
117 Lazada user ratings
Very good quality. Seriously in Germany the quality is even worst then this . Fir that amount of money it’s an good deal fir this kind of sh…Read full reviewShow less
Very good quality. Seriously in Germany the quality is even worst then this . Fir that amount of money it’s an good deal fir this kind of shelf - Thank you for the fast shipping- all arrived in good condition
thanks for this kakainis lng ung rider di man lng nag inform na nasa hagdan lng pala nmn wala man lng calls or message na iniwan nya
Waterproof and durable, Versatile home organizer, Suitable for living rooms, Space-saving multi-layer, Waterproof and durable,
Versatile home organizer, Suitable for living rooms, Space-saving multi-layer, Modern black finish,
Design:i like the product, very easy to assemble
1,981 Lazada user ratings
It says that it's made of stainless steel material and no rust problem - we'll see how it goes. Edges and corners are quite sharp. Easy to a…Read full reviewShow less
It says that it's made of stainless steel material and no rust problem - we'll see how it goes. Edges and corners are quite sharp. Easy to assemble. Sturdy enough for its price, value for money. As always, 5 stars to your delivery person👍
fast shipping and delivery. measurements are according to product description but it is not boltless. you need to put on the screws. good fo…Read full reviewShow less
fast shipping and delivery. measurements are according to product description but it is not boltless. you need to put on the screws. good for its price. medyo manipis pero pwede na. dahil mura naman ito nabili.
Perfect for garage, No rust problem, Heavy duty design, Great value for money, Stainless steel material, Strong and durable,
Strong and durable, Perfect for garage, Easy to assemble, No rust problem, Stainless steel material,
Perfect for garage, Stainless steel material, Spacious storage, Strong and durable, thank you!
Prices are valid at publication and may change. Please refer to the product page for the latest price.
Once you have identified the wall material, gather the necessary tools. You will need a reliable power drill, a spirit level, a tape measure, a pencil, and safety goggles. For drywall installations, a stud finder is essential to locate the wooden or metal framing behind the panels.
Safety should always be your top priority. Before drilling, check the area for hidden hazards like electrical wiring or plumbing pipes. Avoid drilling directly above or below light switches, electrical outlets, or water fixtures, as utility lines typically run vertically or horizontally from these points. A multi-purpose wall scanner can help detect hidden pipes and live wires before your drill bit makes contact.
Select the Correct Anchors and Screws for Your Wall
To prevent your display rack from pulling away from the wall, you must match your mounting hardware to both the wall material and the weight of the items you plan to display. Every anchor type is engineered to grip specific materials under specific load conditions.

For solid concrete and concrete hollow blocks, plastic expansion anchors or heavy-duty masonry sleeve anchors are the standard choice. When you drive a screw into a plastic expansion anchor, the plastic splits and presses tightly against the inner walls of the pre-drilled hole, creating a friction-based grip. For heavier loads on masonry, concrete screws or metal sleeve anchors provide a mechanical lock that can support substantial weight. Always check the packaging for the specific load capacity of the anchors you purchase.
Drywall is relatively soft and brittle, meaning it cannot support heavy loads on its own. If you are mounting a heavy display rack, you must secure the mounting brackets directly into the wall studs using wood screws. When studs are not positioned where you need them, you must use specialized hollow-wall anchors. Toggle bolts, which feature spring-loaded metal wings that expand behind the drywall, are a robust option for hollow sections. Threaded drywall anchors or molly bolts are suitable for lighter decorative items.
Wood paneling offers better holding power than drywall, but thin veneers still require careful hardware selection. For solid wood walls or thick plywood paneling, high-quality wood screws with deep threads are ideal because they bite directly into the wood fibers. Ensure the screws are long enough to penetrate deep into the backing structure without splitting the wood.
Before finalizing your hardware, cross-reference the weight capacity of your chosen anchors with the display rack manufacturer’s specified limits. Remember that the total weight includes both the rack itself and the items you place on it. If your display rack weighs 5 kilograms and you plan to place 10 kilograms of books on it, your mounting hardware must be rated to safely support at least 15 kilograms.
Step-by-Step Installation Process
With your tools gathered and the correct hardware selected, you can begin the physical installation. Start by holding your display rack or its mounting brackets against the wall at your desired height. Use a tape measure to confirm the distance from the floor or adjacent walls is consistent on both sides.
Next, place a spirit level on top of the rack or bracket to ensure it is completely horizontal. Adjust the position until the bubble in the level is centered. Once the rack is level, use a pencil to mark the exact locations of the mounting holes directly onto the wall. Double-check your marks by measuring the distance between them and comparing it to the distance between the holes on the bracket.
When you are ready to drill, hold the power drill completely perpendicular to the wall. Tilting the drill can create an angled or enlarged hole, which prevents the wall anchor from fitting snugly. Apply steady, moderate pressure and let the drill bit do the work. Keep a vacuum cleaner nozzle or a damp cloth nearby to catch falling dust as you drill.
Drilling and Mounting on Masonry and CHB
Drilling into masonry requires specific techniques to avoid damaging the wall structure. If you are working with solid concrete, set your power drill to hammer mode and use a carbide-tipped masonry drill bit. The hammering action chips away the hard concrete while the rotating bit pulls the dust out of the hole. For concrete hollow blocks (CHB), however, switch your drill to standard rotary mode. The hammering action can easily shatter the thin outer shell of a hollow block, leaving you with a large, unusable cavity.
Ensure your drill bit matches the exact diameter specified on your anchor packaging. To control the drilling depth, wrap a piece of painter’s tape around the drill bit at a distance equal to the length of the anchor. Drill into the wall until the tape reaches the surface, then pull the bit straight out while it is still spinning to clear out any remaining concrete dust.
Insert the plastic or metal anchor into the clean hole. It should fit snugly; if it slides in too easily or wobbles, the hole may be too large. Use a hammer to gently tap the anchor until it sits completely flush with the wall surface. Position your display rack bracket over the anchors, insert the screws, and tighten them securely. Avoid over-tightening, as this can strip the plastic threads inside the anchor or crack the masonry around the hole.
Drilling and Mounting on Drywall and Wood Panels
Working with softer materials like drywall and wood panels requires a gentler approach to prevent surface damage. If your stud finder has located a wooden stud behind your drywall, use a standard wood drill bit to drill a small pilot hole directly into the center of the stud. This pilot hole guides the wood screw and prevents the wooden stud from splitting as the screw enters.
If you must mount your rack on a hollow section of drywall using toggle bolts, drill a hole large enough for the folded wings of the bolt to pass through. Thread the toggle wings onto the bolt with the bracket already in place, fold the wings flat, and push them through the hole. You will hear a click as the wings spring open behind the drywall. Pull back slightly on the bracket to create tension on the wings, then tighten the bolt with a screwdriver until the bracket is pulled snug against the wall.
For wood panels, pre-drilling pilot holes is essential to prevent the wood from splintering or cracking. Choose a drill bit that is slightly smaller than the inner shaft of your wood screw. Drill straight into the panel, clear the wood shavings, and drive the wood screws directly through the bracket and into the paneling. Ensure the screw heads sit flush against the bracket to prevent any wobbling.
Weight-Load Safety Checks and Maintenance
Once your display rack is fully mounted, do not immediately load it with your heaviest items. Instead, perform a gradual load test to verify the stability of the installation. Start by placing a few light items on the rack and observing how the brackets and wall respond. Slowly add more weight over the course of a few hours, checking for any signs of movement or flexing.
Regular visual inspections are key to maintaining a safe wall-mounted display. Every few months, take a close look at the mounting points. Check for hairline cracks in the plaster or drywall around the brackets, sagging shelves, or screws that appear to be backing out of the wall. If you notice any dust accumulating directly beneath the brackets, it may indicate that the anchors are shifting or grinding against the wall material.
Knowing when to stop and seek professional help can prevent costly damage or injury. If you encounter a clear stop condition during installation—such as a wall crumbling as you drill, an anchor spinning freely inside its hole, or the display rack shifting under minimal weight—remove the rack immediately. These signs indicate that the wall material is compromised or the hardware is incorrect, and continuing to load the rack will likely result in structural failure.
Frequently Asked Questions (FAQ)
Can I install a heavy display rack on drywall without finding a stud?
Installing a heavy display rack on drywall without securing it to a stud is highly discouraged. Drywall is composed of compressed gypsum plaster wrapped in paper, which lacks the structural integrity to hold significant weight under constant downward tension. While heavy-duty toggle bolts can support moderate loads in hollow drywall, they rely entirely on the strength of the surrounding drywall panel. Over time, constant vibration, bumping, or heavy loading can cause the drywall to crumble, leading to a sudden failure. For any display rack intended to hold heavy books, electronics, or valuable collectibles, at least one side of the bracket should be anchored directly into a wooden or metal stud. Use a reliable stud finder to locate the framing before you begin mounting.
What should I do if the drill hole becomes too large for the anchor?
If a drill hole becomes too large or stripped, do not attempt to force the original anchor to work, as it will not hold under load. For masonry or concrete hollow blocks, the most straightforward solution is to purchase a slightly larger wall anchor and matching screw, then enlarge the hole to fit the new hardware. Alternatively, you can fill the oversized hole with a heavy-duty epoxy or polyester anchoring resin, insert the anchor while the adhesive is wet, and allow it to cure completely before inserting the screw. For wood panels, you can glue a small wooden dowel or wooden toothpicks into the hole with wood glue, let it dry, cut it flush, and drill a new pilot hole. If the damage to drywall is extensive, your most effective option is to patch the ruined hole with joint compound, move the display rack bracket a few centimeters to a fresh section of wall, and drill a new hole.
Community discussion
Share your experience or ask a question. Comments are reviewed before publication.