
Installing a wall-mounted rack with mirror is an excellent way to maximize vertical space while adding functionality to entryways, bedrooms, or bathrooms. Achieving a secure, level, and durable installation requires careful planning, the correct choice of hardware, and precise execution. Whether you are mounting onto solid concrete, hollow block, or drywall, following a systematic installation process ensures your storage unit remains stable and safe for daily use.
Before beginning the installation, always check the applied product’s label and the treated item’s manufacturer instructions. If the instructions conflict, the item is unidentified, or the specific installation use case is not covered by the manual, stop immediately and consult the manufacturer or a qualified professional. Taking these initial precautions prevents damage to your walls and ensures the structural integrity of your furniture.
Pre-Installation Planning and Wall Assessment
Before drilling any holes, you must evaluate the structural capacity of your wall and plan the spatial layout. Begin by measuring the finished dimensions of the rack with mirror and comparing them against your available wall space. If you purchased a large, pre-assembled unit, verify that it can easily pass through your home’s doorways, hallways, or elevator lifts during transport.
Products mentioned in this guide
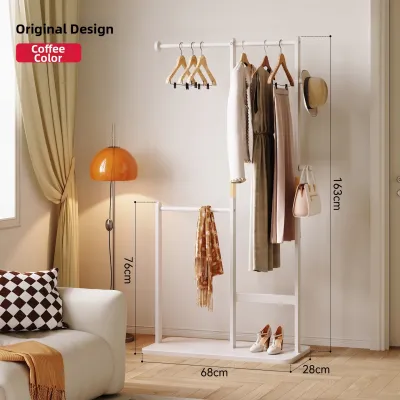
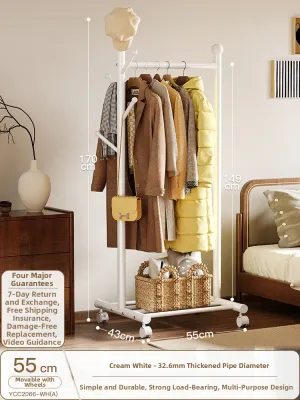

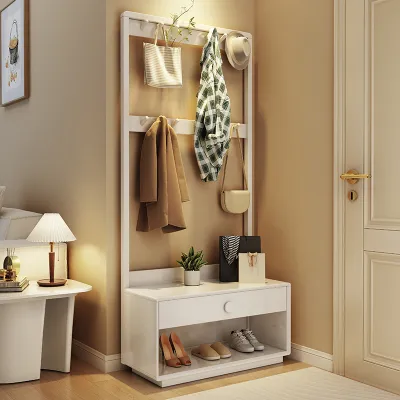


Prices are valid at publication and may change. Please refer to the product page for the latest price.
Calculating the total weight load is a critical safety step. Weigh the rack and the mirror together, then estimate the maximum weight of the items you plan to store on the shelves, such as toiletries, keys, heavy glass perfume bottles, or decorative pieces. Always check the manufacturer’s maximum load rating for both the rack itself and the specific wall anchors you intend to use. Never assume a material’s name guarantees performance; a wood or metal finish does not automatically prove moisture, scratch, or weight durability. Instead, inspect the unit’s joints, backing, and protective finishes to ensure they are suitable for your specific room environment, especially in high-humidity areas like bathrooms.
Identifying your wall type determines the mounting hardware you must use. In the Philippines, residential interior walls are most commonly solid concrete, concrete hollow blocks (CHB) finished with plaster, or drywall (gypsum board) in modern condominium partitions. Tap the wall gently: a dull, solid thud indicates concrete or masonry, while a hollow, resonant sound indicates drywall or hollow blocks.
Establish clear stop conditions before proceeding with a DIY installation. If the wall condition is unknown, shows visible signs of crumbling plaster, or exhibits active moisture damage and soft spots, do not attempt to mount the rack. Furthermore, if the total calculated weight of the mirror and rack exceeds standard DIY anchor limits, halt the project. In any of these scenarios, consult a licensed contractor or a professional handyman to prevent structural failure.
Essential Tools and Hardware Checklist
Having the correct tools and hardware on hand prevents mid-project delays and ensures a secure mount. Using makeshift tools or incorrect fasteners can damage your wall and compromise the stability of the rack.

Gather the following core tools before starting:
- Power drill: A drill with a hammer function is highly recommended for concrete walls, while a standard rotary drill works for drywall.
- Drill bits: Match the bit to your wall type. Use carbide-tipped masonry bits for concrete, or standard twist bits for wood and drywall.
- Spirit level: A level is essential to keep the rack and mirror perfectly horizontal, preventing items from sliding off the shelves.
- Tape measure and pencil: Used for precise spatial layout and marking drill points.
- Screwdriver: A manual screwdriver or a power drill with a screwdriver bit to drive the mounting screws.
Your mounting hardware must match your specific wall type. Solid concrete requires plastic expansion anchors (often referred to locally as wall plugs or “tox” plugs) paired with matching steel screws. Hollow concrete blocks or drywall require heavy-duty toggle bolts or specialized hollow-wall anchors that expand behind the wall surface to distribute weight.
Never mix and match random hardware or reuse old, stripped screws from previous household projects. Reusing worn fasteners significantly increases the risk of thread failure, which can cause the wall-mounted unit to pull away from the wall and fall.
Step-by-Step Installation Process
Marking, Leveling, and Drilling
Precise preparation is the foundation of a straight and secure installation. Begin by determining the ideal height for your rack with mirror. For general comfort, the center of the mirror should sit at eye level, which is typically between 1.5 and 1.6 meters from the floor, though you should adjust this based on the height of the primary users in your household.
Hold the mounting bracket or the entire rack against the wall at your chosen height. Place your spirit level directly on top of the bracket or shelf. Adjust the angle until the liquid bubble sits perfectly between the two center indicator lines. Once level, use a pencil to mark the exact locations of the mounting holes directly onto the wall surface.
Set the rack aside and double-check your pencil marks against the bracket holes to ensure they line up perfectly. Select a drill bit that matches the exact outer diameter of your wall anchors. If you are drilling into concrete, wrap a piece of painter’s tape around the drill bit at a distance equal to the length of the anchor; this serves as a visual depth guide.
Hold the drill perfectly perpendicular to the wall. Apply steady, forward pressure and drill to the marked depth. Once the hole is drilled, clear out all concrete dust and drywall debris using a hand pump, a vacuum cleaner, or a narrow brush. Leaving dust inside the hole prevents the anchor from expanding fully, which can reduce its load-bearing capacity by more than half.
Securing the Bracket and Mounting the Mirror
With the holes prepared, you can now secure the mounting hardware. Take your wall anchors and insert them into the drilled holes. Gently tap them with a hammer or rubber mallet until they sit completely flush with the plaster or drywall surface. If an anchor sticks out, do not force it; remove it, clear the hole of debris, drill slightly deeper, and reinsert.
Position the mounting bracket or rack over the inserted anchors. Insert the screws through the bracket holes and turn them into the anchors. Use a manual screwdriver or a power drill set to a low-torque clutch setting to drive the screws home. Avoid over-tightening the screws, as excessive force can strip the plastic threads inside the anchor or crack the surrounding wall material. Stop turning as soon as the screw head is firmly flush against the bracket.
Once the bracket or rack frame is securely attached to the wall, prepare to mount the mirror. Depending on the design, the mirror may slide into pre-allocated slots, hang from integrated keyhole brackets, or secure directly with specialized mounting clips.
Always have a second person assist you when lifting, positioning, and securing the mirror. Attempting to lift and align a heavy glass mirror alone increases the risk of dropping the item, causing severe personal injury or shattering the glass.
Final Alignment and Load Verification
Before placing any decorative items or toiletries on your newly installed rack, you must verify its alignment and structural stability.
Place your spirit level across the top shelf of the rack and then across the top edge of the mirror. Confirm that both components remain perfectly level after tightening. If the unit is slightly askew, loosen the mounting screws slightly, adjust the bracket within the play of the screw holes, re-level, and retighten.
Perform a physical load verification test. Apply gentle, gradual downward and outward pressure on the rack with your hands. Listen carefully for any creaking, cracking, or grinding sounds, and watch the wall interface for any signs of pulling away, flexing, or wobbling.
If the rack feels loose or moves during this test, do not use it. Check if the screws are fully tightened. If a screw spins freely without tightening, the wall anchor has stripped the hole. In this scenario, you must remove the screw, pull out the failed anchor, and either use a larger heavy-duty anchor or patch the hole and re-drill a new mounting point nearby.
Mounting Techniques for Different Wall Types
Different wall materials possess distinct structural properties, requiring specific techniques and specialized hardware to ensure a safe installation.
Concrete and Solid Masonry
Solid concrete walls offer the highest load-bearing capacity but require the most physical effort to drill. Always use a hammer drill set to its hammer function, paired with a high-quality carbide-tipped masonry drill bit. Drill at a steady, moderate speed to prevent the bit from overheating. Because concrete is unforgiving, ensure your initial measurements are absolutely correct; correcting an off-center hole in concrete is difficult and often requires drilling an entirely new hole nearby. Use heavy-duty plastic expansion plugs or sleeve anchors for maximum hold.
Drywall and Hollow Walls
Drywall and hollow concrete blocks have limited holding strength. For drywall, your priority should always be to locate the wooden or metal studs behind the wall using a stud finder. If you can align your rack’s mounting holes with these studs, drive your mounting screws directly into the wood or metal without plastic anchors; this provides the strongest possible hold. If no studs are available in your desired location, you must use heavy-duty steel toggle bolts. Toggle bolts feature spring-loaded wings that fold flat to pass through the drilled hole and then expand inside the hollow wall cavity, distributing the weight over a larger surface area. Strictly adhere to the lower weight limits of hollow wall fasteners to prevent the drywall from tearing out.
Tiled Surfaces
Mounting a rack with mirror on a tiled wall, such as in a bathroom, requires extreme care to avoid cracking the ceramic or porcelain tiles. Never use a standard masonry bit or the hammer function of your drill directly on the tile. Instead, use a specialized spade-shaped glass and tile drill bit, or a diamond-grit hole saw. Place a piece of masking tape over your marked spot to prevent the drill bit from slipping and scratching the tile. Drill at a low speed with gentle, consistent pressure, and periodically spray a small amount of water on the tile and bit to keep them cool. Once the drill bit has completely penetrated the tile layer and reached the concrete wall behind it, switch to a standard masonry bit and activate the hammer function to complete the hole. Ensure your wall anchor is long enough to pass entirely through the tile and grout layer to grip the solid structure behind it.
Frequently Asked Questions (FAQ)
Can I mount a heavy mirror rack on drywall without a stud?
Standard plastic expansion wall plugs are insufficient for holding heavy mirrors on drywall, as they rely on friction and can easily pull out under vertical load. While heavy-duty toggle bolts or hollow-wall anchors can support moderate weight, mounting a heavy, framed mirror rack solely on drywall without hitting a stud carries a high risk of the drywall tearing or sagging over time due to constant vibration and gravity. If you cannot align the rack with a wall stud, it is highly recommended to choose a lighter, frameless alternative, or consult a professional installer to reinforce the wall backing.
How do I keep the mirror from slipping or vibrating on the rack?
To prevent the mirror from shifting, sliding, or vibrating against the rack frame during daily use, place clear silicone bumpers, non-slip rubber pads, or small strips of double-sided mounting tape between the mirror frame and the rack shelf. These materials absorb vibrations and increase friction, keeping the glass secure. Additionally, inspect your rack to see if the manufacturer has included built-in securing screws, metal clips, or retaining brackets designed to lock the mirror in place. Always utilize these safety features according to the manufacturer’s instructions.
Community discussion
Share your experience or ask a question. Comments are reviewed before publication.