
Maximizing a compact breakfast nook requires utilizing vertical space without encroaching on the limited floor area where chairs slide and people move. A slim shelf organizer serves as an excellent storage solution for coffee mugs, tea selections, and small dining accessories, provided it is installed securely and arranged with balance in mind. By carefully measuring your nook, selecting the appropriate mounting hardware for your wall type, and distributing the weight of your items strategically, you can create an organized, highly functional morning station that feels open and inviting.
Assessing Your Breakfast Nook Space and Shelf Specifications
Before purchasing or assembling any furniture, a thorough spatial assessment of your breakfast nook is essential. Begin by measuring the exact width, height, and depth of the designated area. In compact dining spaces, even a few millimeters of discrepancy can prevent a shelf from fitting or block a chair from pulling out fully.
Remember to account for protruding baseboards, electrical outlets, light switches, and window trim, as these architectural details can significantly reduce the usable footprint. If your nook is located near a doorway, ensure the shelf’s depth will not obstruct the natural swing of the door or create a tight bottleneck.
Products mentioned in this guide
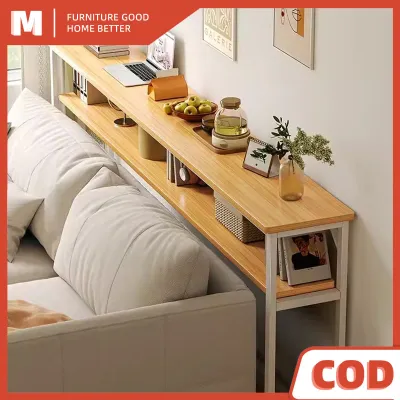
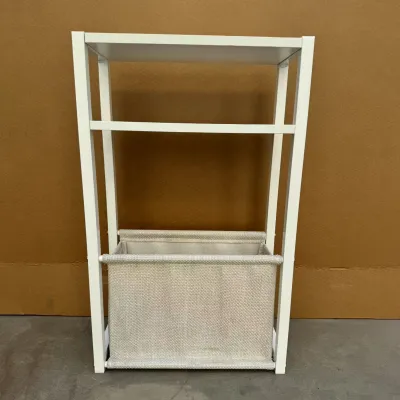
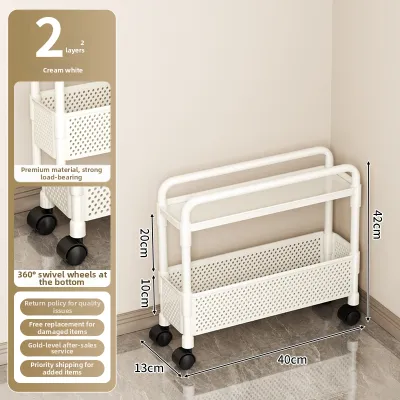
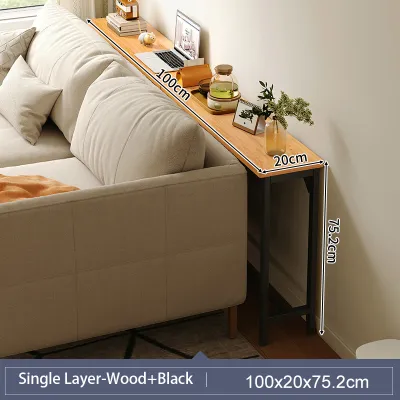
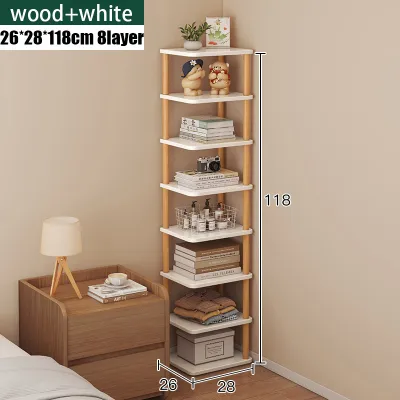
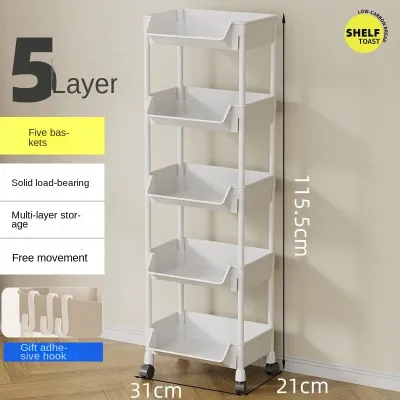
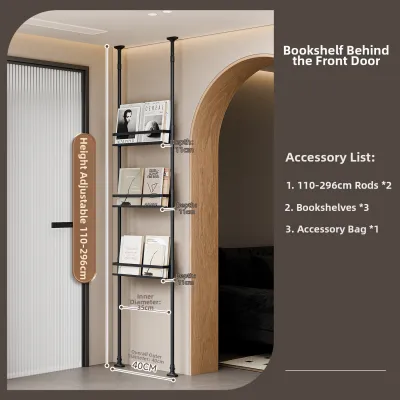
Prices are valid at publication and may change. Please refer to the product page for the latest price.
Once you have these measurements, compare them directly against the fully assembled dimensions of the slim shelf organizer. Do not rely solely on the packaging’s rough estimates; look for the detailed technical specifications provided by the manufacturer. It is also crucial to verify the clearance of your doorways, hallways, and any tight corners leading into the breakfast nook to ensure the packaged unit can be moved into the space.
Finally, determine the composition of the wall where the shelf will stand or hang. In many homes, particularly in tropical urban apartments or condominiums, walls are constructed from solid concrete, hollow blocks, or masonry rather than standard drywall. Identifying whether you are dealing with solid concrete, plaster, or drywall dictates the specific drill bits, wall plugs, or anchors required to secure the unit safely.
Gathering Tools and Preparing the Installation Area
Having the correct tools on hand before you begin ensures a smooth, uninterrupted installation process. Gather a reliable tape measure, a spirit level to guarantee straight alignment, a pencil for marking reference points, and a power drill or manual screwdriver.

If you are mounting the shelf to a concrete or masonry wall, ensure you have a masonry drill bit and compatible wall plugs that match the screw sizes provided by the manufacturer. Having these items ready beforehand prevents mid-project trips to the local hardware store.
Prepare the workspace by clearing the breakfast nook of all existing furniture, chairs, and decorative items. This provides an unobstructed zone to move freely, lay out assembly parts, and operate tools safely. Working in a cluttered space increases the risk of dropping hardware or damaging nearby surfaces.
Before opening any hardware packets, read through the manufacturer’s assembly and installation manual from start to finish. Understanding the sequence of steps prevents common mistakes, such as installing shelves upside down or using the wrong screw length for critical joints.
To visualize the final setup, use painter’s tape or light pencil marks to outline the shelf’s footprint on the floor or its silhouette on the wall. This temporary visual guide allows you to verify that the placement does not interfere with seating comfort, natural light, or daily foot traffic before making any permanent changes.
Step-by-Step Installation of the Slim Shelf Organizer
The installation process varies depending on whether you have chosen a freestanding unit, a floor-to-ceiling tension-mounted system, or a fully wall-attached shelf. Each type requires specific steps to ensure structural integrity and user safety.
Setting Up a Freestanding or Tension-Mounted Shelf
For freestanding or tension-mounted organizers, begin by assembling the main frame on a flat, clean surface, such as a cardboard sheet, to protect your flooring. Follow the manufacturer’s sequence strictly, tightening all bolts and screws by hand first before securing them firmly with a wrench or screwdriver. This prevents the frame from warping during assembly.
Once the frame is upright, place it in its designated spot and use a spirit level to check both the horizontal shelves and the vertical supports. If your unit features adjustable leveling feet, screw them in or out until the bubble on the spirit level rests precisely in the center. This step is vital in older homes or tiled dining areas where floors may have slight slopes or uneven grout lines.
If you are using a tension-mounted shelf that extends from the floor to the ceiling, position the poles carefully. Gradually extend the tension mechanism according to the instructions until the rubber pads grip both surfaces securely. Check the stability by gently shaking the poles at midpoint; they should not slide or shift. Avoid over-tightening, which can damage plaster ceilings or warp the organizer’s vertical poles.
Even freestanding units can benefit from extra stability, especially if they are exceptionally tall and narrow. If the manufacturer includes anti-tip hardware or straps, install them into the wall behind the unit. This precaution is highly recommended in high-traffic breakfast areas where chairs are frequently moved or where accidental bumps are likely to occur.
Mounting a Wall-Attached Slim Shelf
Wall-mounted organizers require precise alignment to look professional and remain secure under load. Begin by holding the mounting brackets or the entire shelf frame against the wall at your desired height. Place a spirit level on top of the frame or bracket, adjust until it is perfectly level, and use a pencil to mark the exact center of each screw hole onto the wall.
Select the appropriate drill bit and wall anchors based on your wall type. For concrete or masonry walls, use a masonry bit to drill holes to the depth specified by the anchor manufacturer. Insert the plastic wall plugs or expansion anchors into the holes, tapping them gently with a hammer until they sit flush with the wall surface. For drywall, use heavy-duty hollow-wall anchors or toggle bolts if you cannot align the brackets with wooden wall studs.
Align the brackets with the installed anchors and drive the screws in securely. Avoid using excessive force with a power drill, which can strip the screw heads or crack plastic anchors. Once the brackets are firmly attached, mount the shelf tiers, baskets, or glass panels according to the assembly instructions.
Before placing any actual kitchenware or decorative items on the shelves, perform a gentle load test. Apply gradual downward pressure with your hands to verify that the brackets do not pull away from the wall and that there is no visible sagging or flexing in the support structure.
Arranging and Styling Items for Maximum Utility and Aesthetics
Once your slim shelf organizer is securely installed, the way you arrange your items determines both its daily usefulness and its visual impact on the breakfast nook. Because space is limited, every item should have a clear purpose and a designated spot.
Position your most frequently used items on the middle shelves, which sit at comfortable elbow-to-eye level. This is the ideal zone for coffee canisters, tea bags, sugar bowls, and daily-use mugs. Placing these items within easy reach streamlines your morning routine, preventing the need to stretch or bend down while preparing your first cup of coffee.
To keep narrow shelves from looking cluttered, utilize small storage accessories. Woven baskets, shallow trays, or clear acrylic bins are excellent for corralling loose items like coffee pods, tea packets, stirrers, and napkins. Grouping these small objects together creates clean visual lines and makes it easier to slide a whole category of items off the shelf when cleaning or refilling.
Reserve the top shelves for lighter, less frequently used items. Placing heavy objects high up raises the unit’s center of gravity, increasing the risk of instability. Instead, use the upper tiers for lightweight decorative pieces, extra paper napkins, or specialty glassware.
To maintain an airy, uncluttered feel in a compact nook, embrace negative space. Avoid packing every shelf to its absolute capacity. Leaving open areas between items allows light to pass through, making the breakfast nook feel larger and more inviting.
Complement the dining aesthetic by adding a small, low-maintenance indoor plant, such as a pothos or a small succulent. These plants thrive in the natural light of a breakfast area and handle indoor humidity well, adding a touch of natural color without taking up valuable table space.
Maintenance and Safety Checks for Long-Term Use
Regular maintenance ensures that your slim shelf organizer remains a safe and attractive feature in your home for years to come. Dust and wipe down the shelves weekly using a soft, damp cloth. Choose cleaning agents that match the specific material of your shelf—such as mild soapy water for sealed wood or non-abrasive cleaners for powder-coated metal—to avoid stripping protective finishes or encouraging rust in humid environments.
Over time, daily use and seasonal changes in humidity can cause hardware to loosen slightly. Make it a habit to inspect the shelf’s structural connections every few months. Use a screwdriver or wrench to gently tighten any loose screws, bolts, or tension adjusters, ensuring you do not over-tighten and strip the threads.
Keep an eye out for early warning signs of structural stress. Inspect the wall around mounting brackets for fine cracks, crumbling plaster, or loose anchors. Check the shelves themselves for any signs of sagging, bowing, or frame warping, which indicate that the weight limit of the unit has been exceeded.
If you observe any structural instability, such as a noticeable wobble, a leaning frame, or brackets pulling away from the wall, take immediate action. Unload all items from the shelf to prevent injury or damage, and do not use the organizer again until you have repaired the mounting hardware or reinforced the installation.
Frequently Asked Questions (FAQ)
Can I install a wall-mounted shelf on drywall without studs?
Yes, you can install a wall-mounted shelf on drywall without studs, but you must use specialized hollow-wall anchors, such as toggle bolts or self-drilling threaded anchors, rather than standard plastic plugs. Drywall alone has limited load-bearing capacity and cannot support the weight of a shelf filled with heavy mugs or jars without proper reinforcement. Always check the manufacturer’s maximum weight limit and distribute the weight evenly across all shelves. If you plan to store heavy items like ceramic dinnerware or small appliances, it is highly recommended to locate at least one wooden wall stud for mounting or opt for a freestanding shelf model instead.
How do I prevent a freestanding slim shelf from tipping over?
To prevent a freestanding slim shelf from tipping, always place the heaviest items, such as ceramic canisters, heavy bowls, or small appliances, on the bottom shelves to lower the unit’s center of gravity. Additionally, secure the top of the shelf to the wall using furniture anti-tip straps, L-brackets, or safety cables anchored into a wall stud or solid masonry. Ensure the shelf is placed on a completely flat, level surface; avoid positioning it on thick, plush rugs or uneven floor tiles that can compromise the stability of the base.
Community discussion
Share your experience or ask a question. Comments are reviewed before publication.