
Mounting an organized storage system for your umbrellas is a practical way to keep your entryway clean, dry, and clutter-free. In tropical regions like the Philippines, where sudden afternoon downpours and heavy monsoon rains are part of daily life, wet umbrellas can quickly become a household hazard if left dripping on the floor. Installing dedicated umbrella clips on a wall display rack provides a secure, elevated storage solution that keeps your essential rain gear within arm’s reach while protecting your living space.
To achieve a secure installation that stands up to daily use, you must carefully evaluate your wall structure, select the correct mounting hardware, and calculate precise spacing between each clip. Properly spaced clips prevent umbrellas from tangling, allow wet fabric to dry efficiently, and ensure that the weight of heavy golf umbrellas does not pull the rack out of the wall. By following a systematic installation process, you can create a functional and visually appealing display that safeguards both your umbrellas and your home’s interior.
Assessing Wall Strength and Gathering the Right Tools
Before driving any screws into your wall, you must determine the composition of the wall surface to select the appropriate anchoring system. In many residential layouts, interior walls are constructed from concrete hollow blocks finished with plaster, while partition walls often consist of drywall or fiber cement boards mounted on light metal or wood studs. Each of these materials responds differently to drilling and load-bearing forces, meaning a standard screw alone will not provide sufficient support for a fully loaded umbrella rack.
Products mentioned in this guide
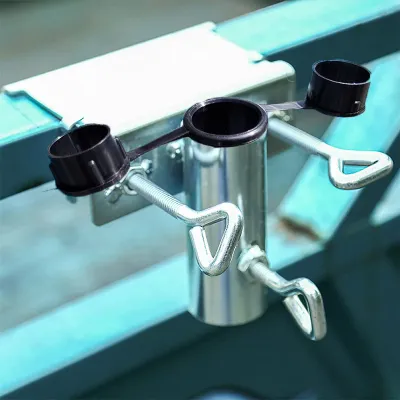
Prices are valid at publication and may change. Please refer to the product page for the latest price.
Using a reliable stud finder or wall scanner is an essential first step to map out the area behind your chosen wall section. This tool helps you locate solid wood or metal studs that offer maximum holding power, while also alerting you to hidden electrical wiring, conduit pipes, or water lines that run through the wall cavity. Drilling into a live wire or a plumbing pipe can cause severe damage and safety hazards, making this pre-installation check a critical step for any home improvement project.
Once you identify the wall material, select anchors and screws designed specifically for that surface and the expected weight of your umbrella collection. For solid concrete or masonry walls, plastic expansion plugs or heavy-duty masonry anchors are necessary to grip the dense material securely. For drywall or fiber cement boards, toggle bolts or self-drilling hollow-wall anchors are preferred because they expand behind the board to distribute the weight across a wider surface area.
Gather all your tools before starting the installation to ensure a smooth and uninterrupted workflow. You will need a power drill with bits that match your anchor sizes, a spirit level to guarantee a straight alignment, a tape measure, a pencil for marking drill points, and a screwdriver. Additionally, wear safety goggles to protect your eyes from falling plaster dust and a dust mask to avoid inhaling fine particles while drilling.
Planning the Layout and Calculating Clip Spacing
A successful umbrella display relies on careful layout planning to ensure that every item fits comfortably without crowding the adjacent clips. Start by gathering all the umbrellas you plan to store, including compact folding models, classic walking umbrellas, and large golf umbrellas. Because umbrellas vary significantly in length, handle shape, and canopy thickness, a uniform spacing plan may not accommodate your entire collection.

Measure the widest point of each folded umbrella, which is typically the curved handle or the thickest part of the wrapped canopy. To prevent the umbrellas from rubbing against one another or tangling when you retrieve them, establish a minimum clearance distance between the clips. A practical rule of thumb is to allow at least 10 to 15 centimeters of space between the center points of adjacent clips for standard umbrellas, and up to 20 centimeters for larger golf models.
If you are organizing a mixed collection, consider an alternating layout that maximizes your available wall space. Placing a short, compact folding umbrella between two long-handled umbrellas prevents the wider canopies from overlapping and allows the handles to sit at different heights. This staggered arrangement not only makes it easier to grab individual umbrellas but also creates a more balanced and visually interesting wall display.
Use a tape measure and a spirit level to project a straight horizontal line across the wall at your desired mounting height. Hold the level steady and draw a light pencil line along its top edge, then mark the exact center points for each clip along this line. Double-check your measurements from both ends of the wall to ensure the display will look centered and aligned with nearby door frames or architectural features.
Step-by-Step Guide to Mounting the Clips Securely
With your layout marked and your tools ready, you can begin the physical installation by drilling the pilot holes for your wall anchors. Fit your power drill with a drill bit that matches the exact diameter specified on your wall anchor packaging. To prevent drilling too deep and causing a blowout on the back of drywall or wasting effort in solid concrete, wrap a piece of painter’s tape around the drill bit to mark the required depth.
Hold the drill perfectly perpendicular to the wall surface and apply steady, even pressure as you drill into each marked point. If you are working on a concrete or plaster wall, use a masonry drill bit and set your drill to the hammer function to penetrate the tough material cleanly. For drywall, use a standard wood or metal bit and drill slowly to avoid tearing the paper backing or cracking the surrounding gypsum core.
Clear any accumulated dust or debris from the drilled holes using a hand pump or a vacuum cleaner attachment to ensure the anchors can seat properly. Insert the wall anchors into the holes, tapping them gently with a rubber mallet or the handle of a screwdriver until they sit completely flush with the wall surface. If an anchor sticks out, do not force it; remove it, clear the hole of any remaining dust, and drill slightly deeper if necessary.
Position the umbrella clips or the main mounting rail over the inserted anchors, aligning the screw holes precisely. Insert the mounting screws through the clips and into the anchors, tightening them slowly with a manual screwdriver or a power drill set to a low-torque clutch setting. Avoid over-tightening the screws, as excessive force can strip the threads inside plastic anchors or crack the plastic mounting flanges of the umbrella clips.
Testing Stability and Preventing Water Damage
Before declaring the project complete, you must verify the structural integrity of your newly installed rack by performing a gradual weight test. Place your heaviest umbrella into its designated clip and observe the mount closely for any signs of sagging, flexing, or pulling away from the wall. Gradually add the remaining umbrellas to the rack, checking that the entire assembly remains rigid and securely anchored under the full load.
Managing moisture is a critical aspect of maintaining a wall-mounted umbrella display, especially during the wet season when umbrellas are frequently soaked. Standing water dripping from wet canopies can quickly seep into baseboards, damage plaster, or cause wooden wall elements to warp and rot. To protect your home, always shake off excess water from your umbrellas outdoors before placing them into the wall clips.
To catch any remaining drips, place a dedicated waterproof drip tray or a raised-edge silicone mat on the floor directly beneath the hanging umbrellas. This simple addition prevents water from pooling on your tiles or wooden floors, making it easy to empty and clean the tray periodically. Additionally, ensure the room has adequate ventilation to allow the damp umbrella fabric to dry quickly, reducing the risk of musty odors and mold growth.
Finally, establish a routine to inspect the mounting hardware every few months to ensure the system remains safe and secure. The repetitive motion of pulling umbrellas out of the clips and pushing them back in can exert dynamic forces that loosen screws over time. If you notice any play or wobbling in the clips, tighten the screws immediately and inspect the wall anchors for signs of wear or pull-out.
Frequently Asked Questions (FAQ)
Can I install umbrella clips on tiled walls without cracking them?
Drilling into ceramic, porcelain, or glass tiles carries a high risk of cracking the surface, which can ruin the appearance of your wall and lead to moisture penetration. If you must mount umbrella clips on a tiled wall, you should use a specialized diamond-tipped or carbide-tipped tile drill bit and keep the bit cool by spraying it with water during the process. Alternatively, for lightweight folding umbrellas, you can use heavy-duty adhesive mounts or suction cups designed for wet environments, though you must respect their strict weight limits and avoid overloading them.
How do I protect the wall from moisture and dripping umbrellas?
To safeguard your wall from water damage, apply a coat of water-resistant paint or a clear polyurethane sealant to the wall area directly behind and below the umbrella rack. This creates an impermeable barrier that prevents moisture from soaking into the plaster or drywall. Additionally, placing a dedicated plastic drip catcher or a waterproof rubber mat on the floor beneath the display will collect runoff, while keeping the area well-ventilated ensures that both the wall and the umbrellas dry rapidly.
Community discussion
Share your experience or ask a question. Comments are reviewed before publication.