
Installing end caps on tubular furniture legs is a straightforward yet essential task for maintaining both your furniture and your flooring. Whether you are assembling new metal chairs, restoring a vintage table, or replacing worn-out protective glides, ensuring a snug and secure fit is key to long-term durability. These small components, often made of plastic, rubber, or metal, serve as the primary barrier between heavy furniture frames and delicate floor surfaces.
When properly installed, end caps prevent the sharp, hollow edges of metal tubing from cutting into carpets, scratching hardwood, or gouging tile. They also seal the interior of the tubes, keeping out dust and moisture that can cause internal corrosion. However, achieving a secure fit requires precise measurement, proper surface preparation, and the right installation techniques. This step-by-step guide will walk you through the entire process, from gathering tools to troubleshooting common challenges, ensuring your furniture remains stable and floor-friendly.
Tools and Materials You Will Need
Before beginning, gathering the correct tools and materials is essential to ensure a smooth, damage-free workflow. Having the right equipment on hand prevents unnecessary delays and protects both the new end caps and the furniture legs from accidental damage.
Products mentioned in this guide
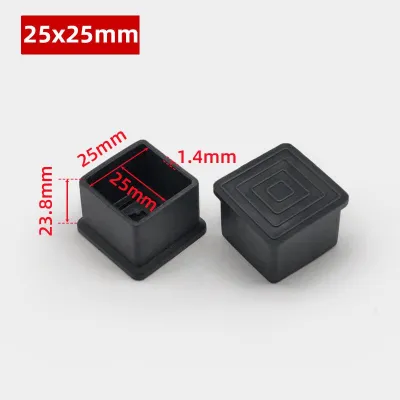
69 Lazada user ratings
Perfect fit for tables, Durable rubber material, Protects floor surfaces, Fast shipping service, Sturdy and reliable, Excellent customer ser…Read full reviewShow less
Perfect fit for tables, Durable rubber material, Protects floor surfaces, Fast shipping service, Sturdy and reliable, Excellent customer service, Non-slip protection, Easy to install,
Fast shipping service, Protects floor surfaces, Secure packaging, Easy to install, Non-slip protection, Perfect fit for tables, Excellent cu…Read full reviewShow less
Fast shipping service, Protects floor surfaces, Secure packaging, Easy to install, Non-slip protection, Perfect fit for tables, Excellent customer service,
Fast shipping service, Durable rubber material, and it fits at the back of the chair. but the front a little bit masikip.
Perfect fit for tables, Easy to install, Fast shipping service, Non-slip protection,
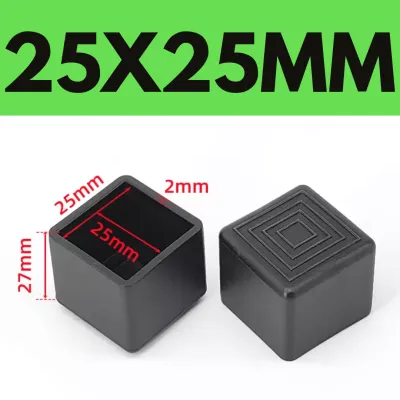
325 Lazada user ratings
Nothing extea ordinary, rubber protection sya para sa paa ng kama, chair or estante, so kung matibay sya tingin ko ay sakto lang, amoy goma …Read full reviewShow less
Nothing extea ordinary, rubber protection sya para sa paa ng kama, chair or estante, so kung matibay sya tingin ko ay sakto lang, amoy goma sya hindi nanan ganun katapang ang amoy basta wag mo ididikit sa ilong i think okay na. Well mura lang naman ito kayani dont expect na hindi masisisra after 6months, sulit buys pa din.
Seller is responsive. Parcel's delivered early as i asked. Super cheap items and in good condition. Although the items are non-breakable, se…Read full reviewShow less
Seller is responsive. Parcel's delivered early as i asked. Super cheap items and in good condition. Although the items are non-breakable, seller still packed it securely with carton. The rubber footings fits. Thank you, seller. 🛠️Durability:excellent 🏅Material Quality:high quality 🔧Ease of Installation:easy
🏅Material Quality:9 🔧Ease of Installation:9 Fast shipping, Easy to install, Protects floor surface, fitted well in my 2x2 tubular steel, rec…Read full reviewShow less
🏅Material Quality:9 🔧Ease of Installation:9 Fast shipping, Easy to install, Protects floor surface, fitted well in my 2x2 tubular steel, recommended tnx seller n rider 🛠️Durability:9
easy to install, durable material, stylish designs and versatile protection for flooring. No more noisy chair
quality ang kapal ng rubber n its salamat PO...papalitan kooang ibang peahen ng upuan na pudpod na
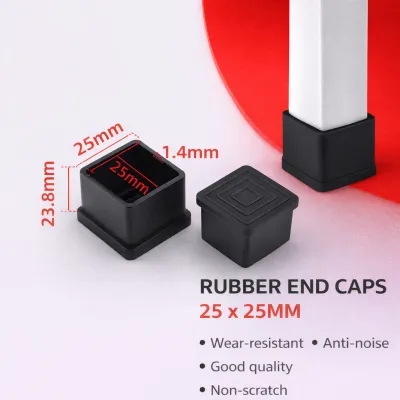
1,786 Lazada user ratings
Perfect fit for square/rectangular legs, Easy to attach to furniture legs, Easy to attach to furniture legs, High-quality rubber footing, Hi…Read full reviewShow less
Perfect fit for square/rectangular legs, Easy to attach to furniture legs, Easy to attach to furniture legs, High-quality rubber footing, High-quality rubber footing, Protects floors from damage, Prevents scratches on floors,
ItemNo more wobbly furniture, delivered well packed and sealed. Opened, inspected and tested on the metal tubing. Perfect fit for square tub…Read full reviewShow less
ItemNo more wobbly furniture, delivered well packed and sealed. Opened, inspected and tested on the metal tubing. Perfect fit for square tubing legs. Thank you Seller and Lazada.
Easy to attach to furniture legs, Anti-slip protection for furniture, mali lang ang size ko. hindi kasya sa legs ng lalagyan sana.
Sturdy rubber material, High-quality rubber footing, Easy to attach to furniture legs, Protects floors from damage,
Nice fits on 25x25 square tubular. Thanks
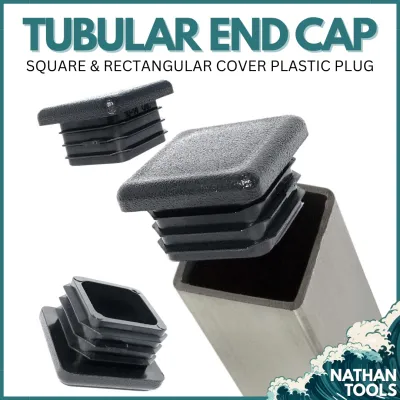
2,280 Lazada user ratings
product received in good condition, well packed and no damage. complete items received. fits perfectly. easy to install and use. good produc…Read full reviewShow less
product received in good condition, well packed and no damage. complete items received. fits perfectly. easy to install and use. good product. perfect to use as plug for tubulars to prevent rust inside of steel tubular or end cap to avoid scratching in the floor.
The product is of good quality. It fit in the 2x2 tubular. I really like the product. Delivery is fast it only take 2 days i already receive…Read full reviewShow less
The product is of good quality. It fit in the 2x2 tubular. I really like the product. Delivery is fast it only take 2 days i already receive the product. The seller is responsive for my query. Thank u seller.
Square and rectangle designs, Fits steel pipes easily, it protects my 2in by 2 inches tubular from water that could possible cause corrosion…Read full reviewShow less
Square and rectangle designs, Fits steel pipes easily, it protects my 2in by 2 inches tubular from water that could possible cause corrosion. Its a good buy
Received the complete quantity ordered. Looks durable, square & rectangular design & fits steel pipes easily. Thanks seller & Lazada!
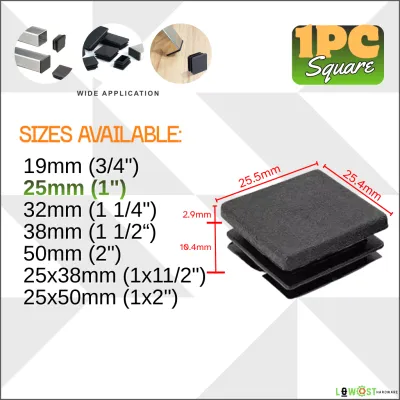
1,131 Lazada user ratings
🛠️Durability:ten/tenIdeal for indoor and outdoor use, 🏅Material Quality:ten/ten 🔧Ease of Installation:nine/tenGreat value for money..........…Read full reviewShow less
🛠️Durability:ten/tenIdeal for indoor and outdoor use, 🏅Material Quality:ten/ten 🔧Ease of Installation:nine/tenGreat value for money...........................
Ideal for indoor and outdoor use, Prevents scratches on the floor, Versatile sizes available, Sturdy and durable design, may gasgas unti
High-quality plastic material, Sturdy and durable design, Affordable and practical solution, Ideal for indoor and outdoor use,
Ideal for indoor and outdoor use, Easy to install, Affordable and practical solution, Great value for money. Thanks!
Nice murang mura dito. Swak sa kanyang presyo. Thanks complete lahat. Recommended this shop.
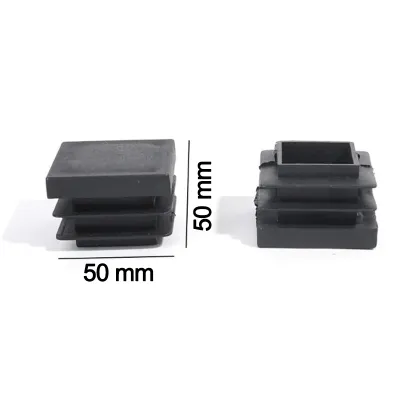
50 Lazada user ratings
🛠️Durability: great value for money 🏅Material Quality: looks sturdy, malapal plastic 🔧Ease of Installation: plug and play great value for mon…Read full reviewShow less
🛠️Durability: great value for money 🏅Material Quality: looks sturdy, malapal plastic 🔧Ease of Installation: plug and play great value for money looks sturdy, malapal plastic plug and play great value for money looks sturdy, malapal plastic plug and play
Sturdy and long-lasting, Easy to install, Protects my floors from scratches, Great value for money, Versatile size options, Durable plastic …Read full reviewShow less
Sturdy and long-lasting, Easy to install, Protects my floors from scratches, Great value for money, Versatile size options, Durable plastic material, Perfect fit for my furniture,
Perfect fit for my furniture, Protects my floors from scratches, Versatile size options, Easy to install, High-quality product,
Great value for money, Provides a clean and finished look, Excellent for DIY projects, Perfect fit for my furniture,
Nice , satisfied... thank you and God bless
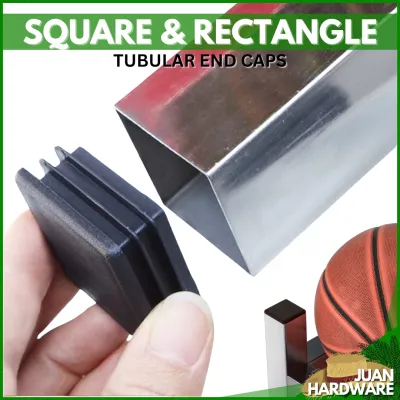
8 Lazada user ratings
Sakto naman sa tubular na 1x1. Plastic pero mukang matibay sana tumagal. Salamat seller at salamat lasada
Easy to install, Neat and clean look,
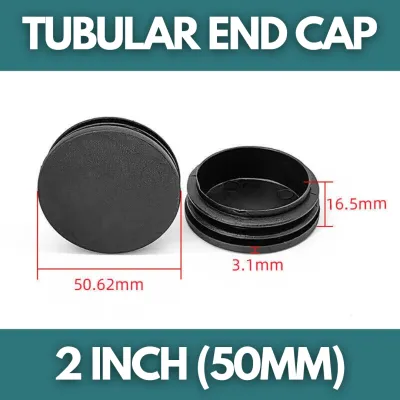
119 Lazada user ratings
Labyu seller saktong sakto mga ni-recommend mong mga sizes ang bilis lang rin dumating salamat sa uuliten ♥️💯🔥🔥
Prices are valid at publication and may change. Please refer to the product page for the latest price.
The most critical tool is a reliable measuring instrument. While a standard measuring tape can work for rough estimates, a pair of vernier calipers is highly recommended for measuring the precise dimensions of tubular legs.
Calipers allow you to measure the exact outer diameter, inner diameter, and wall thickness of the tubing down to the millimeter. This level of accuracy is crucial because even a tiny discrepancy can prevent a cap from fitting properly.
For the physical installation, a high-quality rubber mallet is the preferred tool. A rubber mallet provides the necessary force to seat the caps securely without concentrating the impact in a way that could crack plastic or dent metal.
Avoid using metal household hammers or heavy wooden blocks. These hard surfaces can easily shatter plastic caps, deform metal inserts, or scratch the paint, powder coating, or chrome finish of your furniture legs.
Additionally, keep a clean microfiber cloth and a mild cleaning solution nearby to prepare the surfaces. For smoothing out any rough metal edges, a fine-tooth metal file or a sheet of medium-grit emery paper will be necessary.
To verify that you have the correct end cap size, consult the furniture manufacturer’s specifications if available. If you are sourcing aftermarket caps, use your caliper measurements to match the cap’s design to your tubing’s outer diameter and wall thickness range.
Preparing the Furniture Legs
Proper preparation of the tubular legs is a critical step that directly influences how well the end caps will perform and how long they will stay in place. Skipping this stage often results in caps that slip out, sit crookedly, or fail to insert completely.

Begin by thoroughly cleaning both the inside and outside of the tubular legs where the caps will be installed. Over time, hollow furniture legs can accumulate dust, floor wax, rust, manufacturing oils, or moisture.
These substances create a slippery barrier that compromises the friction fit of the cap, causing it to work its way out during daily use. Wipe the interior walls of the tube with a microfiber cloth dampened with rubbing alcohol or a mild degreaser, and allow the area to dry completely before proceeding.
Once the legs are clean, carefully inspect the cut edges of the tubes. Metal tubing, particularly on budget-friendly or older furniture, often has sharp burrs, metal fragments, or rough plastic flashing left over from the manufacturing process.
These sharp edges can act like blades, slicing through the plastic ribs of your new end caps during insertion and ruining the friction fit. If you detect any rough or sharp edges, use a fine metal file or emery paper to gently smooth them down.
Hold the file at a slight angle and stroke outward, away from the center of the tube, to prevent metal shavings from falling deep inside the leg. Work slowly and check your progress frequently with your finger to ensure the rim is smooth to the touch.
During this inspection, pay close attention to the shape of the tube opening. If the tubular leg is severely deformed, bent, or out of round due to past impacts, stop immediately. Attempting to force a round end cap into an oval or dented tube will damage the cap and fail to provide a stable base; in such cases, seek professional help from a metalworker or furniture repair specialist to restore the tube’s original shape.
Step-by-Step Installation Process
The core of the installation process relies on understanding how friction-fit, pronged, or threaded end caps interact with the hollow structure of tubular legs. These caps are engineered to compress slightly as they enter the tube, creating a tight, mechanical grip against the inner walls that ensures stability and reliable floor protection.
Inserting the End Caps
To begin the physical installation, position the furniture so that the bottom of the leg is easily accessible and stable. Align the end cap carefully with the opening of the tubular leg, ensuring that it is positioned perfectly straight and level with the rim.
If the cap is tilted even slightly when you begin to insert it, the external ribs or prongs will bind against the metal edge, causing the cap to jam, go in crooked, or shear off.
Apply firm, even pressure with the palm of your hand to push the cap as far into the tube as it will go. For some softer rubber or flexible plastic caps, hand pressure may be sufficient to seat them fully.
However, rigid plastic or metal-collared caps will typically require additional mechanical force to overcome the resistance of the internal friction ribs.
If the cap does not seat fully with hand pressure, place a clean microfiber cloth over the top of the cap to protect its finish from scuffs. Take your rubber mallet and tap the cap gently, delivering light, controlled blows directly to the center.
If the cap is relatively large, tap progressively around the outer edges in a circular pattern to ensure it slides down evenly into the tube without tilting.
As you tap, monitor the resistance closely. If the cap stops moving and the sound of the mallet changes to a solid, dull thud, stop immediately. Forcing a stuck cap with excessive force will crack plastic components, bend metal inserts, or split the welded seams of the furniture leg itself. If the cap refuses to go in, pull it out to check for internal obstructions or re-verify your measurements.
Securing and Adjusting the Fit
After inserting the cap, you must verify that it is fully secured and correctly aligned. Perform a visual and tactile check to confirm that the collar or flange of the end cap rests completely flush against the cut edge of the tubular leg, leaving no visible gaps where moisture or dirt could enter.
Run your finger around the joint to ensure there are no raised edges or misalignments that could snag on carpets or damage delicate flooring.
If your furniture utilizes threaded end caps or adjustable leveling glides, the next step is to perform the necessary height adjustments. Thread the adjustable foot into the newly installed insert, turning it clockwise until it is secure.
Place the furniture upright on the flat, level floor surface where it will be used, and adjust each foot individually to eliminate any wobbling.
For certain specialized or heavy-duty furniture applications, the manufacturer may specify the use of additional retaining clips, star washers, or external fasteners to lock the cap in place. When using these components, strictly follow the product’s care and installation instructions.
Avoid over-tightening any secondary fasteners, as excessive tension can strip the threads of plastic inserts or distort the shape of the metal tubing.
Troubleshooting Common Installation Issues
Even with meticulous preparation, you may encounter challenges during the installation process due to variations in manufacturing tolerances or wear on the furniture. Understanding how to identify and resolve these common issues will save time and prevent damage to your materials.
If the end cap is too loose and slides out of the tube with minimal effort, the most common cause is an incorrect measurement or a tube wall that has worn thin over time.
Do not attempt to resolve this by wrapping adhesive tape around the cap’s ribs, as the tape will quickly degrade, shift, and fail under the weight and movement of the furniture. Instead, verify your measurements and consider switching to an expanding insert or a threaded cap designed to accommodate a wider range of wall thicknesses.
Conversely, if the cap is too tight, gets stuck halfway, or begins to deform and shave off plastic during insertion, the cap is likely too large for the tube’s wall thickness.
You can sometimes ease a tight fit on plastic caps by placing them in a refrigerator for fifteen to twenty minutes, which causes the material to contract slightly before installation. Never apply direct heat to the metal tube to expand it, as this can ruin powder-coated, painted, or plated finishes.
If you encounter a situation where the tubular leg itself is cracked, split, or structurally compromised, do not attempt to install the end cap. A damaged leg cannot safely support weight or hold an insert securely.
Stop the installation immediately and consult the furniture manufacturer or a qualified repair professional to determine if the frame can be safely repaired or if the leg must be replaced.
Verifying the Installation and Final Checks
Before returning your furniture to daily service, it is essential to perform a final round of checks to ensure safety, stability, and optimal floor protection. These quick verification steps help confirm that the weight of the furniture is distributed evenly and that the caps will perform reliably under load.
Begin by placing the furniture on its intended flat floor surface and gently rocking it from side to side and front to back. All legs should make equal, firm contact with the floor simultaneously. If you detect any wobble, re-examine the seating depth of the caps or adjust the threaded leveling glides until the piece is perfectly stable.
Synchronizing the height of adjustable feet is particularly important because uneven legs place concentrated stress on specific joints of the furniture frame, which can lead to warping or structural failure over time.
Finally, perform a close visual inspection of each leg base to ensure no cracks have formed in the caps during installation and that no gaps remain. Periodically check the caps over the first few weeks of use to ensure they remain securely seated.
Frequently Asked Questions (FAQ)
Can I use glue to keep loose end caps in place?
Adhesives should only be used if the furniture or cap manufacturer’s instructions explicitly permit them for the specific materials involved. Relying on glue to secure a poorly fitting cap carries several long-term risks.
Permanent adhesives make future replacement extremely difficult when the cap eventually wears down or cracks from daily use. Furthermore, certain strong solvents and glues can chemically react with plastic caps, causing them to become brittle, or damage the painted or powder-coated finish of the metal legs. If a cap is loose, the safest and most reliable solution is to obtain a correctly sized replacement.
How do I remove an end cap that is stuck inside the tube?
To safely remove a jammed, broken, or incorrectly installed end cap, you can use a specialized hook tool or a pair of pliers with protective padding on the jaws to grip the exposed flange.
For threaded inserts that have become stuck deep inside the tube, a screw extractor can be carefully threaded into the center of the cap to pull it free.
You must avoid using excessive force, direct heat, or sharp, unshielded metal tools like screwdrivers to pry the cap out. These aggressive methods can easily scratch the exterior finish of the furniture leg, permanently expand or distort the metal tube, or cause personal injury.
Community discussion
Share your experience or ask a question. Comments are reviewed before publication.