
Creating clean, seamless furniture joints without visible hardware relies on recessing hidden angle brackets directly into the mating surfaces of your wood pieces. By carving out a precise pocket or recess for the bracket body, the hardware remains completely concealed once the pieces are drawn together. This technique transforms standard shelving, custom cabinetry, and modular furniture into sleek, minimalist pieces that look like they are held together by magic. Achieving this professional finish requires careful planning, precise marking, and controlled drilling to ensure the joints remain structurally sound and perfectly flush.
Understanding Hidden Angle Brackets and Joint Requirements
Hidden angle brackets, often referred to as blind corner connectors or recessed joint fasteners, are specialized hardware designed to provide internal structural support. Unlike traditional L-brackets that screw onto the exterior or interior corners of a joint, these brackets sit inside pre-cut mortises or drilled recesses. This makes them ideal for high-end cabinetry, floating shelves, and custom-built wardrobes where exposed metal plates would disrupt the clean lines of the design.
Before starting any installation, you must verify the manufacturer’s specifications for material compatibility and minimum joint depth. Because these brackets require you to remove a portion of the wood to create a recess, the host material must be thick enough to accommodate the hardware without compromising its structural integrity. Attempting to install a deep-recess bracket into a thin panel can result in the drill bit breaking through the opposite side or weakening the board to the point of failure.
Products mentioned in this guide
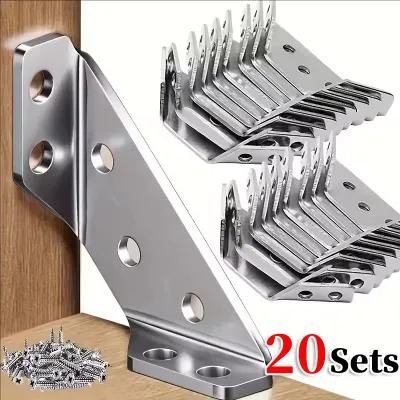
70 Lazada user ratings
Good quality, easy to install. It is good to my do-it- yourself project. I like the appearance.
small, not as what I expected according to your video promo.
🛠️Durability:10 🏅Material Quality:10 🔧Ease of Installation:10
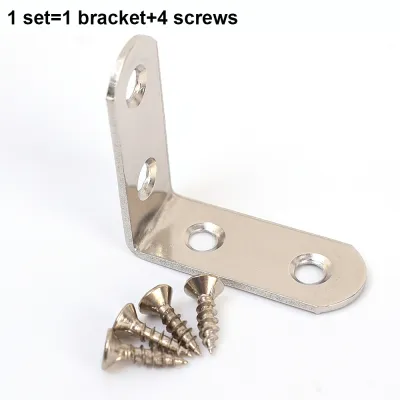
652 Lazada user ratings
🛠️Durability:10/10 🏅Material Quality:10/10 🔧Ease of Installation:10/10 These bracket corner braces support our wobbly chairs. This is much be…Read full reviewShow less
🛠️Durability:10/10 🏅Material Quality:10/10 🔧Ease of Installation:10/10 These bracket corner braces support our wobbly chairs. This is much better than gluing and screwing the joints. Firm and solid outcome of the fixtures. Perfect for furniture and cabinets,
Convenient counterbore design, High-quality stainless steel material, Long-lasting and not easily oxidized, paint it first before you instal…Read full reviewShow less
Convenient counterbore design, High-quality stainless steel material, Long-lasting and not easily oxidized, paint it first before you install it to avoid rusting of metal
🛠️Durability:good 🏅Material Quality:good 🔧Ease of Installation:easy to install. thank you seller, lazada and kuyang rider. rcvd the items and…Read full reviewShow less
🛠️Durability:good 🏅Material Quality:good 🔧Ease of Installation:easy to install. thank you seller, lazada and kuyang rider. rcvd the items and was satisfied.
rcvd items in good shape and complete figures 10 pcs. Re-order again soon. 🏅Material Quality:good
Excellent workmanship, no burrs, No deformation under heavy load, Easy to install with screws,
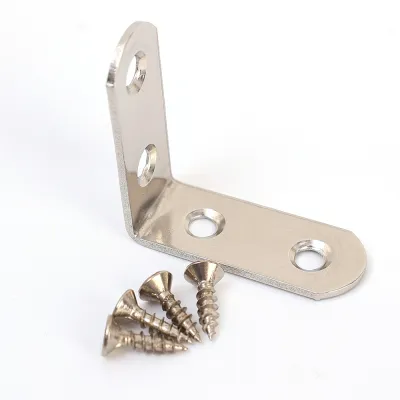
1,808 Lazada user ratings
Perfect for furniture, Versatile corner support, Easy to install, Ease of Use: Convenient, Very easy, User-friendly, Compatibility: Seamless…Read full reviewShow less
Perfect for furniture, Versatile corner support, Easy to install, Ease of Use: Convenient, Very easy, User-friendly, Compatibility: Seamless integration, No compatibility issues, Durability: Reliable material, Strong and tough, Solid construction,
Ease of Use:easy to ise and install using screw which is included in the package Compatibility:compatible to cabinet, chairs and tables
Ease of Use: it is easy to use. Can use to your diy projects Price: affordable price Compatibility: compatible to you light wood works
Easy to install, Perfect for furniture, very useful.just what i need.its good na may kasama na syang screw..
Good for drawers, Includes screws, Perfect for furniture, Flat head style, Versatile corner support,
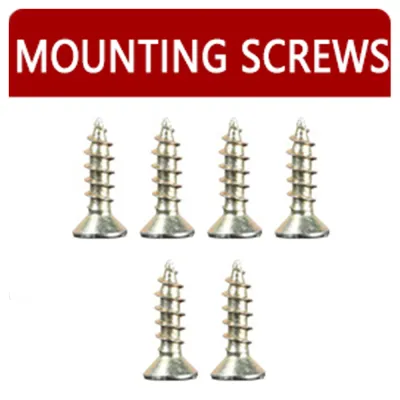
1,359 Lazada user ratings
Durable and long-lasting, Versatile size options available, Versatile size options available, Excellent value for the price, Sturdy and reli…Read full reviewShow less
Durable and long-lasting, Versatile size options available, Versatile size options available, Excellent value for the price, Sturdy and reliable brackets, Perfect for securing furniture, Easy to install and use, Screws included for convenience,
Great for cabinet and door reinforcement, Durable and long-lasting, Provides strong support, Perfect for securing furniture, Versatile size …Read full reviewShow less
Great for cabinet and door reinforcement, Durable and long-lasting, Provides strong support, Perfect for securing furniture, Versatile size options available, Screws included for convenience, Sturdy and reliable brackets,
Easy to install and use, Excellent value for the price, Screws included for convenience, Provides strong support, High-quality stainless ste…Read full reviewShow less
Easy to install and use, Excellent value for the price, Screws included for convenience, Provides strong support, High-quality stainless steel material, Sturdy and reliable brackets, Versatile size options available,
Durability:It's legit Stainless Steel. Makapal sya and up to specs as per description. Quite cheap given the quality. Will definitely order …Read full reviewShow less
Durability:It's legit Stainless Steel. Makapal sya and up to specs as per description. Quite cheap given the quality. Will definitely order from this seller again! Easy to install and use, Durable and long-lasting,
napakaganda at makapal siya napaka dali ilagay maraming salamat seller at sa rider safe din nakarating naka bubble wrapped pa. order ulit ak…Read full reviewShow less
napakaganda at makapal siya napaka dali ilagay maraming salamat seller at sa rider safe din nakarating naka bubble wrapped pa. order ulit ako sa susunod dadamihan ko na hehe
Prices are valid at publication and may change. Please refer to the product page for the latest price.
Assessing the structural integrity of your furniture pieces is a critical first step before making any physical modifications. Consider the type of material you are working with, as solid hardwood, plywood, and medium-density fiberboard (MDF) react differently to being hollowed out. You must ensure that the remaining wood surrounding the bracket recess is robust enough to bear the intended loads and resist the tension created when the joint is tightened.
Tools and Materials Needed for Invisible Connections
Achieving a seamless joint requires a specific set of tools designed for precision and control. A variable-speed power drill is essential, allowing you to adjust the rotation speed based on the density of the wood and the size of the cutting bit. You will also need the appropriate drill bits, which typically include a Forstner bit or a specialized routing bit for carving out the flat-bottomed recess, alongside standard twist bits for pilot holes.

For marking and alignment, a high-quality measuring tape and a sharp pencil are indispensable. A square ruler or a combination square is highly recommended to ensure all lines are drawn at perfect 90-degree angles relative to the edges of the wood. Using a depth stop collar on your drill bit is another crucial safety measure, as it physically prevents you from drilling too deep and ruining your workpiece.
The hardware itself must be selected with care, matching the specific demands of your project. Always use the exact hidden brackets and screws recommended by the bracket manufacturer, as mismatched hardware can lead to loose joints or split wood. Keep safety gear, such as protective eyewear and a dust mask, on hand to shield yourself from flying wood chips and fine airborne dust during the drilling process.
Step-by-Step Installation Guide for Hidden Brackets
Installing hidden brackets is a systematic process that rewards patience and attention to detail. The entire procedure can be broken down into three primary phases: marking the joint, drilling the recess and pilot holes, and assembling the final pieces. To ensure the best results, always work on a clean, flat, and stable work surface, and make it a habit to double-check every measurement before making any irreversible cuts or holes.
Measuring and Marking the Joint
The foundation of a perfect, gap-free joint lies in the accuracy of your initial layout. Begin by consulting the manufacturer’s instructions to determine the exact depth, width, and offset required for the bracket recess. These dimensions dictate where the hardware will sit relative to the mating edges, ensuring that the two pieces of furniture pull together tightly without overlapping or leaving a gap.
Place the two connecting furniture pieces in their final orientation to visualize how they will meet. Use your square ruler to draw a precise centerline across the joint interface on both pieces, ensuring the lines align perfectly when the boards are pressed together. Mark the exact center points where the bracket body will be recessed and where the mounting screws will penetrate the wood.
Double-checking your measurements at this stage is the most effective way to prevent misaligned joints. Measure from multiple reference edges to confirm that the markings on both boards are perfectly mirrored. Even a millimeter of deviation can cause the joint to twist or prevent the two pieces from aligning flush, which is incredibly difficult to correct once the holes are drilled.
Drilling the Recess and Pilot Holes
Once your markings are verified, prepare your power drill by inserting the correct bit size for the bracket recess. Secure the depth stop collar onto the drill bit at the exact depth specified by the bracket manufacturer. If you do not have a commercial depth stop, you can wrap a piece of high-visibility masking tape around the bit to serve as a visual guide, though a physical collar is much safer and more reliable.
Position the tip of the drill bit precisely on your marked center point, holding the drill perfectly perpendicular to the wood surface. Begin drilling at a moderate speed, letting the tool do the work without applying excessive downward pressure. Drill down until the depth stop makes contact with the wood, then pull the bit straight out while it is still spinning to clear away the wood shavings.
After creating the main recess, switch to a smaller twist drill bit to create the pilot holes for the mounting screws. Pilot holes prevent the wood from splitting when the screws are driven in, which is especially important near the edges of engineered boards. If at any point during drilling you notice the material beginning to crack, splinter excessively, or bind the drill bit, halt immediately, clear the debris, and reassess your technique or bit sharpness.
Inserting the Bracket and Securing the Joint
With the recesses and pilot holes prepared, clear away all remaining sawdust and wood chips from the cavities. Gently insert the hidden bracket into the recess to test the fit. The bracket should slide in smoothly and sit completely flush with, or slightly below, the mating surface of the wood. If it protrudes, remove the bracket and carefully scrape away any high spots inside the recess.
Once the bracket is seated correctly, align the second furniture piece with the first, ensuring the pre-drilled pilot holes line up with the bracket’s mounting points. Insert the recommended screws through the bracket and into the pilot holes. Begin tightening the screws manually or with a low-torque clutch setting on your drill to avoid stripping the wood threads.
As the screws tighten, observe how the two pieces of wood draw together. The joint should close smoothly, leaving no visible gaps along the seam. Check that the surfaces are perfectly flush and that the joint feels rigid and stable. Avoid over-tightening the screws, as excessive force can strip the wood fibers inside the pilot holes or crack the surrounding material, compromising the strength of the connection.
Troubleshooting Common Installation Issues
Even with careful planning, you may occasionally encounter issues where the bracket does not sit flush within its recess. This is usually caused by compacted sawdust or tiny wood fibers left behind at the bottom of the hole. Remove the bracket and use a small chisel or a vacuum cleaner to thoroughly clear the cavity, then verify that the depth of the recess matches the manufacturer’s specifications.
If you notice a visible gap between the joined furniture pieces, the culprit is often misaligned pilot holes or a shallow recess. When the pilot holes are slightly off-center, the screws will pull the bracket at an angle, preventing a tight seal. To fix this, you may need to plug the misaligned pilot holes with wood glue and dowels, let them dry, and then re-drill them in the correct position.
In cases where the joint remains loose or the wood begins to split during assembly, stop immediately to prevent permanent damage to your furniture. Re-evaluate the alignment of the hardware and ensure you are using the correct screw sizes. If structural issues persist or if the material seems unable to support the hardware, consult the bracket manufacturer’s troubleshooting guide or seek professional carpentry assistance to reinforce the joint.
Final Inspection and Maintenance Tips
After successfully assembling the joint, perform a thorough visual and physical inspection to verify its stability. Gently wiggle the connected pieces to check for any play or movement; a properly installed hidden bracket should feel completely rigid. Run your fingers across the seam to ensure the transition between the two wood surfaces is smooth and entirely flush.
To maintain the longevity of your furniture, always respect the weight limits specified by the hardware manufacturer. Overloading a shelf or cabinet held together by hidden brackets can put excessive stress on the recessed areas, leading to wood fatigue or sudden joint failure. Keep in mind that the load capacity is determined not just by the metal bracket, but also by the strength of the wood holding it.
Perform periodic inspections of your furniture, especially if it is subjected to frequent movement, vibration, or seasonal changes in humidity. Wood naturally expands and contracts with environmental shifts, which can occasionally loosen screws over time. Gently tightening the mounting screws once or twice a year will ensure that your invisible joints remain secure and seamless for years to come.
Frequently Asked Questions (FAQ)
Can hidden brackets be used on all types of wood and engineered boards?
Compatibility with hidden brackets depends heavily on the thickness, density, and structural characteristics of the specific board you are using. Solid hardwoods and high-quality plywoods are generally excellent candidates because their dense grain structures hold screws securely and resist splitting when recessed.
In contrast, softer woods or low-density engineered boards like standard particleboard can be prone to crumbling or blowing out when hollowed. Always verify the bracket manufacturer’s material recommendations and avoid installing these connectors in materials that are too thin to safely support the depth of the recess.
How much weight can a seamless joint with hidden brackets support?
The weight capacity of a seamless joint varies significantly based on the specific bracket model, the quality of the screws, and the density of the furniture material. A bracket installed in solid oak, for example, will naturally support more weight than the same bracket installed in a soft pine or MDF panel.
Because there is no universal weight rating, you must strictly follow the load limits provided in the hardware manufacturer’s official documentation. Never rely on general estimates, and ensure that your finished furniture design distributes weight evenly across all installed brackets to prevent localized stress points.
Community discussion
Share your experience or ask a question. Comments are reviewed before publication.