
Securely mounting table legs to a wooden tabletop without splitting the wood requires a careful balance of preparation, precise measurement, and proper drilling techniques. The primary method to prevent wood damage is drilling accurate pilot holes that relieve the internal pressure of the screws. By matching your hardware to the thickness of your tabletop and using controlled drilling depths, you can create a stable, wobble-free table. Whether you are assembling a custom dining table, a study desk, or a coffee table, taking a methodical approach ensures the wood remains intact and structurally sound.
Tools and Hardware Required for Table Leg Installation
Before starting your project, gathering the correct tools and fasteners is essential to avoid mid-project delays and improper hardware use. Having the right equipment on hand ensures that each step is executed with precision, minimizing the risk of damaging your tabletop.
The essential tools for this installation include a variable-speed power drill, a set of wood drill bits, a countersink bit, a measuring tape, a carpenter’s square, a pencil or marking awl, and a manual screwdriver. While a power drill is excellent for drilling pilot holes, a manual screwdriver is highly recommended for the final tightening of the screws to prevent over-torqueing and stripping the wood fibers.
Products mentioned in this guide

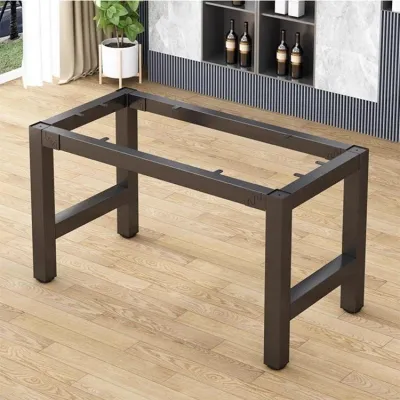

366 Lazada user ratings
Custom cabinet more than a cabinet door, throw away feel a pity, bought a few legs, second change 2 meters long table, stable beautiful and …Read full reviewShow less
Custom cabinet more than a cabinet door, throw away feel a pity, bought a few legs, second change 2 meters long table, stable beautiful and practical
A scrap door panel with legs makes a small table, which can hold several POTS of meat, which is very nice
Fine workmanship, very textured, weight is also heavy, their own installation is very simple
Perfect replacement, non-destructive installation, simple atmosphere, especially good!
There's nothing wrong with the four-legged support, and the wrought iron looks fancy
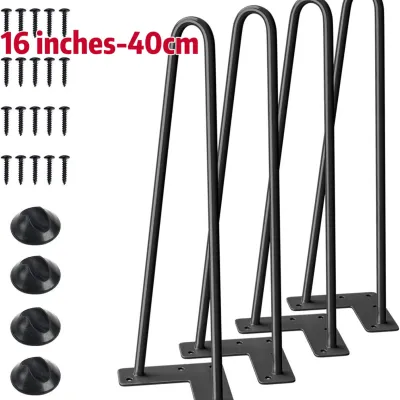
378 Lazada user ratings
Matibay naman ung item kaso mali na naman binigay nila na item 2 pins instead 3pins. Pangalawang order ko na ito mabilis naman shipping pero…Read full reviewShow less
Matibay naman ung item kaso mali na naman binigay nila na item 2 pins instead 3pins. Pangalawang order ko na ito mabilis naman shipping pero kung ano ung inorder un din sana isend. 😄
🏅Material Quality: 10/10 🔧Ease of Installation: 10/10 🛠️Durability: 10/10 Perfect height for my table, Easy to install and perfect design. Im…Read full reviewShow less
🏅Material Quality: 10/10 🔧Ease of Installation: 10/10 🛠️Durability: 10/10 Perfect height for my table, Easy to install and perfect design. Im going torder more for new projects
Easy to install, Sleek and modern design, fast delivery. Thanks!
matibay maganda
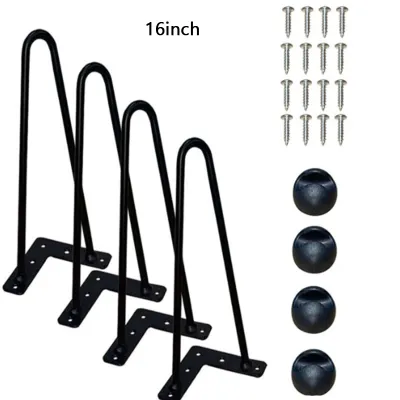
17 Lazada user ratings
The material is very good, simple and beautiful, there is a board at home, and suddenly I thought of installing a leg to make a simple table…Read full reviewShow less
The material is very good, simple and beautiful, there is a board at home, and suddenly I thought of installing a leg to make a simple table, too practical. Put it together in a few minutes with an electric screwdriver, and it's perfectly comfortable
The quality is very good, easy to install, the installation is good, stable and simple, and it is very beautiful to make a small table.
Strong, practical, good quality, fine workmanship. Good seller, I wish a prosperous business, financial resources.
The quality is very good, the stand is very stable, and I made a table myself, which is perfect.
Install it, the size is really good, the style is also beautiful, is the effect I want,
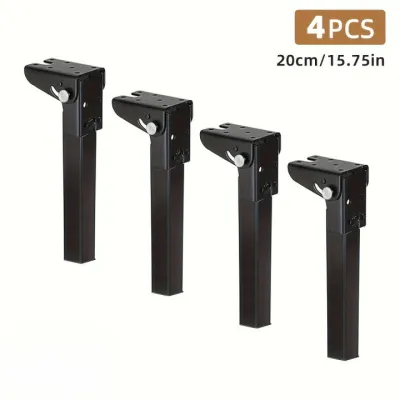
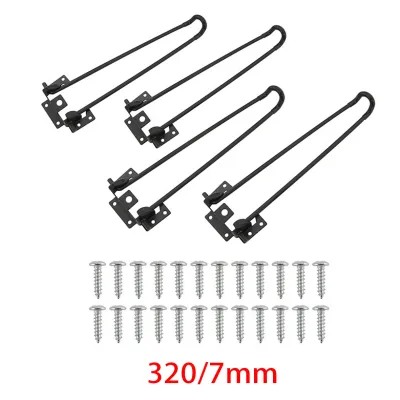
36 Lazada user ratings
Perfect for DIY furniture, No brand, high quality, No brand, high quality, salamat sa rider at seller, mabilis anh shipping
🛠️Durability:10/10 🏅Material Quality:10/10 🔧Ease of Installation:10/104 pieces in one package,Perfect for DIY furniture,
🏅Material Quality:Fits most DIY projects, No brand, high quality,
susubukan pa lamang. madaling ikabit
Sturdy and good
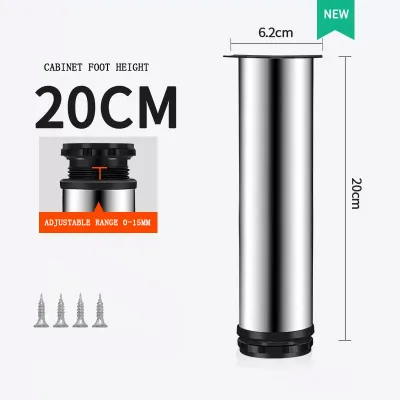
461 Lazada user ratings
Impressive weight-bearing capacity, High-quality stainless steel material, Easy to install and adjust, Versatile for various furniture types…Read full reviewShow less
Impressive weight-bearing capacity, High-quality stainless steel material, Easy to install and adjust, Versatile for various furniture types,
Versatile for various furniture types, Enhances the overall look of my furniture, Impressive weight-bearing capacity, Sturdy and durable
Great addition to my kitchen cabinets, Provides excellent stability, High-quality stainless steel material,
🛠️Durability:10 🏅Material Quality:10 🔧Ease of Installation:10 Ang bilis ng deliver salamat s seller at rider
ok naman sya sakto lang sa taas order ako uli ung sa kamang isas sofa ko gagamitin kasi ito mag diy lang
Prices are valid at publication and may change. Please refer to the product page for the latest price.
When it comes to hardware, you have several options depending on the design of your table legs and the type of wood you are using. Standard wood screws are the most common choice for direct mounting, featuring deep threads designed to grip wood fibers tightly. Mounting plates or brackets are often used to distribute the weight of the table more evenly across the underside of the tabletop. For legs that need to be easily removed for transport, hanger bolts or threaded inserts are a practical choice, allowing you to bolt and unbolt the legs repeatedly without wearing out the wood.
The most critical hardware check is comparing the length of your screws or fasteners against the thickness of your tabletop. To prevent the screws from piercing the visible top surface, measure the tabletop thickness, subtract the thickness of the mounting plate or leg bracket, and ensure your screw length is at least 6 millimeters shorter than the remaining wood thickness. Using screws that are too long will ruin the finished surface, while screws that are too short will not provide enough holding power to support the table’s weight.
Planning Leg Placement and Marking the Wood
Proper leg placement is crucial for both the visual balance and the structural stability of your table. Placing the legs too close to the center can make the table prone to tipping, while placing them too close to the outer edges can interfere with seating comfort and look visually awkward.

Before finalizing your leg positions, verify the finished dimensions of the table, the available space in your room, and your doorway or lift access. Ensuring the fully assembled table can easily pass through entryways is a vital step before anchoring any hardware.
To determine the ideal position, calculate the inset distance from the edges of the tabletop. For most standard rectangular tables, an inset of 3.8 to 7.6 centimeters from both the side and end edges provides an excellent balance of stability and legroom.
Once you have decided on the inset distance, use a carpenter’s square and a measuring tape to ensure symmetrical alignment across all four corners. Place the square against the edges of the tabletop and mark the outer boundaries of the leg mounting plates. Double-check your measurements diagonally from corner to corner; if the diagonal measurements are equal, your layout is accurately square.
With the mounting plates aligned, use a sharp pencil or a marking awl to mark the exact center of each screw hole. An awl is particularly useful because it creates a small physical indentation in the wood, which helps prevent the drill bit from wandering when you begin to drill.
Before you proceed to drilling, thoroughly inspect the underside of the tabletop around your marked points. Look for natural wood characteristics such as knots, grain swirls, or existing finishes. Knots are extremely dense and brittle; drilling or driving screws directly into a knot can easily split the wood. If a marked hole lands directly on a knot, consider shifting the leg placement slightly to avoid it.
Drilling Pilot Holes to Prevent Wood Splitting
Drilling pilot holes is the single most important step in preventing your wooden tabletop from splitting. When you drive a screw into solid wood without a pilot hole, the screw must displace its own volume of wood, forcing the fibers apart and creating immense internal tension that often results in cracking.
To select the correct drill bit size, hold your chosen screw up to the light and place the drill bit directly in front of it. The drill bit should completely cover the solid inner shaft (the core) of the screw, while leaving the outer threads fully visible on both sides. If the drill bit is too narrow, the screw core will still exert too much pressure on the wood; if it is too wide, the threads will not have enough wood to grip, leading to a weak joint.
Controlling the depth of your drilling is critical to avoid accidentally boring through the top of your table. A simple and highly effective technique is to measure the required depth on your drill bit (matching the length of the screw portion entering the wood) and wrap a piece of masking tape tightly around the bit at that mark. As you drill, stop immediately when the edge of the tape flushes with the wood surface.
Always keep the drill perpendicular (at a 90-degree angle) to the tabletop. Tilting the drill can cause the screw to enter at an angle, which may warp the mounting plate or cause the screw tip to come dangerously close to the finished surface. Drill with steady, moderate pressure, and pull the bit out once or twice during the process to clear wood dust from the hole.
If using flat-head screws, a quick pass with a countersink bit will allow the screw heads to sit flush with the mounting plate. The countersink bit creates a beveled opening at the top of the hole, allowing the screw head to sit flat and preventing any raised metal edges from scratching or interfering with the leg attachment.
Attaching the Table Legs and Mounting Hardware
With your pilot holes drilled and cleared of debris, you are ready to secure the mounting hardware and attach the legs. This stage requires patience and a gentle hand to ensure the fasteners grip the wood securely without stripping the newly drilled holes.
Begin by aligning the mounting plates or brackets precisely over the pre-drilled pilot holes. Insert the screws by hand for the first few turns to ensure they are threading straight. Using a manual screwdriver, drive the screws steadily into the wood. If you prefer to use a power drill, set the clutch to a very low torque setting to prevent the drill from over-driving the screws.
As the screw head nears the mounting plate, slow down your pace. The final tightening should always be done with a manual screwdriver. This allows you to feel the resistance of the wood and stop turning the moment the screw head is snug against the bracket. Over-tightening can easily strip the wood fibers, destroying the thread grip and leaving you with a loose, unstable connection.
If you are building a heavy dining table or using dense hardwoods, installing threaded inserts is highly recommended. Threaded inserts are metal sleeves with external wood threads and internal machine threads. You drill a slightly larger pilot hole, drive the insert flush into the wood using an hex key, and then secure the table legs using machine screws. This creates an incredibly strong joint that can be disassembled and reassembled countless times without any risk of wearing out the wood.
Always pay close attention to the physical feedback of the wood during installation. If you hear a sharp creaking sound, feel the screw suddenly bind and resist turning, or notice tiny hairline fractures spreading from the hole, stop immediately. Back the screw out slightly and inspect the hole to ensure it is deep enough and free of compacted sawdust.
Verifying Stability and Final Adjustments
Once all the legs are securely attached, the final phase is to flip the table and verify its stability. This step ensures that your hard work translates into a safe, functional piece of furniture.
Flipping a newly assembled table should always be done with the assistance of another person. Do not attempt to pivot the table on two of its legs, as this lateral force can exert immense leverage on the mounting joints, potentially bending the brackets or tearing the screws out of the wood. Lift the table completely off the ground, rotate it, and set it down gently on all four legs simultaneously.
Place the table on a flat, level surface and check for any wobble. If the table rocks slightly, determine whether the issue is an uneven floor or a minor variation in leg length. Many modern table legs come with adjustable leveling glides on the bottom; simply turn these glides to extend or retract them until the table sits stable.
Inspect the top surface of the tabletop directly above the mounting points. Look closely for any signs of “telegraphing,” which appears as slight bumps, raised wood grain, or micro-cracks. If you notice any raised areas, it indicates that a screw was slightly too long or driven too deep, pushing the wood fibers upward. In such cases, back the screw out slightly to relieve the pressure before permanent damage occurs.
Wood is a natural, dynamic material that expands and contracts with changes in humidity and temperature. After the table has been in use for a few weeks, it is a good practice to flip it over once more and check the tightness of the screws. Gently re-tighten any connections that have settled or loosened slightly over time to maintain long-term structural integrity.
Frequently Asked Questions (FAQ)
Can I install table legs directly without mounting plates?
Directly screwing table legs into a tabletop is only recommended if the legs have a wide, integrated mounting flange and the tabletop is made of thick, solid wood. For thin tabletops, plywood, or manufactured woods like MDF, direct screwing is highly discouraged. These materials lack the internal structural strength to resist lateral forces, making the screws prone to pulling out. Utilizing mounting plates or heavy-duty brackets distributes the weight and lateral stress across a larger surface area, preventing damage and ensuring the table remains stable over years of daily use.
How do I fix a stripped screw hole in the tabletop?
If a screw hole strips during installation, you can easily repair it using classic woodworking techniques. For minor stripping, coat a few wooden toothpicks or a small wooden dowel in high-quality wood glue, insert them tightly into the stripped hole, and let the glue dry completely. Once cured, cut the excess wood flush with the tabletop surface and drill a new pilot hole directly into the repaired area. If the damage is extensive, you may need to shift the mounting plate slightly to drill into fresh wood, or install a brass threaded insert to provide a stronger, more permanent metal-to-metal connection. For severe structural damage that compromises the tabletop’s integrity, consulting a professional carpenter is recommended.
Community discussion
Share your experience or ask a question. Comments are reviewed before publication.