
Finding the perfect cabinet under the lababo requires balancing your kitchen’s physical layout with the chaotic network of pipes, valves, and drains hidden beneath your sink. To choose a cabinet that fits seamlessly, you must measure the exact width, depth, and height of your under-sink cavity, map out every plumbing obstacle, and select a door style that matches your floor space. Getting these dimensions right ensures a clean, built-in look while keeping your essential plumbing accessible for future maintenance.
Whether you are renovating a traditional Filipino kitchen with a custom concrete countertop slab or installing modular wooden cabinetry, a systematic approach prevents costly installation errors. Taking the time to assess your space before purchasing saves you from the frustration of a cabinet that blocks your shut-off valves or leaves ugly gaps along your walls.
Assessing Your Under-Sink Space and Plumbing Constraints
Before pulling out your measuring tape, you must identify the physical limitations of your sink setup and the plumbing fixtures beneath it. The style of your kitchen sink directly dictates how much vertical space remains for storage. A drop-in sink rests its rim on top of the counter, whereas an undermount sink is clamped beneath it, sitting several centimeters lower. This lower profile cuts into your usable vertical clearance, meaning a deep undermount basin will significantly restrict the height of items you can store or the height of the cabinet frame itself.
Products mentioned in this guide
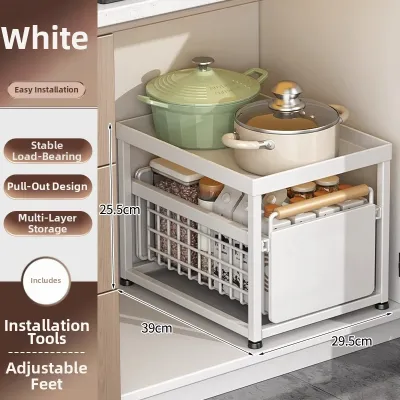
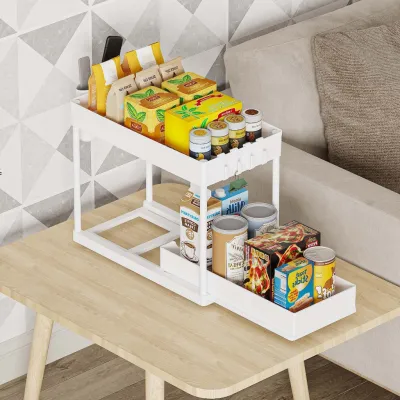
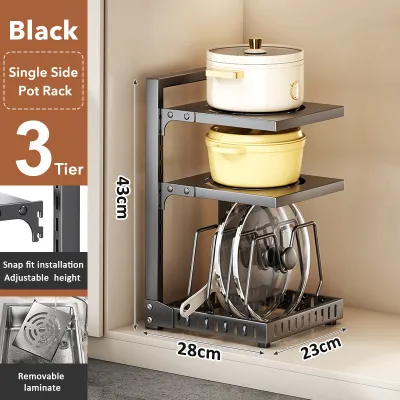
Prices are valid at publication and may change. Please refer to the product page for the latest price.
Next, locate and examine the primary plumbing fixtures under the lababo, including the P-trap, water supply lines, shut-off angle valves, and any waste disposal units. These elements are rarely flush against the wall and often protrude directly into the center of the space. You must determine if your pipes are rigid PVC or flexible metal hoses. If your plumbing layout is highly complex or off-center, you may need to consult a licensed plumber to see if the pipes can be safely rerouted before you purchase a standard, pre-built cabinet.
Structural elements behind and around your sink also play a major role in your installation options. Check the back wall for load-bearing studs, concrete columns, or backer boards that cannot be cut or drilled into. In many Philippine homes, sinks are built into cast-in-place concrete counters finished with tiles. If you are retrofitting a cabinet under a concrete slab, the cabinet will function as an insert, meaning its outer dimensions must be slightly smaller than the rough concrete opening to slide in smoothly.
Step-by-Step Guide to Measuring for an Under-Sink Cabinet
To ensure your new cabinet fits perfectly, you must gather precise measurements of the rough opening. Always record your measurements in a single unit, such as millimeters or inches, and double-check each number to avoid errors. When measuring, use a high-quality steel tape measure and keep it perfectly straight.

Measuring the Width
- Top Width: Measure the horizontal distance from the left edge to the right edge of the opening at the very top, just under the countertop.
- Middle Width: Measure the same horizontal distance across the center of the opening.
- Bottom Width: Measure the horizontal distance along the floor.
- Why this matters: Walls and concrete supports are rarely perfectly plumb. Use the smallest of these three measurements when choosing your cabinet width to ensure the unit does not get stuck during installation.
Measuring the Depth
- Countertop Edge: Measure from the back wall to the front edge of the countertop or concrete slab.
- Subtract Clearances: Subtract the thickness of any backsplash tiles at the rear and allow at least 20 to 30 millimeters of clearance at the front so the cabinet doors do not overhang past the countertop edge.
- Hinge and Drawer Clearance: Ensure there is enough depth for door hinges to operate without striking nearby walls or adjacent cabinet frames.
Measuring the Height
- Floor to Countertop: Measure from the finished kitchen floor to the underside of the countertop slab or sink rim.
- Toe Kick Alignment: Note the height of the existing toe kick area on adjacent cabinets, which is typically around 100 millimeters. Aligning your new cabinet's toe kick ensures a cohesive, professional look across your kitchen run.
- Floor Levelness: Take height measurements at both the left and right corners of the opening, as kitchen floors often slope slightly toward floor drains.
Measuring Plumbing Clearances
- Vertical Clearance: Measure from the floor to the lowest point of the P-trap or drain pipe.
- Horizontal Clearance: Measure from the side walls to the outermost water valves.
- Depth Clearance: Measure from the back wall to the front face of the thickest pipe to ensure the cabinet back panel can be modified or positioned without crimping supply lines.
Choosing the Right Cabinet Dimensions and Door Configuration
Once you have your rough opening measurements, compare them against standard cabinet sizes. Standard modular kitchen cabinets typically come in width increments of 100 millimeters, with common sizes for under-sink units being 600, 800, or 900 millimeters. If your measured opening is slightly wider than a standard cabinet size, you can bridge the gap using matching filler strips. These wooden or PVC strips are cut to size and installed between the cabinet and the wall, creating a seamless, custom-built appearance.
Your kitchen’s layout and available floor space will determine which door configuration is most practical. The right door style maximizes access to your storage while keeping your walkways clear.
Standard Hinged Doors
Standard hinged doors are the most common choice for kitchen cabinets, offering full access to the interior when opened. However, they require significant clearance directly in front of the cabinet to swing open.
- Walkway Requirements: Best suited for spacious kitchens or L-shaped layouts where the open doors will not block foot traffic.
- Hardware Check: Look for soft-close, rust-resistant hinges, which are essential in humid tropical environments.
Sliding or Bypass Doors
Sliding or bypass doors slide horizontally along a track, keeping the footprint of the cabinet entirely contained within its frame.
- Space Savings: Excellent for narrow galley kitchens or tight spaces where a swinging door would strike an island or appliance.
- Access Trade-off: These doors only allow you to access half of the cabinet interior at any given time, making it slightly harder to reach plumbing fixtures in an emergency.
Bi-fold or Pocket Doors
Bi-fold doors fold in half as they slide open, while pocket doors slide back into dedicated recesses on the sides of the cabinet.
- Maximum Access: They provide wide, unobstructed access to the deep interior of your cabinet without occupying valuable walkway space.
- Hardware and Cost: These configurations require specialized, high-precision hardware and careful installation to prevent the doors from sticking or jumping off their tracks.
When planning the cabinet interior, keep in mind that the central P-trap and drain pipe will prevent you from using standard, full-width shelves. Instead, look for adjustable side shelving units or specialized U-shaped pull-out drawers designed to curve around plumbing. Finally, match the cabinet’s exterior finish, color, and hardware with your existing kitchen units to maintain visual harmony.
Common Sizing Mistakes to Avoid When Buying a Cabinet Under the Lababo
Measuring for a cabinet under the lababo is more complex than measuring for a standard pantry or wall cabinet. Avoiding these common pitfalls will save you time, money, and installation headaches:
- Ignoring Countertop Overhangs: Many homeowners measure the depth of the cabinet carcass but forget to account for the countertop overhang. If your cabinet sits flush with the countertop edge, water drips from the sink can run down the front of the doors, causing wood rot or finish damage over time.
- Neglecting Door Swing Obstructions: Always map out the swing radius of hinged doors. Ensure they will not hit your refrigerator, oven handle, or trash bin when opened, and that they leave enough room for you to stand comfortably in front of the sink.
- Assuming Standard Heights Fit: Never assume a standard 800-millimeter-high cabinet will fit under your counter without measuring. Custom-built concrete counters in older homes are often lower than modern modular standards, which can leave you with a cabinet that is too tall to slide in.
- Blocking Plumbing Access Panels: Many local building codes require clear access to cleanouts and shut-off valves. Buying a solid-backed cabinet without planning for these access points can force you to cut messy, structural holes in your new furniture during installation.
- Forgetting the Delivery Path: A cabinet that fits perfectly under your sink is useless if you cannot get it into your home. Measure the narrowest points of your hallways, doorways, stairwells, and elevator doors to ensure the fully assembled cabinet or flat-pack box can safely reach your kitchen.
Final Installation Clearances and Pre-Purchase Checklist
Before finalizing your purchase, run through a physical checklist to ensure your cabinet will be both functional and durable. First, verify that the cabinet’s internal dimensions leave at least 50 millimeters of clearance around your P-trap and supply lines. This breathing room is crucial for future plumbing repairs, leak inspections, and general airflow.
Because the area under the lababo is highly prone to humidity and minor leaks, pay close attention to your material choices. If you choose wood-based cabinets, ensure they are made from highly water-resistant materials like marine-grade plywood or high-density PVC board, and check that all edges are properly sealed. For added protection, install a water-resistant silicone liner or drip tray at the bottom of the cabinet to catch slow drips before they damage the base board.
Additionally, confirm that the cabinet features adjustable leveling feet. Kitchen floors, especially those with floor drains, are rarely perfectly flat. Adjustable feet allow you to level the cabinet carcass, ensuring your doors align perfectly and do not swing open on their own. Finally, review the manufacturer’s installation instructions. If your chosen cabinet requires anchoring to a back wall or modifying your existing plumbing, secure the services of a qualified professional before delivery day to ensure a smooth, worry-free setup.
Frequently Asked Questions (FAQ)
Can I install a standard cabinet if my plumbing pipes are exposed?
Yes, you can install a standard cabinet with exposed plumbing, but you will need to modify the unit. Most standard cabinets feature a thin back panel that can be easily cut using a jigsaw to create custom openings for your pipes. Alternatively, you can choose a cabinet with an open-back design or removable service panels specifically engineered to slide around existing plumbing fixtures.
Do I need a special cabinet if I have a garbage disposal unit?
While you do not need a completely different cabinet style, a garbage disposal unit requires careful spatial planning. These units are heavy and bulky, hanging directly below the sink drain and taking up significant vertical and lateral space. You must select a cabinet with a completely open interior—meaning no center dividers or low shelves—and ensure the door opening is wide enough to allow you to safely access, clean, or service the disposal unit.
Community discussion
Share your experience or ask a question. Comments are reviewed before publication.