
Selecting the perfect hanging shoe organizer requires more than just counting your shoes and picking a model online. To ensure a seamless fit, you must evaluate the physical boundaries of your room, the structural capacity of your door or wall, and the unique shapes of your footwear collection. A mismatched organizer can prevent doors from closing, scratch expensive woodwork, or sag under the weight of your shoes.
By taking systematic measurements of your vertical and horizontal space, you can confidently choose a hanging shoes organizer wall or door system that maximizes storage without disrupting your room’s flow. This guide details every step of the measurement process, helping you avoid common sizing errors while protecting your home’s surfaces.
Measure Your Available Wall or Door Space
To establish the maximum footprint for your organizer, you must first calculate the total available vertical and horizontal space on your target wall or closet door. Begin by gathering a steel measuring tape, a pencil, and a notepad to record your findings.
Products mentioned in this guide
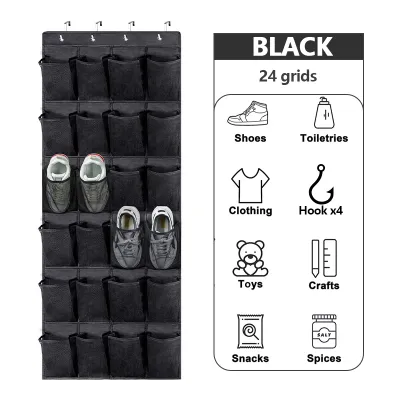
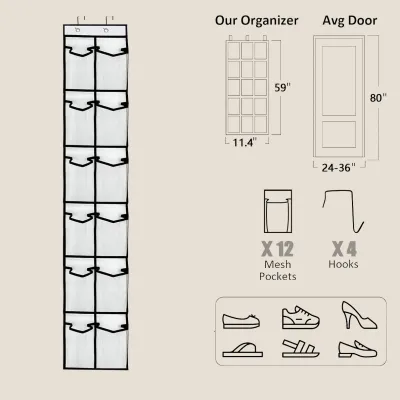
Prices are valid at publication and may change. Please refer to the product page for the latest price.
First, determine the maximum height by measuring from your intended top mounting point down to your desired bottom clearance limit. If you plan to mount the organizer on a wall, mark the spot where the top brackets or hooks will be anchored. Measure straight down from this mark to a point at least 15 to 20 centimeters above the floor. For door-mounted setups, measure from the very top edge of the door down to the same bottom clearance limit. This vertical measurement gives you the absolute maximum length the organizer can be.
Next, measure the available width to ensure the organizer does not overlap with critical architectural features. On a door, measure the flat surface of the door panel, leaving a safety margin of at least 5 centimeters on each side of the door frame or bevels. If you are mounting on a wall, measure the horizontal span between adjacent walls, light switches, electrical outlets, or closet rods. The organizer must hang completely flat without bunching or overlapping these elements.
Finally, inspect the mounting surface for physical obstructions that could prevent the organizer from hanging flush. On walls, look for baseboards, decorative wall moldings, picture frames, or ventilation grilles. On doors, take note of the door handle, lock mechanisms, and any decorative recessed panels. If your organizer hangs over a door handle, it will push outward, causing the pockets to tilt and potentially spill your shoes. Ensure the path directly behind the hanging area is entirely flat and free of obstacles.
Verify Door Thickness and Top Clearance
Over-the-door organizers rely on metal or plastic hooks that wrap around the top edge of the door panel. If these hooks do not match your door’s dimensions, you risk damaging the door frame or preventing the door from closing entirely.

Start by measuring the exact thickness of your door. Open the door and place your measuring tape across the top edge or the side profile. Standard interior doors in the Philippines typically measure between 35 millimeters and 45 millimeters in thickness, but custom-built or older wooden doors can vary significantly. Compare this measurement against the hook clearance specified by the organizer manufacturer. If the hook is too narrow, it will not slide over the door; if it is too wide, the organizer will wobble and slide back and forth every time you open the door.
Next, check the top gap clearance between the top edge of the door and the upper door frame. To do this, close the door and observe the space at the top. You can test the clearance by placing a small coin, such as a 5-peso coin (which is approximately 1.9 millimeters thick), on top of the door and closing it. If the door closes smoothly without catching or scraping the coin, you have enough clearance for standard metal hooks. If the gap is too tight, forcing a hook into the space will scrape the paint, damage the wood, and eventually warp the door frame.
Finally, evaluate the door’s swing path and adjacent clearance. A fully loaded shoe organizer can easily protrude 15 to 25 centimeters from the face of the door. Open the door completely to verify that this extra depth will not strike adjacent walls, wardrobes, or furniture. If your door opens into a narrow hallway or behind a bedroom door, ensure the added bulk does not block walkways or prevent the door from opening to its full angle.
Match Pocket Dimensions to Your Footwear
Once you have established the outer dimensions of your organizer, you must look closely at the individual pockets. A common mistake is choosing an organizer based solely on the total number of pockets without considering the actual size of your shoes.
Begin by measuring the tallest and bulkiest items in your shoe collection. High heels, ankle boots, platform sandals, and chunky athletic sneakers require significantly more vertical and horizontal space than flat slippers or canvas slip-ons. Measure the height, width, and length of your largest pair of shoes. If you plan to store high heels or boots, look for organizers that feature deep, flexible fabric pockets or adjustable compartments rather than tight, rigid plastic slots.
Understanding pocket depth and width is crucial for calculating actual capacity. Some organizers are designed with single-shoe pockets, meaning you need two pockets for one pair of shoes. Others feature wide pockets meant to hold a complete pair together. If you have larger shoe sizes, a single pocket advertised for a “pair” might only fit one shoe. For bulky footwear, look for pockets that measure at least 15 centimeters wide and 20 centimeters deep to prevent the shoes from falling out or stretching the material to its breaking point.
Be prepared to adjust your capacity expectations based on your shoe types. An organizer marketed as a “24-pocket shoe organizer” might comfortably hold 24 pairs of flat sandals or flip-flops (known locally as tsinelas), but only 12 pairs of leather loafers or running shoes. If your collection consists mainly of structured, heavy, or oversized shoes, prioritize organizers with fewer, larger pockets over those with many small, restrictive compartments.
Evaluate Weight Limits and Mounting Safety
A fully loaded shoe organizer carries a surprising amount of weight. To prevent structural damage, surface scratches, or sudden hardware failure, you must assess the load capacity of both the organizer and the mounting surface.
Different mounting methods offer varying levels of stability and weight distribution. Over-the-door hooks distribute weight across the top of the door frame, making them highly stable but dependent on the door’s structural integrity. Wall-mounted adhesive strips are convenient and damage-free, but they perform poorly in highly humid environments, such as during the wet season in the Philippines, where moisture can weaken the adhesive bond and cause the organizer to fall. Screwed wall brackets or anchors provide the most secure and permanent mount, especially on concrete or drywall, but they require drilling and proper hardware.
Assess the construction material of your door before hanging heavy items on it. Solid wood doors can easily support a fully loaded 24-pocket organizer. Hollow-core doors, however, are constructed with thin plywood or fiberboard veneers over a cellular cardboard interior. Hanging excessive weight on a hollow-core door can cause the top hooks to bend, dent, or even tear through the thin outer veneer over time. If you must use an over-the-door system on a hollow-core door, opt for wide, padded hooks that help distribute the weight across a larger surface area.
Always read the manufacturer’s specifications for the maximum weight limit of the organizer itself. Calculate the estimated weight of your shoe collection: a typical pair of casual sneakers weighs about 0.5 to 1 kilogram, meaning a 24-pair collection can easily weigh between 12 and 24 kilograms. Ensure the fabric, stitching, and metal eyelets of the organizer are rated to handle this load. Look for double-stitched seams and reinforced metal grommets at the top mounting points.
If you notice any signs of surface damage, structural cracking, or if the manufacturer’s mounting instructions conflict with your door or wall type, stop immediately. Do not attempt to force the installation. In such cases, consult a professional carpenter or choose a freestanding shoe rack or cabinet as a safer, more stable alternative.
Common Measuring and Sizing Mistakes to Avoid
A few overlooked details can turn a helpful storage solution into a daily frustration. Avoiding these common measuring oversights will ensure your organizer remains functional and durable.
One of the most frequent mistakes is failing to measure the floor clearance. If the bottom of the organizer drags on the ground, it will accumulate dust, hair, and dirt. More importantly, in humid tropical climates, floors are frequently mopped to keep spaces clean and cool. If the fabric of your organizer touches the floor, it will absorb water and cleaning chemicals during mopping, leading to color bleeding, fabric deterioration, and mold growth. Always leave at least 15 to 20 centimeters of open space below the lowest pocket.
Another common error is assuming all interior doors are uniform. While many residential doors share similar heights, thickness and top clearance gaps vary widely between homes, especially in custom-built or renovated spaces. Never purchase an organizer based on “standard” labels without verifying your specific door thickness and top frame clearance first.
Lastly, do not ignore the visual bulk and physical protrusion of a loaded organizer. A pocket that looks slim when empty will expand significantly when stuffed with shoes. If your door opens into a narrow hallway or a tight walk-in closet, this added bulk can make the space feel cramped and restrict your natural movement. Measure the walkway clearance with the door fully open to ensure you still have comfortable passage.
Frequently Asked Questions (FAQ)
Can I use an over-the-door shoe organizer on a hollow core door?
Yes, but you must take extra precautions to prevent damage. Because hollow-core doors have a fragile outer veneer, heavy loads can easily dent or crush the wood fibers under the hooks. To minimize this risk, select an organizer that features wide, flat, and padded metal hooks, which distribute the downward force more evenly. Avoid loading the bottom pockets with your heaviest footwear, such as thick-soled boots or heavy leather shoes. If the door feels unstable or if the hooks begin to bend the top edge, transition to a wall-mounted bracket system or a freestanding shoe rack to protect your woodwork.
How much space should I leave between the bottom of the organizer and the floor?
You should maintain a clearance of at least 15 to 20 centimeters between the bottom edge of the organizer and the floor. This gap is essential for routine household maintenance, allowing you to sweep, vacuum, or damp-mop the floor without the fabric dragging or getting wet. In humid regions like the Philippines, keeping the organizer off the ground prevents it from absorbing rising dampness and floor moisture, which protects both the organizer material and your shoes from mold, mildew, and premature wear.
Community discussion
Share your experience or ask a question. Comments are reviewed before publication.