
Attaching wood table legs to a tabletop requires a careful balance of precise measurement, appropriate hardware selection, and proper installation techniques. By taking the time to calculate the correct inset distance, drill accurate pilot holes, and choose fasteners that accommodate natural wood movement, you can build a stable, durable table that resists wobbling. Whether you are assembling a custom DIY project or restoring an existing piece of furniture, following a systematic approach ensures a secure connection that preserves the integrity of the wood.
Tools and Hardware Required for Installation
To achieve a professional result, gather all necessary tools and hardware before beginning. Accurate layout requires a reliable tape measure, a carpenter’s square to ensure perfect 90-degree angles, and a sharp pencil for marking. For the installation, you will need a power drill, wood drill bits matching your fastener sizes, and a manual screwdriver to prevent over-tightening. Using a manual screwdriver instead of a power driver for the final tightening stage helps you avoid stripping the wood fibers.
Selecting the right hardware depends on your tabletop’s thickness, the leg design, and the finished dimensions of the piece. Common options include surface-mounted top plates, threaded inserts, or traditional corner brackets used with a table apron. If you are working with a heavy dining table, a full apron frame with corner brackets offers superior stability compared to simple mounting plates. Always check the manufacturer specifications for your chosen hardware to verify its load capacity and ensure it can support the weight of your tabletop. Additionally, consider your space constraints; if the finished table needs to pass through narrow doorways or lifts, choosing removable hardware like threaded inserts is highly beneficial.
Products mentioned in this guide
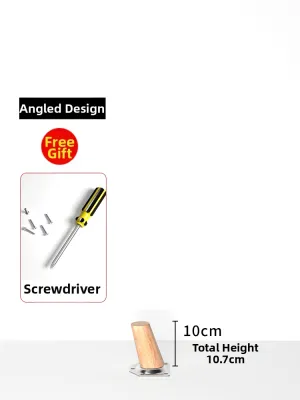
14 Lazada user ratings
Durability:4/5 Comfort:5/5 Adjustability:4/5 quality good for the price. this time the parts are complete. thank you vendor. included 1 extr…Read full reviewShow less
Durability:4/5 Comfort:5/5 Adjustability:4/5 quality good for the price. this time the parts are complete. thank you vendor. included 1 extra leg and parts and installation tool.
Easy to install - came with a screwdriver so you can screw this in even if you don’t have tools at home. I wish it was fatter
Gonna leave a good review for now, haven't used it yet, will add more once I do.
The seller is quite impressive and even threw in an extra one!
The seller is really awesome and even threw in an extra one!
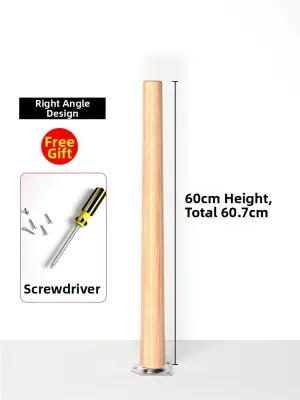
6 Lazada user ratings
highly recommended . very reliable supplier. very strong material. best for diy projects.
It's really stable when holding things, no wobbling at all.
Things sit really steady, no wobbling at all.
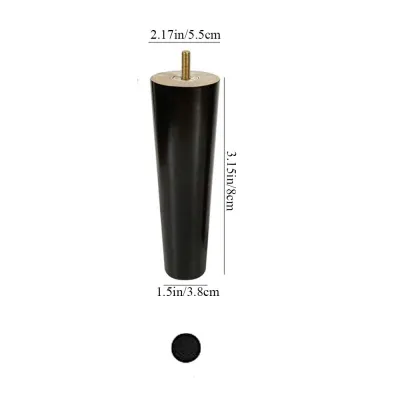

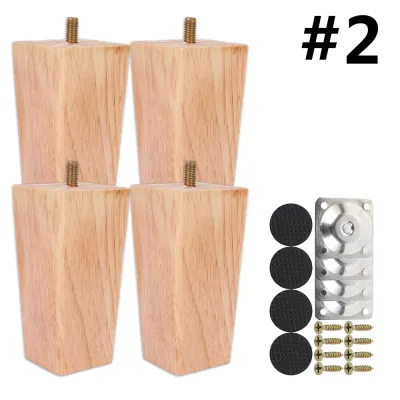
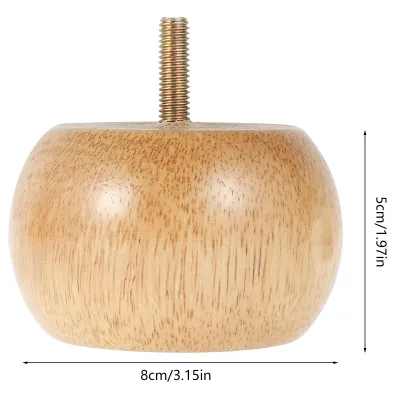
36 Lazada user ratings
DIY installation with M8 bolts, Non-scratch floor protection, Suitable for cabinets and sofas, Suitable for cabinets and sofas, Sturdy load-…Read full reviewShow less
DIY installation with M8 bolts, Non-scratch floor protection, Suitable for cabinets and sofas, Suitable for cabinets and sofas, Sturdy load-bearing design, Sturdy load-bearing design, Solid rubberwood construction, Available in multiple colors, 5cm height for robot vacuum,
Classic style for all furniture, Solid rubberwood construction, Sturdy load-bearing design, Non-scratch floor protection, DIY installation w…Read full reviewShow less
Classic style for all furniture, Solid rubberwood construction, Sturdy load-bearing design, Non-scratch floor protection, DIY installation with M8 bolts,
Suitable for cabinets and sofas, Classic style for all furniture, Solid rubberwood construction, Available in multiple colors,
Eucalyptus wood durability, Suitable for cabinets and sofas, Smooth and safe edges, Available in multiple colors,
Eucalyptus wood durability, Suitable for cabinets and sofas, Classic style for all furniture,
Prices are valid at publication and may change. Please refer to the product page for the latest price.
Preparing the Tabletop and Wood Table Legs
Before measuring, place your tabletop underside-up on a clean, padded surface, such as a moving blanket or clean cardboard, to protect the finished face from scratches. Inspect both the tabletop and the legs for flatness, warping, or structural defects that could prevent the hardware from sitting flush. If you find any rough spots or uneven areas around the mounting zones, sand them smooth with medium-grit followed by fine-grit sandpaper.

It is best to apply your chosen wood finish to both the legs and the underside of the tabletop before final assembly. Sealing the underside helps protect the wood against moisture changes, which minimizes seasonal warping. Finally, identify the grain direction of your tabletop and note any existing structural supports, such as aprons, battens, or metal C-channels. Solid wood tabletops expand and contract across their grain width rather than their length, and understanding this movement is crucial for positioning your mounting hardware correctly.
Measuring and Marking Leg Placement
Achieving visual balance and physical stability requires calculating the ideal leg inset distance. Placing the legs too close to the outer edges can look awkward and expose the mounting hardware, while placing them too far inward reduces the table’s footprint and increases the risk of tipping. For standard dining tables and desks, insetting the legs between 1.5 and 3 inches from the outer edges of the tabletop is a reliable guideline. For smaller pieces like coffee tables or side tables, a smaller inset of 1 inch may be appropriate to maximize stability.
Use a carpenter’s square pressed firmly against the edges of the tabletop to draw precise reference lines, creating a corner grid where your hardware will sit. Place your mounting plates or legs directly onto this grid to verify their position, ensuring they do not overhang or interfere with any structural supports. Once aligned, use a sharp pencil or a center punch to mark the exact center of each screw hole. Double-check all four corners with your tape measure to guarantee complete symmetry before proceeding to the drilling stage.
Drilling Pilot Holes and Attaching the Legs
Drilling pilot holes is a critical step that prevents the wood from splitting when screws are driven. To choose the correct drill bit size, match the bit’s diameter to the solid inner shank of your screw, leaving the outer threads exposed. If you are working with dense hardwoods like oak or maple, the pilot hole should be slightly larger than it would be for softwoods like pine to ease the screw’s entry without compromising grip.
To avoid drilling completely through your tabletop, wrap a piece of painter’s tape around the drill bit at your desired depth to serve as a visual stop. Keep the drill perfectly perpendicular to the tabletop and stop drilling the moment the tape flag brushes the wood. Position your mounting hardware over the pilot holes and drive the screws using a manual screwdriver. This gives you better control and prevents over-torqueing, which can easily strip the wood threads. If your legs use pre-installed hanger bolts, thread them into the secured plates until they are flush and tight against the mounting surface.
Testing Stability and Making Final Adjustments
Once all legs are attached, the table must be flipped upright to test its stability. Because tilting a table puts significant lateral stress on the legs, always ask a partner to help you lift and rotate the table safely. Avoid dragging or pivoting the table on two legs, which can bend the mounting plates or tear the screws out of the wood.
Place the table on a flat, level surface and gently press down on each corner to check for wobble. If you detect any movement, use a spirit level to determine if the floor or the table legs are uneven. You can correct minor height discrepancies by installing adjustable screw-in foot glides or applying heavy-duty adhesive felt pads. Finally, inspect the joints underneath to ensure there are no gaps between the legs and the tabletop, tightening any loose fasteners as needed.
Common Mistakes to Avoid During Installation
One of the most common DIY mistakes is skipping pilot holes, which almost always results in split wood and weak joints. Another frequent error is using screws that are too long, risking permanent damage by puncturing the visible top surface of the tabletop. Always measure your tabletop thickness and ensure your screws are at least 1/4 inch shorter than the combined thickness of the wood and the mounting hardware.
Additionally, many builders fail to account for seasonal wood movement. Solid wood tabletops expand and contract across their grain as humidity levels change. Rigidly fixing a wide tabletop to a frame without allowing for this movement can cause the wood to warp or crack over time. To prevent this, use fasteners designed to allow movement, such as figure-8 fasteners, Z-clips, or mounting plates with slotted screw holes that let the tabletop slide slightly as it breathes.
Frequently Asked Questions (FAQ)
Can I attach wood table legs directly to a glass or stone top?
No, you cannot attach wood table legs directly to glass or stone using standard wood screws, as these materials cannot be drilled with standard bits and are prone to cracking. For glass tops, the standard method is to use specialized UV-activated structural adhesives to bond metal mounting disks directly to the glass, which then receive the legs. For stone tops like marble or granite, a plywood sub-top is typically adhered to the underside of the stone using epoxy, allowing you to screw the wood legs safely into the plywood base. Alternatively, you can use a self-supporting metal or wood frame where the stone or glass top simply rests on top of the structure, supported by non-slip rubber bumpers.
How do I fix a wobbly table after attaching the legs?
To fix a wobbly table, first move it to a different, flat surface to determine if the issue is caused by an uneven floor. If the table still wobbles, inspect the underside to ensure all mounting plates are flush against the tabletop and that all screws are fully tightened. If the hardware is secure but a minor height difference remains, the easiest solution is to install adjustable threaded leg glides into the bottom of the legs, which allow you to fine-tune the height of each leg individually. For very minor adjustments on hard floors, applying adhesive-backed felt pads of varying thicknesses to the bottom of the legs can also eliminate wobble while protecting your flooring from scratches.
Community discussion
Share your experience or ask a question. Comments are reviewed before publication.