
A sagging awning bracket not only ruins the clean lines of your outdoor space but also poses a serious safety hazard, especially during sudden tropical downpours or gusty winds. You can reinforce a sagging awning bracket by identifying the underlying structural weakness, removing the load, and upgrading the fasteners, adding diagonal support braces, or installing a solid backing board to distribute the weight safely across the wall studs or masonry. Taking care of this issue early prevents costly damage to your home’s exterior cladding and ensures your outdoor shade remains stable and secure.
Addressing a sagging bracket requires a systematic approach to ensure the repair is durable. By understanding the forces at play and using the correct hardware, you can restore the structural integrity of your awning mount and extend its service life.
What causes an awning bracket to sag, and is it safe to repair?
Awning brackets typically sag due to loose or stripped fasteners, structural degradation of the mounting surface, or physical overloading from wind, heavy rain, and accumulated debris. When an awning is extended, it acts as a large sail, catching the wind and exerting immense leverage on the upper mounting points. Over time, this constant dynamic tension can pull fasteners out of their anchoring material.
Products mentioned in this guide
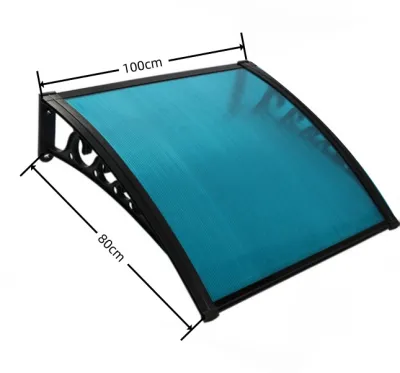
107 Lazada user ratings
tiiiihn buu.hhuibb hhgfi hioob jooonh hgdfuk jjiib hjjjb hhjok jiii ggggi uiii uuiib hjjjb hjjib jjjkk jjkobhjjj.jjjjj hjjii hhjooob hjiob
My item was delivered maybe 2 weeks ago, at ngyon lng namin nabuksan pero kulang ng isang arm dapat at 3 can you send me one of it.
Very useful. Also very beautiful. But the screws provided are large, but they are large, strong and durable.
one of the bracket is missing can you send the mussing bracket it supposed to be 3 pcs.
Durable polycarbonate, UV protection, easy to install
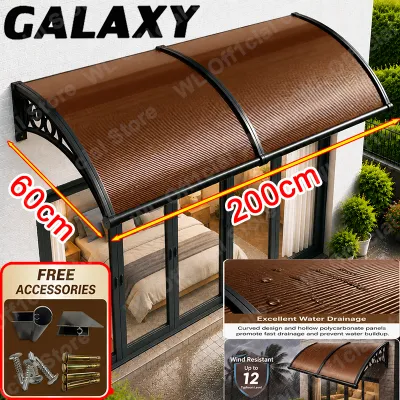
98 Lazada user ratings
My order was excellent but the delivery was disgusting. The rider of J&t first attempt stated was a faikure due to the client ask for a re s…Read full reviewShow less
My order was excellent but the delivery was disgusting. The rider of J&t first attempt stated was a faikure due to the client ask for a re schedule whereiin I didnlt ask for one, He posted a proof of delivery, a convo with someone which is not me. He didn’t send a message . I was at home the whole day waiting for my delivery. The rider is Jayson Panimdim, don’t put the blame to me if you can’t deliver
🛠️Durability:good 👜Portability:good 🛠Ease of Setup:good panagalawa ko order,,ok pa din Naman maliban dun sa kulang na Isang set Ng expansion …Read full reviewShow less
🛠️Durability:good 👜Portability:good 🛠Ease of Setup:good panagalawa ko order,,ok pa din Naman maliban dun sa kulang na Isang set Ng expansion bolt,,nalaglag siguro sa delivery at Yung delivery di din Naman maingat,nayupi Yung pinaka bubong pero di Naman sira at pwede pa makabit..dagdagan na lang siguro Ang support sa packaging,dahil malambot lang Ang pinaka bubong.
🛠️Durability:good 👜Portability:good 🛠Ease of Setup:good mabilis delivery at maayos Naman at walang damage,kumpleto at walang kulang,mura at p…Read full reviewShow less
🛠️Durability:good 👜Portability:good 🛠Ease of Setup:good mabilis delivery at maayos Naman at walang damage,kumpleto at walang kulang,mura at parang mamahalin Naman ,,matibay at elegante tignan.
Ok po magandacat walang damagecty seller,lazada at courier.
All goods ang order ko ty seller sa uulitin
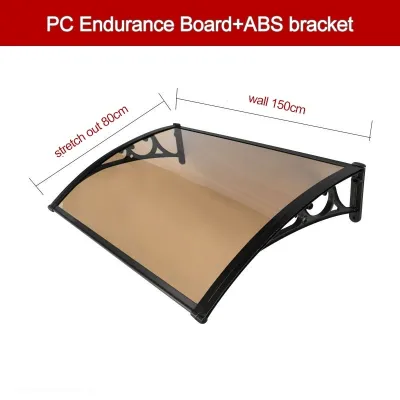
48 Lazada user ratings
softer type of fiberglass,good for the door
good quality thank you seller ⭐⭐⭐⭐⭐
🛠️Durability: good goods
sakto ok n ok
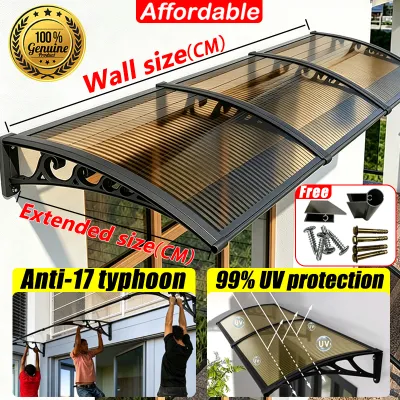
3 Lazada user ratings
this is crap.
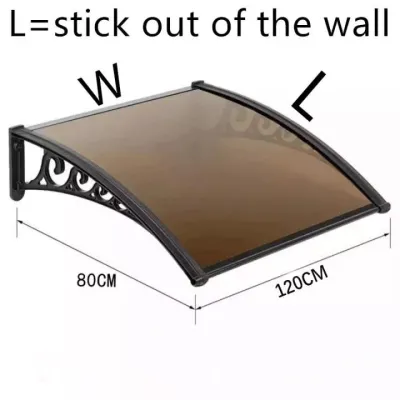
363 Lazada user ratings
Easy to install and foldable for convenience., The frame adds stability and support., Provides excellent sun protection., Waterproof and per…Read full reviewShow less
Easy to install and foldable for convenience., The frame adds stability and support., Provides excellent sun protection., Waterproof and perfect for rainy days.,
Provides excellent sun protection., Anti-UV material ensures long-lasting use., Easy to install and foldable for convenience., Perfect for s…Read full reviewShow less
Provides excellent sun protection., Anti-UV material ensures long-lasting use., Easy to install and foldable for convenience., Perfect for shading your balcony.,
Plastic material I hope it will last longer.Provides excellent sun protection., Perfect for shading your balcony.,
awesome, I like it very very much, hope it will last for 20 years thanks
Item as described
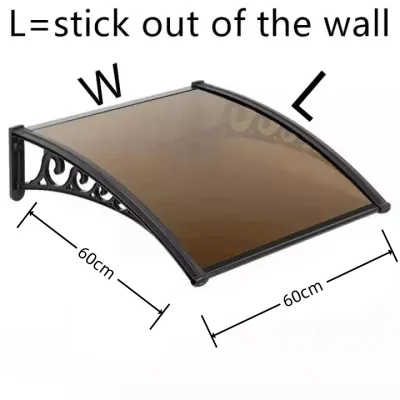
914 Lazada user ratings
High-quality materials used, Versatile and adjustable size options, Weather-resistant and long-lasting, Perfect for parties and gatherings,
I am very happy with the product and the quick delivery, the price is good and I think it is durable. Thank you seller
I received the item securely packed and was delivered fast. Good quality and will definitely purchase again
This canopy is very good.The endurance board is also very thick.Highly recommended purchase
The canopy is of good quality, and the shipping package is strong and effective.It's nice.
1,002 Lazada user ratings
The item arrived earlier than expected, Though the courier mis hadled and caused deformation of the metal edge elements... The seller is ver…Read full reviewShow less
The item arrived earlier than expected, Though the courier mis hadled and caused deformation of the metal edge elements... The seller is very professional and understand the case, uppon knowing through chat, sent me the replacement parts free of charge and very fast in 1 day.. Thank you seller. I recommend for those looking for this product to buy in this seller... The item is so durable and easy to install... Seller's after sale support is very good. The item fit perfectly and beautifully to my garden wash area..
Ideal for DIY awning installation. Perfect for door and window protection from rain and sun. Sturdy and durable design, quality materials us…Read full reviewShow less
Ideal for DIY awning installation. Perfect for door and window protection from rain and sun. Sturdy and durable design, quality materials used. I have received the items in good condition. The parcel arrived ahead of schedule and was securely packed. A very nice product, exactly what I needed! COMPLETE I am extremely satisfied and will definitely order again from your Good Shop... Thank you so much , looking forward to my next purchase.
Ideal for DIY installing of awning for the door and windows in the house. Materials are sturdy and well made, value for the money. I have re…Read full reviewShow less
Ideal for DIY installing of awning for the door and windows in the house. Materials are sturdy and well made, value for the money. I have received the items in good condition. The parcel arrived ahead of schedule and was securely packed. A very nice product, exactly what I needed! COMPLETE I am extremely satisfied and will definitely order again from your Good Shop... Thank you so much , looking forward to my next purchase.
The package was already open and item is not fully secured. Polycarbonate sheet and frame is in good condition but the expansion bolt is sub…Read full reviewShow less
The package was already open and item is not fully secured. Polycarbonate sheet and frame is in good condition but the expansion bolt is substandard need to replace and buy another anchoring materials
Item delivered efficiently by Ninja courier and arrived well packaged . All components complete . Have not assembled as yet but will post ad…Read full reviewShow less
Item delivered efficiently by Ninja courier and arrived well packaged . All components complete . Have not assembled as yet but will post additional reviews once assembled and installed .
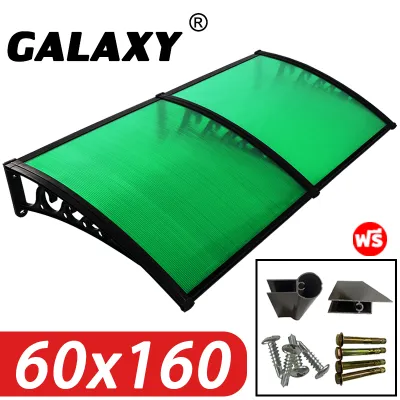
711 Lazada user ratings
Ang produkto ay sumusunod sa order, mabilis ang paghahatid, maganda ang packaging, walang pinsala, walang problema sa kalidad, madaling i-in…Read full reviewShow less
Ang produkto ay sumusunod sa order, mabilis ang paghahatid, maganda ang packaging, walang pinsala, walang problema sa kalidad, madaling i-install
Height adjustable to get a perfect shade, very good for blocking sun and rain, beautiful and elegant design.
thank you very much, seller your promise to deliver the missing items is complete...thank you very much
Good light transmittance, Provides excellent sun shade,
Prices are valid at publication and may change. Please refer to the product page for the latest price.
Loose fasteners are the most common culprit, often caused by thermal expansion, contraction, or improper initial installation. If the awning was mounted directly into wood without hitting a solid stud, or if light-duty plastic anchors were used in concrete, the fasteners will eventually yield to the constant downward pull.
Structural degradation of the wall material itself is another major cause of sagging. In humid or wet environments, water can seep behind the bracket, leading to wood rot in timber framing or fascia boards. For brick or concrete walls, moisture penetration combined with structural settling can cause masonry to crack, crumble, or lose its holding power around the anchors.
To determine if a DIY repair is safe, perform a thorough visual inspection. Look for gaps between the bracket and the wall, rust streaks on the hardware, or visible cracks in the surrounding brick or concrete. Press a screwdriver gently into wooden mounting surfaces; if the wood feels soft, spongy, or crumbles easily, structural rot is present.
A DIY repair is generally safe and feasible if the wall structure itself is sound and the sagging is limited to loose hardware or minor bracket flexing. However, if you observe extensive wood rot across multiple wall studs, bowing walls, or severely cracked and crumbling masonry, the structural integrity of the building is compromised. In these cases, a DIY fix is not safe, and you must consult a professional contractor to rebuild the mounting surface.
Which tools and materials do you need to reinforce an awning bracket?
To safely and effectively reinforce a sagging awning bracket, you must gather a combination of diagnostic tools, heavy-duty fasteners, structural supports, and personal protective equipment. Having the correct gear on hand before you begin prevents mid-project delays and ensures a more secure installation.

For diagnostic and preparation work, you will need a reliable stud finder (for wood-framed walls) or a masonry detector, a bubble level to check alignment, a tape measure, and a pencil. A wire brush and a utility knife are helpful for cleaning the mounting surface and removing old sealants.
Your power and hand tool kit should include a high-torque drill or impact driver. If you are working with concrete or brick, a hammer drill is essential for boring clean, precise holes. You will also need a socket set or nut drivers that match the size of your heavy-duty fasteners, along with a hammer and a blow bulb or vacuum to clear dust from drilled holes.
When selecting fasteners and reinforcement hardware, choose materials designed for outdoor use to prevent rust and corrosion. For wood installations, select hot-dip galvanized or stainless steel lag screws that are thick enough to handle the load and long enough to penetrate deep into the framing. For masonry, opt for heavy-duty sleeve anchors or wedge anchors. Depending on the reinforcement method you choose, you may also need structural L-brackets, diagonal support braces, or a pressure-treated wood backing board.
Safety must be your top priority when working on overhead structures. Use a sturdy, slip-resistant A-frame ladder placed on flat, level ground. Wear safety glasses to protect your eyes from falling plaster, wood dust, or masonry debris, and use heavy-duty work gloves to protect your hands when handling metal brackets and power tools.
How do you inspect and prepare the existing bracket and wall surface?
Before attempting any structural reinforcement, you must relieve the tension on the bracket by securing or removing the awning mechanism, then thoroughly clean and inspect the mounting area to identify hidden damage. Attempting to work on a bracket while it is supporting the full weight of an extended awning is highly dangerous and can lead to sudden structural failure.
Start by retracting the awning completely and securing the arms with heavy-duty zip ties or straps to prevent them from springing open unexpectedly. If you are working with a large or heavy retractable awning, it is highly recommended to remove the fabric roll and arm assembly entirely from the brackets, following the manufacturer’s instructions. For fixed awnings, position temporary support posts, such as sturdy wood studs, underneath the outer frame to take the weight off the wall mounts.
Once the load is relieved, remove the sagging bracket to inspect the wall surface underneath. Use a wire brush and a scraper to clean away old silicone sealant, dirt, rust, and loose paint from both the bracket and the wall. This cleaning step is crucial because it reveals hairline cracks in masonry or early signs of wood rot that might otherwise remain hidden.
Examine the wall material closely to determine the best anchoring strategy. If you are mounting to wood, verify that the existing holes align with the center of a solid wall stud rather than just the exterior siding or fascia. If the wall is masonry, check if the existing holes are wallowed out, oversized, or located too close to mortar joints, which can weaken the anchor’s grip.
Measure the depth and diameter of the existing mounting holes. If the holes are stripped or enlarged, you cannot simply reinstall the same size hardware. You must plan to either drill new holes in a slightly offset, structurally sound location or prepare to use larger, heavy-duty fasteners that can grip the surrounding material securely.
What are the step-by-step methods to tighten, brace, or replace the bracket?
Depending on the severity of the sag and the condition of the mounting surface, you can reinforce the bracket by upgrading the fasteners, installing diagonal support braces, or mounting a structural backing board. Choose the method that best matches your wall type and the level of wear you identified during your inspection.
Method 1: Tightening and upgrading existing fasteners
If the mounting surface is structurally sound but the existing fasteners have loosened or stripped their holes, upgrading to heavier, longer hardware is the most direct solution.
For wood-framed walls, select new lag screws that are at least one size thicker and long enough to penetrate at least 75 millimeters into the solid wood studs. Pre-drill pilot holes using a drill bit slightly smaller than the shank of the new lag screw to prevent the wood from splitting. Drive the new lag screws through the bracket and into the stud using a socket wrench, tightening them until they are snug against the bracket without over-tightening, which could strip the wood fibers.
For concrete or solid brick walls, replace failing plastic plugs or light-duty screws with heavy-duty steel sleeve anchors or wedge anchors. Drill out the existing holes to match the diameter of the new anchors, using a hammer drill and a masonry bit. Use a blow bulb or vacuum to remove all masonry dust from the holes, as leftover dust can prevent the anchors from gripping properly. Insert the anchors through the bracket into the holes, then tighten the nuts to the manufacturer’s specified torque to expand the sleeve and lock the bracket in place.
Method 2: Installing L-brackets or diagonal support braces
When an awning bracket experiences high downward leverage, adding a diagonal support brace or a heavy-duty L-bracket directly underneath the main bracket helps redistribute the load away from the top fasteners.
Position a heavy-duty metal L-bracket or a diagonal brace directly beneath the sagging awning bracket. Ensure the vertical leg of the brace aligns perfectly with a wall stud or a solid section of masonry. Use a bubble level to verify that the brace is plumb and make pencil marks through the mounting holes onto the wall.
Pre-drill the marked holes using the appropriate drill bit for your wall material. Secure the brace to the wall using heavy-duty lag screws for wood or sleeve anchors for masonry. Once the brace is firmly anchored to the wall, secure its upper horizontal leg to the underside of the awning bracket or the awning frame, ensuring a tight, flush fit that prevents any downward pivoting.
Method 3: Adding a structural backing board or cleat
If the original mounting area is uneven, slightly damaged, or if the wall studs do not align perfectly with the awning brackets, installing a structural backing board (also known as a ledger board or cleat) is the most reliable way to distribute the weight.
Select a piece of pressure-treated lumber, typically a 2×6 or 2×8 board, cut to a length that spans across at least two or three wall studs. Treat any cut edges of the wood with a preservative sealer to protect against moisture. Position the backing board on the wall, use a level to ensure it is perfectly horizontal, and mark the locations of the wall studs.
Pre-drill holes through the backing board and into the wall studs. Secure the board to the studs using multiple heavy-duty lag screws, ensuring the board is pulled tight and flush against the exterior wall. Apply a bead of high-quality exterior silicone sealant along the top and side edges of the backing board to prevent water from seeping behind it.
Finally, mount your awning brackets directly onto the newly installed backing board. For maximum strength, use heavy-duty carriage bolts that pass completely through the backing board, secured with washers and nuts on the backside, or use heavy lag screws that penetrate through the board and deep into the underlying wall studs.
How can you verify the structural stability and maintain the awning afterward?
Once the reinforcement is complete, you must perform a controlled load test, verify the alignment for proper water runoff, and establish a regular maintenance routine to prevent future sagging. Taking these final steps ensures your repair is successful and protects your investment over the long term.
To perform a load test, slowly reattach the awning fabric or release the tension straps on the retractable arms. Carefully extend the awning to its full length while observing the reinforced brackets. Look closely for any signs of flexing, shifting, or pulling away from the wall. Listen for any creaking or popping sounds, which could indicate that a fastener is slipping or that the wall material is yielding under the load.
Next, place a bubble level on the front bar of the awning to verify that it is perfectly level horizontally. Then, check the pitch or slope of the awning. A proper downward slope is essential to ensure that rainwater runs off the fabric immediately rather than pooling in the center. If water pools on the fabric, the sheer weight of the water can quickly exceed the load capacity of even the most reinforced brackets, leading to sudden failure.
Establish a routine maintenance schedule to keep your awning in top condition. At least twice a year, especially before and after the rainy season, perform a quick inspection of the mounting hardware. Use a wrench to check that all lag screws and masonry anchors remain tight, as wind vibrations can slowly loosen hardware over time.
Keep the awning fabric clean and free of heavy debris, such as fallen leaves, twigs, or dirt, which add unnecessary weight. If your awning is retractable, lubricate the moving joints and hinges periodically with a dry silicone spray according to the manufacturer’s instructions to reduce operating friction and vibration, which in turn reduces stress on the wall brackets.
When should you stop the DIY repair and call a professional?
While many awning bracket repairs are straightforward, you must recognize the limits of a DIY approach to prevent severe property damage, personal injury, or voiding your product warranty. Knowing when to step back and call a professional ensures that complex structural issues are handled safely.
Stop the DIY repair immediately if you discover extensive structural damage to your home’s framing. If multiple wall studs are rotted, soft, or insect-damaged, or if the brick veneer is pulling away from the main house frame, the wall cannot safely support the weight of an awning. A licensed contractor must rebuild the wall structure before any awning can be safely mounted.
Working at significant heights or on unstable ground is another clear boundary. If your awning is mounted high on a second-story wall or above a steep slope where you cannot safely position a ladder, do not risk a fall. Professional installers have the specialized scaffolding, safety harnesses, and rigging equipment required to perform high-altitude installations safely.
Motorized awnings present unique challenges that often require professional expertise. If your sagging awning has an integrated motor, wind sensor, or complex electrical wiring, attempting to disassemble or repair the brackets yourself can damage the electrical components or cause personal injury. If you encounter wiring that needs to be disconnected or rerouted, hire a qualified electrician or an authorized awning technician.
Finally, always consult the manufacturer’s installation manual before making any modifications. If the instructions warn against using non-proprietary hardware, or if your proposed reinforcement conflicts with the design of the awning, continuing with a DIY fix may void your warranty. When in doubt, investing in a professional assessment is the safest and most reliable way to protect your home and ensure your outdoor space remains a secure place to relax.
Community discussion
Share your experience or ask a question. Comments are reviewed before publication.