
Wobbly wooden furniture is a common household nuisance, but it does not always mean a beloved chair or table has reached the end of its useful life. Often, the issue stems from joints that have loosened over years of daily use, temperature fluctuations, or shifting loads. Before discarding a piece, reinforcing the joints with steel angle brackets offers a highly effective, durable, and low-cost solution to restore structural integrity.
To begin, determine if your furniture is a suitable candidate for bracket reinforcement. Inspect the wobbly area closely to identify the root cause of the movement. If the wood itself is severely rotted, crumbling, or split through major load-bearing sections, brackets will not provide a safe or lasting fix. However, if the wood is solid but the original dowels, tenons, or glue joints have dried out and loosened, steel brackets are an excellent choice to arrest the wobble.
Selecting the right steel metal brackets requires matching the hardware to the scale and stress of the furniture. For lightweight items like small side tables or decorative shelves, thin, two-hole corner braces are generally sufficient. For heavy-use items such as dining chairs, large tables, or deep bookshelves, choose thicker, heavy-duty brackets with four or more screw holes. Look for brackets made of zinc-plated or stainless steel to resist moisture and prevent rust over time.
Products mentioned in this guide
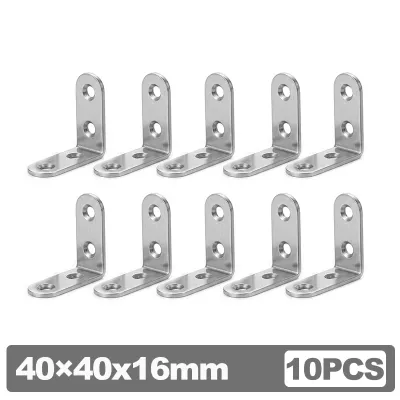
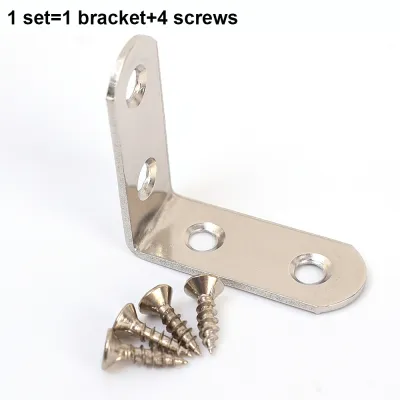
653 Lazada user ratings
Rating: 8/10 The product works as expected and is easy to use. The overall quality is decent, though it could be improved slightly in terms …Read full reviewShow less
Rating: 8/10 The product works as expected and is easy to use. The overall quality is decent, though it could be improved slightly in terms of durability. It's functional for everyday use, but there are some minor performance issues that could be better. Still, for the price, it's a solid purchase if you're not looking for something high-end. Photo not related. (Photo of SB19 KEN or FELIP)
Packaging:good package delivered fast thank you seller I got with tons of discount Durability:it's thicken. Ease of Use:easy to use without …Read full reviewShow less
Packaging:good package delivered fast thank you seller I got with tons of discount Durability:it's thicken. Ease of Use:easy to use without the need of power tools.. will order again soon.. good for Versatility:good to use in no nails and hammering houses.
High-quality stainless steel material, Perfect for furniture and cabinet, No deformation under heavy load,
Kaso KULANG yung Self tapping screw. 4 out of 12 lang pinadala! Yung ibang items, tama naman.
Prices are valid at publication and may change. Please refer to the product page for the latest price.
Matching the screws to your furniture is equally critical to avoid damaging the wood. Measure the thickness of the wooden pieces where the screws will be inserted. The screw length must be long enough to bite deeply into the wood for a secure hold, yet short enough to leave a safe margin so the tip does not pierce through the finished, visible exterior surface. Standard wood screws with flat heads that sit flush inside the bracket’s countersunk holes are ideal for this application.
Essential Tools and Materials for the Job
Having the correct tools on hand before you begin ensures a smooth, efficient, and precise installation process. Gather your steel metal angle brackets and a set of compatible wood screws that match your measurements.
For drilling and fastening, a power drill with appropriate bits is recommended. You will need a bit that matches the core diameter of your screws to create clean pilot holes. A manual screwdriver is useful for the final tightening phase to prevent over-torqueing.
Accurate alignment requires a measuring tape, a sharp pencil, and a combination square. These tools help you position the brackets symmetrically and ensure they sit perfectly flush against the intersecting wooden surfaces.
Additionally, keep wood glue nearby to reinforce loose joints before mounting the brackets. Wear protective goggles to shield your eyes from flying wood dust during drilling.
Step-by-Step Installation Guide
Installing steel brackets requires a systematic approach to ensure the repaired furniture remains stable and safe for daily use. Following a clear sequence of preparation, precise marking, and careful drilling will yield a professional-grade result.

Preparing the Joints and Marking Placement
Before mounting any hardware, prepare the loose joint so the bracket sits perfectly flat. Clean out old glue, dust, or debris from the corner using a stiff brush. If the joint is extremely loose, apply wood glue into the gap and clamp the pieces together tightly to re-establish alignment.
Once the joint is stabilized, position your steel angle bracket flush against the inside corner. Use a combination square to verify that the intersecting wooden pieces are at a perfect 90-degree angle, or match the original design angle of the furniture. Any gap between the bracket and the wood will reduce the effectiveness of the reinforcement and may pull the joint out of alignment when the screws are tightened.
With the bracket held firmly in place, use a sharp pencil to mark the exact center of each screw hole onto the wood. Before proceeding, inspect the marked areas to ensure you are not drilling directly into hidden dowels, nails, or existing assembly hardware. Adjust the bracket position slightly if necessary to avoid these internal obstructions.
Drilling Pilot Holes and Securing the Brackets
Drilling pilot holes is a non-negotiable step when working with hardwood or dense furniture materials. Without pilot holes, the wedge action of the screw can easily split the wood, permanently weakening the joint. Select a drill bit that matches the inner shank of the screw, excluding the threads; this allows the threads to cut deeply into the wood while preventing excess pressure.
To avoid drilling too deep and puncturing the outer surface of your furniture, wrap a piece of painter’s tape around the drill bit at the desired depth to serve as a visual stop. Hold the drill perfectly perpendicular to the wood surface and drill straight, clean pilot holes to the marked depth. Remove any loose wood shavings from the holes before inserting the screws.
Align the bracket over the pilot holes and drive the screws. Start by hand-threading them slightly to ensure they enter straight. Use a manual screwdriver or a low drill clutch setting to tighten them evenly. Stop as soon as the screw head sits flush against the bracket to avoid stripping the wood fibers.
Reinforcing Specific Furniture Types
While the basic installation steps remain the same, the placement and size of your steel brackets must be tailored to the specific structure of the furniture. Different items experience different types of physical stress during daily use.
Stabilizing Wobbly Chairs and Tables
Chairs and tables experience significant lateral forces when people sit, lean, or move them across the floor. To stabilize these items effectively, install the steel angle brackets inside the corner where the leg meets the apron—the horizontal wooden frame directly beneath the tabletop or seat. Placing the brackets here keeps them hidden from normal view while reinforcing the primary stress points.
For large dining tables that support heavy loads, use multiple smaller brackets or a single heavy-gauge bracket on each corner to distribute the stress. For lightweight side tables, a single standard-sized bracket per leg is usually sufficient. Always check the clearance around the brackets to ensure they do not interfere with seating space, table leaves, or any moving drawer slides.
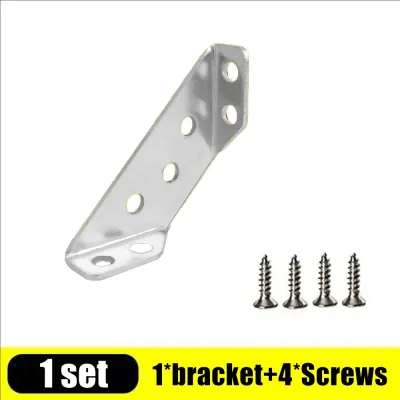
When working on dining chairs, ensure the bracket placement does not obstruct the seat cushion or webbing underneath. If the chair legs are angled, you may need to source adjustable or angled brackets rather than standard 90-degree corner braces to achieve a flush fit.
Strengthening Wooden Shelves and Cabinets
Shelves and cabinets primarily face downward gravitational loads and lateral racking forces. To prevent wooden shelves from sagging or pulling away from their side supports, mount steel brackets directly underneath the shelf, securing one side to the shelf bottom and the other to the vertical support wall. Position the brackets slightly back from the front edge to keep them unobtrusive.
For cabinet boxes that sway or lean to one side, reinforce the back corners. Mounting brackets in the rear interior corners helps maintain a perfectly square frame and prevents racking. If the cabinet has a thin backing board, ensure you anchor the bracket into the solid wood frame members rather than the thin fiberboard.
Before finalizing the installation, verify that the bracket depth does not exceed the shelf or cabinet frame depth. Protruding metal edges are a safety hazard and can cause scratches. If a bracket is slightly too long, select a smaller size to keep the hardware safely recessed.
Testing Stability and Knowing When to Stop
After securing all the brackets, place the furniture back on a level surface to test your work. Gently rock the piece from side to side and front to back, applying moderate pressure to simulate normal use. Listen closely for any squeaks and watch for any remaining movement at the reinforced joints.
Inspect each installed bracket to ensure the screws remain tight and flush against the metal surface. If you notice any slight shifting, check if the screws need a minor adjustment or if an additional bracket is required on an adjacent corner to fully distribute the load.
However, recognize when a piece of furniture is beyond a simple DIY bracket repair. If the wood is crumbling due to dry rot, has extensive termite damage, or features major structural splits through the main support legs, steel brackets will not make the item safe. In these cases, the furniture requires professional restoration or replacement.
Frequently Asked Questions (FAQ)
Can I use drywall screws with steel metal brackets?
No, you should avoid using drywall screws for furniture repair. Drywall screws are hardened and designed to resist tension, but they are highly brittle and have very low shear strength. The lateral forces and shifting weight on chairs and tables can easily snap the head off a drywall screw. Always use dedicated wood screws, which are made of softer, more ductile steel or brass that can bend slightly under stress without snapping.
Will the brackets be visible after installation?
In most cases, brackets can be placed strategically out of sight, such as on the underside of tabletops, inside cabinet frames, or beneath chair aprons. If a bracket must be installed in a visible area, you can minimize its visual impact. Consider painting the steel bracket to match the color of the wood, or use decorative brass or antique-bronze brackets that complement the furniture’s style.
Community discussion
Share your experience or ask a question. Comments are reviewed before publication.