
Mounting IKEA TRONES shoe cabinets in a space-conscious home in the Philippines can be challenging because residential wall construction varies widely, ranging from solid concrete partition walls to hollow blocks and lightweight gypsum boards. To secure your IKEA TRONES cabinets safely, you must identify your specific wall material, select the correct heavy-duty wall anchors (as IKEA does not include wall-mounting screws in the box), and follow a precise drilling and leveling process tailored to that surface. Because these cabinets are made of lightweight polypropylene, they are highly durable against the humid tropical climate, but once loaded with multiple pairs of shoes, they exert significant downward and outward leverage on their mounting points. Ensuring a secure installation prevents the cabinets from sagging, pulling away from the wall, or falling over time.
What tools and hardware do you need before starting your IKEA TRONES installation?
Before starting your IKEA TRONES installation, you must gather a power drill (with a hammer function for masonry), a spirit level, a pencil, a tape measure, a screwdriver, and the specific wall anchors and screws suited to your wall type. Because wall construction varies so much from home to home, IKEA does not include wall-mounting screws or plugs in the packaging. You must check the official IKEA TRONES assembly instructions to verify the mounting hole sizes on the cabinet backplate, but you will need to purchase the matching screws and anchors separately from a local hardware store.
For concrete or concrete hollow block (CHB) walls, you will need a hammer drill, masonry drill bits, and plastic wall plugs (commonly referred to locally as tox) or heavy-duty expansion anchors. For drywall or gypsum board, you will need a standard drill, wood or metal drill bits (if mounting directly to studs), and specialized drywall anchors like toggle bolts or self-drilling threaded anchors.
Products mentioned in this guide
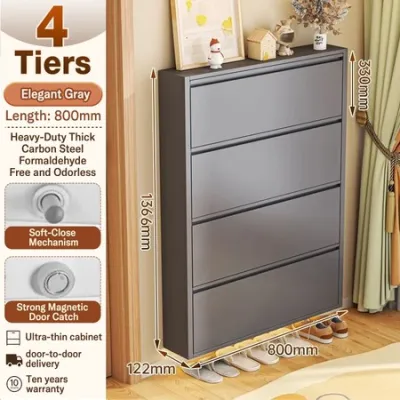
396 Lazada user ratings
Very fast , ordered on the 26th and delivered on the 28th. It was a busy time of the year so i was not able to open at once and make a revie…Read full reviewShow less
Very fast , ordered on the 26th and delivered on the 28th. It was a busy time of the year so i was not able to open at once and make a review. The parcel arrived with torn packaging and broken seals. One of the parts was rusty and dented. This is my second time to order the same item, the first was good. This time i ordered 2 sets of shoe rack...very disappointed! ang daming dents and rusty parts.. yung isang set kulang ng bottom panel, buti na lang di halata. Pinukpok namin yung dents. No wonder bumaba ang presyo during the holidays, alam ni seller na di pulido yung products. Will not recomment your shop😡
Easy to install, great stuff! The effect is very good! After installation, there is a great sense of achievement! It's indeed quite heavy! C…Read full reviewShow less
Easy to install, great stuff! The effect is very good! After installation, there is a great sense of achievement! It's indeed quite heavy! Craftsmanship level: Perfect
Stable flat surface, Ultra thin and space-saving, well packed, no damage, complete accessory, though not easy to assemble it's like Lego 😂, …Read full reviewShow less
Stable flat surface, Ultra thin and space-saving, well packed, no damage, complete accessory, though not easy to assemble it's like Lego 😂, thanks to the seller thou
🔨Durability:durable 📏Capacity:can fit up to 16 pairs 🎨Design:very aestheticUltra thin and space-saving, Stable flat surface,
The quality is very good. My husband and I can assemble it properly, and there is an instruction manual,
Prices are valid at publication and may change. Please refer to the product page for the latest price.
In addition to the drilling equipment, a reliable spirit level is non-negotiable to prevent crooked cabinets that might swing open or look misaligned. A pencil is needed for marking, and a tape measure ensures correct height and spacing, especially if you are installing multiple units in a tight entryway or hallway. Having a vacuum cleaner or a small brush on hand is also helpful to clean out masonry dust from the drilled holes before inserting your anchors, ensuring a tight, friction-based grip.
How do you identify your wall type to choose the right anchors?
You can identify your wall type by performing a simple knock test, observing drill resistance, and checking visual cues to distinguish between solid concrete, concrete hollow blocks, and drywall. Selecting the wrong anchor can lead to a catastrophic failure where the cabinet tears out of the wall under load. In the Philippines, residential walls are typically constructed from one of three materials, each requiring a specific anchoring strategy.

Solid concrete is often found in newer high-rise condominiums or structural columns of houses. When you knock on a solid concrete wall, it sounds completely solid and dull, with no echo. Drilling into it requires a hammer drill and significant effort, producing fine, light-gray dust. This material offers the highest load capacity when paired with standard plastic expansion plugs or metal expansion bolts.
Concrete hollow block (CHB) is the most common material for exterior and partition walls in traditional Philippine houses. Knocking on CHB walls produces a hollow, echoing sound in some spots and a solid sound near the mortar joints. When drilling, the bit will pass through a hard outer plaster and concrete shell (about 1 to 2 inches thick) and then suddenly drop into an empty void. Standard plastic plugs may not hold securely if they expand inside these hollow voids, requiring careful placement or specialized hollow-block anchors.
Drywall or gypsum board is commonly used for interior partitions in modern renovations, office spaces, or condo room dividers. Knocking on drywall produces a very clear, hollow, papery sound. It is soft to the touch compared to masonry, and drilling into it is extremely easy, producing fine white powder. This material has the lowest load capacity and requires specialized anchors that spread the weight across a wider area of the board.
Before marking or drilling, inspect the wall surface for signs of moisture damage, bubbling paint, or cracks, which can compromise the wall’s structural strength, especially in humid tropical environments. Always use a stud finder or wall scanner to check for hidden electrical conduits (often run in PVC pipes inside CHB or behind drywall) and water pipes, especially if the wall is shared with a bathroom or kitchen.
What are the correct mounting steps for concrete and hollow block walls?
To mount IKEA TRONES cabinets on concrete or hollow block walls, you must mark the mounting holes using a spirit level, drill precise holes using a masonry bit that matches your wall plugs, insert the anchors flush, and screw the cabinet backplate securely to the wall. Masonry walls provide excellent load-bearing capacity when paired with the correct hardware, but they require precise drilling to prevent the anchors from slipping.
Begin by holding the TRONES cabinet shell against the wall at your desired height. Place a spirit level on top of the cabinet to ensure it is completely horizontal. Use a pencil to mark the exact center of the mounting holes onto the wall through the cabinet’s rear mounting slots. Once marked, set the cabinet aside.
Switch your power drill to hammer mode and attach a masonry drill bit that matches the diameter of your plastic wall plugs (commonly 6mm or 8mm, but verify with your anchor packaging). Drill straight into the marked points, keeping the drill perpendicular to the wall. For solid concrete, drill slightly deeper than the length of the plug. For hollow blocks, try to drill into the solid web of the block if possible; if you hit a hollow core, ensure your drill remains steady so the hole does not become oversized.
Clean out the dust from the holes using a hand pump, straw, or vacuum. Insert the plastic wall plugs (tox) into the holes. They should fit snugly; you may need to tap them gently with a hammer until they are flush with the wall surface. If the plug is loose or spins, the hole is too large, and the anchor will not hold.
Align the TRONES cabinet holes with the inserted anchors. Insert the screws through the cabinet’s mounting washers (supplied by IKEA) and tighten them into the wall plugs. Do not over-tighten, as this can crack the plastic cabinet frame.
If the drill bit slips into a large void within a hollow block and the plastic plug spins freely without gripping when you tighten the screw, stop immediately. A spinning anchor cannot support weight. In this scenario, you must either shift the mounting location slightly to hit a solid section of the block or switch to specialized hollow-wall toggle bolts that expand behind the block’s outer shell.
How should you install IKEA TRONES cabinets on drywall or gypsum board?
Installing IKEA TRONES cabinets on drywall requires locating the wooden or metal studs behind the board for direct mounting, or using heavy-duty hollow-wall toggle anchors if studs are not positioned where you want the cabinets. Standard plastic expansion plugs designed for concrete must never be used in drywall, as they cannot support dynamic loads and will easily pull out, damaging your wall and causing the cabinet to fall.
Whenever possible, mount at least one side of the TRONES cabinet directly into a wall stud. Use a stud finder to locate the vertical wooden or metal framing behind the gypsum board. Secure the cabinet to the stud using standard wood or self-tapping metal screws. This provides the most secure and reliable attachment.
If studs do not align with your desired cabinet placement, you must use specialized drywall anchors. Threaded drywall anchors are suitable for light to medium loads; these screw directly into the drywall, creating wide threads that grip the gypsum. For maximum security, use heavy-duty toggle bolts or snap-toggles. These anchors feature a metal wing that folds to pass through a drilled hole and then springs open behind the drywall sheet, distributing the weight over a larger surface area.
Always check the maximum load capacity printed on your anchor packaging. Keep in mind that while the anchor itself might support a high weight, the drywall sheet itself has limits. Avoid overloading TRONES cabinets mounted solely on drywall with heavy items like boots or tools; reserve them for lighter footwear and accessories to prevent the drywall from sagging or cracking over time.
How do you align and secure multiple TRONES cabinets for a stable setup?
To align and secure multiple IKEA TRONES cabinets in a stacked or side-by-side configuration, you must measure and mark a continuous grid, use a long spirit level to maintain alignment across all units, and join the cabinets together using the provided connection points. One of the main design benefits of the TRONES system is its modularity, allowing you to create a seamless wall of storage. However, even a minor misalignment of a few millimeters on the first cabinet will multiply across subsequent units, resulting in visible gaps or crooked lines.
Begin by measuring the outer dimensions of a single TRONES cabinet. If you are mounting them side-by-side, map out the total width on your wall. If stacking them vertically, ensure you leave enough clearance for the top cabinet’s bin to tilt open fully without hitting the ceiling or an overhanging shelf.
Use a long spirit level to draw a straight horizontal reference line across the entire installation area. Mark the mounting holes for all cabinets relative to this line rather than measuring each one individually from the floor, as floors in many homes are not completely level.
IKEA TRONES cabinets feature pre-drilled holes on their sides and tops, allowing you to screw adjacent units directly to one another. Once the main cabinets are securely anchored to the wall, use the small joining screws to lock the cabinets together. This structural connection distributes the load and prevents individual units from shifting or warping.
Once the entire assembly is mounted and joined, perform a physical stability check. Gently pull on each cabinet to ensure there is no wobbling, flexing of the brackets, or movement against the wall. Gradually load the cabinets with shoes, starting with the heaviest items at the bottom to maintain a low center of gravity, and inspect the mounting points after a few days of regular use to ensure the anchors remain firmly seated.
Community discussion
Share your experience or ask a question. Comments are reviewed before publication.