
Setting up a functional bedroom layout in a rented condominium often presents a frustrating challenge: how to secure convenient storage without losing your security deposit to wall damage. Traditional bedside cabinet assembly typically relies on drilling heavy anchors into concrete or drywall, an action that most landlords in the Philippines strictly prohibit or penalize during move-out inspections. Fortunately, modern no-drill solutions—ranging from advanced engineering adhesives to tension-based structural poles—allow you to assemble a stable, stylish bedside storage system without leaving a single permanent mark on your walls.
By understanding the mechanical limits of these alternative mounting methods, you can design a bedside setup that holds your daily essentials securely. This guide walks you through space assessment, material selection, step-by-step installation, and long-term maintenance tailored specifically for high-density condo living.
Assessing Your Space and Choosing the Right No-Drill Solution
Before purchasing any storage unit, pull out a metal measuring tape to assess the physical footprint beside your bed. In typical Philippine condo bedrooms, space is at a premium, and every centimeter counts. Measure the distance between the edge of your mattress and the adjacent wall, ensuring that your proposed storage unit will not obstruct wardrobe doors, sliding balcony entryways, or natural walking paths. If your bed frame sits tight against the wall, vertical wall-mounted options or slim-profile systems will be your best choice.
Products mentioned in this guide
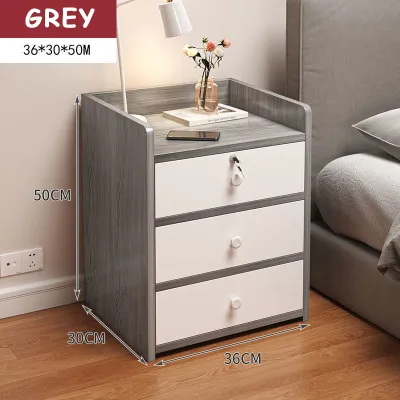
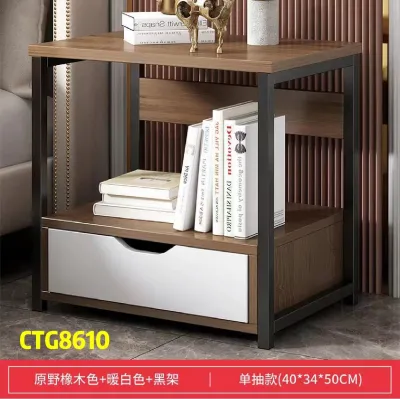
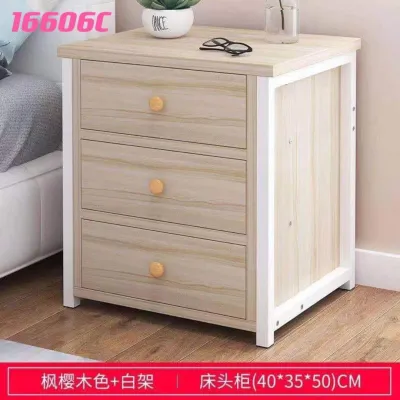
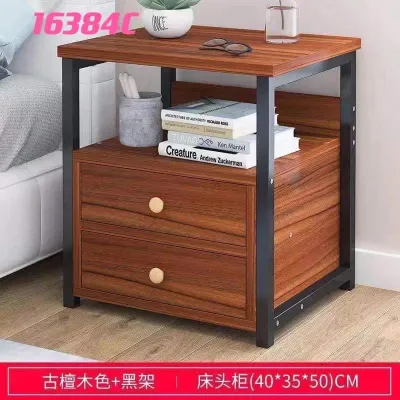
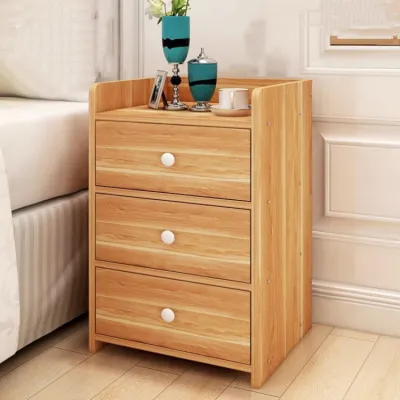
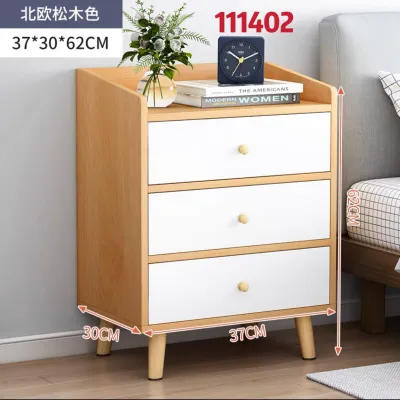
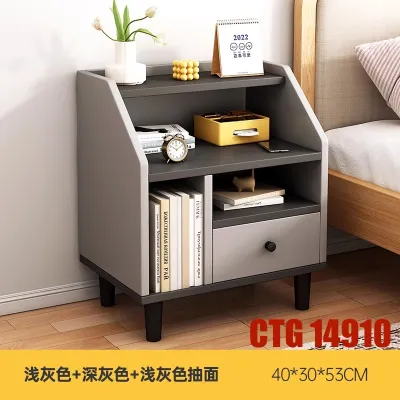
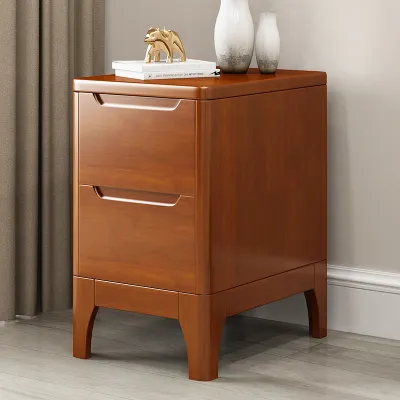
Prices are valid at publication and may change. Please refer to the product page for the latest price.
Next, identify the exact material of your bedside wall. Most modern condominiums feature either painted concrete shear walls or painted gypsum drywall partitions. Take a moment to knock on the wall: a solid, flat sound indicates concrete, while a hollow echo points to drywall. Smooth, non-porous surfaces like polished tiles, glass, or varnished wood panels are ideal for heavy-duty adhesives. Conversely, highly textured plaster, rough brick, or matte paint finishes limit the contact area of adhesives, making tension-based or freestanding units a much safer choice.
Your specific storage habits must dictate the mechanical support you choose. Categorize the items you intend to place beside your bed. If your bedside table only needs to hold a smartphone, a pair of eyeglasses, and a lightweight charging hub, lightweight adhesive floating shelves are highly efficient. However, if you plan to store heavy hardcover books, a ceramic table lamp, or a tablet, adhesive strips alone may fail. For heavier items, look toward tension-pole shelving systems that transfer weight directly to the floor, or opt for a slim, freestanding bedside cabinet.
In the Philippines, condo lease agreements are notoriously strict regarding aesthetic alterations. Minor paint chips or plaster damage can easily lead to deductions of ₱2,000 to ₱5,000 from your security deposit to cover professional repainting fees. Choosing a completely reversible, no-drill assembly method eliminates this financial risk entirely, giving you peace of mind throughout your tenancy.
Essential Tools and Materials for No-Drill Assembly
To achieve a reliable, long-lasting installation, you must gather the correct preparation and alignment tools before unboxing your new furniture. Skipping basic preparation steps is the leading cause of adhesive and tension-mount failures.

Surface Preparation Supplies
- 70% Isopropyl Rubbing Alcohol: Essential for stripping away skin oils, dust, and microscopic grease layers from the wall surface.
- Lint-Free Microfiber Cloths: Used to apply the alcohol and buff the surface dry without leaving tiny fibers behind.
- Pencil and Painter's Tape: For marking precise alignment lines without staining the paint.
Alignment and Measurement Tools
- Metal Measuring Tape: To verify height and clearance dimensions.
- Spirit Level: A small bubble level (or a highly rated leveling app on your smartphone) ensures your shelves are perfectly horizontal. A tilted shelf creates uneven gravity pull, which accelerates adhesive failure over time.
Storage Units and Mounting Hardware
- The Storage Unit: This could be a lightweight plastic floating shelf, a modular pegboard, or a compact bedside cabinet designed for adhesive or tension mounting.
- Mounting Hardware: Ensure you have high-quality, damage-free adhesive strips (such as silicone-based or stretch-release polymer strips), heavy-duty magnetic brackets, or adjustable tension rod assemblies.
Before proceeding with any assembly, turn the product packaging over to read the manufacturer’s specified weight limits and surface compatibility. Pay close attention to environmental restrictions. Many standard adhesives are rated for air-conditioned, low-humidity environments and can lose up to 50% of their holding capacity when exposed to the high humidity typical of tropical climates.
Step-by-Step: Adhesive Bedside Cabinet Assembly and Shelf Installation
Adhesive-mounted shelves and lightweight cabinets offer a clean, minimalist aesthetic, but their stability relies entirely on the quality of the chemical bond you create during installation.
1. Clean the Surface Thoroughly
Dust, skin oils, and airborne grime are the primary causes of adhesive failure. Pour a generous amount of 70% isopropyl rubbing alcohol onto a clean microfiber cloth and vigorously scrub the target wall area. Do not use multi-purpose household sprays or glass cleaners, as these products often leave behind a thin, silicone-based residue that prevents the adhesive from bonding. Allow the cleaned area to air-dry completely for at least 15 minutes.
2. Plan and Mark the Alignment
Use your measuring tape to determine the ideal height of your bedside shelf, matching it comfortably with the top of your mattress. Hold the mounting bracket against the wall and place your spirit level on top of it. Once the bubble is perfectly centered, use a pencil to draw light guidelines along the top and sides of the bracket. Apply a strip of painter’s tape just below this line to act as a physical guide during the mounting step.
3. Apply the Adhesive Strips
When beginning your bedside cabinet assembly, unbox the adhesive strips and identify the wall-side and cabinet-side backings. Apply the strips to the back of the mounting bracket or cabinet frame, spacing them evenly to distribute the weight. Avoid placing the strips too close to the outer edges of the bracket; keeping them a few millimeters inward prevents the adhesive from oozing out under pressure. Press each strip firmly onto the bracket for 30 seconds to initiate the initial bond.
4. Press and Cure the Mount
Remove the remaining protective liners from the wall-side of the adhesive. Align the bracket carefully with your pencil marks. Press the bracket firmly against the wall using both hands, applying even, heavy pressure across the entire surface for at least 30 seconds. If your shelf or cabinet design features a slide-off mounting plate, slide the main body off the bracket now, leaving only the bare bracket attached to the wall. Let the adhesive cure undisturbed for the manufacturer’s specified period—typically 12 to 24 hours—before sliding the shelf back on or placing any items on it.
5. Assess the Paint Quality
Standard drywall or concrete partition walls painted with low-grade builder’s latex paint are highly prone to peeling under tension. If you notice the paint layer bubbling or flexing slightly when you apply pressure to the bracket, stop immediately. For weak paint surfaces, test a small, inconspicuous area behind your bed frame first, or transition to products featuring specialized damage-free stretch-release technology that pulls away cleanly without tearing the paint film.
Step-by-Step: Setting Up Magnetic and Tension-Based Storage
When wall adhesives are unsuitable due to textured paint, high humidity, or landlord restrictions, magnetic and tension-based systems offer highly stable, zero-contact alternatives.
Using Magnetic Mounts on Metal Surfaces
If your bed frame, headboard, or adjacent furniture features a sturdy steel or iron frame, you can utilize heavy-duty magnetic storage organizers. These systems require no adhesive and can be repositioned instantly.
Verify Magnetic Strength: Ensure the metal surface is truly magnetic (ferrous) and clean it with a damp microfiber cloth to remove dust or manufacturing oils. Thick powder coatings or rust-resistant paint layers can slightly reduce magnetic grip, so choose mounts with rubberized magnetic backings to prevent sliding.
Distribute Weight Evenly: Magnetic shelves are highly susceptible to sliding downward if they are loaded unevenly. Place heavier items, like power banks or books, closest to the magnetic base plate, and keep lighter items toward the outer edges to minimize leverage.
Check Load Capacity: Always check the manufacturer’s load capacity ratings. A typical magnetic bedside pocket is rated for 1 to 3 kilograms on solid steel, but this capacity drops significantly on thin sheet metal or hollow metal tubes.
Installing Tension Poles and Rods
Floor-to-ceiling tension poles with adjustable tray shelves are an excellent way to create multi-tiered bedside storage in tight condo corners without touching the walls.
Measure Ceiling Height: Measure the exact distance from your floor to your ceiling. Ensure there are no obstructions like ceiling fans, light fixtures, or decorative gypsum moldings directly above your planned installation zone.
Adjust the Tension: Assemble the pole segments according to the product manual. Position the pole vertically beside your bed, using your spirit level to check its alignment from both the front and side profiles. Extend the adjustable section until the top and bottom feet make firm contact with the ceiling and floor, then engage the twist-lock or spring-loaded tension mechanism to secure it.
Verify Stability: Before loading any shelves, grasp the pole at chest height and give it a firm shake to verify its stability. Ensure the top and bottom caps are fitted with non-slip rubber or silicone pads. These pads are crucial for protecting your condo’s laminate, vinyl, or ceramic tile flooring and painted concrete ceiling from scuffs and structural pressure marks.
Verifying Stability and Maintaining Your No-Drill Setup
Once your assembly is complete, resist the urge to immediately load it with all your personal items. A systematic verification process ensures your setup remains secure over time.
Step-by-Step Load Testing
- Day 1: Place only ultra-light items, such as an empty plastic cup or a single charging cable, on the shelf.
- Day 2: Add slightly heavier items, like a smartphone or a small paperback book.
- Day 3: Gradually increase the load to your target weight, ensuring you stay well below the manufacturer's recommended maximum limit to maintain a safe operating margin of at least 30%.
Routine Inspections No-drill installations require ongoing monitoring to prevent sudden failures. Every few weeks, visually inspect the mounting points. Look for peeling adhesive edges, sliding magnetic bases, or a loss of tension in vertical poles. In the warm, humid climate of the Philippines, moisture can slowly penetrate and degrade the chemical bonds of standard adhesives, making regular checks essential, especially during the rainy monsoon season.
Safe Removal Protocols When your lease ends or you decide to rearrange your bedroom, do not pull or pry the shelves directly off the wall. For adhesive strips, use a hairdryer on a low-to-medium heat setting to gently warm the adhesive backing for 60 seconds, which softens the polymer. Slowly pull the removal tab parallel to the wall, stretching it out gradually to release the bond without tearing the paint or plaster. Always follow the specific removal instructions provided by the product manufacturer to preserve your condo’s walls and secure your full deposit refund.
Frequently Asked Questions (FAQ)
Can I use no-drill adhesive shelves on freshly painted condo walls?
No, you should avoid applying heavy-duty adhesives to freshly painted walls. Even though paint may feel dry to the touch within a few hours, it takes several weeks (often 3 to 4 weeks) for the paint to fully cure and bond securely to the drywall or concrete beneath. Applying adhesives too early traps moisture and solvents, preventing proper curing and almost guaranteeing that the paint will peel off when any weight is applied to the shelf. Always consult both the paint manufacturer’s curing guidelines and the adhesive product’s surface restrictions before installation.
What is the safest way to remove adhesive bedside cabinets without peeling the paint?
The safest removal method involves applying gentle heat and pulling the adhesive tabs correctly. Use a hairdryer on a low heat setting to warm the adhesive for 30 to 60 seconds, which makes the adhesive pliable. If using stretch-release strips, grab the exposed tab and pull it slowly, keeping your hand flat against the wall so you are pulling parallel to the surface rather than outward. If the adhesive is a permanent mounting tape, use a piece of dental floss or thin fishing line to gently saw through the foam backing behind the cabinet bracket, then roll off the remaining residue with your thumb. Stop immediately if you see the paint layer beginning to bubble or lift.
Community discussion
Share your experience or ask a question. Comments are reviewed before publication.