
Moving to a new home is an exciting milestone, but packing up a household can quickly feel overwhelming—especially when dealing with the sheer volume and variety of children’s toys. To prevent chaos during your lipat bahay journey, the key lies in a systematic approach to sorting, sanitizing, and packing. Utilizing dedicated toy organizers storage not only protects your investment during transit but also makes setting up your new playroom incredibly efficient. By establishing a clear plan before the moving truck arrives, you can ensure that fragile items remain intact, small parts do not vanish, and your children have their favorite comforts ready on day one.
Choose the Right Toy Organizers and Packing Supplies
Selecting the correct packing materials is the foundation of a successful move. While it is tempting to throw everything into leftover cardboard grocery boxes, toys require specialized protection to withstand the physical demands of transit and the environmental challenges of a tropical climate. High humidity can soften cardboard, leaving your items vulnerable to crushing, moisture damage, and pests like ants or cockroaches.
To safeguard your children’s belongings, gather these essential supplies before you begin:
Products mentioned in this guide
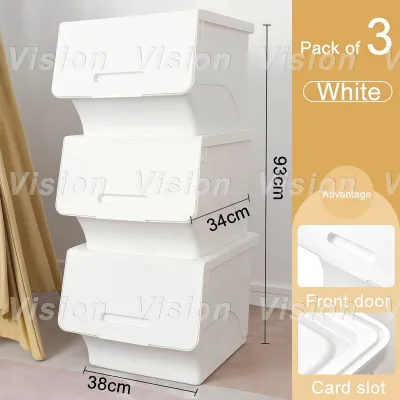
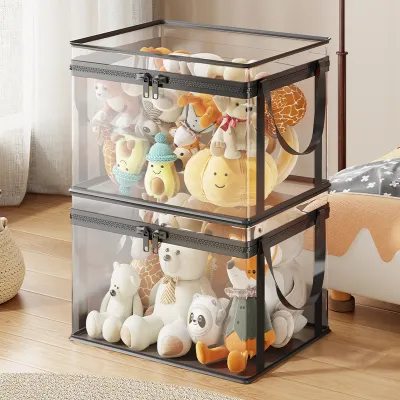
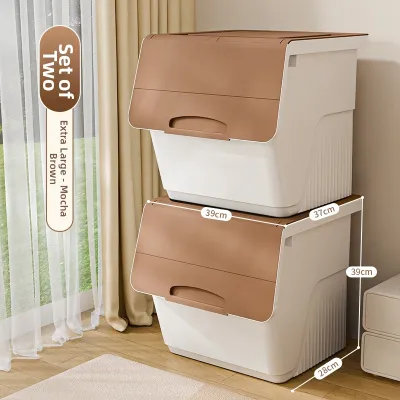
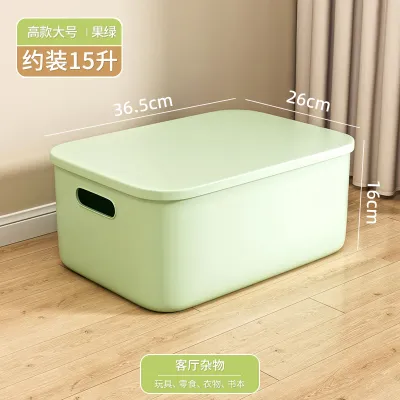
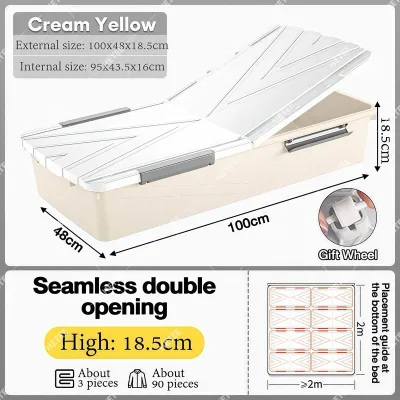
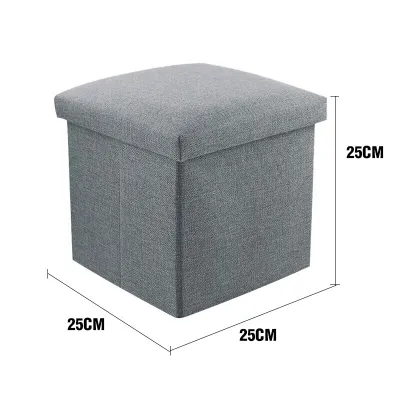
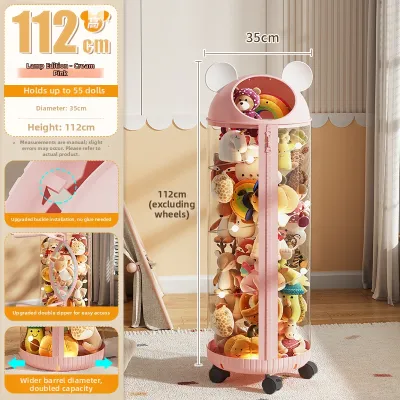
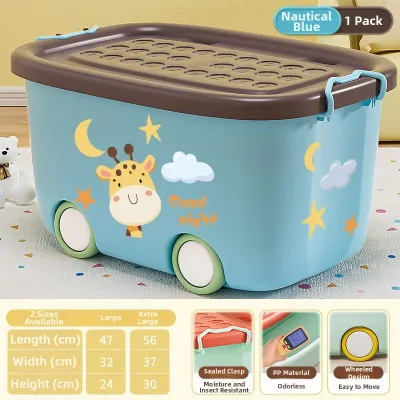
Prices are valid at publication and may change. Please refer to the product page for the latest price.
- Sturdy Plastic Bins with Snap-Lock Lids: These offer superior structural integrity and create a tight seal against dust, water, and pests.
- Heavy-Duty Bubble Wrap: Essential for cushioning delicate figurines, porcelain dolls, or electronic screens.
- Clean Packing Paper: Use ink-free paper to wrap individual items and fill empty voids without leaving newsprint stains.
- Sealable Ziplock Bags: Perfect for grouping tiny building bricks, board game tokens, and doll accessories.
- Thick Permanent Markers: Essential for clear, bold labeling that will not smudge during handling.
When shopping for toy organizers storage, prioritize stackability, weight capacity limits, and ergonomic handle designs. Look for bins with reinforced corners and recessed lids that allow multiple units to lock securely together when stacked vertically. Check the manufacturer’s load capacity ratings; overloading a bin beyond its limit can cause the plastic to warp or crack under pressure.
Finally, always measure the exterior dimensions of your chosen organizers. Verify that they will easily clear your current and future doorways, narrow hallways, and condominium lifts. Knowing these exact measurements also allows you to calculate how they will fit into your moving vehicle, ensuring you maximize cargo space without creating unstable, tipping hazards.
Sort and Declutter Toys to Lighten Your Load
Packing toys you no longer need is a waste of time, energy, and valuable packing space. Before a single item goes into a bin, go through your child’s entire collection and categorize them using the classic “Keep, Donate, and Discard” sorting framework. This process dramatically lightens your physical load and ensures you only transport items that bring genuine value to your new home.

To make the sorting process manageable, divide the “Keep” pile into logical sub-categories. You can group toys by type—such as building blocks, plush toys, board games, and electronic devices—or organize them by the child’s age and target room destination. This structured division makes unpacking a breeze because each bin will have a designated home in the new house.
During the sorting phase, perform a thorough quality inspection. Check board games and puzzles for missing pieces; if a game is incomplete and unplayable, it may be time to discard or recycle it. For battery-operated toys, open the battery compartments to inspect for white powder or corrosion. Corroded batteries can permanently damage internal circuits, so discard compromised toys and safely remove active batteries from those you plan to keep.
As you finalize your piles, remember to set aside a dedicated “first-night” bag. Fill this bag with a few favorite toys, comfort blankets, and simple activities to keep your children occupied and comforted during the hectic moving day. Having these familiar items easily accessible prevents meltdowns and keeps kids entertained while you coordinate with the moving crew.
Clean and Dry Toys Based on Their Material
In the Philippines, high relative humidity creates a perfect breeding ground for mold and mildew. Sealing dirty or damp toys inside airtight plastic containers for even a few days can result in musty odors and ruined playthings. Therefore, a strict rule of moving preparation is that all toys must be 100 percent dry before they are packed into your toy organizers storage.
Hard Plastic and Rubber Toys
Plastic blocks, action figures, and rubber bath toys are highly durable but can harbor bacteria and grime. Wipe these items down with a microfiber cloth dipped in warm, mild soapy water, or wash them in batches in a clean basin. Avoid harsh chemical bleach, which can degrade the plastic or cause discoloration. Once washed, rinse them thoroughly with clean water and spread them out on a clean, dry towel. Allow them to air dry completely in a well-ventilated room or under a fan to ensure no moisture remains trapped in crevices or hollow interiors.
Plush and Fabric Toys
Stuffed animals and fabric play mats easily absorb dust and moisture. Spot clean minor stains with a damp cloth and mild detergent, or machine wash them if the manufacturer’s care labels permit. Use a gentle cycle with a mild laundry detergent. After washing, ensure they are thoroughly dried. You can tumble-dry them on a low-heat setting or hang them to dry in direct sunlight. Ensure the inner stuffing is completely dry to the touch; any residual dampness inside a plush toy will lead to mold growth once sealed in a storage bin.
Wooden and Electronic Toys
Wipe wooden toys with a slightly damp microfiber cloth to remove surface dust. Never soak wooden items, as excessive moisture can cause the wood to swell, warp, or crack, ruining the joints and paint. For electronic toys, use compressed air to blow dust out of crevices and dry microfiber cloths to polish screens and plastic casings. Never apply liquid cleaners near battery compartments, speakers, screens, or internal circuits, as moisture can short-circuit the electronics.
Pack Toys Safely Into Storage Organizers
Once your toys are clean, dry, and categorized, the physical packing process begins. Proper packing prevents shifting, minimizes the risk of breakage, and maximizes the interior space of your toy organizers storage. Follow this systematic, five-step guide to pack your bins like a professional.
Step 1: Cushion the Base Before placing any toys inside, line the bottom of your plastic organizer with a protective layer. You can use a sheet of bubble wrap or a few layers of clean packing paper. This initial layer acts as a shock absorber, protecting the items at the bottom from the vibrations and bumps of the moving truck.
Step 2: Distribute Weight Always place your heaviest toys—such as wooden blocks, heavy plastic trucks, or die-cast metal vehicles—at the bottom of the bin. This keeps the organizer’s center of gravity low, preventing it from tipping over during transit. Place lighter, more delicate items, such as plastic figurines or craft kits, on top of the heavy base to prevent them from being crushed.
Step 3: Contain Small Parts Small, loose pieces are easily lost in a move. Group building bricks, action figure accessories, and puzzle pieces into clear, sealable ziplock bags. Squeeze out excess air before sealing the bags to save space. Label each bag with a permanent marker so you know exactly which set it belongs to, then place the bags securely inside the larger organizer.
Step 4: Eliminate Empty Gaps Items that shift during transit are highly prone to scratching or breaking. Fill any empty spaces or voids inside the organizer with crumpled packing paper or soft, clean plush toys. This locks the items in place, preventing them from colliding when the moving vehicle makes sudden turns or stops.
Step 5: Avoid Overpacking It is tempting to pack every bin to the absolute brim, but overstuffing is a major safety hazard. Ensure that the lid of your organizer closes flat and locks securely without forcing it. Overpacking puts outward pressure on the plastic walls, which can crack the hinges, warp the lid, or cause the bin to burst open when stacked under other heavy items in the truck.
Label and Load Organizers for a Smooth Transit
A successful move relies on clear communication, especially if you are hiring professional movers. Proper labeling and strategic loading ensure that your toy organizers storage arrive at your new home intact and find their way to the correct room without confusion.
Create a highly visible labeling system on your bins. Use a thick permanent marker to write the general contents and the destination room on both the top lid and at least two sides of the container. For example, write “Kids’ Playroom – Board Games & Art Supplies” clearly. Labeling multiple sides ensures that even when the bins are stacked, the labels remain readable. You can also use color-coded adhesive tape or stickers to help movers identify which boxes belong in the kids’ rooms at a single glance.
When loading the moving vehicle, follow strict weight-distribution rules. Place your heaviest, most rigid plastic organizers on the bottom of the pile to create a stable foundation. Stack progressively lighter bins on top. Never place heavy cardboard boxes or furniture on top of your plastic toy bins, as excessive weight can crack the plastic lids. Secure the stacks against a flat interior wall of the truck, and use heavy-duty straps to prevent the columns from shifting or tipping during sudden stops.
Unpack and Set Up the New Playroom Efficiently
Arriving at your new home is exciting, but a sea of boxes can quickly feel overwhelming. To establish a sense of normalcy and comfort for your children, approach the playroom setup systematically rather than unpacking everything at once.
Before opening any toy bins, assemble and position your large furniture pieces first. Set up your bookshelves, cubby units, and heavy storage cabinets in their permanent locations. Ensure that tall shelving units are safely anchored to the wall to prevent tip-over accidents, especially in active play areas. Having these structural storage units ready gives you an immediate place to put toys as you unpack them.
Unload your toy organizers directly into these designated play zones. Work systematically by unpacking only one bin at a time. This prevents toys from piling up on the floor, which creates a tripping hazard and clutter. As you empty each container, fold up packing paper and gather bubble wrap immediately. Discard or recycle these packing materials right away to keep the new playroom safe, clean, and ready for your children to enjoy.
Frequently Asked Questions (FAQ)
Should I remove batteries from electronic toys before packing?
Yes, removing batteries is highly recommended before packing toys for a move. During transit, toys can shift, causing buttons to be pressed accidentally, which drains the battery power and creates unexpected noise in the moving truck. More importantly, the high heat and humidity inside a moving vehicle or storage unit can cause batteries to leak corrosive acid, permanently damaging the toy’s internal wiring and circuits.
Are cardboard boxes safe for storing toys during a move?
While cardboard boxes are a budget-friendly option for short moves, plastic toy organizers storage with snap-lock lids are far superior. Plastic bins provide robust protection against moisture, dust, and pests, which is particularly crucial in the humid climate of the Philippines. Cardboard can easily absorb moisture from the air, weakening its structural integrity and risking damage to the toys inside if boxes are stacked.
Community discussion
Share your experience or ask a question. Comments are reviewed before publication.