
Living in a compact condominium in Metro Manila or other urban hubs across the Philippines often means maximizing every square inch of your living space without risking your security deposit. When drilling into solid concrete walls or gypsum board partitions is prohibited by your lease agreement, finding a functional mini table for a small room requires looking at alternative mounting and support mechanisms. By understanding how different no-drill designs interact with your condo’s existing surfaces, you can set up a stable workspace, dining nook, or bedside surface that leaves no trace when it is time to move out.
Choosing the right setup involves balancing your daily needs with the physical realities of your rental unit. Whether you need a temporary spot for remote work, a compact dining surface, or a simple ledge to hold your morning coffee, there are several structural designs engineered specifically to stay secure without a single screw. Evaluating these options carefully will help you maintain a functional home while saving you from losing a security deposit that can easily exceed ₱20,000 in prime urban developments.
In tropical climates, high humidity levels can also affect how certain materials and adhesives perform over time. This makes it even more critical to choose a mechanism that matches your specific environment. From tension poles to cantilevered frames, each option has distinct structural requirements that you must verify before making a purchase.
Products mentioned in this guide
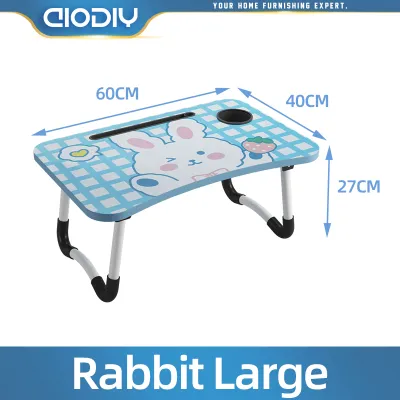
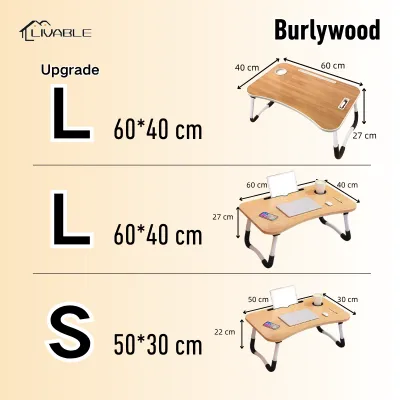
Prices are valid at publication and may change. Please refer to the product page for the latest price.
How No-Drill Table Mechanisms Work in Rentals
Tension pole systems utilize vertical pressure to secure shelving and small table surfaces between the floor and the ceiling. These systems feature a spring-loaded or screw-threaded mechanism that exerts outward force, locking the vertical pole tightly in place. To maintain stability, they require solid, unyielding surfaces at both ends. In many Philippine condos, this means installing them against solid concrete slabs rather than hollow drywall partitions or delicate drop ceilings. The vertical pressure is adjustable, allowing you to customize the height of the table surface as your needs change over time.
Over-the-door or hook-over partition tables rely on existing structural edges, such as solid interior doors, balcony railings, or sturdy room dividers. These tables hang from integrated metal brackets, distributing their weight downward along the vertical plane of the supporting structure. They are highly portable and require absolutely no contact with wall paint, making them excellent for temporary setups. However, you must ensure the supporting door or railing is strong enough to handle both the bracket and the items placed on the table. Additionally, check that the bracket thickness does not prevent your doors from closing properly.
Freestanding narrow or C-shaped tables require zero wall contact and rely entirely on their own base geometry for stability. These tables feature a cantilevered design where the flat base slides underneath a sofa, bed, or armchair, bringing the tabletop surface directly over your lap. They are ideal for tight layouts because they utilize the empty floor space beneath your existing furniture. Because they do not touch the walls, they carry zero risk of surface damage or lease violations. Their frames are typically constructed from powder-coated steel, which helps resist rust in humid environments.
Adhesive or peel-and-stick mounting systems use high-strength chemical bonds to attach small, lightweight ledges or folding brackets directly to the wall. While convenient, these systems demand strict verification of your wall’s paint type and surface texture. Moisture and high humidity can weaken certain adhesives over time, making it critical to check the manufacturer’s environmental limits. Many heavy-duty adhesives also require a curing period of 24 to 72 hours before you can place any weight on the surface. Skipping this step is a primary cause of sudden bracket failure.
What to Measure Before Buying a Mini Table
Before browsing online marketplaces, you must measure both the physical footprint of the table and its active surface area. A mini table for a small room should ideally feature a foldable, drop-leaf, or nesting design that can be tucked away when not in use. Measure the surrounding clearance to ensure that when the table is fully extended, there is still enough room for you to walk past comfortably without bumping into sharp corners. A good rule of thumb is to maintain at least 60 centimeters of walkway clearance around active furniture.

Clearance checks must extend beyond simple floor space to include architectural details that might obstruct your table. Measure the height and depth of baseboards, skirting boards, window sills, and electrical outlets. A C-shaped table, for instance, requires a specific clearance height between the floor and the bottom of your sofa frame to slide in smoothly. If your sofa sits too low to the ground, the table base will not fit underneath, rendering the cantilevered design useless. Similarly, ensure the table placement does not block door swings, built-in wardrobe doors, or air conditioning vents.
Weight capacity verification is another critical step that cannot be determined by material names alone. Do not assume a table is sturdy simply because the product description mentions “solid wood” or “alloy steel.” Always locate the manufacturer’s official specification label or user manual to find the exact maximum load limit, usually listed in kilograms. Keep in mind that no-drill tables generally have lower weight capacities than traditional bolted furniture. You must also distinguish between static load (the weight of objects resting on the table) and dynamic load (the temporary force applied when you lean your elbows on the surface).
Which No-Drill Table Fits Your Space?
Choosing the right table depends heavily on your daily activities and the specific layout of your condo. For instance, if you need a temporary remote work setup near a window to catch natural light, a hook-over window-sill table might be the most space-efficient choice. If you are trying to squeeze a nightstand into a narrow gap beside your bed, a slim C-shaped table or a small tension-pole shelf unit will fit without blocking your path. For extra food preparation space in a compact rental kitchen, a freestanding folding utility cart or a narrow console table can provide the necessary surface without violating your lease.
To help you evaluate these options, the following comparison matrix maps common condo scenarios to the most suitable no-drill table mechanisms:
| Scenario | Recommended Table Type | Primary Advantage | Critical Limitation / Lease Restriction |
|---|---|---|---|
| Bedside utility in a narrow gap | C-shaped freestanding table | Slides under bed frame; zero wall contact | Requires specific floor clearance under the bed |
| Temporary workspace near window | Hook-over window-sill table | Uses existing structural edges; saves floor space | Limited to sturdy, load-bearing frames; check window lock safety |
| Multi-tier storage in living area | Floor-to-ceiling tension pole system | High vertical space utilization; adjustable heights | Cannot be used on suspended, gypsum, or drop ceilings |
| Lightweight entryway key drop | Heavy-duty adhesive folding ledge | Folds flat against the wall when not in use | Risk of peeling paint on low-quality or humid walls |
| Kitchen prep or dining extension | Freestanding narrow console or folding cart | Highly mobile; can be rolled away when cooking | Takes up dedicated floor footprint when active |
When evaluating these options, consider the inherent trade-offs in stability. Freestanding narrow tables and C-shaped desks are inherently more stable for heavier items like laptops, monitors, or small kitchen appliances because their weight is supported directly by the floor. Tension-pole systems, while excellent for vertical storage, can experience slight swaying if the vertical pressure is not perfectly calibrated or if the floor experiences frequent vibrations from nearby appliances like washing machines. If you plan to use heavy equipment, a freestanding model with a wide, low-profile base is generally safer than relying on tension or adhesive mechanisms.
Furthermore, consider how easy the table is to dismantle or relocate. If you anticipate moving to a different condo unit in the near future, freestanding and hook-over models offer the highest level of portability. They can be packed flat in minutes without leaving any residue or requiring replacement parts. Tension poles and adhesive mounts, on the other hand, require careful disassembly and may need new adhesive strips or rubber pads before they can be reinstalled safely in a new location.
Safety Checks and Installation Boundaries
Before installing any tension-pole system, you must perform a thorough ceiling and floor material check. Suspended ceilings, acoustic tiles, and gypsum board drop ceilings are not designed to withstand vertical compression and will crack or collapse under the pressure of a tension pole. Only install these systems between solid concrete slabs and stable flooring. To protect delicate finishes like laminate, vinyl planks, or polished tiles, always place non-slip rubber or silicone protective pads at both contact points to distribute the pressure and prevent scratches.
Proper load distribution is vital for maintaining the balance of any no-drill furniture. When placing items on a cantilevered C-shaped table or a hook-over desk, always position the heaviest objects closest to the main support structure rather than on the outer edges. This simple habit prevents tipping and reduces the leverage force exerted on the joints. Regularly check the manufacturer’s weight tags to ensure you are not exceeding the recommended capacity, especially when adding temporary items like heavy books, water pitchers, or decorative potted plants.
Knowing when to stop and abandon a setup is crucial for preventing costly property damage. If you notice visible bowing in your drywall, slipping poles, cracking sounds, or peeling paint during installation, stop immediately. These are clear indicators that the surface cannot support the mechanism. In such cases, dismantle the setup and consult your landlord or a qualified professional to explore alternative freestanding furniture options that do not rely on wall or ceiling pressure.
Additionally, keep environmental factors in mind during installation. In areas of high humidity, such as bathrooms or kitchens without exhaust fans, metal components can corrode and adhesives can degrade faster. Inspect all joints, brackets, and contact pads every few months to ensure they remain secure and free of rust or mold. Taking these proactive steps will keep your living space safe and functional throughout your tenancy.
Frequently Asked Questions (FAQ)
Can adhesive tables damage rental walls?
Yes, high-strength adhesives can easily tear away paint, drywall paper, or plaster when removed, especially in humid tropical environments where moisture can compromise paint adhesion. Removable adhesive strips are designed to stretch and release cleanly, whereas permanent mounting glues or heavy-duty double-sided tapes bond permanently to the surface. To protect your security deposit, always perform a hidden spot test in an inconspicuous area, such as behind a door or near the baseboard, and carefully review your lease agreement’s wall modification clauses before applying any adhesive mounts.
How do I check if a tension pole table is safe for my ceiling?
To determine if your ceiling can support a tension pole, perform a simple physical check by gently tapping the surface. A hollow, drum-like sound indicates a drywall or suspended ceiling, which is unsafe for tension furniture. A solid, dull thud indicates concrete, which is suitable for installation. Always use wide, non-marking protective pads at the top and bottom of the pole to distribute the pressure evenly. Additionally, schedule a monthly check to inspect the pole for any slippage, loss of tension, or indentation on the ceiling surface, adjusting the mechanism as needed to maintain safety.
Community discussion
Share your experience or ask a question. Comments are reviewed before publication.