
Finding extra space in a compact kitchen can be a major challenge, especially in high-density condominium units or rental apartments across Metro Manila and other urban areas in the Philippines. Traditional wall-mounted furniture often requires drilling deep holes into concrete or tiled walls—a task that is frequently prohibited by landlords and can lead to costly security deposit deductions. Fortunately, a specialized narrow table for kitchen layouts offers a practical alternative, utilizing innovative, non-invasive mounting systems to maximize your limited floor area. By taking advantage of heavy-duty adhesives, tension-based supports, or magnetic brackets, you can introduce valuable prep space or storage without ever touching a power drill.
To make these space-saving solutions work, you must align the mounting technology with your specific kitchen environment. Not all non-invasive methods are created equal, and their success depends heavily on the surface materials of your walls, the ambient humidity of your home, and the weight of the items you plan to store. Understanding these variables ensures that your new workspace remains stable, safe, and highly functional over years of daily use.
How to Choose a No-Drill Narrow Table for Your Kitchen
Selecting the right non-invasive narrow table requires careful planning and precise measurements. Unlike standard freestanding furniture, a wall-supported table relies entirely on the structural integrity of its mounting surface and the accuracy of its physical placement to remain stable.
Products mentioned in this guide
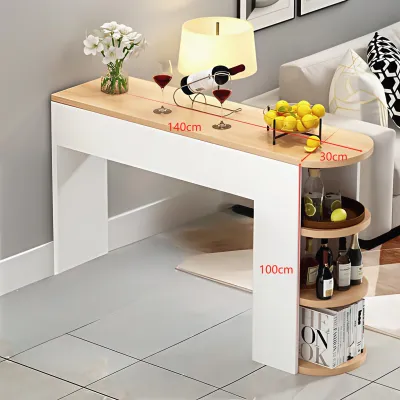
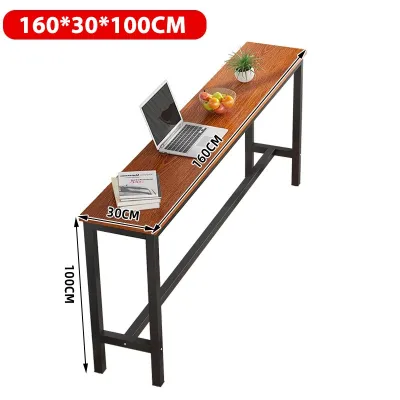
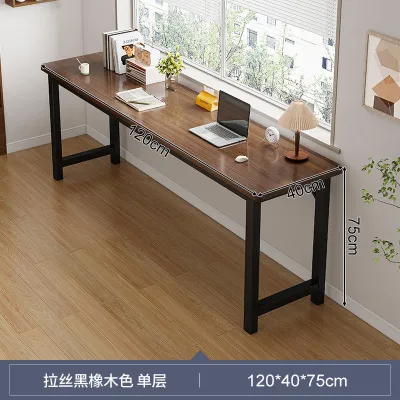
Prices are valid at publication and may change. Please refer to the product page for the latest price.
Assessing available space
Before browsing online marketplaces or local furniture shops, you must measure the exact footprint of your proposed installation area. Focus on narrow gaps that are often underutilized, such as the space between your refrigerator and the main countertop, the area directly beneath a kitchen window, or the wall space adjacent to your dining area. Measure the depth, width, and height of the zone, ensuring that the table’s finished dimensions will not obstruct walkways, cabinet doors, or appliance swings. In compact kitchens, maintaining a clear walkway of at least 60 to 90 centimeters is essential for safe movement while carrying hot pots or sharp utensils. Additionally, consider how the table will be delivered and brought into your home; verify that the packaged dimensions can easily clear your condo’s doorway, hallway corners, and elevator access.
Wall material compatibility
The success of any adhesive-based mounting system depends entirely on the material of your kitchen walls. Heavy-duty adhesives and specialized mounting tapes require smooth, non-porous surfaces to establish a secure, long-lasting bond. Glazed ceramic tiles, polished glass partitions, and flat metal panels are ideal candidates for adhesive mounts because they allow the bonding agent to seal completely without air pockets. Conversely, you must never attempt to use heavy-duty adhesives on painted drywall, wallpaper, plaster, or textured concrete walls. The weight of the table, combined with the pulling force of daily use, will easily peel the paint or wallpaper away from the wall, leading to a sudden structural failure, broken kitchenware, and expensive wall damage.
Weight capacity expectations
It is critical to manage your expectations regarding the load capacity of a no-drill narrow table. These furniture pieces are engineered strictly for light-duty tasks and auxiliary storage rather than heavy food preparation or appliance housing. A typical no-drill table can safely support lightweight items such as spice jars, small cutting boards, fresh herbs, or a single plate and cup for a quick breakfast. They are not structurally rated to hold heavy kitchen appliances like microwave ovens, rice cookers, air fryers, or cast-iron cookware. Furthermore, you must avoid leaning your body weight on the outer edge of the table or resting your elbows heavily on the surface, as this uneven leverage can easily break the adhesive bond or slip the tension support.
Foldable vs. fixed designs
When choosing a design, consider how you intend to use the extra surface area on a daily basis. Drop-leaf or folding narrow tables feature hinged brackets that allow the tabletop to swing downward when not in use, making them highly effective for temporary prep spaces or quick dining spots in ultra-tight kitchens. When folded flat against the wall, these tables reclaim valuable floor space, keeping your walkways entirely unobstructed. On the other hand, fixed narrow shelves or slim console units remain permanently open, providing continuous, lightweight storage for frequently used ingredients or decorative items. While fixed designs offer immediate access, they lack the spatial flexibility of folding models, so you must ensure their permanent depth does not interfere with your daily kitchen workflow.
Best Adhesive-Mounted Narrow Tables for Tile and Glass
For kitchens dominated by tiled backsplashes or glass partition walls, adhesive-mounted narrow tables offer a clean, modern aesthetic without the need for visible floor supports. These systems utilize advanced chemical bonding to hold the table bracket firmly against the wall.

Design focus
When shopping for an adhesive-mounted narrow table for kitchen use, look specifically for models that feature wide-contact backing plates or heavy-duty brackets. The larger the surface area of the adhesive pad, the more evenly the weight is distributed across the wall, which significantly reduces the risk of localized failure. Many reliable options utilize specialized nano-tape or industrial-grade polyurethane adhesives that are specifically formulated to withstand the high-humidity environments typical of tropical climates. Avoid generic double-sided tapes, and prioritize products that explicitly state their load-bearing capacity and adhesive surface area in their technical specifications.
Ideal scenarios
Adhesive-mounted tables excel in creating highly localized, specialized work zones within your kitchen. For example, you can install a slim, folding wooden ledge directly over a tiled backsplash to serve as a temporary ingredient prep station while cooking. Alternatively, mounting a narrow acrylic or treated-wood shelf onto a glass partition wall can instantly create a compact coffee bar or a dedicated space for your morning espresso machine’s accessories. These setups are also highly effective for extending the edge of your existing countertop, providing a convenient spot to place a dish-drying rack or freshly washed vegetables without cluttering your main workspace.
Limitations and risks
While modern adhesives are remarkably strong, they are not immune to environmental degradation. In a busy kitchen, the combination of high heat, steam, and airborne cooking oils can slowly break down the chemical bonds of the adhesive over time. This risk is particularly high if the table is mounted near a gas stove, induction cooktop, or electric kettle. Before purchasing, always check the manufacturer’s temperature and moisture resistance ratings for the adhesive. If the adhesive is not rated for high temperatures, exposure to cooking steam can cause the table to sag or detach without warning, creating a safety hazard.
Pre-purchase checklist
To ensure a successful and safe installation, run through a quick pre-purchase checklist before finalizing your selection. First, verify the exact dimensions of the bracket’s contact area to ensure it fits perfectly within your tile grid without overlapping grout lines, as uneven grout lines will prevent a proper adhesive seal. Second, inspect the material of the table itself; choose materials like rust-proof aluminum, treated bamboo, or high-density acrylic that can resist high humidity and frequent wiping with damp cloths. Finally, always consult the manufacturer’s care instructions to confirm that the table surface can handle standard kitchen cleaning agents without warping, discoloring, or losing its protective finish.
Tension-Rod and Over-Counter Narrow Tables for Flexible Spaces
If your kitchen walls are painted, textured, or otherwise unsuitable for adhesives, you can utilize physical tension or existing structural counter edges to support your narrow table. These mechanical solutions require absolutely no wall contact, making them highly versatile for renters.
Tension-rod supported tables
Tension-rod supported systems rely on adjustable vertical poles that are wedged securely between your kitchen floor and ceiling, or horizontally between two sturdy, fixed cabinets. These poles act as a rigid structural frame onto which you can clamp or slide a narrow tabletop at your desired height. Because the weight is transferred vertically to the floor and ceiling rather than horizontally into a wall, these systems can often support slightly more weight than adhesive models. They are exceptionally easy to install, adjust, and dismantle, leaving absolutely no marks or residue behind when it is time to move out of your apartment or condominium.
Over-the-sink or over-counter narrow tables
Another highly practical, non-invasive option is the over-the-sink or over-counter narrow table. These freestanding units feature elevated legs or integrated hooks that allow them to sit directly over your existing sink basin or rest securely on the back edge of your main countertop. By utilizing the vertical space that is normally wasted above your sink or behind your faucet, these tables provide immediate utility without requiring any wall attachment whatsoever. They are typically constructed from water-resistant materials like stainless steel or treated plastics, making them perfect for wet environments.
Use cases
These tension and over-counter designs are incredibly useful for a variety of daily kitchen tasks. An over-the-sink narrow table can serve as an elevated dish-drying station, allowing water to drip directly into the basin and freeing up valuable counter space for food prep. Tension-rod tables can be configured as compact prep islands or temporary dining ledges where you can sit on a high stool to enjoy a quick meal. For condo residents with limited floor space, these setups allow you to create a multi-functional kitchen zone that can be easily reconfigured as your daily needs change.
Stability checks
Before placing any items on a tension-supported or over-counter table, you must thoroughly test its stability and wobble factor. Gently shake the structure to ensure the tension is tight enough to resist accidental bumps or nudges. Always verify that the tension rods or table legs are equipped with thick, non-slip rubber or silicone pads; these pads not only prevent the table from slipping under load but also protect your floors, ceilings, and expensive cabinet finishes from scratches and indentations. If the structure feels loose or sags when light pressure is applied, immediately adjust the tension or reposition the legs according to the manufacturer’s assembly instructions.
Magnetic Narrow Tables: Fridge-Side and Metal-Surface Solutions
Magnetic mounting is a highly specialized, ultra-convenient option for adding narrow surfaces to your kitchen, but it is often misunderstood by homeowners looking for wall-mounted solutions.
The wall myth
It is a common misconception that magnetic organizers and tables can be mounted directly onto standard kitchen walls. Standard plaster, drywall, concrete, and ceramic tiles are completely non-magnetic, meaning these products will not adhere to them without a secondary metal backing plate. Instead, magnetic narrow tables and shelves are designed specifically to attach to the flat, exposed metal surfaces of major kitchen appliances. The most common mounting locations are the sides of your refrigerator, the front of a washing machine, or the flat metal panels of a dishwasher.
Design features
Most magnetic solutions in this category are designed as compact, narrow spice racks, paper towel holders, or small fold-down utility trays. They feature large, powerful neodymium or rubber-coated magnets embedded across the entire back surface of the unit. This flat, continuous magnetic contact ensures that the shelf remains flush against the appliance. Fold-down magnetic trays are particularly useful, as they can be kept closed to maintain a slim profile and flipped down only when you need a temporary spot to rest a recipe book, a tablet, or lightweight cooking ingredients.
Weight and safety limits
Magnetic mounts have very strict vertical pull-force limits that you must never exceed. Because they rely on magnetic attraction rather than physical fasteners, overloading these shelves will cause them to slide slowly down the side of your appliance, potentially scratching the finish, spilling your items, or causing injury. They are strictly intended for lightweight items, typically under 2 to 3 kilograms in total weight. Never use a magnetic tray as a primary food prep surface, and never lean on it, as the downward leverage of your hands will easily break the magnetic seal and cause the unit to fall.
Surface protection
To preserve the appearance and resale value of your kitchen appliances, always take steps to protect their painted or stainless-steel finishes from scratches. When installing or adjusting a magnetic shelf, avoid sliding it across the metal surface; instead, pull it straight off to break the magnetic bond, and place it gently into its new position. For added protection, you can apply a thin layer of clear protective film, clear packing tape, or a soft felt pad to the back of the magnets. This simple precaution prevents grit and dust from getting trapped between the magnet and the appliance, which is the primary cause of unsightly scratches during adjustments.
Comparing No-Drill Mounting Methods for Kitchen Tables
To help you quickly determine which non-invasive mounting method is best suited for your specific kitchen layout, wall materials, and daily cooking habits, review the comparative breakdown below.
| Mounting Method | Best Surface Type | Ideal Use Case | Key Limitation |
|---|---|---|---|
| Adhesive | Glazed tiles, polished glass, flat metal | Temporary prep stations, coffee bars, counter extensions | Fails on painted walls, wallpaper; degraded by high heat. |
| Tension Rod | Solid floors, ceilings, sturdy cabinets | Freestanding prep zones, temporary dining ledges | Requires clear vertical/horizontal space; can slip if loose. |
| Over-Counter | Existing countertops, sink basins | Elevated dish-drying, spice and ingredient organization | Occupies a portion of the existing counter or sink footprint. |
| Magnetic | Refrigerator sides, metal appliance panels | Spice racks, paper towel holders, light utility trays | Extremely low weight capacity; completely unusable on standard walls. |
Installation and Safety Tips for Humid Climates
Installing a no-drill narrow table in a tropical climate like the Philippines requires extra care, as high humidity and ambient heat can significantly impact the performance and lifespan of adhesive bonds and metal components.
Surface preparation
Before applying any adhesive mount, you must clean the target surface with absolute precision. Tropical climates encourage the rapid buildup of invisible cooking grease, airborne dust, and humidity residue on kitchen walls. Wipe the tiles or glass thoroughly with a clean microfiber cloth soaked in rubbing alcohol to strip away all oils and moisture. Allow the surface to air-dry completely for at least 10 to 15 minutes before proceeding. Never use standard household glass cleaners or soapy water, as these can leave behind a thin chemical residue that prevents the adhesive from forming a direct, secure bond with the wall.
Curing time
One of the most common causes of adhesive failure is premature loading. After applying the adhesive brackets to the wall, you must wait the full manufacturer-recommended curing time before attaching the table surface or placing any weight on it. In the humid environment of the Philippines, the chemical bonding process can take longer than in drier climates. It is highly recommended to let the adhesive cure undisturbed for 48 to 72 hours. Resist the temptation to test the strength of the bracket during this curing window, as any movement can permanently weaken the bond.
Humidity and heat management
To maximize the lifespan of your no-drill table, carefully plan its placement relative to your kitchen’s heat sources. Avoid mounting adhesive-supported tables directly above gas stoves, induction cooktops, rice cookers, or electric kettles, where rising steam and high temperatures will rapidly degrade the adhesive. Direct sunlight streaming through kitchen windows can also heat up metal brackets and soften adhesive backings, so try to position adhesive tables in shaded, well-ventilated areas of the kitchen.
Routine safety checks
Because non-invasive mounting systems can degrade over time, you must perform routine safety and stability checks. Every few weeks, gently press down on the table to check for any wobble, sagging, or play in the joints. Visually inspect adhesive pads for signs of peeling at the edges, and check metal brackets for any warping or rust, which can develop quickly in humid coastal regions. If you notice any signs of structural compromise, immediately stop using the table, remove all items from its surface, and safely dismantle the unit to prevent an accidental collapse.
Frequently Asked Questions (FAQ)
Can I use standard removable adhesive strips to mount a narrow kitchen table?
No, you should never use standard removable adhesive strips—such as those designed for hanging lightweight picture frames or holiday decorations—to mount a narrow kitchen table. These consumer-grade strips are not engineered to support structural weight, withstand the dynamic downward forces of food preparation, or resist the high humidity and temperature fluctuations of a kitchen. Attempting to use them will almost certainly result in a sudden collapse of the table. Instead, always use the heavy-duty construction adhesives, specialized mounting plates, or high-strength furniture nano-tapes that are explicitly provided or recommended by the table manufacturer. Keep in mind that removing these industrial-strength adhesives may still require careful effort to avoid damaging certain delicate wall finishes.
How do I remove adhesive brackets from kitchen tiles without damaging them?
Removing heavy-duty adhesive brackets from glazed kitchen tiles can be done safely without cracking the tiles or scratching the glaze if you follow a patient, step-by-step process. First, use a standard household hairdryer set to medium or high heat to blow hot air directly onto the adhesive bracket for several minutes; this heat will soften the chemical bonds of the adhesive. Once the adhesive is warm and pliable, take a piece of strong dental floss, fishing line, or a flexible plastic scraper, and slowly work it behind the bracket, slicing through the softened adhesive layer. Avoid using metal scrapers, screwdrivers, or excessive prying force, as these can easily scratch, chip, or crack the tile glaze. Finally, clean away any remaining sticky residue by applying a commercial adhesive remover or rubbing alcohol and wiping it clean with a soft cloth.
Are no-drill narrow tables safe for eating meals on?
No-drill narrow tables can be safely used for eating light meals, but they are not structural equivalents to traditional, drilled load-bearing dining tables. They are perfectly capable of holding a light plate, a bowl of soup, a cup of coffee, and your utensils. However, because they lack permanent wall anchors or heavy floor legs, they cannot handle unevenly distributed weight or heavy physical pressure. When dining, you must strictly avoid leaning your body weight on the edge of the table, resting your elbows heavily on the surface, or pulling downward on the outer corners. Additionally, to protect the table’s finish and prevent heat from affecting any underlying adhesive brackets, always place hot plates or steaming bowls on insulated trivets or heat-resistant placemats rather than directly on the tabletop surface.
Community discussion
Share your experience or ask a question. Comments are reviewed before publication.