
When floor space is at a premium inside a small closet, the most efficient shoe racks organizers are those that exploit vertical dead space, utilize the back of the closet door, or hang directly from the existing closet rod. These solutions—such as over-the-door pocket organizers, hanging fabric shelves, and stackable shelf risers—allow you to store dozens of pairs without occupying a single square inch of floor area. By shifting your storage strategy from horizontal to vertical, you can keep your footwear organized, visible, and protected even in the tightest of spaces.
How to Measure Your Closet for Shoe Storage
Before purchasing any shoe racks organizers, taking precise measurements of your closet interior is essential to avoid buying a system that does not fit. Start by using a steel measuring tape to record the exact width, height, and depth of the closet. When measuring depth, measure from the back wall to the inside of the door frame rather than the outer edge. This ensures that any organizer you install will allow the closet doors to close completely without rubbing against your shoes.
Beyond basic dimensions, you must identify potential structural obstacles within the closet. Look for door swing paths, sliding door overlap zones, hinge protrusions, and baseboards that might obstruct a tight-fitting rack. For instance, if your closet has bi-fold or sliding doors, certain sections of the closet opening will always be partially blocked, meaning slide-out organizers must be positioned carefully to avoid hitting the door frame when extended.
Products mentioned in this guide
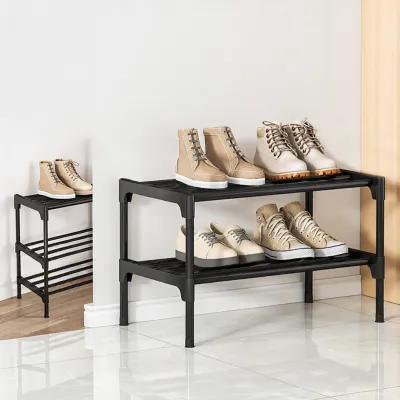
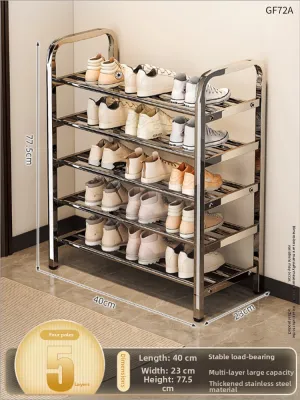
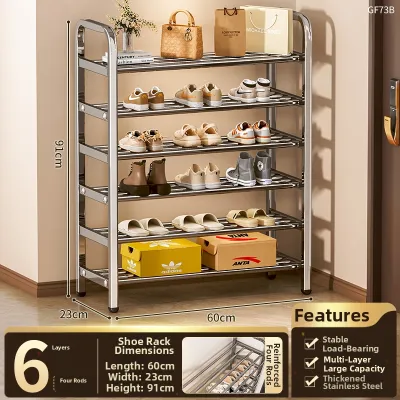
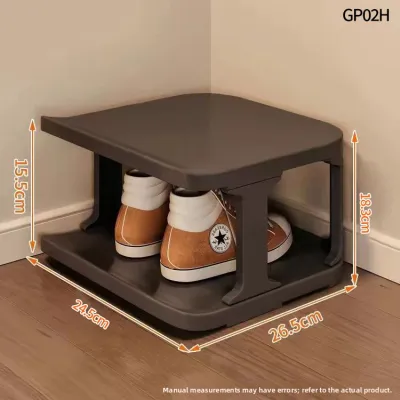
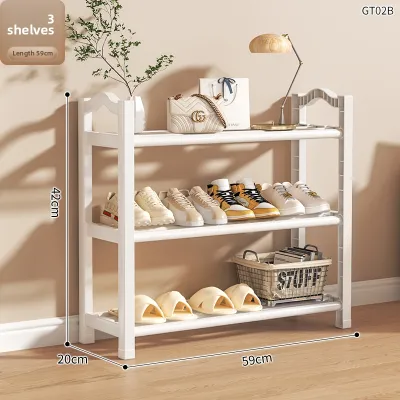
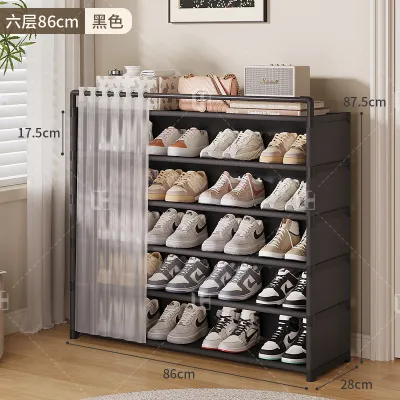
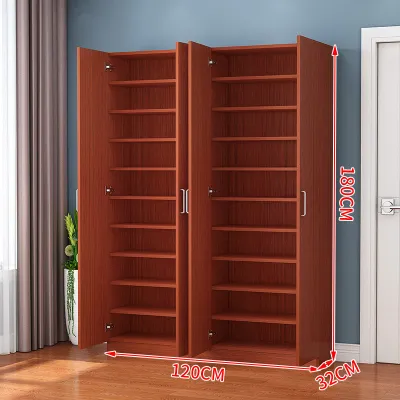
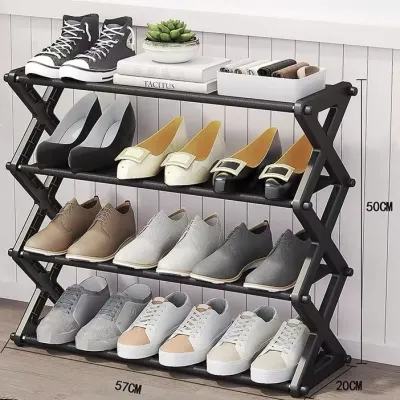
Prices are valid at publication and may change. Please refer to the product page for the latest price.
Next, evaluate the vertical clearance of your existing setup. Measure the distance from the closet floor to the bottom hem of your longest hanging garments, such as dresses, trousers, or traditional barongs. This gap represents your available vertical dead space. If this space is tall enough, it can accommodate low-profile stackable risers or small bins without interfering with your hanging clothes.
Finally, conduct a thorough inventory of your footwear collection. Count the total number of pairs you need to store and categorize them by style, such as flat sandals, sneakers, heels, and boots. Knowing the exact breakdown of your collection allows you to calculate the precise storage capacity and shelf heights required, preventing you from buying an organizer that is either too small or incompatible with your specific shoe types.
Most Space-Efficient Shoe Rack Types for Limited Floor Space
When floor space is restricted, traditional wide shoe cabinets are impractical. Instead, you must look upward. The key is to identify underutilized zones within your closet—such as the vertical air space on shelves, the back of the door, or the rod itself—and match them with specialized shoe racks organizers designed to maximize these areas.

Over-the-Door and Hanging Organizers
Over-the-door shoe racks and hanging organizers are among the most effective solutions for zero-floor-footprint storage. Over-the-door models typically feature clear plastic pockets, durable mesh slots, or lightweight wire frames that hang over the top edge of standard closet doors. Before choosing this option, verify your door’s thickness—standard interior doors are usually 35mm to 45mm thick—and ensure there is at least a 2mm gap at the top of the door frame to accommodate the hanging brackets. You must also check that the door hinges can support the added weight of a fully loaded organizer without sagging over time.
Hanging organizers, on the other hand, suspend directly from your existing closet rod using heavy-duty Velcro straps or steel hooks. These fabric or plastic vertical cubbies are exceptionally well-suited for lightweight footwear such as flats, sandals, slippers, and canvas sneakers. Because they rely entirely on the strength of your closet rod, it is crucial to distribute the weight evenly. Place heavier shoes in the bottom cubbies to keep the organizer stable, and avoid overloading the rod to prevent it from bowing or pulling away from the wall brackets.
Stackable Shelf Inserts and Risers
If your closet already features built-in wooden or wire shelving, you can easily double or triple your storage capacity using stackable shelf inserts and risers. These mini-racks fit directly onto your existing shelves, dividing a single tall shelf into multiple smaller tiers. This effectively eliminates the wasted vertical air space that typically hovers above low-profile shoes like loafers, sneakers, and ballet flats.
When selecting stackable risers, look for adjustable models that allow you to customize the height of each tier. It is vital to measure the exact depth of your closet shelves before purchasing; the risers must sit fully on the shelf surface without protruding. If an insert sticks out even slightly, it can prevent sliding or hinged closet doors from closing properly, leading to frustrating daily obstructions.
Slide-Out Bins and Under-Shelf Baskets
For deep closet shelves where shoes frequently get pushed to the back and forgotten, slide-out bins and under-shelf baskets offer excellent accessibility. Under-shelf baskets feature metal arms that slide onto your existing shelf boards, creating a suspended wire basket underneath. These are perfect for storing flat sandals, flip-flops, or shoe care accessories like brushes and extra laces without consuming any shelf surface area.
Slide-out drawer bins or pull-out trays can be mounted directly onto existing shelves or the closet floor. These systems use sliding tracks to let you pull the entire shoe tray forward, bringing shoes at the back into clear view. When installing slide-out mechanisms, ensure you have enough clearance on either side of the closet door frame. The tracks must be mounted perfectly level to ensure smooth operation, and you should check the manufacturer’s weight capacity to ensure the slides can handle heavier footwear without binding.
Sizing Guidelines: Matching Shoe Types to Shelf Clearances
To maximize every centimeter of your closet, you must match your chosen shoe racks organizers to the physical dimensions of your footwear. Relying on generic industry averages can lead to wasted space or shoes that simply do not fit. Instead, establish a customized spatial plan based on three primary shoe profiles.
Low-profile footwear, including flat sandals, flip-flops, and ballet flats, requires the least vertical space. A shelf clearance of 10 to 12 centimeters is generally sufficient for these items. By using tight-clearance shelf risers or slim hanging pockets, you can stack multiple pairs vertically in a space that would normally hold only one pair of boots.
Medium-profile shoes, such as standard sneakers, running shoes, loafers, and low-heeled dress shoes, typically require a vertical clearance of 13 to 15 centimeters. When planning horizontal space, keep in mind that bulky athletic sneakers or wide-fit shoes require more width per pair (often 20 to 25 centimeters) than slim dress shoes (which may only need 15 to 18 centimeters). Always measure the widest part of your bulkiest shoes to ensure they will fit side-by-side on your selected racks.
High-profile footwear, such as ankle boots, high heels, and high-top sneakers, demands a vertical clearance of 18 to 25 centimeters or more. If you own several pairs of boots, look for organizers with adjustable shelves or designated tall compartments. Alternatively, you can store boots on the very top shelf of your closet where vertical space is less restricted.
If you prefer to keep your shoes in their original boxes to protect them from dust and light, your spatial calculations must change entirely. A standard shoe box measures approximately 33 centimeters long, 20 centimeters wide, and 12 centimeters high. Storing boxed shoes requires significantly deeper and taller shelf clearances, so verify that your closet shelves can accommodate these dimensions before committing to a boxed storage system.
Common Space-Matching Mistakes in Small Closets
Organizing a compact closet requires precision, and a few common oversight errors can quickly render your new storage system unusable. One of the most frequent mistakes is ignoring the door swing path. If you install a floor-standing rack or a bulky over-the-door organizer, it can block the closet door from opening fully, restricting your access to the rest of your clothes. Always ensure that any door-mounted system has enough clearance to clear the adjacent wall or door frame when swung open.
Another common error is purchasing shoe racks organizers that are too deep for the closet interior. Many standard closets have a depth of only 50 to 60 centimeters. If your shoe organizer is too deep, or if your shoes protrude past the front edge of the shelves, the closet doors will rub against the toes of your shoes or fail to latch entirely. This constant friction can scuff delicate shoe materials and damage the door alignment.
Overcrowding your organizers is also highly counterproductive. Squeezing too many pairs onto a single shelf or forcing wide shoes into narrow pockets makes daily retrieval frustrating and can permanently deform the structure of your footwear. It can also cause delicate materials like suede, patent leather, or soft canvas to rub against each other, leading to unsightly scuffs and color transfer.
Lastly, many homeowners neglect the critical factor of ventilation. Tightly packing shoes into a dark, enclosed closet restricts airflow. Without proper air circulation, any residual moisture or sweat trapped in the shoes cannot evaporate, creating an ideal breeding ground for unpleasant odors and structural damage to the shoe adhesives.
Installation Safety and Humidity Control
Ensuring your shoe racks organizers are safely installed and properly maintained is vital for both your home’s safety and the longevity of your footwear collection. Before mounting any heavy slide-out trays, wall-hung racks, or shelving units, you must verify the construction of your closet walls. If your closet walls are made of standard drywall, never attempt to mount heavy, loaded racks using regular wood screws alone. Drywall cannot support concentrated weight and will eventually crumble, causing the rack to collapse.
For secure drywall installation, always use heavy-duty toggle bolts or threaded drywall anchors rated for the specific weight of your loaded rack. Whenever possible, locate the wooden wall studs behind the drywall using a stud finder and secure the mounting brackets directly into them. If you are unsure of your wall type, if the installation requires complex drilling, or if you plan to store a very heavy collection of boots, it is highly recommended to consult a professional installer or opt for freestanding, non-mounted storage alternatives.
In the tropical and highly humid climate of the Philippines, humidity control is a paramount concern for shoe preservation. High ambient humidity, particularly during the rainy season, can rapidly lead to mold and mildew growth on leather, canvas, and suede shoes. To combat this, always ensure your shoes are completely clean and dry before placing them inside the closet.
To actively manage moisture levels, place moisture-absorbing desiccant packs, silica gel canisters, or hanging dehumidifier bags directly on your shoe shelves or inside the hanging organizer compartments. These products draw excess moisture out of the air, protecting your shoes from fungal rot. Additionally, practice routine maintenance by leaving your closet doors open for a few hours each week to encourage fresh air circulation, and periodically wipe down the interior shelves with a dry microfiber cloth to prevent dust and moisture buildup.
Frequently Asked Questions (FAQ)
Here are quick answers to some of the most common concerns regarding small closet shoe storage and maintenance.
How do I prevent mold on shoes stored inside a closed closet?
To prevent mold, never store shoes while they are damp from sweat or rain. Wipe them down with a clean cloth and allow them to air-dry completely in a well-ventilated room before putting them away. Avoid storing shoes in sealed plastic containers, which trap moisture; instead, use breathable fabric hanging organizers or open-front mesh bins. Placing activated charcoal bags or silica gel desiccants on your closet shelves will also help absorb excess ambient humidity.
Is it safe to mount heavy shoe racks on closet drywall?
Standard drywall cannot support the weight of a fully loaded shoe rack using basic screws. To ensure safety, you must use heavy-duty toggle bolts or hollow-wall anchors designed to distribute weight behind the drywall, or screw the rack directly into the wooden wall studs. Always check the manufacturer’s maximum weight capacity label for both the organizer and the anchors, and avoid overloading the shelves beyond these specified limits.
Community discussion
Share your experience or ask a question. Comments are reviewed before publication.