
Maximizing limited floor space is the ultimate goal when organizing a compact condo or apartment in the Philippines. In tight entryways where every square inch counts, a wall mount shoe rack offers an efficient way to clear floor clutter by utilizing underused vertical space. By lifting footwear off the ground, you instantly create a cleaner visual flow and make daily cleaning much easier.
Choosing the right wall-mounted system requires balancing several practical factors. You must consider your wall’s structural load capacity, the depth clearance of your entryway, and the specific types of footwear you need to store. Because condo layouts vary widely, the ideal storage solution is one that matches your specific wall type and daily foot traffic.
Assessing Your Entryway Space and Wall Conditions
Before purchasing any wall-mounted organizer, you must carefully measure your physical entryway to avoid blocking high-traffic pathways. Start by measuring the width of your hallway and the swing radius of your main door. A shoe rack that protrudes too far can obstruct your entry, making it difficult to carry groceries or move furniture into the unit. Ideally, you should maintain a clear walking path of at least 90 centimeters in your main corridor.
Products mentioned in this guide
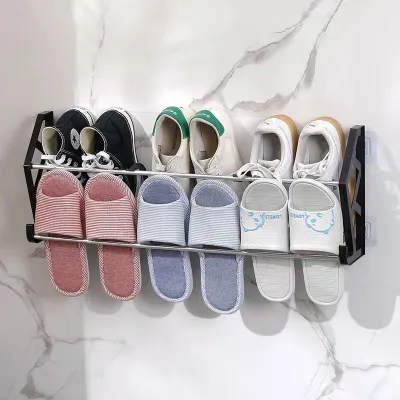
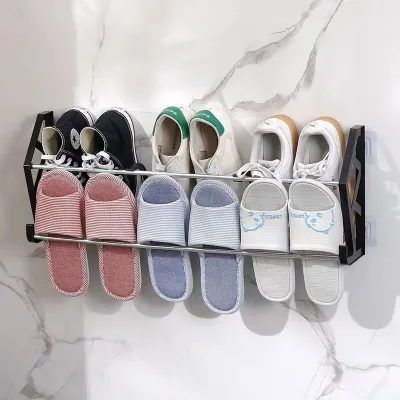
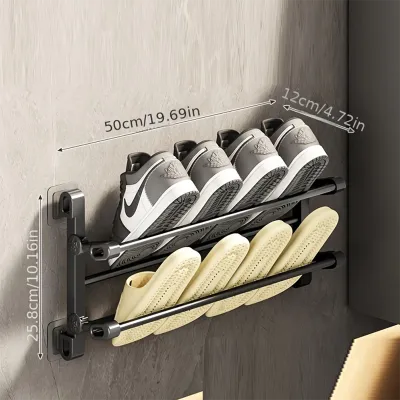

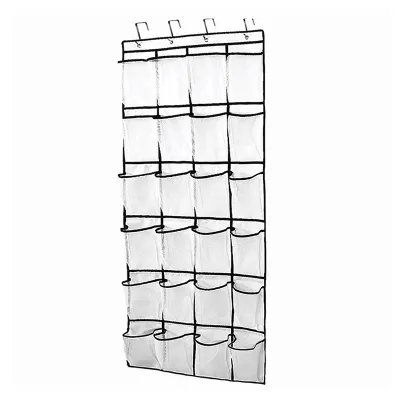
Prices are valid at publication and may change. Please refer to the product page for the latest price.
Next, identify the exact material of your target wall, as this determines how you will secure the rack. Most modern high-rise condos feature structural walls made of solid poured concrete or concrete hollow blocks. These walls offer excellent load-bearing capacity but require a masonry drill bit and heavy-duty plastic or metal expansion anchors.
Conversely, internal partition walls are often constructed from gypsum board or drywall. These surfaces have much lower weight limits and require specialized hollow-wall anchors or toggle bolts to prevent the rack from tearing through the wall.
Finally, always consult your condo association or leasing office before drilling into any walls. Many property management offices have strict guidelines regarding permanent alterations, drilling depths, or structural modifications. If you are renting, you may need to explore non-damaging mounting alternatives, such as heavy-duty adhesive strips or over-the-door organizers, to ensure you recover your security deposit when moving out.
Types of Wall-Mounted Shoe Storage for Compact Living
Wall-mounted shoe storage generally falls into three main design categories, each offering distinct trade-offs in terms of spatial footprint, accessibility, and aesthetics. Selecting the right style depends on whether you prioritize hiding visual clutter, maximizing storage capacity, or keeping your shoes highly accessible.

Enclosed storage systems keep your footwear completely out of sight, which helps maintain a minimalist look in small rooms but requires more physical depth. Open shelving and minimalist rails, on the other hand, offer quick access and a lighter visual profile but expose your shoes to dust and require you to keep your footwear neatly arranged.
Fold-Down and Flip-Down Shoe Cabinets
Fold-down and flip-down shoe cabinets are highly popular for narrow condo hallways because of their incredibly slim profile when closed. These units typically feature tilting compartments that store shoes vertically, reducing the cabinet’s overall depth to as little as 15 to 20 centimeters. When you open a compartment, the shoes tilt outward for easy retrieval, making them an excellent choice for tight corridors where a standard cabinet would block the walkway.
However, this ultra-slim design comes with specific storage limitations. Tilting compartments are generally optimized for flat shoes, sneakers, and sandals, meaning they may not accommodate high heels, bulky boots, or oversized footwear without bending the shoe shafts.
Additionally, because these cabinets project outward when opened, you must ensure there is enough clearance in front of the unit for the drawers to fully extend. Because of their tall, thin shape, these cabinets must be securely anchored to the wall at the top to prevent them from tipping forward when multiple compartments are opened simultaneously.
Floating Shelves and Minimalist Rails
Floating shelves and minimalist metal rails offer an open, airy alternative that keeps your footwear easily accessible. By suspending shoes individually or in small rows, these low-profile fixtures keep the floor completely visible, which visually expands the feel of a small entryway. This setup is particularly useful for storing your most frequently worn pairs, such as daily work shoes or outdoor slippers, keeping them off the floor but within arm’s reach.
When selecting floating shelves, look for designs that feature an angled surface or a raised front lip. These features prevent shoes from sliding off the shelf under their own weight, especially when storing smooth-soled footwear.
The primary trade-off with open rails is constant exposure to dust and ambient humidity, which are common in tropical climates. To prevent dust buildup, it is best to use open shelves for shoes that you rotate and wear regularly, rather than for long-term storage of delicate materials like suede or untreated leather.
Multi-Tier Vertical Racks and Pegboards
If you have a large shoe collection but limited horizontal wall space, multi-tier vertical racks and modular pegboards are highly effective solutions. Vertical racks utilize the full height of your wall, stacking multiple rows of shoes from waist height up to the ceiling. Many of these systems feature adjustable brackets or tension rods, allowing you to customize the height between tiers to accommodate everything from flat sandals to high-top sneakers.
Because a fully loaded multi-tier rack can carry significant weight, proper weight distribution is critical. These systems require multiple secure anchor points along the vertical supports to prevent the frame from bowing or pulling away from the wall over time.
Alternatively, modular pegboard systems offer a highly customizable layout where you can reposition individual shoe hooks, shelves, and baskets as your storage needs change, making them a versatile option for growing households.
Key Features to Check Before Buying
When shopping for a wall mount shoe rack on any online marketplace or local furniture store, you should verify several key product specifications to ensure long-term durability. First, measure the shelf depth and check the lip design. Ensure the shelf depth matches your largest shoe size; soles that overhang the edge can cause shoes to fall or scuff the surrounding wall. A sturdy front barrier or a non-slip surface treatment is essential for keeping shoes securely in place.
Second, pay close attention to the material finish and ventilation. The high humidity levels typical of the Philippine climate can accelerate rust on low-quality metal components and encourage mold growth on untreated wood. Opt for powder-coated steel, rust-resistant aluminum, or sealed engineered wood that can withstand moisture. Proper ventilation is also crucial; open-backed designs or slatted shelves allow air to circulate freely around your footwear, preventing unpleasant odors and moisture buildup.
Finally, always verify the quality and type of mounting hardware included in the package. Many imported shoe racks come with standard wall plugs that may not be suitable for the specific wall type in your condo. If the included screws and anchors feel flimsy or do not match your wall substrate, it is highly recommended to purchase high-quality, heavy-duty anchors separately from a local hardware store to guarantee a secure installation.
Installation and Safety Considerations for Condos
Installing a wall-mounted shoe rack requires precision to ensure the unit remains stable under a full load. Always use a level tool during installation to ensure your shelves are perfectly horizontal; even a slight tilt can cause shoes to slide off over time. When drilling into concrete or masonry walls, use a hammer drill with a matching masonry bit, and ensure you drill to the exact depth recommended for your expansion anchors.
Before you begin drilling, it is vital to check for hidden hazards behind the wall. Entryway walls often house electrical conduits for light switches, intercom systems, and doorbell wiring, as well as vertical plumbing pipes. Using a stud finder with live-wire detection can help you locate safe drilling zones. If you encounter resistance that feels different from standard concrete, or if you are unsure of what lies behind the wall, stop drilling immediately.
Knowing when to halt a DIY installation is key to preventing costly damage to your home. If you do not own the proper tools, feel uncomfortable drilling into solid concrete, or face strict condo regulations regarding structural drilling, consult a professional handyman or your building’s maintenance staff. A professional installation ensures the rack is safely anchored, protecting your footwear, your walls, and your family from accidental falls.
Frequently Asked Questions (FAQ)
Can I install a wall mount shoe rack on drywall?
Yes, you can install a wall-mounted shoe rack on drywall, but you must use the correct hardware to support the weight. Standard plastic expansion anchors designed for concrete will slip out of drywall under a heavy load. Instead, you must locate the wooden or metal wall studs behind the drywall using a stud finder and screw the rack directly into them. If the studs do not align with your rack’s mounting holes, use heavy-duty toggle bolts or threaded drywall anchors, which expand behind the gypsum board to distribute the weight safely.
How do I protect my wall from shoe scuffs?
To protect your wall from unsightly scuffs and dirt from shoe soles, you can apply a few simple, non-damaging barriers. Applying a layer of clear, self-adhesive protective film or removable vinyl wallpaper behind the rack creates a washable barrier that you can easily wipe clean. Alternatively, choosing a shoe rack design that includes a built-in back panel or maintaining a small gap of one to two centimeters between the shelf and the wall will prevent dirty outsoles from making direct contact with your paint.
Community discussion
Share your experience or ask a question. Comments are reviewed before publication.