
Choosing the right shoe storage depends entirely on your available footprint, wall conditions, and how you interact with your footwear daily. While stackable units offer modular growth, wall-mounted designs reclaim floor space, and freestanding racks provide robust stability for open areas. This guide breaks down the spatial and practical requirements of each configuration so you can match the right style to your specific closet dimensions and collection size before purchasing.
In tropical environments, proper shoe storage also plays a critical role in preserving your footwear. High humidity can accelerate the deterioration of adhesives and encourage mold growth on leather and canvas. Selecting a rack that promotes adequate airflow while fitting your physical layout is essential for keeping your collection organized and well-preserved.
Assessing Your Closet Space and Shoe Collection
Before browsing storage options, measure the physical limits of your closet. Use a metal measuring tape to record the interior depth, width, and vertical clearance. Be sure to account for baseboards, door hinges, and the swing path of closet doors, as these structural elements can easily obstruct a newly placed rack.
Products mentioned in this guide
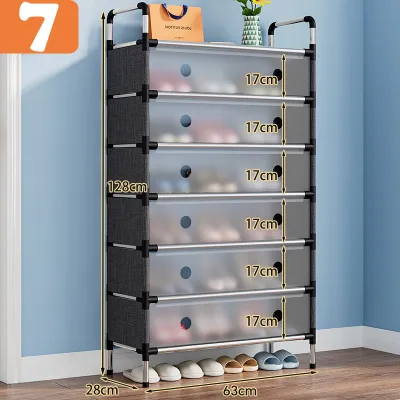
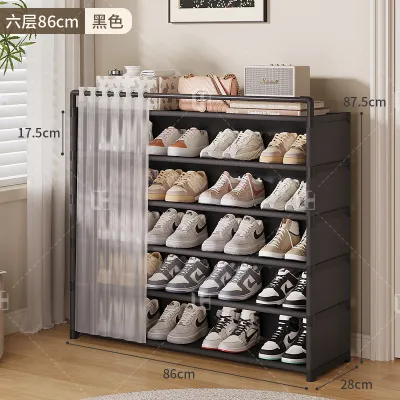
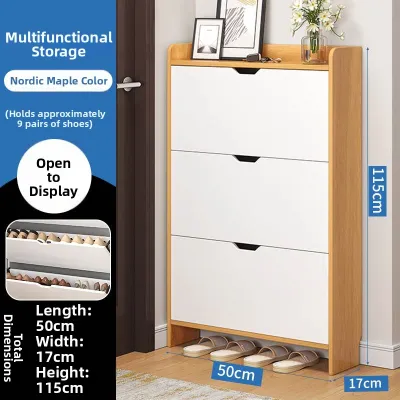
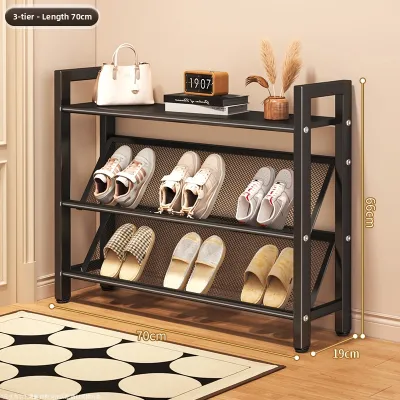
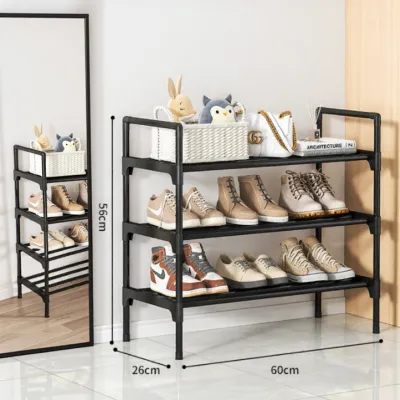
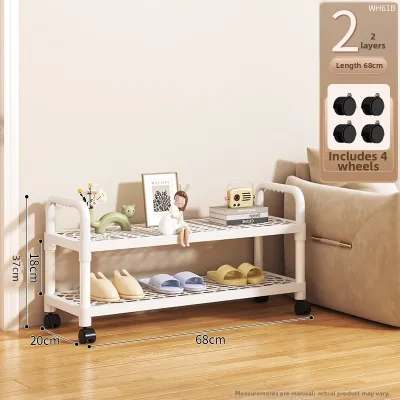
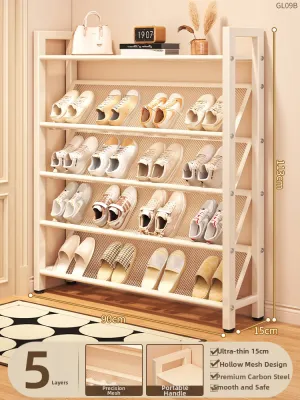
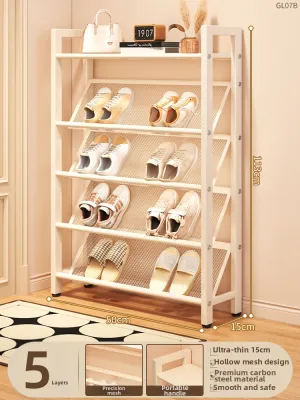
Prices are valid at publication and may change. Please refer to the product page for the latest price.
Next, audit your footwear collection by grouping items by height and weight. Separate flat sandals, everyday slippers, high heels, bulky sneakers, and heavy boots. This categorization helps determine the vertical shelf clearance you need and prevents you from overloading lightweight shelves with heavy items.
Finally, identify your accessibility needs by dividing your shoes into daily and seasonal categories. Frequently worn pairs should reside in easy-to-reach zones between knee and waist height. Off-season footwear or delicate formal shoes can be placed on higher shelves or stored in protective boxes to shield them from dust and ambient moisture.
Stackable Shoe Racks: Flexibility for Growing Collections
Stackable shoe racks offer a highly customizable approach to closet organization, making them excellent for individuals whose footwear collections are actively expanding. These modular systems start as a single low-profile unit on your closet floor and can be built upward as you acquire more pairs. They are particularly suited for standard closets with generous vertical clearance but limited horizontal floor space.

However, stacking units upward introduces specific physical trade-offs. As you add more tiers, the overall center of gravity rises, which can compromise the stability of the entire structure. If the interlocking joints are loose or made of flexible plastic, a tall stack can wobble or lean forward when fully loaded with heavy sneakers.
To ensure safety, always verify the manufacturer’s maximum stacking height and weight limits before purchasing additional tiers. Examine the interlocking mechanisms—look for secure dowels, snap-lock clips, or deep nesting grooves rather than simple friction fits. Additionally, check the rigidity of the frame materials; sturdy metal poles or thick engineered wood frames resist bending and swaying much better than thin plastic alternatives.
Wall-Mounted Shoe Racks: Maximizing Tight Spaces
When floor space is at an absolute premium, wall-mounted shoe racks provide an elegant solution by reclaiming underutilized vertical surfaces. These systems are ideal for narrow reach-in closets, the blank wall space behind bedroom doors, or entryways where keeping the floor completely clear makes sweeping and mopping much easier. Elevating your shoes also improves air circulation around them, which is highly beneficial in humid climates where trapped moisture can damage delicate materials.
Despite their space-saving benefits, wall-mounted racks require a higher level of installation effort and structural awareness. Unlike floor-based options, they rely entirely on your wall’s load-bearing capacity. This means you must match the mounting hardware to your specific wall type, whether it is concrete, hollow block, or drywall.
Before drilling, always verify the composition of your walls. For drywall or plasterboard, locate the wooden or metal studs using a stud finder to ensure a secure hold; relying solely on plastic drywall anchors for a fully loaded shoe rack can result in wall damage. If you are mounting onto concrete or masonry walls, ensure you use heavy-duty masonry wall plugs and screws, following the manufacturer’s installation instructions precisely to prevent the rack from pulling away from the wall.
Freestanding Shoe Racks: Stability for Open Layouts
Freestanding shoe racks are the traditional, heavy-duty workhorses of footwear storage, offering unmatched stability and immediate accessibility. These self-supporting structures are best suited for spacious walk-in closets, open bedroom corners, or dedicated mudrooms where floor space is not severely restricted. Because they do not require wall mounting or delicate balancing, they can easily support heavier footwear collections, including thick-soled boots, heavy leather dress shoes, and multiple pairs of athletic sneakers.
The primary trade-off with a freestanding rack is its rigid, non-negotiable footprint. Unlike stackable units, you cannot easily shrink or expand a freestanding frame to fit changing closet layouts. If your closet dimensions are tight, a freestanding rack can block walkways, obstruct low-hanging clothes, or prevent closet doors from opening fully.
Safety is another crucial consideration, particularly in active households. A tall, narrow freestanding rack can become top-heavy if loaded incorrectly. When selecting a model, check the width of the base relative to its overall height; a wider base provides a much safer center of gravity. If you have young children or pets who might pull on the shelves, look for models that include wall-tethering hardware or choose a lower, wider profile to eliminate the risk of accidental tip-overs.
Decision Matrix: Matching Rack Styles to Your Setup
To help you visualize how these three styles compare, the table below outlines their key physical characteristics, installation demands, and ideal use cases.
| Shoe Rack Style | Floor Space Used | Installation Required | Weight Capacity | Best Shoe Types |
|---|---|---|---|---|
| Stackable | Moderate (expandable vertically) | Low (simple assembly, interlocking) | Medium (depends on stack height) | Lightweight sneakers, flats, sandals |
| Wall-Mounted | None (completely elevated) | High (drilling, wall anchors required) | Low to Medium (limited by wall anchors) | Heels, flats, lightweight running shoes |
| Freestanding | High (fixed footprint) | Low to Moderate (standard assembly) | High (very stable base) | Heavy boots, leather dress shoes, bulky sneakers |
When finalizing your decision, consider these conditional rules:
- Choose a stackable shoe rack if your shoe collection is growing, you have ample vertical space under your hanging clothes, and you want a tool-free setup that can adapt over time.
- Choose a wall-mounted shoe rack if you have a narrow closet with zero available floor space, want to keep your floors clear for easy cleaning, and are comfortable drilling into your walls for a permanent storage solution.
- Choose a freestanding shoe rack if you have a spacious walk-in closet or open bedroom corner, own heavy footwear, and prioritize maximum stability without mounting anything to your walls.
If your closet has highly irregular angles, extremely shallow depths (under 25 centimeters), or sliding doors with minimal clearance, standard retail shoe racks may not fit. In these scenarios, you might need to look into custom closet built-ins, over-the-door hanging organizers, or slim pull-out shoe drawers that slide out horizontally to maximize tight spaces.
Verifying Fit, Clearance, and Safety Before Purchase
Before finalizing your purchase, perform a final physical check of your closet space using the exact dimensions provided by the shoe rack manufacturer. Do not rely on visual estimates; use a physical measuring tape to map out the rack’s height, width, and depth inside your closet. Ensure that when the rack is fully loaded with shoes, your closet doors can still close completely and your walkways remain entirely unobstructed.
Next, carefully review the assembly and installation requirements. Some wall-mounted systems require specific tools, such as a hammer drill for concrete walls, a spirit level to ensure straight shelves, or specific drill bit sizes that may not be included in the package. If you are renting your home, check your lease agreement regarding drilling holes into walls, as wall-mounted systems will leave permanent marks that require patching later.
Finally, recognize the limits of DIY installation. If you encounter unknown wall materials, suspect hidden electrical wiring or plumbing pipes behind your closet walls, or feel unsure about your ability to secure a heavy rack safely, stop and consult a qualified local handyman or professional installer. Ensuring the structural integrity of your home and the safety of your household is always worth the extra step.
Frequently Asked Questions (FAQ)
How do I prevent a freestanding shoe rack from tipping over?
To prevent a freestanding shoe rack from tipping, always load it from the bottom up. Place your heaviest footwear, such as boots and thick-soled leather shoes, on the lowest shelves to establish a low center of gravity. Keep lightweight sandals, slippers, and flats on the upper tiers. If the manufacturer provides an anti-tip kit or wall-tethering strap, install it immediately according to the instructions, especially if the rack is placed on carpeted floors or in high-traffic areas.
Can I mix different shoe rack styles in the same closet?
Yes, mixing styles is an excellent way to maximize a larger closet’s efficiency. For example, you can place a low stackable rack on the floor beneath short-hanging clothes for your everyday sneakers, while mounting a slim wall rack on the side wall or behind the door for heels and flats. When combining styles, ensure you maintain at least 60 centimeters of clear walkway space so you can move freely, and verify that no rack blocks the full swing or slide of your closet doors.
Community discussion
Share your experience or ask a question. Comments are reviewed before publication.