
Mounting a bag hanger rack stand to your wall is an excellent way to organize your space, protect your bags from floor dirt, and keep your daily essentials within arm’s reach. Whether you are organizing a bedroom, an entryway, or a walk-in closet, a secure installation prevents the rack from pulling away from the wall under the weight of heavy backpacks, purses, and laptop bags. Achieving a stable mount requires matching your installation method to your specific wall material, using the correct hardware, and following a precise drilling and securing sequence.
In tropical climates like the Philippines, high humidity levels can affect both the wall structure and the materials of your storage solutions. Moisture can soften plaster over time or cause rust on low-grade metal fasteners, making a proper, heavy-duty installation even more critical. By taking the time to assess your wall type, gather the correct tools, and mount the rack methodically, you ensure your bags remain safely suspended and your walls undamaged.
Assess Your Wall Type and Rack Specifications
Before drilling any holes, you must evaluate the wall where you plan to mount the rack. In many homes, especially in urban condominiums and traditional houses, walls are constructed from solid concrete, hollow concrete blocks, or plaster-coated brick. Other modern residences or renovated spaces may use drywall partitions over light metal or wood studs. Each of these materials behaves differently under stress and requires distinct drilling techniques and anchoring hardware.
Products mentioned in this guide


![[On Hand] Shira Bag Rack Stand White/Brown/Wood Bamboo Coat Rack Stand With 8 Hooks Coat Rack Bag Organizer](https://img.lazcdn.com/g/p/88a8b959bd6e4ef3f842b3cce3fb027d.jpg_400x400q80.jpg_.webp)
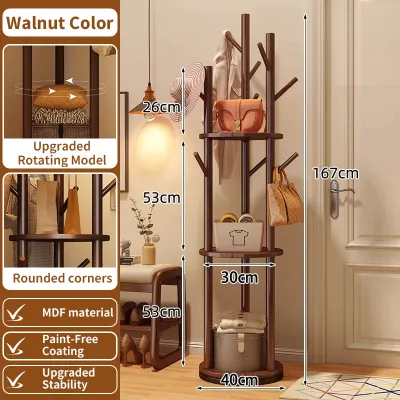
Prices are valid at publication and may change. Please refer to the product page for the latest price.
To identify your wall type, tap on the surface. A hollow, echoing sound typically indicates drywall or hollow concrete blocks, while a dull, solid thud points to solid concrete or brick. If you are dealing with drywall, you must locate the vertical wooden or metal studs behind the wall surface using a stud finder. Mounting directly into a stud provides the highest level of support, which is essential for heavy bag storage. If no studs align with your desired rack placement, you will need specialized hollow-wall anchors.
Next, review the manufacturer’s specifications for your bag hanger rack stand. Check the product manual or packaging for the recommended weight capacity and the spacing of the pre-drilled mounting holes. Compare these dimensions with your available wall space, ensuring there is enough clearance for your largest bags to hang freely without blocking doorways, light switches, or walkways. Keep in mind that a rack loaded with multiple leather bags, laptops, and accessories can easily weigh several kilograms, making structural support your top priority.
Gather the Required Tools and Hardware
Having the correct tools on hand before you begin prevents mid-project delays and ensures a clean, professional finish. For a standard installation on concrete or masonry walls, you will need a power drill with a hammer function, a masonry drill bit that matches the diameter of your wall anchors, a spirit level, a tape measure, a pencil, and a hammer. If you are mounting onto drywall, a standard rotary drill, a wood drill bit, and a reliable stud finder are necessary instead.

The choice of wall anchors and screws is the most critical factor in preventing the rack from sagging or falling. For concrete or brick walls, plastic expansion anchors (often referred to locally as tox plugs) or heavy-duty sleeve anchors are ideal. For drywall installations where you cannot align the rack with studs, toggle bolts or threaded drywall anchors are required to distribute the weight across the back of the board. Ensure the screws you use are long enough to pass completely through the rack’s mounting bracket and penetrate deep into the wall anchor.
Always inspect the hardware provided in the product packaging. While many manufacturers include standard screws and anchors, these generic fasteners may not be suitable for your specific wall type. For instance, the included plastic plugs might be too weak for hollow block walls or completely useless on drywall. Do not hesitate to purchase high-quality, specialized anchors from a local hardware store to guarantee a secure hold.
Step-by-Step Installation Process
Begin by determining the ideal height for your bag hanger rack. It should be high enough to keep long shoulder straps and large backpacks from touching the floor, yet low enough for you to reach comfortably. Hold the rack against the wall at this chosen height and place a spirit level on top of it. Adjust the rack until the bubble in the level is perfectly centered between the indicator lines. Using a pencil, mark the exact center of each mounting hole onto the wall surface.
Once your marks are made, double-check the alignment by measuring the distance between the marks and comparing them to the distance between the holes on the rack itself. If you are drilling into concrete or masonry, set your power drill to the hammer setting and equip it with a masonry bit. Hold the drill perfectly perpendicular to the wall to prevent the hole from becoming enlarged or angled. Drill to a depth slightly deeper than the length of your wall anchor, using a piece of tape wrapped around the drill bit as a depth guide.
For drywall installations, use a standard drill bit to create pilot holes. If you are mounting directly into a wooden stud, the pilot hole should be slightly smaller than the screw thread diameter, and no anchor is needed. If you are using hollow-wall anchors, drill the hole to the exact size specified on the anchor packaging. Clean any dust or debris out of the drilled holes using a vacuum cleaner or a hand pump, as trapped dust can prevent anchors from seating properly.
Gently tap the plastic anchors or tox plugs into the drilled holes using a hammer until they are flush with the wall surface. If you are using toggle bolts on drywall, assemble the bolt through the rack’s mounting bracket first, compress the metal wings, and push them through the drilled hole until you hear them spring open behind the wall. Align the rack’s mounting holes with the installed anchors, insert the screws, and tighten them using a screwdriver or a drill on a low torque setting to avoid stripping the plastic or damaging the wall.
Safety must remain your primary concern throughout this process. If you encounter unexpected resistance while drilling, or if the drill bit suddenly drops into an empty space where it should not, stop immediately. Concrete walls often contain electrical conduits, water pipes, or structural steel rebar. Accidentally drilling into these can cause severe damage, flooding, or electrical hazards. If you are unsure of what lies behind the wall, consult a qualified professional before proceeding.
Verify Stability and Test the Load Safely
Once the rack is mounted, you must verify its stability before trusting it with your valuable bags. Begin with a visual inspection. Check that the back of the rack sits completely flush against the wall surface with no visible gaps. If one side is protruding, it may indicate that a screw is not fully tightened or that the wall anchor has started to pull out.
Next, perform a physical stability check. Gently grasp the rack and apply light downward and outward pressure. It should feel completely rigid, with no wobbling, shifting, or flexing. If you detect any movement, check each screw and tighten them further. If a screw spins freely without tightening, the anchor inside the wall may be stripped or the drilled hole may be too large, requiring troubleshooting.
To test the load capacity safely, introduce weight incrementally. Start by hanging a single, lightweight item, such as an empty tote bag or a light jacket. Observe the mounting points for any signs of flexing or pulling away from the wall. Gradually add heavier items, such as a handbag or a small backpack, one by one. Avoid placing your heaviest items, like a laptop bag filled with electronics, on the rack until you are completely confident in the mount’s structural integrity.
Long-Term Maintenance and Safety Checks
A wall-mounted rack is subject to continuous stress from the constant hanging and removing of bags. Over time, this repetitive motion can loosen screws or degrade the surrounding wall material. In humid environments, moisture can seep into plaster or drywall, weakening the area around the anchors. Periodically inspect the mounting points for any signs of cracking, paint peeling, or crumbling plaster.
To prolong the life of your installation, practice even weight distribution. Avoid hanging all your heaviest bags on a single hook or on one side of the rack, as this uneven load can warp the rack frame or put excessive strain on a single wall anchor. Distribute the weight evenly across all available hooks or shelves to balance the load.
If you notice the rack beginning to sag, or if the wall surface around the screws shows signs of structural compromise, remove the bags immediately. You will need to take the rack down, patch the damaged wall area with a suitable filler, and reinstall the rack in a slightly different position using fresh hardware. Ignoring a loose mount can lead to the rack falling, causing damage to your walls, your floor, and your bags.
Frequently Asked Questions (FAQ)
Can I install a bag hanger rack on drywall without studs?
Yes, you can install a bag hanger rack on drywall without studs, but you must use specialized hollow-wall anchors rather than standard plastic plugs. Toggle bolts, molly bolts, or heavy-duty threaded drywall anchors are designed to expand or grip the back of the drywall sheet, distributing the weight over a larger surface area. Always check the weight rating on the anchor packaging and ensure it exceeds the combined weight of the rack and the bags you plan to hang. Avoid hanging extremely heavy items, such as fully loaded travel backpacks, on a drywall mount that is not anchored directly to a stud.
What should I do if the rack feels loose after installation?
If the rack feels loose, first check if the screws are fully tightened into the anchors. If a screw spins without tightening, the pilot hole may have been drilled too large, or the anchor may have stripped the surrounding wall material. To fix this, remove the rack and the loose anchor. You can fill the damaged hole with a heavy-duty wall filler or epoxy, let it cure completely, and drill a new hole. Alternatively, you can shift the entire rack slightly to the left or right to drill fresh holes into undamaged wall sections, ensuring you use the correct anchor size for your drill bit.
Community discussion
Share your experience or ask a question. Comments are reviewed before publication.