
Finding the right shoe storage solution is a balancing act between your physical closet dimensions and your actual footwear inventory. If you are shopping for a shoe rocks organizer cabinet to tidy up your closet, the ideal size depends on your specific shoe types, pair count, and closet layout. For standard shoe collections stored flat, a cabinet depth of 30 to 35 centimeters is generally required. However, if you are working with tight spaces, angled shelves or tilt-out compartments can reduce this depth requirement to just 15 to 25 centimeters. Taking the time to calculate your storage needs and measure your space prevents expensive return shipping fees and ensures your closet doors operate smoothly.
Step 1: Audit Your Shoe Collection and Capacity Needs
Before browsing designs, you must conduct a thorough audit of your current shoe collection. Empty your closet, count every pair of shoes you own, and group them by style and profile. Low-profile shoes like slippers, flat sandals, and canvas plimsolls require minimal vertical clearance, typically around 10 to 12 centimeters. Medium-profile footwear, including athletic sneakers, running shoes, and low-block heels, needs about 15 to 18 centimeters of height. High-profile items such as high heels, ankle boots, and work boots require 20 to 30 centimeters or more. If you own tall boots, you will need dedicated tall compartments or adjustable shelves that can be repositioned to accommodate the shafts without bending the leather.
Next, translate your pair count into physical shelf width. On average, a pair of men’s shoes requires 22 to 25 centimeters of lateral shelf space, while women’s shoes require 18 to 22 centimeters. If you have 15 pairs of standard sneakers, you will need a cumulative shelf length of approximately 3.3 meters. If your chosen cabinet is 80 centimeters wide, each shelf can comfortably hold about three pairs of shoes. Therefore, you will need a cabinet with at least five tiers to house your current collection without cramming them together.
Products mentioned in this guide
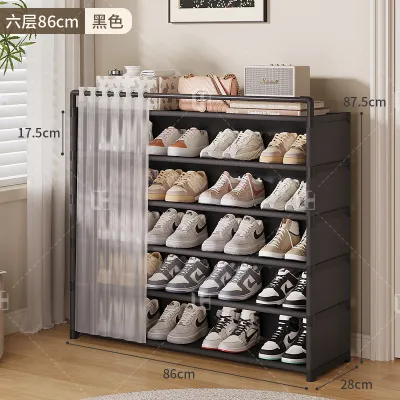
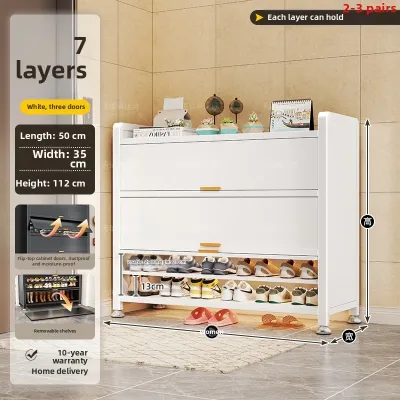
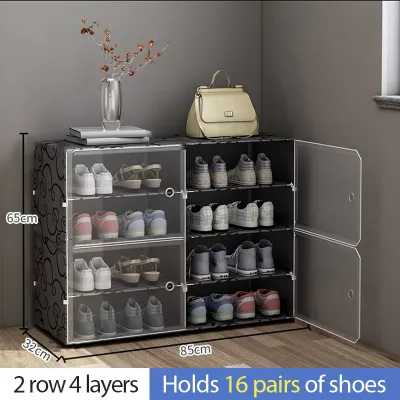
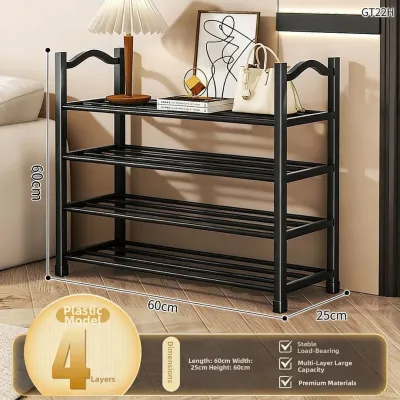
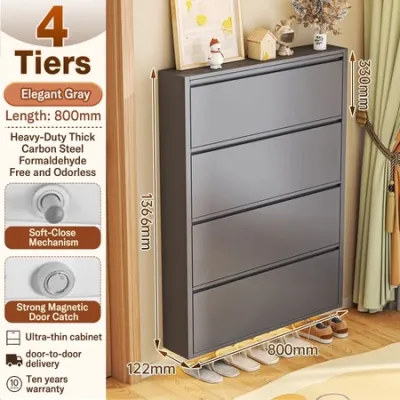
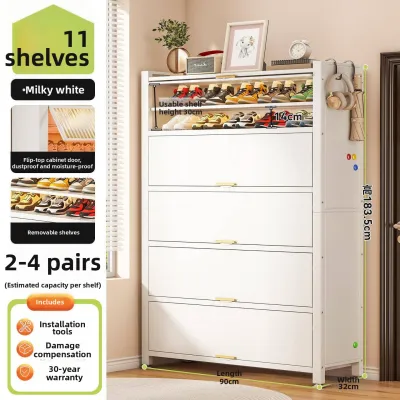
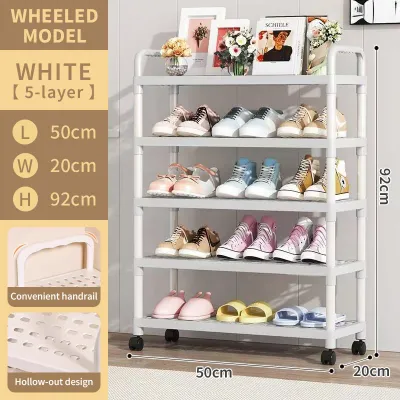
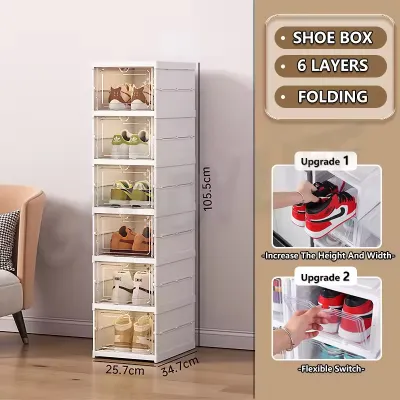
Prices are valid at publication and may change. Please refer to the product page for the latest price.
Always incorporate a 10% to 20% growth buffer for future purchases. If your current inventory stands at 20 pairs, select a cabinet rated to hold 22 to 24 pairs. Overcrowding your shelves limits airflow, which can damage delicate shoe materials and make it difficult to locate specific pairs.
Finally, consider the structural difference between storing shoes flat versus using angled or drop-front shelves. Flat shelves maximize vertical space efficiency for low-profile shoes but require a deeper cabinet profile. Angled shelves or drop-front tilt drawers reduce the cabinet’s depth footprint, making them excellent for narrow walk-in pathways, but they require more vertical height per tier because the shoes are tilted upward or downward.
Step 2: Measure Your Closet Space and Clearance
To ensure your new cabinet integrates seamlessly, you must measure your designated closet zone with high precision. Use a reliable steel tape measure and record the internal width, depth, and height of the space. Because home walls and built-in closet frames are rarely perfectly square, take measurements at three separate points: the top, the middle, and the bottom of the zone. Use the smallest of these three figures as your maximum allowable cabinet dimension to avoid a tight fit that could scratch your closet walls during installation.

Do not forget to account for structural obstructions that can easily block a cabinet or prevent it from sitting level. Look closely for baseboards along the floor, wall-mounted light fixtures, internal closet power outlets, and door hinges. If your closet features sliding doors, measure the depth of the door tracks and the overlap area where the two door panels meet. A cabinet placed too close to the front of the closet can block sliding doors from passing each other, rendering half of your storage inaccessible. For hinged closet doors, map out the swing arc to ensure the cabinet doors or drawers can open fully without colliding with the main doors.
In the tropical climate of the Philippines, managing humidity inside closets is a constant challenge. High humidity levels combined with dark, stagnant closet air can lead to rapid mold and mildew growth on leather, suede, and canvas shoes. To mitigate this risk, always leave a ventilation gap of 2 to 5 centimeters between the back of the shoe cabinet and the closet wall. This space allows air to circulate freely, preventing damp pockets from forming behind the furniture.
Additionally, check the vertical clearance below your hanging garments. If you plan to place the shoe cabinet beneath hanging rods, measure the distance from the closet floor to the bottom hem of your lowest-hanging clothes, such as trousers, long coats, or dresses. The top of your shoe cabinet should sit at least 10 to 15 centimeters below this hemline. This clearance prevents your clean clothes from dragging across the dusty top of the cabinet or becoming wrinkled and compressed.
Step 3: Match Shoe Rocks Organizer Cabinet Dimensions to Your Layout
Slim and Tall Cabinets for Narrow Gaps
For closets with limited floor width but plenty of unused vertical space, a slim and tall cabinet is the most efficient configuration. These units typically range from 30 to 50 centimeters in width and can stand anywhere from 120 to 180 centimeters tall. They are designed to slide into narrow corner gaps, fit snugly beside existing hanging organizers, or occupy the tight space behind a bedroom door.
Because tall, narrow cabinets have a small footprint relative to their height, their center of gravity is high. When fully loaded with heavy footwear, they pose a serious tip-over hazard, especially during seismic activity or if accidentally bumped. Always check the manufacturer’s guidelines regarding stability and load capacities. It is highly recommended to secure any freestanding cabinet taller than 100 centimeters to the wall studs using an anti-tip safety kit.
Wide and Low Cabinets for Under-Clothing Areas
If your closet layout features a long hanging rod with open space underneath, a wide and low cabinet is the ideal choice. These units generally measure between 50 and 80 centimeters in height and can span 80 to 120 centimeters in width. This layout keeps your footwear organized at ground level while leaving the upper vertical space free for hanging shirts, jackets, and folded garments.
When selecting a low cabinet, match its depth to the standard depth of your closet system, which is typically 50 to 60 centimeters. A shoe cabinet depth of 35 to 40 centimeters allows the unit to sit completely inside the closet frame. This ensures that the cabinet does not protrude into your bedroom walkway or interfere with the closing mechanism of your main closet doors.
Modular and Stackable Options for Flexible Storage
For renters, growing families, or anyone with an expanding shoe collection, modular and stackable shoe organizers offer excellent flexibility. These systems allow you to start with a compact two-tier or three-tier base unit and purchase matching add-on modules over time as your storage needs increase.
When planning a stackable setup, always verify the manufacturer’s maximum weight limits and recommended stacking heights. Ensure that the interlocking plastic pegs, wooden dowels, or metal brackets provided for connection are fully engaged and stable. Overloading a stacked system or exceeding the safe height limit can cause the top units to sag, slip, or collapse, potentially damaging your shoes and posing a safety risk.
Step 4: Verify Delivery Access, Assembly, and Safety
Before finalizing your purchase, you must verify that the packaged cabinet can physically reach its destination. Retrieve the shipping box dimensions from the product specifications and compare them against the narrowest points in your home’s entry path. Measure the clearance of your front door, hallways, stairwells, and bedroom doorways. If you live in a multi-story condominium or apartment, check the internal dimensions of the elevator and any tight corners in the common corridors to ensure a smooth delivery.
Next, evaluate the assembly conditions required for the cabinet. Most flat-packed wood or composite cabinets require a clean, flat floor space that is at least double the size of the completed unit for assembly. Laying down a soft blanket or cardboard packaging protects the panels from scratches during construction. Before starting, check that you have the necessary tools on hand, such as a rubber mallet, a level, and a screwdriver, and carefully inspect the joints and finish quality. If the printed assembly instructions conflict with your specific home setup, stop and consult the manufacturer or a professional installer.
Safety must remain a priority, particularly if you have children or pets in the home. Any freestanding shoe cabinet that is shallow or top-heavy must be anchored to the wall. Use the anti-tip hardware included in the package, and ensure you use the correct wall plugs for your wall type, whether concrete, brick, or drywall.
Finally, check for potential operational clashes between the shoe cabinet’s doors or drawers and your existing closet doors. If both doors are opened simultaneously, they should not scrape against each other or block your physical exit path from the room.
Common Sizing Mistakes to Avoid
One of the most frequent errors is forgetting to account for the swing arc of hinged closet doors. A shoe cabinet may fit perfectly inside the closet footprint, but if its outer edges block the main closet doors from opening to a full 90 degrees, accessing your clothes will become a daily frustration.
Another common mistake is buying a cabinet that is too deep for your closet niche. A cabinet that protrudes even a few centimeters past the closet frame can prevent sliding doors from closing, ruin the flush aesthetic of your built-in wardrobe, or create a tripping hazard in narrow walkways.
Many buyers also assume that all shoe cabinet shelves are of a uniform, fixed height. Purchasing a cabinet without adjustable shelves often leaves you with wasted vertical space above low flats, while your high-top sneakers, heels, or ankle boots are forced to lie sideways or are left scattered on the floor.
Lastly, pushing a solid-back cabinet completely flush against an exterior-facing wall is a major risk in humid regions. This traps cool air and moisture behind the unit, creating an ideal breeding ground for mold and fungal spores that can quickly ruin expensive leather and suede footwear. Always maintain a small air gap and check the backing material for ventilation cutouts.
Frequently Asked Questions (FAQ)
How much depth does a standard shoe organizer cabinet need?
A standard shoe organizer cabinet with flat shelves requires an internal depth of 30 to 35 centimeters to accommodate most adult shoe sizes up to a US men’s size 12. If your closet is shallow (under 30 cm deep), look for cabinets with angled shelves or tilt-out drop-front drawers. These designs tilt the shoes vertically, reducing the required cabinet depth to just 15 to 25 centimeters while still keeping your footwear organized.
Should a shoe cabinet inside a closet have solid or slatted doors?
For cabinets placed inside an enclosed closet, slatted, louvered, or mesh doors are highly recommended, especially in humid regions like the Philippines. Solid doors trap stale air and residual foot moisture, which accelerates mold growth and unpleasant odors. Slatted doors facilitate continuous airflow, keeping your shoes dry. If you prefer a completely clean look with solid doors, ensure the cabinet has ventilation cutouts or grilles on the back panel, and leave a gap between the cabinet and the wall.
Community discussion
Share your experience or ask a question. Comments are reviewed before publication.