
Moving into a new home in the Philippines is an exciting milestone, but the post-move transition—locally known as lipat bahay—often leaves the kitchen in temporary disarray. Among the many items that need a dedicated home, snacks are frequently overlooked, ending up scattered across countertops or buried deep within dark cabinets. Establishing an efficient snack station early in your unpacking process not only keeps your kitchen looking tidy but also prevents food waste by keeping your favorite treats visible and accessible. Choosing the right snack rack organizer depends heavily on your kitchen’s layout, your family’s snacking habits, and the tropical climate, which demands careful consideration of airflow and moisture control. By systematically organizing your pantry items, you can transform a chaotic post-move kitchen into a highly functional, welcoming space for your household.
How to Assess Your Kitchen Space for Snack Storage
Before purchasing any storage solutions, a thorough assessment of your new kitchen’s physical layout is essential to avoid buying organizers that do not fit. Begin by measuring the interior dimensions of your cabinets, noting the exact height, width, and depth of each shelf. It is crucial to check the door clearance, especially if you plan to install pull-out mechanisms or organizers that sit close to the cabinet hinges, as even a minor obstruction can prevent doors from closing fully.
Next, look for underutilized dead spaces that can be converted into valuable storage zones. In many Philippine homes and condominium units, kitchen space is premium, making areas like the inside of cabinet doors, narrow gaps between major appliances, or deep corner shelves prime candidates for vertical or slim organizers.
Products mentioned in this guide
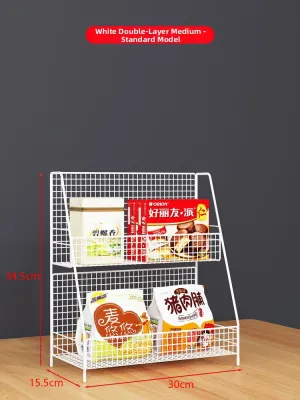
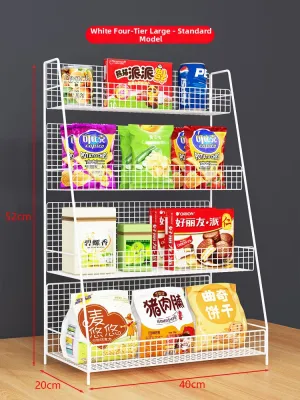
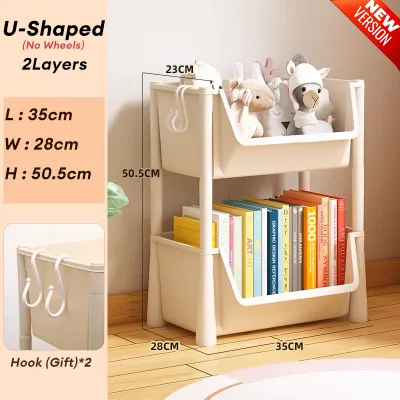
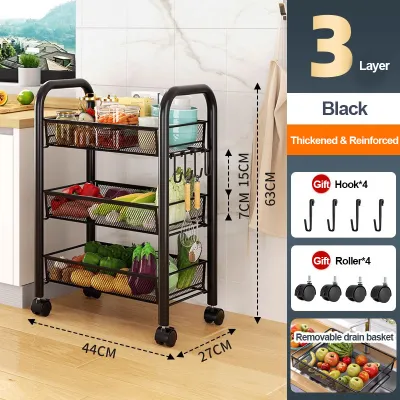
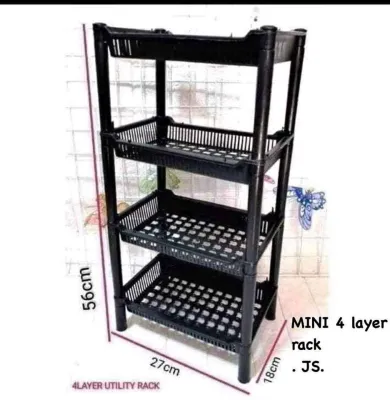
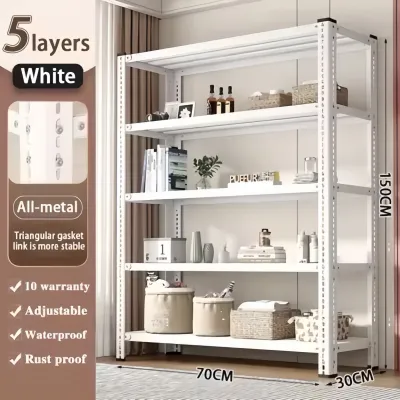
Prices are valid at publication and may change. Please refer to the product page for the latest price.
Finally, evaluate the weight-bearing capacity of your existing shelves. While empty plastic bins or wire baskets are lightweight, filling them with heavy jars, canned goods, or bulk snack packs can cause wooden or laminate shelves to sag over time. Ensure that the structural integrity of your cabinetry matches the load of both the organizer and the snacks you intend to store. If you are moving into a high-rise condominium, also consider the doorway and lift access of your building when transporting larger, fully assembled freestanding racks, ensuring they can be easily brought up to your unit without damage.
Best Snack Rack Organizer Types for Different Kitchen Layouts
Different kitchen layouts require distinct organizational approaches to maximize efficiency and maintain a clutter-free environment. Whether you are working with a spacious walk-in pantry, deep lower cabinets, or limited countertop space, selecting the appropriate style of snack rack organizer ensures that every item has a logical place and remains within easy reach.

Tiered Shelf Organizers for Deep Cabinets
Deep upper cabinets or pantry shelves often become black holes where smaller snack packages are pushed to the back and forgotten until long after their expiration dates. Tiered shelf organizers, which resemble mini staircases, solve this visibility issue by elevating items placed in the rear rows. This setup is ideal for canned goods, small snack boxes, individually wrapped biscuits, and jars of spreads.
When selecting a tiered organizer, check the step height carefully. If the steps are too shallow, taller items in the front will still block your view of the items behind them; if they are too steep, you might run out of vertical clearance between the top step and the upper cabinet ceiling.
Additionally, verify the base footprint of the organizer. It must fit comfortably within your cabinet’s depth without protruding or obstructing the cabinet door from latching securely. Non-slip surfaces on each tier are also highly beneficial to prevent lightweight plastic snack packaging from sliding off when you reach for an item.
Pull-Out Baskets and Bins for Lower Cabinets
Lower cabinets offer generous storage volume but require you to bend down and reach into dark corners to find what you need. Installing sliding or pull-out baskets transforms these deep spaces into highly accessible drawers, making them perfect for bulk snack bags, family-sized chip packets, and heavier items.
When choosing pull-out systems, assess whether your household prefers soft-close slides or standard rails. Soft-close mechanisms prevent noisy slamming and reduce wear on your cabinetry, though they may require a slightly higher budget in ₱ compared to basic runner designs.
It is also critical to check the maximum weight capacity of the sliding mechanism. Heavy-duty metal slides are necessary if you plan to store dense items, as weak rails can sag, stick, or fail entirely under a full load.
Lastly, measure the height of the basket relative to the cabinet opening. Ensure there is ample clearance so that tall snack packages do not catch on the upper cabinet frame when the basket is retracted.
Door-Mounted and Wall-Hanging Racks for Small Kitchens
For compact kitchens, studio apartments, or condominium units where counter and cabinet space are extremely limited, vertical surfaces offer an excellent alternative. Door-mounted and wall-hanging racks utilize the often-ignored space on the backs of pantry doors or empty wall sections to keep your countertops completely clear.
Before installing an over-the-door or mounted rack, evaluate the strength of your cabinet or pantry door hinges. Heavy metal racks loaded with snacks can strain standard hinges, leading to misaligned doors over time.
You must also select the mounting method based on your living situation. If you are renting your home, damage-free adhesive hooks or over-the-door brackets are preferable to avoid losing your security deposit. For owned homes, permanent screw-mount options provide superior stability and load capacity.
To ensure longevity, use these vertical racks primarily for lightweight, flat snack packages, such as single-serve crackers, seaweed snacks, or juice pouches, which prevent the rack from pulling away from the mounting surface.
Freestanding Countertop Carousels for Easy Access
Frequently consumed snacks, such as daily fruit portions, nuts, or school snacks for children, are best kept on open countertops or accessible shelves. Freestanding countertop carousels, or lazy Susans, allow you to access items from all sides with a simple spin, eliminating the need to rummage through rows of containers.
Before placing a carousel on your counter, measure the required rotation clearance. The unit must have enough space to spin freely without hitting walls, backsplashes, adjacent appliances, or decorative items.
Stability is another critical factor; check the design of the central axis and the width of the base. A carousel with a narrow base can easily tip over if heavy items are placed on one side while the other side is empty.
Prioritize models with smooth-bearing mechanisms. High-quality ball bearings ensure effortless spinning even when the carousel is fully loaded, preventing jerky movements that could cause items to fly off the tray.
Key Features to Check Before Buying
When browsing online marketplaces or physical home improvement stores in the Philippines, it is easy to be swayed by aesthetics alone. However, ensuring your snack rack organizer is durable and practical requires checking several key structural and material features.
First, consider material suitability for the local climate. The high humidity levels in the Philippines can cause low-grade metal wire racks to rust quickly, especially in kitchens without air conditioning. Instead of assuming any metal is rust-proof, verify if the product has a powder-coated finish or a certified stainless steel grade, and inspect the welded joints for smooth, solid connections. For plastic options, check the manufacturer’s care instructions and look for smooth, non-porous finishes that resist moisture buildup and are easy to wipe clean.
Ease of cleaning is another vital consideration. Kitchens are prone to grease, dust, and food crumbs. Check whether the organizer’s components are easy to wipe down or if they have intricate crevices that trap dirt. Solid plastic bins that can be washed in the sink are often more practical for sticky spills, while wire racks should have smooth, accessible joints.
Look for adjustability features that allow the organizer to grow with your household’s changing preferences. Expandable widths, stackable designs, and removable dividers give you the flexibility to accommodate different snack sizes, from small candy bars to large family-sized chip bags.
Finally, always double-check the product’s exact dimensions listed on the seller’s page against your physical measurements before checking out. Relying on photos can be misleading, as items often appear larger or smaller in stylized product images than they are in reality. Additionally, verify the assembly conditions; check if the organizer arrives flat-packed and requires specific tools, or if it features a drill-free, toolless setup that is easy to assemble immediately after your move.
Setting Up Your Snack Station After Lipat Bahay
Once you have selected and verified your organizers, the final step is setting up your snack station in a way that promotes order and minimizes waste. Begin by grouping your snacks by category, such as savory chips, sweet biscuits, healthy nuts, or quick breakfast bars. Arrange them by expiration date, placing items that need to be consumed first toward the front—a practice known as the first-in, first-out method.
In the tropical climate of the Philippines, temperature and humidity control are paramount. Avoid setting up your snack station near heat-generating appliances like ovens, refrigerators, or microwaves, and keep them out of direct sunlight. This is especially important for temperature-sensitive items like chocolates, gummy candies, or cream-filled biscuits, which can melt or spoil quickly when exposed to heat.
Lastly, safety should always be a priority when organizing your new home. Secure any freestanding, tall, or top-heavy storage units to the wall or shelf to prevent tipping. This precaution is particularly crucial in households with active children or pets who might pull on baskets or shelves to reach their favorite treats. Use appropriate anchoring methods, such as wall straps or brackets, to ensure the units remain stable even under uneven weight distribution.
Frequently Asked Questions (FAQ)
How do I prevent snack racks from sliding inside cabinets?
To keep your organizers securely in place without causing permanent damage to your cabinetry, place non-slip shelf liners or silicone grip pads underneath the base of the rack. These liners provide excellent traction, preventing bins from shifting when you open drawers or reach for items. For lightweight plastic bins or wire racks, you can also apply small pieces of removable adhesive putty or hook-and-loop Velcro strips to the corners of the base. This keeps the organizer stable while allowing you to remove it easily for cleaning without peeling off the cabinet’s laminate or paint finish.
Are wire or solid plastic racks better for kitchen snacks?
Both materials have distinct trade-offs depending on your storage needs. Wire racks offer excellent airflow, which helps keep fresh snacks dry, and they provide high visibility so you can see your inventory from any angle. However, small or single-serve snack packets can easily slip through the gaps, and wire joints can be tedious to clean if crumbs accumulate. Solid plastic racks, on the other hand, easily support items of all sizes and effectively contain any accidental spills or grease. While they require more frequent washing to prevent dust and oil buildup, they are generally easier to sanitize and keep your shelves completely protected.

Community discussion
Share your experience or ask a question. Comments are reviewed before publication.