
Organizing a home study in the Philippines requires a thoughtful approach to space management, especially when drilling into concrete or plaster walls is not an option. No-drill floating shelves offer a practical, damage-free alternative for renters and homeowners alike who want to maximize vertical space without the noise, dust, and permanent alterations of traditional drilling. However, because these systems rely entirely on adhesives, tension, or specialized brackets, their success depends on matching the mounting mechanism to your specific wall type and managing weight limits carefully.
To build an efficient and safe study environment, you must look beyond aesthetic appeal and focus on structural integrity. High humidity levels, common wall finishes, and the weight of books and study accessories all play critical roles in how well a no-drill shelf performs over time. By evaluating your wall surfaces, understanding material limits, and selecting designs tailored to your daily workflow, you can create an organized workspace that remains stable and secure.
Evaluating Wall Compatibility and Space Clearance
Before purchasing any no-drill shelving system, you must assess the physical characteristics of your study walls. In the Philippines, residential walls are commonly constructed from painted concrete, hollow blocks with plaster finishes, or lightweight drywall. Adhesive-based floating shelves require a completely smooth, non-porous, and stable surface to achieve a secure bond. Materials such as smooth ceramic tiles, glass, metal, and well-sealed, high-gloss painted surfaces are highly compatible with heavy-duty adhesive strips or liquid glues.
Products mentioned in this guide
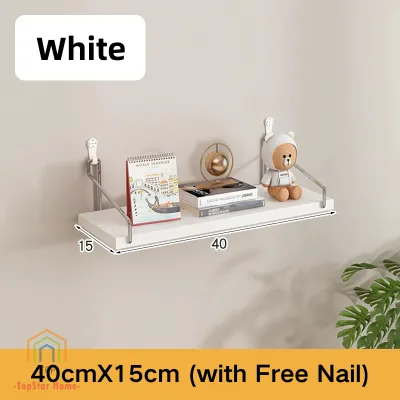
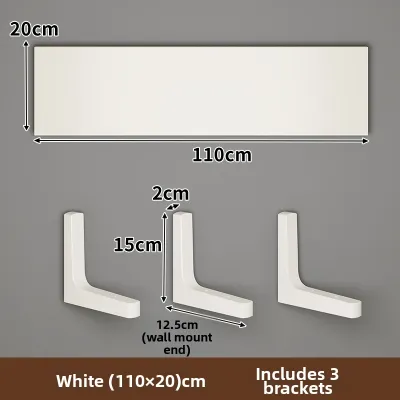
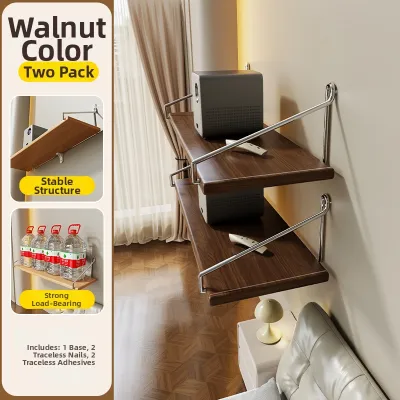
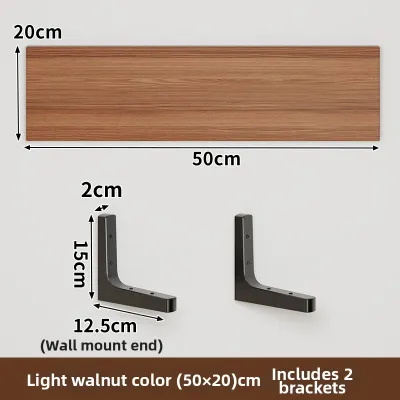
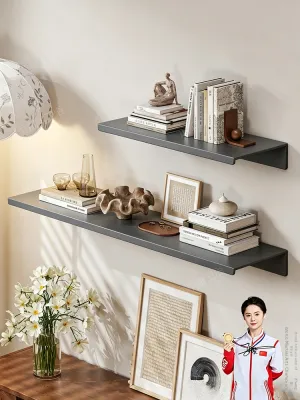
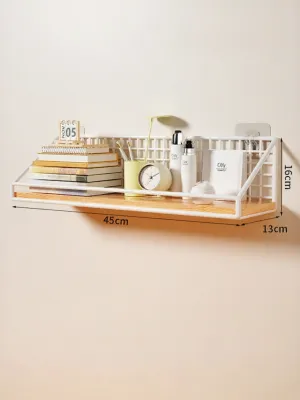
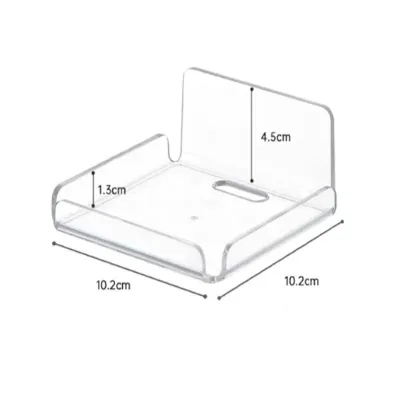
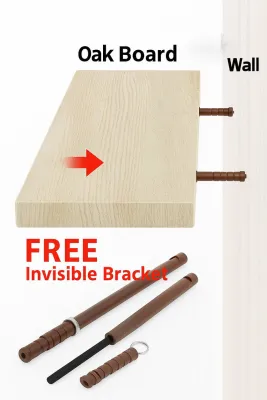
Prices are valid at publication and may change. Please refer to the product page for the latest price.
Conversely, textured walls, rough concrete, wallpaper, and walls with peeling or chalky paint are highly unsuitable for adhesive mounting. The adhesive will only grip the outermost layer of dust, texture, or loose paint, leading to sudden shelf failure and potential damage to your study equipment. If your study features matte or flat latex paint, the adhesive may bond well initially but can tear the paint layer away from the plaster when subjected to downward force. For these surfaces, alternative no-drill options like tension-rod shelving or freestanding desk hutch organizers are far more reliable.
Environmental factors also influence adhesive performance. High relative humidity, typical of the tropical Philippine climate, can gradually weaken certain water-based adhesives over time. When selecting adhesive shelves, verify that the manufacturer specifies moisture-resistant or waterproof adhesive compounds, which are better suited to withstand seasonal humidity shifts. Additionally, avoid mounting adhesive shelves directly in the path of air conditioner drafts or in areas prone to wall moisture seepage, as rapid temperature fluctuations and hidden dampness can compromise the bond.
Safety also requires checking for hidden hazards behind the wall surface before installation. Even though you are not drilling, applying high-strength adhesives or tension systems near shallow-buried electrical conduits or water pipes can cause issues during future maintenance or removal. Use a wall scanner if available, or refer to your home’s layout plans to ensure the mounting area is clear of utility lines.
Finally, precise physical clearance measurements are essential to maintain an ergonomic and comfortable workspace. Measure the depth and width of the proposed shelf against your desk chair’s full range of motion. A shelf that protrudes too far into your active workspace can lead to painful bumps when you stand up or stretch. Ensure there is at least 50 to 60 centimeters of vertical clearance between your desktop and the bottom of the lowest shelf to allow room for laptop screens, desk lamps, and natural hand movements.
Identifying Structural and Material Requirements
When evaluating no-drill shelves on online marketplaces, it is easy to be swayed by attractive product photography. To ensure long-term durability, you must look past marketing buzzwords and scrutinize the actual structural specifications. Never assume a shelf is sturdy simply because it is described as “solid wood” or “heavy-duty metal.” The overall load capacity is determined by the weakest link in the assembly, which is almost always the mounting interface and the bracket design.

Begin by checking the manufacturer’s explicitly stated weight limits. Reliable listings will provide a maximum load capacity, often specified in kilograms. Keep in mind that these ratings are typically calculated under ideal laboratory conditions on perfectly smooth surfaces. For real-world application in a home study, it is wise to operate well below this maximum limit—ideally utilizing only 50% to 60% of the rated capacity—to account for environmental variables like humidity and minor installation imperfections.
Consider the physical design of the shelf platform itself. For a home study, shelves with a completely flat, smooth surface can present risks for smaller items. Look for practical design features such as raised lip edges, front guardrails, or shallow tray designs. These structural elements prevent pens, USB drives, cylindrical markers, and small tools from rolling off the edge and falling behind your desk. If you plan to store tablets or reference cards, a shelf with an integrated front groove can hold these items upright securely.
Material finishes also dictate how well the shelf handles daily wear and tear. A home study shelf is subject to ink spills, graphite dust, and frequent friction from sliding organizers. Review the product description for protective surface treatments. For wooden or engineered wood shelves, a water-resistant polyurethane or melamine laminate coating makes it easy to wipe away ink marks and dust with a damp cloth. For metal shelves, a powder-coated finish is highly desirable as it resists scratching, chipping, and rust in humid environments.
Pay close attention to the joint construction of the shelf and its integrated brackets. Shelves molded as a single continuous piece of high-impact plastic or bent metal tend to have fewer failure points than those requiring multi-piece assembly with small plastic pegs. If the shelf uses a separate bracket and platform design, ensure the connection points are reinforced and that the platform locks securely into the bracket to prevent sliding or tilting under uneven loads.
Matching Shelf Designs to Study Workflows
An organized study relies on having the right tools within arm’s reach while keeping the primary desk surface clear. Different study tasks require different shelf configurations. By matching the design of your no-drill shelves to your specific daily workflow, you can improve both your productivity and your physical comfort during long working hours.
For compact study rooms or corner desk setups, L-shaped or corner floating shelves are highly effective. The corner of a room is often underutilized vertical space. Installing a corner shelf allows you to store reference materials and decorative items close to your workspace without crowding the main wall directly in front of your monitor. This configuration also provides natural structural support, as the shelf is braced against two perpendicular wall surfaces, which can sometimes improve stability.
If your daily routine involves managing a mix of active projects, reference books, and loose stationery, consider multi-tiered or stepped shelf designs. These systems allow you to establish a clear storage hierarchy. You can place active notebooks, current reading materials, and frequently used pens on the lower, most accessible tier. Meanwhile, historical archives, reference manuals, and less frequently used office supplies can sit on the upper tiers, keeping your immediate visual field clean and distraction-free.
For tech-heavy study setups, look for shelves designed with integrated cable management slots or under-shelf utility features. Shelves with built-in hooks or attachable hanging baskets are incredibly useful for organizing headphones, charging cables, and small desk accessories. Some modern designs feature hollow channels or rear cutouts that allow you to route power cables discreetly, enabling you to place small desk lamps, smart speakers, or phone chargers directly on the shelf without creating a tangled mess of wires along your wall.
Modular pegboard-style no-drill systems offer the ultimate flexibility for dynamic workflows. These systems consist of a main backing board secured with heavy-duty adhesive pads, onto which you can mount various hooks, shallow shelves, and pencil cups. As your study needs change—perhaps shifting from textbook-heavy reading to digital design work—you can easily reposition the accessories on the pegboard without having to remove or reinstall the main wall mounts.
Executing Safe Installation and Load Management
Proper installation is the single most critical factor in preventing a no-drill shelf from falling. Even the highest-quality adhesive will fail if the wall preparation steps are rushed or ignored. Before beginning, gather the necessary cleaning supplies, a pencil, and a spirit level to ensure a precise, level installation.
Start by thoroughly cleaning the target wall area. Dust, skin oils, and microscopic grime prevent adhesives from making direct contact with the wall surface. Wipe the area with isopropyl alcohol and a clean, lint-free microfiber cloth. Avoid using household glass cleaners or multi-surface sprays, as these often leave behind a thin chemical residue that can interfere with the adhesive bond. Allow the wall to dry completely; in humid conditions, this may take several minutes longer than expected.
Use your spirit level and a pencil to mark the exact placement of the adhesive pads or brackets. Once heavy-duty adhesive strips touch the wall, they cannot be easily repositioned without losing a significant portion of their bonding strength. Apply the adhesive pads to the bracket or wall according to the manufacturer’s instructions, pressing firmly across the entire surface area for at least 30 seconds to activate the pressure-sensitive compounds.
One of the most common mistakes is loading the shelf immediately after installation. Most high-strength adhesives require a mandatory curing period to reach their full load-bearing capacity. Refer to the product manual for the exact curing time, which typically ranges from 12 to 24 hours. Keep the shelf completely empty during this period. Do not tempt fate by placing even lightweight items on it prematurely, as this can cause micro-tears in the adhesive layer that lead to failure days or weeks later.
Once the curing period is complete, load the shelf strategically to manage leverage and torque. Place the heaviest items, such as reference books or organizers, at the back of the shelf, as close to the wall surface as possible. This minimizes the pulling force exerted on the adhesive pads. Distribute weight evenly across the horizontal span of the shelf rather than stacking everything in the center or on one outer edge, which can cause the shelf to tilt and peel away from the wall.
Establish a routine to inspect your shelves for early warning signs of failure. Periodically check the gap between the wall and the shelf bracket. If you notice any peeling at the edges of the adhesive pad, bracket bending, or bubbling of the wall paint around the mount, unload the shelf immediately. Do not attempt to re-press a failing adhesive pad; instead, remove it entirely, clean the surface, and apply a fresh, high-quality replacement adhesive strip.
Sourcing and Verifying Options in the Philippines
Finding reliable no-drill floating shelves on popular e-commerce platforms in the Philippines requires a critical eye. Because online marketplaces are flooded with generic listings, you must perform diligent research to filter out low-quality products and ensure you receive a shelf that matches your expectations.
Start by ignoring the main promotional images, which often use digital rendering to show shelves holding unrealistically heavy items like large potted plants or stacks of massive encyclopedias. Instead, scroll directly to the detailed product description. Cross-reference the listed dimensions (length, width, and depth) and the specified weight limits. If a listing lacks clear measurements or fails to state a maximum load capacity, treat it with caution and consider contacting the seller directly for clarification.
Customer reviews are your most valuable tool for verifying real-world performance. Look specifically for reviews that include actual photos and videos uploaded by buyers in the Philippines. These images provide a realistic view of the product’s color, material finish, and overall build quality. Pay close attention to feedback regarding the included adhesive pads or mounting hardware. If multiple buyers report that the adhesive failed within a few days, or that the shelf arrived warped, it is best to look for an alternative option.
Verify the shipping origin and estimated delivery times before finalizing your purchase. Many items on local e-commerce platforms are shipped from overseas warehouses, which can result in longer transit times and higher shipping fees. Additionally, check the seller’s return and refund policies. Because no-drill shelves must fit your wall surface perfectly, ensure you can easily return the product if you discover upon arrival that your wall paint is incompatible with the adhesive system. Factor in any potential return shipping costs to calculate the true total investment in ₱.
Finally, consider purchasing name-brand adhesive strips separately if you are doubtful about the quality of the unbranded adhesives included in cheap shelf kits. Upgrading to reputable, locally available adhesive brands can significantly improve the safety and longevity of your floating shelves, protecting your valuable study books and electronics from accidental falls.
Frequently Asked Questions (FAQ)
Can no-drill shelves hold heavy textbooks?
No-drill floating shelves are generally not designed to support heavy, oversized textbooks or dense reference manuals. Their load capacity is strictly limited by the strength of the adhesive bond or tension mechanism and the integrity of your wall’s outer paint layer. While some high-quality adhesive shelves can safely support lightweight notebooks, novels, and stationery, overloading them can lead to sudden failure. If you have a large collection of heavy academic textbooks, it is highly recommended to store them on a sturdy floor-standing bookcase, a desk hutch, or shelves secured with traditional drilled wall anchors.
How do I remove adhesive shelves without peeling the paint?
To remove adhesive-mounted shelves safely without damaging your wall paint, you must soften the adhesive before attempting to pull it off. Use a handheld hairdryer set to medium or high heat and direct the warm air at the adhesive pad for several minutes. The heat will gradually soften the sticky polymers. Once warmed, gently slide a thin plastic scraper, a putty knife, or even a piece of dental floss behind the bracket to slice through the adhesive layer. Avoid prying the bracket directly off the wall, as this will tear the paint. Any remaining sticky residue can be cleaned using a mild adhesive remover or a cloth dampened with warm soapy water, depending on your paint type.
Are tension-pole shelves a better alternative for renters?
Tension-pole shelving systems are an excellent alternative for renters who need high-capacity storage but cannot drill into their walls. These systems use a spring-loaded vertical pole that wedges securely between the floor and the ceiling, bypassing the need for wall adhesives entirely. Because the weight is transferred vertically down to the floor, tension-pole systems can support significantly heavier book collections than adhesive floating shelves. However, they do have trade-offs, including a larger physical footprint on your floor and a more prominent, industrial visual appearance that may not suit minimalist study designs.

Community discussion
Share your experience or ask a question. Comments are reviewed before publication.