
Finding the right wall-mounted hanging shoe rack for your closet in the Philippines requires balancing storage capacity with the physical realities of your home’s construction. In tropical environments where high humidity can affect both footwear materials and wall structures, a poorly chosen organizer can lead to sagging shelves, rusted brackets, or even damaged walls. By understanding how to evaluate your closet space, match mounting hardware to your specific wall type, and select durable materials, you can create an organized, long-lasting storage system that keeps your footwear accessible and well-preserved.
Elevating your shoes off the floor not only keeps your closet looking neat but also improves air circulation around your footwear. This is particularly important in tropical climates, where stagnant air in dark closets can encourage mold growth on leather and canvas shoes. A wall-mounted system maximizes vertical space, which is especially valuable in compact urban condominiums or traditional homes where floor area is at a premium. By utilizing the vertical plane, you free up floor space for easier cleaning and keep your shoes organized and visible.
Assessing Your Closet Space and Wall Type
Before purchasing any hanging shoe rack, you must accurately measure your available closet space. Use a steel measuring tape to determine the vertical and horizontal clearance inside the closet. Be sure to measure the height from the floor to the bottom of your lowest-hanging garments, such as dresses or trousers, to ensure the rack will not interfere with your hanging clothes. If your closet has built-in shelves or drawers, account for their positions so the shoe rack does not block access to them.
Products mentioned in this guide
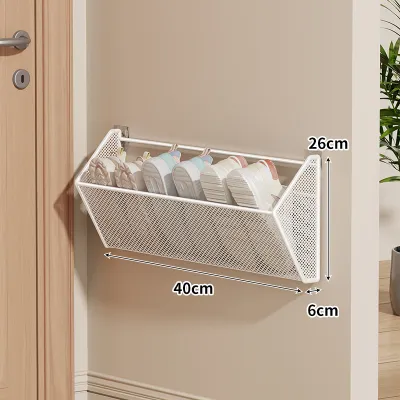
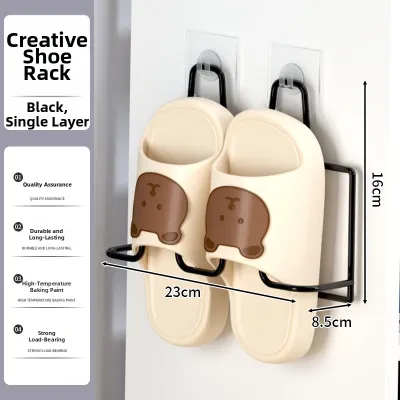
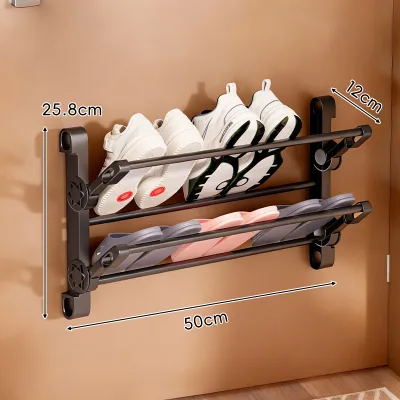
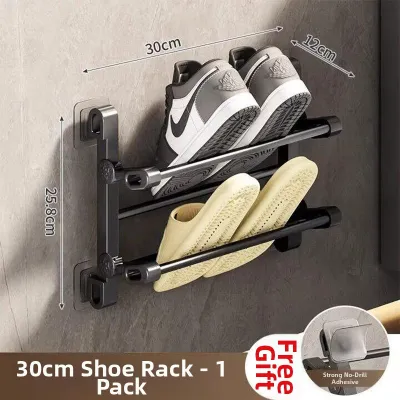


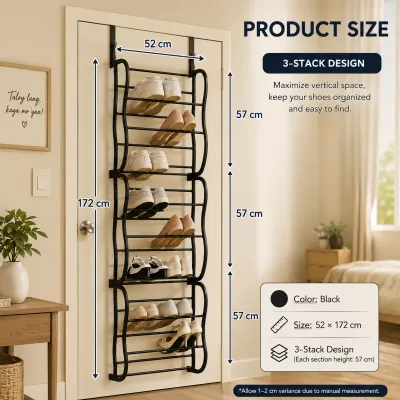
Prices are valid at publication and may change. Please refer to the product page for the latest price.
Consider the door swing path and depth clearance of your closet. For closets with standard hinged doors, map out how far the door swings inward or outward. A shoe rack that protrudes too far from the wall can block the door from closing fully or get struck by the door edge, leading to scratches and structural wear. If your closet utilizes sliding doors, calculate the depth of the rack relative to the sliding track clearance; the rack must sit completely flush within its designated section to allow the doors to slide freely.
Identifying your wall material is a critical step that determines how you will mount the organizer. In many homes in the Philippines, interior walls are constructed from solid concrete or concrete hollow blocks finished with cement plaster. However, modern condominiums and partition walls often use drywall or fiber cement boards mounted on light metal studs. Each of these materials has vastly different load-bearing capacities and requires specific installation techniques to prevent the rack from pulling loose.
Solid concrete walls offer excellent load-bearing capacity but require heavy-duty drilling with a masonry bit and specialized wall plugs. Drywall partitions, while easier to drill into, are much more fragile and cannot support heavy loads without proper reinforcement. If you are mounting a rack on drywall, you must locate the underlying metal or wooden studs to secure the main brackets, or use specialized hollow-wall anchors that distribute the weight across a larger surface area of the board.
Finally, check the mounting area for hidden obstructions before you begin drilling. Inspect the wall for electrical conduits, light switches, or plumbing lines that might run behind the surface. In many residential layouts, electrical wiring runs vertically or horizontally from nearby switches and outlets. Drilling into these can cause short circuits, power outages, or severe safety hazards. Additionally, check for protruding cabinet hinges, baseboards, or uneven plastering that might prevent the rack from sitting perfectly flat against the wall.
Key Features to Evaluate in Hanging Shoe Racks
Footwear is heavier than it looks, making weight capacity a primary consideration when evaluating shoe racks. A single pair of leather shoes, thick-soled sports sneakers, or heavy heels can weigh between 0.8 to 1.5 kilograms. Multiply this by ten or twenty pairs, and your wall rack must support 10 to 30 kilograms of constant downward force. Evaluate the manufacturer’s stated weight capacity per tier, hook, or shelf, and ensure the load is distributed evenly across multiple mounting points rather than concentrated on a single screw.

Material durability is highly dependent on the local environment. The tropical climate of the Philippines brings high relative humidity, which can accelerate the degradation of storage organizers. Untreated steel or low-grade iron will rust quickly, staining your shoes and weakening the structure. Look for organizers made of powder-coated steel, anodized aluminum, or heavy-duty molded plastics. If choosing fabric-based hanging organizers, opt for breathable, synthetic non-woven fabrics or polyester canvas treated with moisture-resistant coatings to prevent mold and mildew growth.
The structural integrity of a shoe rack depends heavily on its joints and connections. Inspect how the shelves or hooks connect to the main vertical frame. Welded joints on metal racks offer high stability but must be checked for smooth finishes to avoid snagging shoes. Snap-fit plastic connectors are easy to assemble but should fit tightly without wobbling. Avoid racks that rely on flimsy plastic friction clips for heavy shoe collections, as these can slip over time under constant weight.
A versatile shoe rack accommodates various footwear heights. Flat sandals, slippers, and low-profile loafers require very little vertical clearance, whereas high-top sneakers, high heels, and ankle boots need significantly more space. Look for hanging systems with adjustable shelf heights, removable tiers, or repositionable hooks. This flexibility prevents wasted vertical space and ensures that taller shoes do not get crushed or bent out of shape.
Comparing Common Hanging Shoe Rack Wall Designs
Over-the-door hybrid systems typically feature hooks that drape over the top of a standard closet door, but they also include integrated screw holes for optional wall mounting. This design is highly suitable for renters or those with lightweight partition walls, as the door frame bears the primary vertical load. It is best used for lightweight footwear like slippers, sandals, and canvas flats.
Pegboard and slatwall systems consist of a wall-mounted backplate (made of metal or heavy-duty plastic) onto which you hook individual shoe brackets, wire shelves, or pegs. This is the most customizable option available, allowing you to rearrange the layout as your shoe collection changes. It is highly durable and ideal for heavy sneakers, boots, and heels, provided the main backplate is securely anchored into solid concrete or wall studs.
Fold-down and cascading shelves are designed specifically for tight spaces. These racks hold shoes at an angle (cascading) or feature shelves that fold flat against the wall when not in use. By reducing the outward projection of the rack, they maximize floor space in narrow walk-in closets or behind entry doors. They keep shoes highly visible and easily accessible, making them excellent for daily-wear footwear.
To help you decide which system fits your specific closet layout and installation capabilities, the following matrix compares the three primary design categories across key performance and usability metrics.
| Design Type | Space Efficiency | Installation Effort | Ideal Shoe Types | Wall Compatibility |
|---|---|---|---|---|
| Over-the-Door Hybrid | High (uses door space) | Low (minimal drilling) | Lightweight flats, sandals, slippers | Hollow doors, drywall, light partitions |
| Pegboard / Slatwall | Medium (requires wall width) | High (requires precise mounting) | Heavy sneakers, boots, high heels | Solid concrete, brick, sturdy studs |
| Fold-Down / Cascading | Maximum (ultra-low profile) | Medium (standard wall mounting) | Daily wear, low-profile shoes, flats | Concrete, drywall, wood panels |
As shown in the matrix, there is a direct trade-off between installation effort and load capacity. While over-the-door hybrid systems offer quick setup and low wall strain, they cannot safely support heavy leather boots or extensive sneaker collections. Conversely, pegboard and slatwall systems require a more intensive installation process but provide the structural strength and customization needed for diverse, heavy footwear collections.
Installation and Safety Checks for Wall-Mounted Organizers
Using the wrong wall anchor is the primary cause of organizer collapse. For solid concrete or concrete hollow block walls, use plastic wall plugs (commonly referred to locally as “tox” plugs) or expansion sleeve anchors paired with high-quality steel screws. For drywall or gypsum board partitions, standard plastic plugs will pull out under weight; instead, use toggle bolts, heavy-duty threaded drywall anchors, or hollow wall anchors that expand behind the board to grip a wider surface area.
Always calculate the total weight of the shoes you plan to store before mounting the rack. If a manufacturer rates a wall-mounted rack for a maximum capacity of 20 kilograms, apply a safety margin of at least 20 to 30 percent. Aim to load the rack to no more than 14 to 16 kilograms. This safety buffer accounts for the dynamic downward force applied when you pull a shoe off a tight hook or accidentally bump into the rack.
Knowing when to stop a DIY installation is crucial for home safety. If your drill bit suddenly hits a hard, metallic obstruction that does not yield, stop immediately, as this could be an electrical conduit or a structural steel rebar. If the wall material crumbles excessively, leaving a hole too large for your anchor, or if you detect moisture or soft spots in the wall, do not proceed with mounting. In these scenarios, or if you are drilling near bathroom wet walls where water pipes are routed, consult a qualified local carpenter or handyman to complete the installation safely.
Sourcing and Verifying Your Purchase
When shopping on major ecommerce platforms in the Philippines, look beyond the product photos, which are often generic stock images. Prioritize sellers with high positive ratings and active customer service. Read the verified buyer reviews carefully, filtering for reviews that include photos or videos of the actual product assembled. Pay close attention to feedback regarding the thickness of the metal, the sturdiness of the plastic joints, and whether the package arrived with all necessary mounting hardware.
Compare listings across different sellers to find the best value, keeping in mind that prices are listed in ₱. Be aware of low base prices that are offset by unusually high shipping fees. Because wall-mounted shoe racks—especially metal pegboards or multi-tier frames—can be bulky and heavy, shipping costs can vary significantly depending on your location. Calculate the total landed cost (item price plus shipping) before making your final decision.
Once your package arrives, perform an immediate inspection before starting assembly or discarding the packaging. Lay out all the components and count the screws, wall plugs, brackets, and shelves against the parts list in the instruction manual. Use a tape measure to verify that the physical dimensions of the rack match the product listing and the closet space you measured. If any parts are missing, bent, or damaged, contact the seller immediately to arrange a replacement or return under their store policy.
Frequently Asked Questions (FAQ)
Can I mount a hanging shoe rack on a closet door instead of the wall?
Yes, you can mount a hanging shoe rack on a closet door, but you must first evaluate the door’s construction and hardware. Most modern interior doors are hollow-core doors, which consist of thin wood or fiberboard panels over a honeycomb cardboard interior. These doors cannot support standard wood screws under the weight of a fully loaded shoe rack, as the screws will easily strip out of the thin wood.
To safely mount a rack on a hollow-core door, use over-the-door hooks that hang from the top edge of the door, or use specialized hollow-door toggle anchors that expand inside the empty cavity. Additionally, check the door’s hinges and frame clearance. Ensure there is a gap of at least 2 to 3 millimeters between the top of the door and the frame so the door can close smoothly with the hooks in place. Avoid overloading the door with heavy footwear to prevent the hinges from sagging over time.
How do I prevent my shoes from falling off a hanging rack?
Preventing shoes from slipping off open, cascading, or wire-frame hanging racks involves a combination of proper placement and simple modifications. For wire shelves or smooth plastic tiers, you can add thin, cut-to-size silicone or rubber non-slip drawer liners. These liners provide extra grip, preventing slick-soled shoes, high heels, or smooth leather flats from sliding forward and falling off the rack.
If your hanging rack features adjustable shelf angles, set them to a shallower incline for shoes with minimal heel traction. Always place heavier footwear, such as boots or thick-soled sneakers, on the lower tiers of the rack to maintain a stable center of gravity. When placing shoes on wire loops or hooks, insert them heel-first or toe-first depending on the specific hook shape to ensure they lock securely into place and remain balanced.

Community discussion
Share your experience or ask a question. Comments are reviewed before publication.