
Determining how many pairs of shoes a mounted shoe rack can actually hold inside your closet is the key to avoiding a cluttered entryway or a bedroom floor covered in footwear. While manufacturers often advertise generous storage capacities, the real-world limit depends on the physical width of the rack, the specific profiles of your shoes, and the structural layout of your closet. For most standard closet installations, a mounted shoe rack will realistically hold between 9 and 24 pairs of shoes, depending on how efficiently you plan the space.
To find the exact capacity for your collection before making a purchase, you must look past generic marketing claims and calculate the usable space based on your personal footwear habits. By measuring your closet accurately, understanding how different shoe styles impact spacing, and accounting for necessary installation clearances, you can design an organized closet system that keeps your shoes accessible and well-preserved.
Estimating Your Mounted Shoe Rack Capacity
To calculate how many pairs of shoes will fit on a mounted rack, you can use a simple physical formula rather than relying on the estimated capacity printed on the product packaging. First, determine the usable horizontal width of a single rack tier in centimeters or inches. Next, measure the width of your widest everyday shoes across the widest part of the sole, then multiply that number by the number of pairs you want to store to see if they will fit on a single level.
Products mentioned in this guide
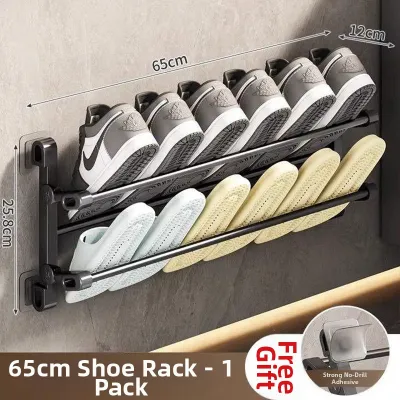
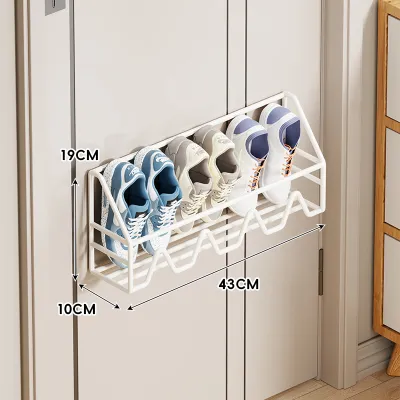


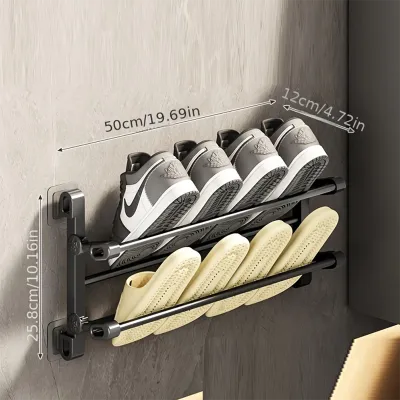
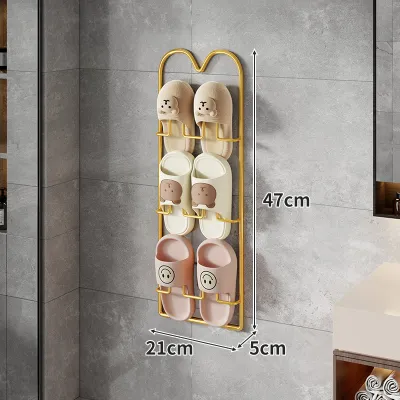
Prices are valid at publication and may change. Please refer to the product page for the latest price.
The Basic Capacity Formula
- Usable Rack Width divided by Average Shoe Pair Width = Pairs Per Tier
- Pairs Per Tier multiplied by Number of Tiers = Total Rack Capacity
For example, if a single tier of your mounted rack offers 80 centimeters of usable horizontal space, and your average pair of sneakers measures 20 centimeters across when placed side by side, you can comfortably fit four pairs on that tier. If the rack has three tiers, your realistic capacity is 12 pairs of sneakers. If you primarily store slim sandals that measure only 15 centimeters per pair, that same 80-centimeter tier can accommodate five pairs, bringing the total capacity of a three-tier rack up to 15 pairs.
When evaluating multi-tier, staggered, or pull-out designs, the calculation requires slight adjustments. Pull-out shoe racks often feature multiple rows nested closely together, which maximizes depth but may require extra vertical clearance so the tops of the shoes do not scrape the shelf above during operation. Staggering your shoes—placing one shoe facing forward and the other facing backward—can sometimes save a few centimeters of horizontal space per pair, allowing you to squeeze an extra pair onto a tight tier.
Always read the manufacturer specifications for the exact physical dimensions of the rack rather than relying on the advertised pair capacity. Manufacturers often base their capacity estimates on small, flat footwear, such as low-profile flats or children’s shoes. Checking the actual width, depth, and height of the shelving units ensures your calculations reflect your actual wardrobe.
Measuring Your Closet Space for a Mounted Shoe Rack
Before purchasing any mounting hardware, you must take precise measurements of your closet interior to ensure the rack fits and allows your closet doors to function properly. Use a metal measuring tape to record the interior width, depth, and height of the specific zone where you plan to install the rack. Do not assume your walls are perfectly square; take measurements at the top, middle, and bottom of the closet wall to identify any warping or unevenness.

Be sure to account for baseboards, wall trim, or internal shelving supports that might protrude into your mounting area. If your closet has baseboards that are two centimeters thick, your actual usable wall width is reduced by four centimeters if you plan to mount the rack close to the floor. Measuring the narrowest point of the space prevents you from purchasing a rack that is too wide to slide into place.
Door swing clearance is another critical factor that is easily overlooked. If your closet features traditional hinged doors, the mounted shoe rack must not obstruct the door’s path as it swings inward. For closets with sliding doors, you must measure the depth of the door tracks and ensure the shoe rack sits far enough back that the sliding panels can bypass the front of your shoes without rubbing or jamming.
Finally, inspect the closet interior for existing obstructions that could interfere with the installation. Note the positions of low-hanging clothes on closet rods, built-in wooden shelves, light fixtures, and door hinge hardware. A mounted shoe rack needs sufficient vertical clearance so that long coats or dresses hanging above do not drape over your clean shoes, which can transfer dirt and restrict access to both your clothes and your footwear.
Variables That Affect How Many Pairs Actually Fit
Your footwear profile is the most significant variable affecting how many pairs of shoes will fit on your mounted rack. Bulky running shoes, basketball sneakers, and heavy work boots have wide soles and thick uppers that occupy significantly more physical volume than flat sandals, canvas slip-ons, or formal dress shoes. If your collection consists mostly of athletic wear, you will need to budget more horizontal and vertical space per pair than someone storing lightweight summer footwear.
Footwear Spacing Guidelines
- Flat Sandals and Slippers: Require minimal vertical clearance and can often be nested closely together.
- Athletic Sneakers and Boots: Require wider horizontal spacing and taller vertical gaps to prevent crushing the uppers.
- High Heels and Wedges: Require specialized vertical clearance and benefit from angled shelves or heel grips.
The design of the mounted rack itself also dictates storage density. Angled tiers are highly effective for shallow closets because they tilt the shoes downward, reducing the depth profile of the rack so it does not protrude as far into the room. Many angled racks feature heel grips or front lips to keep the shoes secure, though these designs require more vertical clearance between tiers to allow you to lift the shoes off the rack.
Adjustable shelving systems offer the greatest flexibility for maximizing capacity over time. Racks with adjustable brackets allow you to customize the height of each tier, meaning you can set a narrow gap for flat shoes and a wider gap for boots or high heels. This customization prevents wasted vertical space, allowing you to install more tiers within the same wall area.
While maximizing storage density is often the primary goal, you must balance capacity with daily usability. Cramming your shoes tightly together to fit one extra pair can make it frustrating to retrieve or store your footwear, often leading to scuffed leather or bent shoe counters. Leaving a small gap of two to three centimeters between pairs ensures you can easily grab your shoes without knocking adjacent pairs off the rack.
Installation Clearances and Structural Limits
To ensure your mounted shoe rack remains secure over years of daily use, you must verify the structural integrity of your closet walls or panels. Mounted racks exert continuous downward leverage, especially when fully loaded with heavy footwear. Identify whether your closet walls are made of solid concrete, brick, drywall, or wooden wardrobe panels, as each material requires specific mounting hardware and anchors.
Never attempt to mount a heavy shoe rack directly into drywall without locating the wooden studs behind the wall. If the stud spacing does not align with your rack’s mounting brackets, you must use high-quality toggle bolts or heavy-duty hollow-wall anchors designed to support the anticipated weight. For concrete or masonry walls, which are common in many homes, you will need a hammer drill and masonry anchors to create a permanent, stable connection.
Calculating the weight limit of your mounting surface is essential for safety. A single pair of leather boots or heavy sneakers can easily weigh over one kilogram, meaning a fully loaded 15-pair rack can exert a constant load of 15 kilograms or more on the wall brackets. Check the load capacity of both the mounting hardware and the rack itself, and ensure you distribute the heaviest footwear across the lowest tiers to minimize leverage on the upper wall anchors.
In tropical climates like the Philippines, high humidity levels can create moisture traps inside enclosed closets, leading to mold and mildew growth on organic materials like leather, suede, and canvas. When installing a mounted shoe rack, ensure there is adequate airflow around the unit. Avoid mounting the rack flush against the back wall if possible, and leave space between the shoes and the closet panels to allow air to circulate freely, protecting your footwear from moisture damage.
Common Space and Capacity Mistakes to Avoid
One of the most common planning mistakes is ignoring the depth of shoes that hang over the front or rear edges of the shoe rack. Many mounted racks are designed with shallow shelves to save space, assuming the heels or toes of your shoes will overhang the edges. If your closet depth is tight, this overhang can prevent your closet doors from closing completely, forcing you to store your shoes at an angle or reduce the number of pairs on the rack.
Another frequent error is overlooking the physical clearance needed to comfortably reach, lift, and remove your shoes from the tiers. If you mount the shelves too close together vertically, you will struggle to slide your hands between the tiers to retrieve your footwear. Always test the vertical clearance by placing your tallest everyday shoes on a flat surface and measuring the height needed to lift them up and out without hitting an imaginary shelf above.
Finally, avoid the temptation to assume that all closets share identical “standard” interior dimensions. Even within the same home, closet depths and door configurations can vary significantly between bedrooms. Always measure your specific closet space and verify the dimensions of the mounted shoe rack before purchasing, ensuring a seamless installation that maximizes your storage capacity without compromising the functionality of your closet doors.
Frequently Asked Questions (FAQ)
Can I mount a shoe rack on a hollow closet door?
Mounting a heavy shoe rack directly onto a hollow-core closet door carries a high risk of structural damage. Hollow doors consist of thin wood or composite outer skins over a cardboard honeycomb core, which does not provide enough solid material for standard mounting screws to grip. Over time, the constant weight of the shoes and the motion of opening and closing the door can cause the screws to pull out, tearing the door skin and causing the rack to fall.
If you must use a hollow door for storage, check the manufacturer guidelines for specialized hollow-door anchors or over-the-door mounting systems that hang from the top edge of the door frame. These systems distribute the weight across the top of the door rather than relying on screws driven into the thin face panels. Alternatively, consider a floor-standing shoe organizer or a wall-mounted rack installed on a nearby solid wall stud.
How do I calculate the space needed for boots on a mounted rack?
To calculate the space required for boots, you must measure both the shaft height and the calf width of your tallest pairs. Standard shoe rack tiers are typically spaced 15 to 20 centimeters apart, which is insufficient for ankle boots, riding boots, or work boots that require vertical clearances of 25 to 50 centimeters to stand upright without bending or creasing the material.
To accommodate these taller profiles, look for mounted shoe racks that feature adjustable brackets or removable shelves, allowing you to dedicate a taller zone specifically for boots. Alternatively, you can store your boots on the very top tier of the mounted rack where there is no shelf above to restrict height, or use boot hooks to hang them from a closet rod, leaving the lower tiers of your mounted rack free for standard low-profile shoes.

Community discussion
Share your experience or ask a question. Comments are reviewed before publication.