
Assembling a ready-to-assemble (RTA) kitchen buffet cabinet requires a methodical approach, the right tools, and a bit of patience. By systematically organizing your parts, understanding how the hardware functions, and following a logical sequence, you can construct a sturdy and beautiful storage piece for your dining area. Taking your time during a cavinet assemble for kitchen project ensures that doors align perfectly, drawers slide smoothly, and the entire structure remains stable under the weight of your dinnerware.
Preparation and Workspace Setup
Before you open the packaging, clear a generous amount of floor space in or near the kitchen where the cabinet will permanently stand. Moving a fully assembled buffet cabinet through narrow doorways or tight hallways can strain the joints and cause structural damage. Ensure the assembly area is clean, dry, and free of foot traffic. Lay down the large cardboard box the cabinet arrived in to serve as a protective mat, which shields both your home’s flooring and the cabinet’s finished panels from scratches.
Unpack all components carefully and group them by type. Lay out the side panels, shelves, doors, and backboards, then group the hardware—such as cam locks, screws, wooden dowels, and hinges—into separate small containers or onto a clean tray. Cross-reference every item with the parts list in the manufacturer’s instruction manual. If any panels are damaged or hardware pieces are missing, it is best to pause and contact the retailer immediately rather than attempting to construct an incomplete unit.
Products mentioned in this guide
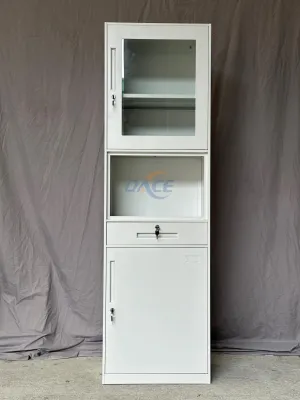
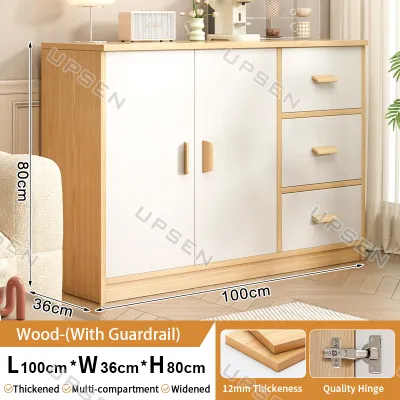
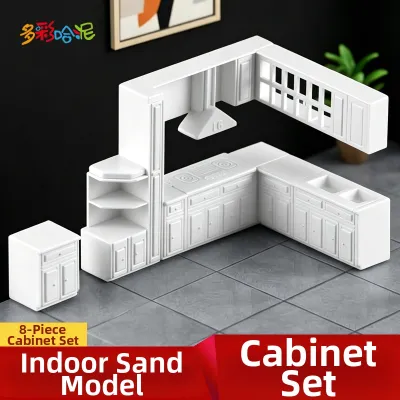
Prices are valid at publication and may change. Please refer to the product page for the latest price.
Gather your manual hand tools before starting. A standard Phillips-head screwdriver, a flathead screwdriver, and a rubber mallet are typically all you need for flat-pack furniture. Avoid using power drills or electric screwdrivers; the high speed and torque of power tools can easily strip screw holes, crack engineered wood panels, or split delicate laminate finishes.
Finally, verify the finished dimensions of the cabinet against your designated kitchen or dining space. Measure the width, depth, and height of the area, keeping in mind the clearance needed for cabinet doors to swing open fully and drawers to extend without obstructing walkways. In busy household spaces, ensuring a comfortable traffic flow around the buffet is essential for daily convenience and safety.
Step-by-Step Assembly Process
Constructing your kitchen buffet cabinet is a sequential process where each step builds directly upon the previous one. Skipping ahead or ignoring the specified order can lead to structural misalignment, making it difficult or impossible to fit later pieces like back panels or drawers.

A key rule of flat-pack assembly is to avoid overtightening fasteners during the initial stages. Keep all structural screws, cam locks, and dowels slightly loose as you piece the main frame together. This small amount of play allows you to align the panels perfectly and ensure the unit is square before you perform the final tightening.
Building the Main Frame and Base
Begin by preparing the individual panels. Insert the wooden dowels and screw the cam pins into their pre-drilled holes on the side, top, and bottom panels as indicated in your manual. Wooden dowels provide lateral strength, while cam locks pull the panels tightly together. If a dowel is tight, gently tap it with a rubber mallet rather than a metal hammer to avoid denting the wood.
Connect the side panels to the bottom base panel and the top structural rails. Align the pre-drilled holes with the protruding cam pins and dowels, then slide the panels together. Insert the circular cam lock nuts into their designated recesses on the interior faces of the panels, ensuring the arrow on each lock points toward the incoming pin. Use a manual screwdriver to turn the cam locks clockwise until they lock firmly into place.
Before tightening these connections completely, check that the frame is perfectly square. You can verify this by using a tape measure to measure diagonally from the top-left corner to the bottom-right corner, and then from the top-right corner to the bottom-left corner. If both diagonal measurements are identical, your cabinet frame is square. If they differ, gently nudge the frame until the measurements match, then tighten all cam locks and screws securely.
Once the main frame is squared and secured, attach the base legs or the plinth support system. If your cabinet features adjustable leveling feet, install them now. Ensure all legs are fastened tightly to support the heavy load of kitchenware. If your kitchen floor has a slight slope, these adjustable feet will allow you to level the cabinet later, preventing wobbling and ensuring the doors hang straight.
Installing Back Panels and Internal Shelves
The back panel of a buffet cabinet is not merely cosmetic; it provides vital lateral stability that prevents the entire structure from swaying or collapsing sideways. Slide the thin back panel into the grooves cut along the inner rear edges of the side panels. If your cabinet uses a nail-on backboard, align it carefully so it is flush with all outer edges of the frame.
Secure the back panel using the provided small nails or screws. Space them evenly along the perimeter, taking care to drive them straight into the center of the frame panels. If a nail is driven at an angle, it can break through the finished interior or exterior surface of the cabinet. Ensure the backboard lies completely flat without any bowing or gaps, as a tight seal helps protect the cabinet interior from dust and moisture.
With the main structure stabilized, you can configure the internal storage. Locate the pre-drilled holes for the shelf support pins along the interior sides of the cabinet. Determine your desired shelf heights based on the items you plan to store, such as tall pitchers, serving bowls, or stacks of plates. Insert the shelf pins or brackets at identical heights on all four corners, ensuring they are perfectly level.
Carefully lower the internal shelves onto the support pins. Press down gently on each shelf to verify that it sits securely and does not rock. Always refer to the manufacturer’s manual to check the specified weight limits for each shelf. Distribute heavier items, like ceramic baking dishes or heavy pots, on the bottom shelf of the cabinet to maintain a low center of gravity and maximize stability.
Mounting Doors, Drawers, and Hardware
Before hanging the doors or inserting the drawers, attach the necessary hardware to the individual components while they are still easily accessible. Screw the drawer slides onto the interior sides of the cabinet frame, ensuring they are oriented correctly and sit flush against the front edge. Attach the matching slide runners to the sides of the drawer boxes.
Assemble the drawer boxes by joining the front, side, and back panels, sliding the drawer bottom into place before securing the final piece. Attach the drawer handles or pulls using the provided machine screws, tightening them by hand until they are snug. Slide the completed drawers into the cabinet tracks, checking for smooth movement and ensuring they align evenly with the front frame.
Next, prepare the cabinet doors. Insert the hinge cups into the large circular recesses on the back of the doors and secure them with the provided screws. If your cabinet features glass display doors, handle them with extra care, placing them on a soft surface to prevent cracking. Mount the mounting plates for the hinges onto the interior side walls of the cabinet frame.
Hold the door up to the cabinet frame and slide the hinge arms into the mounting plates until they click or lock into place. Leave a small, even gap around all edges of the doors to prevent them from rubbing against the frame or each other when opened. If the doors appear crooked or do not close flush, use the adjustment screws on the hinge body to shift the doors vertically, horizontally, or in depth until they are perfectly aligned.
Final Adjustments and Safety Checks
With the assembly complete, move the buffet cabinet to its final position in your kitchen or dining room. Perform a physical stability test by gently shaking the cabinet from the top and sides. If you notice any wobbling, creaking, or loose joints, trace the source of the movement and tighten the corresponding cam locks or screws. If your floor is uneven, adjust the leveling feet until the unit stands completely firm.
Review the manufacturer’s guidelines regarding the overall weight capacity of the cabinet. Overloading the shelves or drawers can cause the engineered wood to bow, warp, or fail over time. Place lighter glassware and decorative items on the upper shelves, while keeping heavy dinnerware, small kitchen appliances, and pantry staples in the lower compartments.
For safety, especially if the buffet cabinet is tall, top-heavy, or placed in a home with young children or active pets, installing anti-tip wall anchors is highly recommended. These anchor kits typically consist of a strap or bracket secured to both the back of the cabinet and a wall stud. If you are securing the cabinet to concrete, brick, or drywall, ensure you use the correct wall anchors and screws. If you are unsure about your wall type or how to safely mount the hardware, consult a qualified professional to complete this step.
Maintenance and Care for Your New Cabinet
To preserve the appearance and structural integrity of your kitchen buffet cabinet, establish a regular cleaning and maintenance routine. Dust the surfaces weekly with a soft, dry microfiber cloth. For deeper cleaning, wipe the panels with a slightly damp cloth and a mild, non-abrasive detergent. Avoid using harsh chemical cleaners, bleach, or abrasive scrubbing pads, as these can strip the protective laminate or veneer finish and leave permanent scratches.
In tropical climates like the Philippines where humidity levels fluctuate, engineered wood can be sensitive to environmental changes. Periodically inspect the cabinet’s hardware, including door hinges, drawer slides, and structural screws. Normal daily use and seasonal expansion or contraction of the wood can cause fasteners to loosen over time. Gently tighten any loose screws with a hand screwdriver to keep the doors aligned and the frame stable.
Moisture is the primary enemy of flat-pack furniture. Always wipe up liquid spills, condensation, or splashes immediately with a dry cloth. If water is allowed to sit on the surfaces, it can seep into the unsealed seams or edges of the panels, causing the internal engineered wood to swell, bubble, or degrade. Using coasters under cups and placing protective mats under hot dishes will further safeguard your cabinet’s finish for years to come.
Frequently Asked Questions (FAQ)
What should I do if the pre-drilled holes do not align?
If you encounter pre-drilled holes that do not seem to align, do not force the pieces together or immediately drill new holes. First, loosen all the surrounding screws and cam locks on that section of the cabinet. Often, tightening one fastener too early pulls the entire assembly out of alignment, preventing subsequent holes from lining up. Loosening the hardware allows the panels to shift slightly, which usually resolves the misalignment. If the panels still do not fit together or if a hole is completely missing, avoid modifying the wood yourself, as this can void the manufacturer’s warranty. Instead, contact the retailer or manufacturer to request replacement parts.
How can I fix doors that are rubbing against each other or the frame?
Rubbing doors are a common issue that can be easily resolved by adjusting the cabinet hinges. Modern European-style hinges feature three adjustment screws that control the door’s position in three dimensions. The front screw adjusts the side-to-side gap, allowing you to move the door closer to or further from the cabinet edge. The middle screw adjusts the depth, moving the door in or out relative to the frame. The rear screw secures the hinge to the plate and often allows for vertical adjustment. Make small, incremental turns—about a quarter-turn at a time—on these screws, and test the door closure after each adjustment to avoid overcorrecting.
Is it necessary to use a power drill for assembling flat-pack furniture?
Using a power drill is generally not recommended for assembling ready-to-assemble furniture. The high speed and torque of a drill can easily strip the pre-drilled holes in engineered wood, crack the panels, or damage the hardware. Hand tools, such as a manual Phillips screwdriver, provide much better control over the force applied to each fastener. If you do choose to use a power drill to speed up the process, set it to the lowest possible torque setting and stop driving before the screw is fully seated. Always perform the final tightening by hand to ensure a secure fit without stripping the internal threads or damaging the wood.

Community discussion
Share your experience or ask a question. Comments are reviewed before publication.