
Assembling your IKEA LAGKAPTEN desk is a straightforward process that you can easily complete on your own without professional assistance. By systematically preparing your workspace, organizing the included hardware, and following a methodical attachment sequence, you can construct a stable and reliable workspace. This guide walks you through every phase of the setup, from unboxing the components to making final leveling adjustments for a wobble-free finish.
Setting up a dedicated home office in a tropical climate like the Philippines requires careful attention to how furniture is handled and assembled. High humidity levels can affect engineered wood products if they are exposed to moisture or assembled on damp surfaces. Taking the time to assemble your desk correctly ensures that the joints remain tight and the structure stays robust over years of daily use. Whether you are pairing your tabletop with standard legs, adjustable legs, or a drawer unit, the core assembly principles remain the same.
Preparing Your Workspace and Tools
Before opening any packaging, select a spacious, flat area in your room where you can move freely around the tabletop. A clear floor space that is at least twice the size of the desk itself is ideal for organizing parts without clutter. If you are working on tiled or concrete floors, laying down a soft barrier is essential to protect the finish. The cardboard box that your tabletop arrived in serves as an excellent protective mat during the assembly process.
Products mentioned in this guide
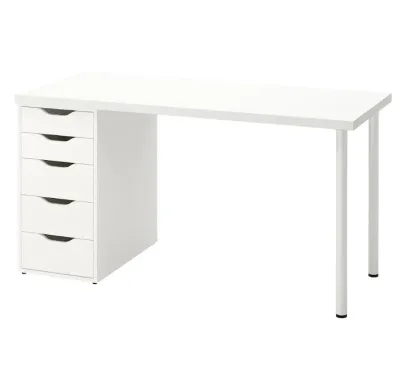
Prices are valid at publication and may change. Please refer to the product page for the latest price.
Gather all necessary tools before you begin to avoid interrupting your workflow. While the package typically includes a basic Allen key or specialized wrench if required for specific leg models, you will need to provide your own manual tools. A medium-sized Phillips screwdriver is the primary tool required for securing the mounting plates to the pre-drilled holes. Having a flathead screwdriver nearby can also be helpful for adjusting cam locks or aligning small hardware components.
Take a few minutes to read through the manufacturer’s instruction manual from cover to cover. Pay close attention to the visual diagrams, which highlight the correct orientation of the tabletop and the specific placement of screws. The manual also outlines safety warnings, such as the recommendation to have a second person assist with lifting and flipping the desk once the legs are attached. Preparing your mind and your workspace beforehand prevents common mistakes and reduces assembly time.
Unboxing and Organizing the Components
Unboxing your furniture requires a gentle touch to prevent accidental damage to the exterior surfaces. Avoid using sharp utility knives or deep-cutting blades along the center of the package, as they can easily slice through the cardboard and scratch the tabletop finish underneath. Instead, carefully peel back the packing tape or open the box from the side flaps. Slide the tabletop out gently, keeping it resting on a clean, dry surface.

Once everything is unpacked, lay out all the components and cross-reference them with the parts inventory list in the instruction booklet. The LAGKAPTEN series is designed to be modular, meaning it can be paired with various leg styles or drawer units. Verify that you have the correct number of legs, mounting plates, and screws required for your specific configuration. If you notice any missing hardware or visible defects on the tabletop surface, address these issues before proceeding with the build.
To keep your workspace organized, group all small hardware pieces by type and size. Using small plastic containers, bowls, or even the compartments of the cardboard packaging can prevent screws, dowels, and cam locks from rolling away. In a busy household or a room with deep-pile rugs, a single lost screw can halt your entire project. Keeping your hardware sorted ensures you can quickly grab the exact piece required for each step without confusion.
Step-by-Step Assembly Instructions
Begin the physical assembly by placing the LAGKAPTEN tabletop face down on your protective cardboard barrier. This exposes the underside of the desk, where you will find several sets of pre-drilled holes. These holes are strategically positioned to accommodate different leg configurations and support systems. Align the metal mounting plates or brackets over the corresponding pre-drilled holes, ensuring that the flat side of the plate sits flush against the wood surface.
Insert the provided screws through the mounting plate holes and into the pre-drilled guide holes of the tabletop. Use your manual Phillips screwdriver to turn each screw clockwise until it begins to grip the material. It is crucial to start all screws by hand to ensure they enter straight and do not cross-thread. Do not tighten any single screw completely at this stage; instead, leave them slightly loose to allow for minor adjustments as you align the plate.
Once all screws for a mounting plate are in place, tighten them progressively using a cross-pattern or diagonal sequence. This technique distributes the pressure evenly across the plate and prevents the hardware from pulling to one side. Tighten each screw until it is snug against the metal plate, but avoid applying excessive force. The core of the tabletop is made of lightweight engineered materials, and over-tightening can easily strip the pre-drilled holes, reducing the overall holding power of the screws.
With the mounting plates securely fastened to the underside of the tabletop, you can now attach the individual leg components. Depending on the specific model you purchased, the legs may screw directly into the center thread of the mounting plates, or they may slide into a bracket and secure with side screws. Align the top of each leg with the mounted plate, ensuring it sits perfectly perpendicular to the tabletop. Slowly thread the leg into place, turning it clockwise until it meets the plate.
If your leg system uses side screws or collar clamps to lock the legs into the brackets, ensure that the leg is fully seated in the socket before tightening. Use the manual screwdriver or the included Allen key to secure these secondary fasteners. Check each leg visually to confirm that it is straight and does not lean at an angle. A misaligned leg can compromise the stability of the desk and place uneven stress on the mounting plates once the desk is turned upright.
Adjusting the Legs and Leveling the Desk
Flipping the assembled desk upright is a critical step that requires care to avoid damaging the newly attached legs. Rather than pivoting the desk on two legs—which places immense lateral pressure on the joints and can tear the mounting plates out of the tabletop—lift the entire desk completely off the floor. If the desk is large or heavy, ask a family member or friend to assist you. Lift the desk together, rotate it in the air, and set it down gently on all four feet simultaneously.
Once the desk is standing on its feet, check its stability by gently rocking it from side to side. Most modern desk legs designed for this system feature adjustable plastic feet at the bottom. These feet can be threaded in or out to compensate for uneven floors, which are common in many homes. If you notice a gap between one of the feet and the floor, rotate that specific foot counterclockwise to extend it until it makes firm contact with the ground.
Use a bubble level or a leveling app on your smartphone to check the alignment of the tabletop along both its length and width. Adjust the feet incrementally until the bubble rests perfectly in the center of the indicator. If the desk continues to wobble despite adjusting the feet, check the floor surface for deep grout lines or uneven tiles. Placing a small, non-slip furniture pad under the affected foot can help stabilize the desk on challenging flooring materials.
Final Stability Checks and Maintenance
With the desk leveled, perform a final physical stability test before placing your computer, monitor, or other office equipment on the surface. Apply gentle downward pressure to each of the four corners, then press down on the center of the tabletop. Observe how the legs and mounting plates respond to the weight. There should be no noticeable flexing, shifting, or creaking sounds. If you detect any movement, turn the desk over and inspect the connections.
To preserve the structural integrity of your workspace, always adhere to the manufacturer’s weight capacity guidelines. The LAGKAPTEN tabletop is designed for standard home office use, such as supporting a laptop, a monitor, a keyboard, and basic desk accessories. Avoid placing heavy desktop towers, large printers, or multiple heavy books in a single concentrated area. Distributing the weight evenly across the surface prevents the tabletop from bowing or sagging over time.
Keep in mind that engineered wood and metal fasteners can settle and shift slightly during the first few weeks of regular use. The daily vibrations from typing, writing, and moving items on the desk can cause screws to loosen minutely. Mark your calendar to perform a quick maintenance check about two to three weeks after assembly. Use your manual screwdriver to gently test and re-tighten all the screws on the underside of the tabletop, ensuring your desk remains rock-solid for the long term.
Frequently Asked Questions (FAQ)
What should I do if the desk wobbles after assembly?
If your desk wobbles, start by checking the adjustable feet at the bottom of each leg. Ensure that all feet are making solid contact with the floor and that none of them are suspended in the air. Next, inspect the connection between the legs and the mounting plates; if any leg is slightly loose, tighten it securely. Finally, verify that the screws holding the mounting plates to the tabletop are fully seated and have not worked themselves loose during the initial setup.
Can I use a power drill for assembling the desk?
Using a power drill is not recommended for assembling this desk due to the high risk of damaging the materials. Power drills can easily apply too much torque, which can strip the pre-drilled holes in the engineered wood tabletop or crack the internal structure. A manual Phillips screwdriver allows you to feel the resistance of the screw, ensuring you achieve a snug fit without over-tightening. If you must use a power drill, set it to the lowest possible torque setting and finish the final tightening steps by hand.
How do I clean and maintain the desk surface?
To clean the tabletop, wipe it down regularly with a soft cloth slightly dampened with water and a mild, non-abrasive soap. Avoid using harsh chemical cleaners, bleach, or abrasive scrubbing pads, as these can dull or scratch the protective finish. Because high humidity and standing water can cause the edges of engineered wood to swell, always dry the surface immediately with a clean, dry microfiber cloth. Using coasters for drinks and desk mats under hot laptops will also help protect the surface from moisture and heat damage.

Community discussion
Share your experience or ask a question. Comments are reviewed before publication.