
Attaching a head board for metal frame bed setups is a practical way to elevate your bedroom’s aesthetic and comfort without purchasing an entirely new bed. Most standard metal bed frames are designed with mounting brackets specifically for this purpose, allowing you to secure a wooden, metal, or upholstered headboard with basic hardware. The process involves verifying the alignment of the mounting holes, selecting the correct bolts and washers, and securing the pieces together to create a stable, wobble-free assembly.
In the Philippines, where high humidity can affect both metal and wood components over time, taking the time to install your headboard correctly is essential. Proper installation prevents annoying squeaks, protects your bedroom walls from scuff marks, and ensures the structural integrity of your sleeping setup. Whether you are dealing with a compact single bed or a spacious king-size frame, understanding how these components connect will help you achieve a secure and professional result.
Check Compatibility and Gather Your Tools
Before handling any heavy components, you must verify that your metal bed frame and headboard are physically compatible. Not all metal frames are manufactured with integrated headboard brackets, and some headboards may feature unique leg spacings that do not align with standard frames. Begin by inspecting the head end of your metal bed frame to locate the flat, vertical brackets with pre-drilled slots or holes. If your frame lacks these brackets, you will need to purchase separate bolt-on or clamp-on headboard brackets designed to attach to the side rails.
Products mentioned in this guide

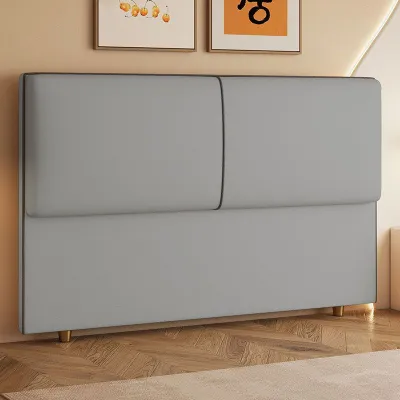


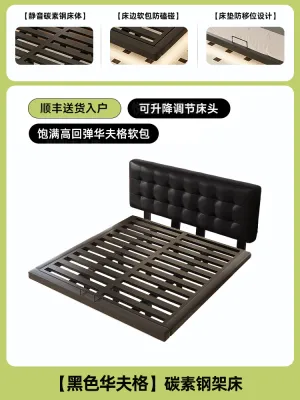



Prices are valid at publication and may change. Please refer to the product page for the latest price.
Next, measure the horizontal distance between the mounting holes on your headboard legs and compare this measurement to the distance between the bracket slots on your metal frame. Standard bed sizes—such as single, double, queen, and king—generally follow consistent width guidelines, but minor manufacturing variations can still occur. You should also measure the vertical distance from the floor to the lowest mounting holes on the headboard to ensure it sits at your desired height above the mattress.
Gathering the correct tools beforehand will streamline the installation process and prevent unnecessary physical strain. You will need a reliable measuring tape, an adjustable wrench or a socket set, a flathead or Phillips screwdriver (depending on your hardware), and a spirit level to ensure the headboard sits perfectly straight. It is also wise to prepare a soft cloth, an old blanket, or a piece of cardboard to place on the floor to protect your bedroom flooring and the finish of your furniture from scratches during assembly.
Because headboards can be heavy, awkwardly balanced, and difficult to align single-handedly, working with a partner is highly recommended. Having a second person to hold the headboard upright while you align the bolts prevents sudden slips that could damage your walls, scratch the metal frame, or cause injury. Before you begin, clear a generous workspace around the head end of the bed, pull the frame away from the wall to give yourself ample room to maneuver, and confirm that the bed frame sits on a completely flat, stable surface.
Understand the Hardware and Attachment Methods
The stability of your headboard depends entirely on the quality and configuration of the hardware connecting it to the metal frame. Standard connection kits typically feature headboard bolts, matching hex nuts, and flat washers. While many headboards and frames include this hardware, thread sizes and bolt lengths can vary, meaning you may occasionally need to purchase compatible fasteners from a local hardware store. Common bolt sizes include 1/4-inch or 5/16-inch diameters, with lengths ranging from 1.5 to 3 inches depending on the thickness of your headboard legs.

Washers are critical components that should never be omitted during assembly. Placing a flat washer between the bolt head and the metal bracket, as well as between the nut and the headboard leg, distributes the clamping pressure evenly across a larger surface area. This distribution prevents the metal bolt head from warping or pulling directly through the elongated bracket slots under stress. Additionally, washers act as a protective barrier, preventing metal-on-metal friction that can strip paint, encourage rust in humid environments, and generate loud squeaking noises.
If your metal bed frame features flat end rails without pre-drilled brackets, you must use modification plates or universal headboard brackets. These adapter brackets clamp or bolt directly onto the existing frame rails, creating a standardized mounting surface for your headboard. When purchasing these adapters, verify their compatibility with your specific frame style and check if they allow for both vertical and horizontal adjustments to accommodate non-standard headboard dimensions.
Always refer to the manufacturer’s instructions for both your bed frame and your headboard to identify any specific hardware requirements, weight limits, or torque recommendations. Over-tightening bolts can strip the threads of the metal frame or crack the wooden legs of a headboard, while under-tightening will lead to structural instability. If you encounter conflicting instructions between the headboard and the frame, prioritize the guidelines provided by the headboard manufacturer regarding load distribution and leg support.
Step-by-Step Guide to Installing a Head Board for Metal Frame Bed Setups
Step 1: Position the Headboard Begin by standing the headboard upright at the head end of your metal bed frame, ensuring the finished side faces the mattress. Position it close to the frame but leave a small gap of approximately 5 to 10 centimeters from the wall to prevent the headboard from scraping against the paint or plaster during installation. If you are working on a tiled or hardwood floor, place a protective mat or piece of cardboard beneath the headboard legs to prevent slipping and surface damage.
Step 2: Align the Holes With your helper holding the headboard steady, gently slide the bed frame toward the headboard legs until the mounting brackets make contact. Peer through the slots in the metal frame brackets to locate the corresponding pre-drilled holes or slots in the headboard legs. If the holes do not line up immediately, have your helper lift or lower the headboard slightly until at least two mounting points on each leg align with the frame brackets.
Step 3: Insert the Hardware Slide a flat washer onto your first bolt and insert the bolt through the aligned hole, starting from the side of the metal frame bracket and pushing it through the headboard leg. If your headboard has threaded inserts, you will screw the bolt directly into the leg; if it has open pass-through holes, push the bolt all the way through. Once the bolt emerges on the opposite side, place a second washer over the exposed threads, followed by a hex nut. Repeat this process for all remaining mounting holes, ensuring you use at least two bolts per leg for adequate stability.
Step 4: Hand-Tighten Thread the hex nuts onto the bolts by hand, turning them clockwise until they are snug against the washers. Do not use any wrenches, sockets, or screwdrivers at this stage. Leaving the hardware slightly loose allows the headboard to pivot and slide slightly within the bracket slots, which is essential for making minor vertical and horizontal alignments in the next steps.
Step 5: Level the Headboard Place a spirit level flat across the top edge of your headboard. Have your helper gently adjust the left or right side of the headboard upward or downward until the bubble in the level is perfectly centered. If you do not have a spirit level, you can measure the distance from the floor to the top corner of the headboard on both sides to ensure they are equal. Maintaining a level alignment prevents uneven weight distribution and keeps the headboard looking visually balanced against your bedroom wall.
Step 6: Fully Tighten While your helper holds the leveled headboard firmly in place, use an adjustable wrench or socket set to tighten the nuts while holding the bolt head steady with a screwdriver. Tighten the hardware gradually, alternating between the left and right legs to ensure even pressure distribution. Stop tightening as soon as the washers sit flush and firm against the mounting surfaces; over-tightening can crush wooden legs, strip metal threads, or warp the bracket plates.
Troubleshooting Misaligned Holes and Missing Brackets
Holes Do Not Line Up One of the most common challenges during installation is discovering that the holes on your headboard do not align with the brackets on your metal bed frame. If you find yourself facing misaligned holes, check if your headboard legs feature long, vertical slots rather than simple circular holes. These slots are designed to accommodate height variations and can often be aligned by raising or lowering the headboard. Additionally, check if your bed frame brackets can be loosened and slid horizontally along the end rail to match the width of your headboard.
Using Universal Brackets If the gap between the headboard legs and the frame brackets is too wide to bridge with standard hardware, or if your bed frame completely lacks mounting points, you will need to utilize universal headboard brackets or modification plates. These plates act as extension arms, bolting onto your existing frame and extending outward or inward to create a secure, custom connection point. They are readily available at local home improvement centers and online furniture retailers, offering a highly reliable solution for mismatched furniture sets.
When to Stop and Seek Help If you find that the existing holes are completely incompatible and you are tempted to drill new holes into either the metal frame or the headboard, you should stop immediately. Drilling into structural metal can weaken the frame’s load-bearing capacity, create sharp burrs that pose safety hazards, and void the manufacturer’s warranty. Similarly, drilling into finished wood or upholstered headboard panels without professional tools can cause splitting, tearing, or structural failure. If standard brackets and modification plates cannot resolve the alignment issue, consult the manufacturer or contact a qualified local furniture repair professional to modify the pieces safely.
Final Stability and Safety Verification
Once all hardware is fully tightened, you must perform a thorough safety and stability check before pushing the bed back into its final position. Stand at the front of the bed and perform a gentle shake test by pushing and pulling the top of the headboard. The headboard should feel rigid and move in unison with the metal frame; if you detect any independent wobbling, rattling, or shifting, identify which joint is loose and tighten the corresponding bolts.
Over the first few days of daily use, the weight of your mattress and body movements can cause the newly assembled joints to settle. It is normal for bolts to loosen slightly during this initial break-in period, so plan to inspect and re-tighten the hardware after one week of use. Regular seasonal checks are also beneficial, especially in areas with high humidity where wood expansion and contraction can gradually alter the tightness of the fasteners.
Next, run your hand carefully around the back of the connection points to check for any sharp edges, exposed bolt threads, or protruding nuts. Bolts that stick out too far can gouge your bedroom walls, tear wallpaper, or snag bed linens when you make the bed. To prevent this damage, you can install plastic thread caps or self-adhesive rubber bumpers over the exposed ends of the bolts, which also serves to dampen any vibration noises against the wall.
Finally, verify the overall integrity of your bed frame by ensuring that all four corners remain level and flat on the floor. Check that the original frame joints, support legs, and mattress slats are still securely seated in their designated positions. Adding the weight of a headboard alters the center of gravity of your bed, so ensuring the entire foundation remains stable is essential for a safe and comfortable night’s sleep.
Frequently Asked Questions (FAQ)
Can I attach a wooden headboard to a metal bed frame?
Yes, you can generally attach a wooden headboard to a metal bed frame, provided the headboard features sturdy wooden legs or a bottom rail with pre-drilled holes that align with the frame’s brackets. If your wooden headboard is a solid, flat panel without legs, you will need to purchase floor-standing headboard legs or universal wall-mounting brackets to support its weight. When mounting metal brackets directly to wood, always use flat washers to prevent the metal hardware from crushing or digging into the wood fibers over time.
Do I need to anchor the headboard to the wall?
For standard-sized, lightweight headboards, securing them firmly to the metal bed frame is entirely sufficient for normal daily use. However, wall anchoring is highly recommended for exceptionally tall, heavy, or top-heavy headboards, as well as in households with active children or pets who might pull on the furniture. If you decide to anchor your headboard to the wall, follow local safety guidelines and use appropriate wall anchors—such as toggle bolts for drywall or expansion anchors for concrete and masonry walls—to prevent tip-over accidents.

Community discussion
Share your experience or ask a question. Comments are reviewed before publication.