
To know if an over-the-door shoe rack will fit your door and hold your shoes, you must measure three critical door dimensions—thickness, top gap clearance, and width—and compare your shoe types against the rack’s physical dimensions. Relying solely on a manufacturer’s advertised “pair capacity” often leads to fit issues, as these estimates typically assume small, flat shoes. By measuring your door’s thickness, top clearance, and swing path, and analyzing your footwear’s bulk and weight, you can ensure a secure installation that does not damage your home.
Quick Checklist: Door Compatibility and Shoe Capacity
Before purchasing an over-the-door shoe rack, a quick assessment of your door’s physical limits and your storage needs can prevent a costly return. Use this high-level checklist to evaluate compatibility:
- Door Thickness: Ensure the mounting brackets match your door's exact thickness, which typically ranges from 1-3/8 to 1-3/4 inches.
- Top Gap Clearance: Verify there is at least a 2mm gap (roughly the thickness of a coin) between the top of the door and the frame so the door can close smoothly.
- Shoe Type and Volume: Compare the physical dimensions of your bulkiest shoes, such as sneakers or boots, against the rack's tier spacing rather than relying on generic pair counts.
- Weight Capacity: Confirm that both the rack and your door hinges can support the combined weight of your collection, especially if you store heavy leather shoes or thick-soled boots.
How to Measure Your Door for an Over-the-Door Rack
To guarantee a secure fit, you must take precise physical measurements of your door before selecting a rack. Start by measuring the exact thickness of your door leaf. Open the door and place a tape measure across the flat outer edge; most standard interior doors measure around 35mm to 45mm thick. If the mounting brackets included with the rack are too wide, the unit will rattle and slide; if they are too narrow, they will not slide over the top edge at all.
Products mentioned in this guide
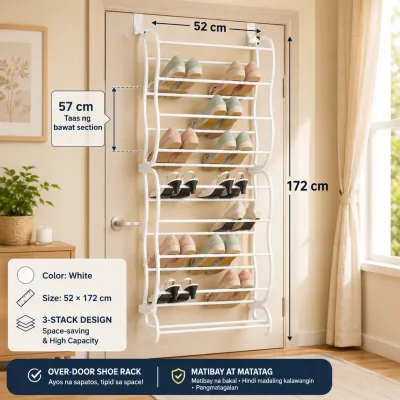
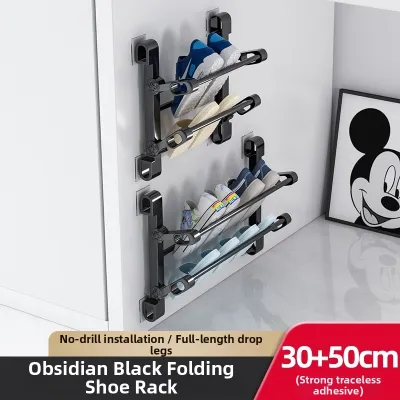
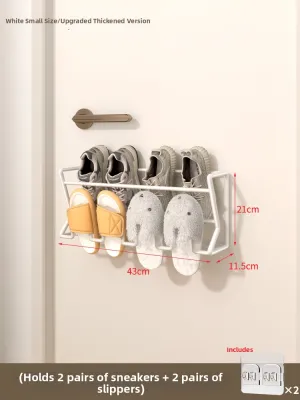
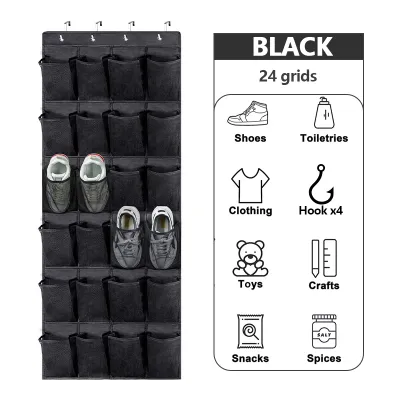

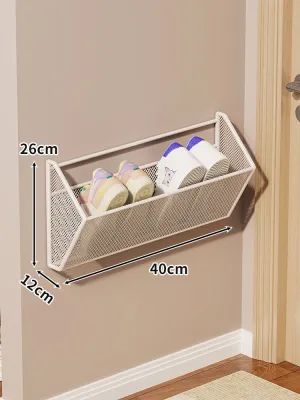
Prices are valid at publication and may change. Please refer to the product page for the latest price.

Next, measure the overall width of the door to ensure the rack’s horizontal frame does not overhang. The rack must sit entirely within the flat surface of the door, clear of any decorative panels, raised molding, or doorknobs. In many homes in the Philippines, bedroom and utility doors may be narrower than main entrance doors, making this horizontal check vital.
Evaluating the top edge of the door is equally critical. Look for any potential obstructions such as weatherstripping, decorative trim, or metal latch plates that could block the brackets. In highly humid tropical climates, wooden doors frequently swell during the rainy season, which can significantly reduce the clearance between the top of the door and the frame.
Finally, identify if your door type is structurally compatible with an over-the-door system. Sliding doors, pocket doors, and barn doors are entirely incompatible because the mounting brackets will block the sliding mechanism. Glass panel doors should also be avoided, as the metal brackets and the weight of the shoes can scratch the glass or cause structural stress on the delicate frame.
Matching the Rack Capacity to Your Shoe Collection
A common pitfall is assuming that a rack advertised as a “24-pair shoe organizer” will easily hold 24 pairs of your actual footwear. Manufacturers typically calculate these capacities using standard, low-profile shoes like flat sandals, slippers, or thin canvas plimsolls. If your collection consists of bulky running sneakers, basketball shoes, or high heels, these items will occupy significantly more horizontal and vertical space.
To avoid crowding, check the vertical tier spacing and adjustability of the rack. Taller footwear, such as ankle boots, high-top sneakers, or high heels, requires more vertical clearance between shelves to prevent the tops from getting crushed. Racks with adjustable shelves or flexible fabric pockets offer better versatility for varied shoe collections.
The depth of the shelves or pockets is another critical dimension to verify. If the shelves are too shallow, larger shoe sizes—especially men’s sizes—will overhang the edge. This overhang not only looks untidy but also increases the risk of shoes falling off whenever the door is opened or closed.
Do not overlook the total weight of your shoe collection. A single pair of heavy leather shoes or thick-soled work boots can easily weigh over one kilogram. Multiply this by the number of shoes you plan to store, and compare this total against the rack’s maximum weight limit to prevent the frame from bending or sagging over time.
Checking Clearances, Hinges, and Door Movement
An over-the-door shoe rack must not interfere with the daily operation of your door or cause damage to the surrounding walls. Begin by checking the gap between the door and the frame when the door is fully closed. If this gap is too tight, the metal brackets will scrape against the door frame, stripping the paint and eventually preventing the door from latching properly.
You must also evaluate the door’s swing path and hinge placement. Adding an over-the-door rack typically increases the depth of your door by 6 to 10 inches once shoes are loaded. If your door swings open against an adjacent wall or wardrobe, this added depth will prevent the door from opening fully, and the rack may dent the drywall or scratch nearby furniture.
Floor clearance is another essential factor, particularly for long hanging fabric organizers or multi-tier metal frames that extend near the bottom of the door. Ensure that the lowest point of the rack, including any hanging shoes, clears the floor surface. This is especially important if you have thick doormats, area rugs, or uneven tiled flooring that could catch on the bottom of the organizer.
Lastly, assess any existing door hardware, such as automatic door closers or hydraulic arms. If your door utilizes an automatic closing mechanism, ensure the mounting brackets do not block the arm’s movement or interfere with the alignment of the latch, which could compromise your home’s security and convenience.
Common Sizing and Capacity Mistakes to Avoid
One of the most frequent mistakes is assuming all doors in a home share identical dimensions. Always measure the specific door where you plan to install the rack, as bathroom, bedroom, and closet doors often vary in thickness and clearance.
Another critical error is overloading the door hinges beyond their structural weight tolerance. Hanging dozens of heavy shoes on a lightweight, hollow-core bedroom door can strain the hinges over time, causing the door to sag, scrape against the floor, or fail to close properly.
Ignoring the physical depth of your shoes when loaded onto the rack can also lead to frustration. Shoes that protrude too far can block narrow hallways or walkways, creating a tripping hazard in high-traffic areas of your home.
In humid tropical environments, packing shoes too tightly into enclosed fabric pockets can trap moisture and sweat, creating an ideal breeding ground for mold and mildew. To prevent this, prioritize open wire or plastic rack designs that promote continuous air circulation around your footwear.
Frequently Asked Questions (FAQ)
Can I use an over-the-door shoe rack on a hollow core door?
Hollow core doors can support lightweight over-the-door shoe racks, but caution is required. These doors only have solid wood framing around the outer edges, while the center is hollow or filled with cardboard honeycomb. Ensure the mounting brackets sit flat over the solid top rail of the door to distribute the weight evenly. Avoid overloading the rack with heavy boots or leather shoes, as excessive weight can warp the door or cause the brackets to crush the thin outer veneer.
Will the rack damage my door frame or paint?
Metal mounting brackets can scratch paint, dent wood, or leave dark marks on your door frame over time due to friction. To prevent this damage, apply adhesive felt pads, foam tape, or rubber liners to the inside of the brackets before hanging them. This cushions the contact points and prevents the metal from rubbing directly against the painted surfaces when the door is operated.
How do I keep the rack from swinging when I open the door?
To stop an over-the-door rack from swinging like a pendulum, you must secure its lower section. Most quality racks include bottom anchors, double-sided adhesive strips, or suction cups to stabilize the frame against the door face. Additionally, distribute the weight of your shoes strategically by placing the heaviest pairs on the bottom tiers to lower the center of gravity and minimize movement.

Community discussion
Share your experience or ask a question. Comments are reviewed before publication.